Product Overview
The VASAGLE Queen Size Floating Bed Frame (Model URMB851G01SV1) is designed to provide both comfort and modern aesthetics to your bedroom. This bed frame features a unique floating design, integrated LED lighting, a convenient charging station, and a tufted storage headboard. It is engineered for noise-free operation and does not require a box spring.
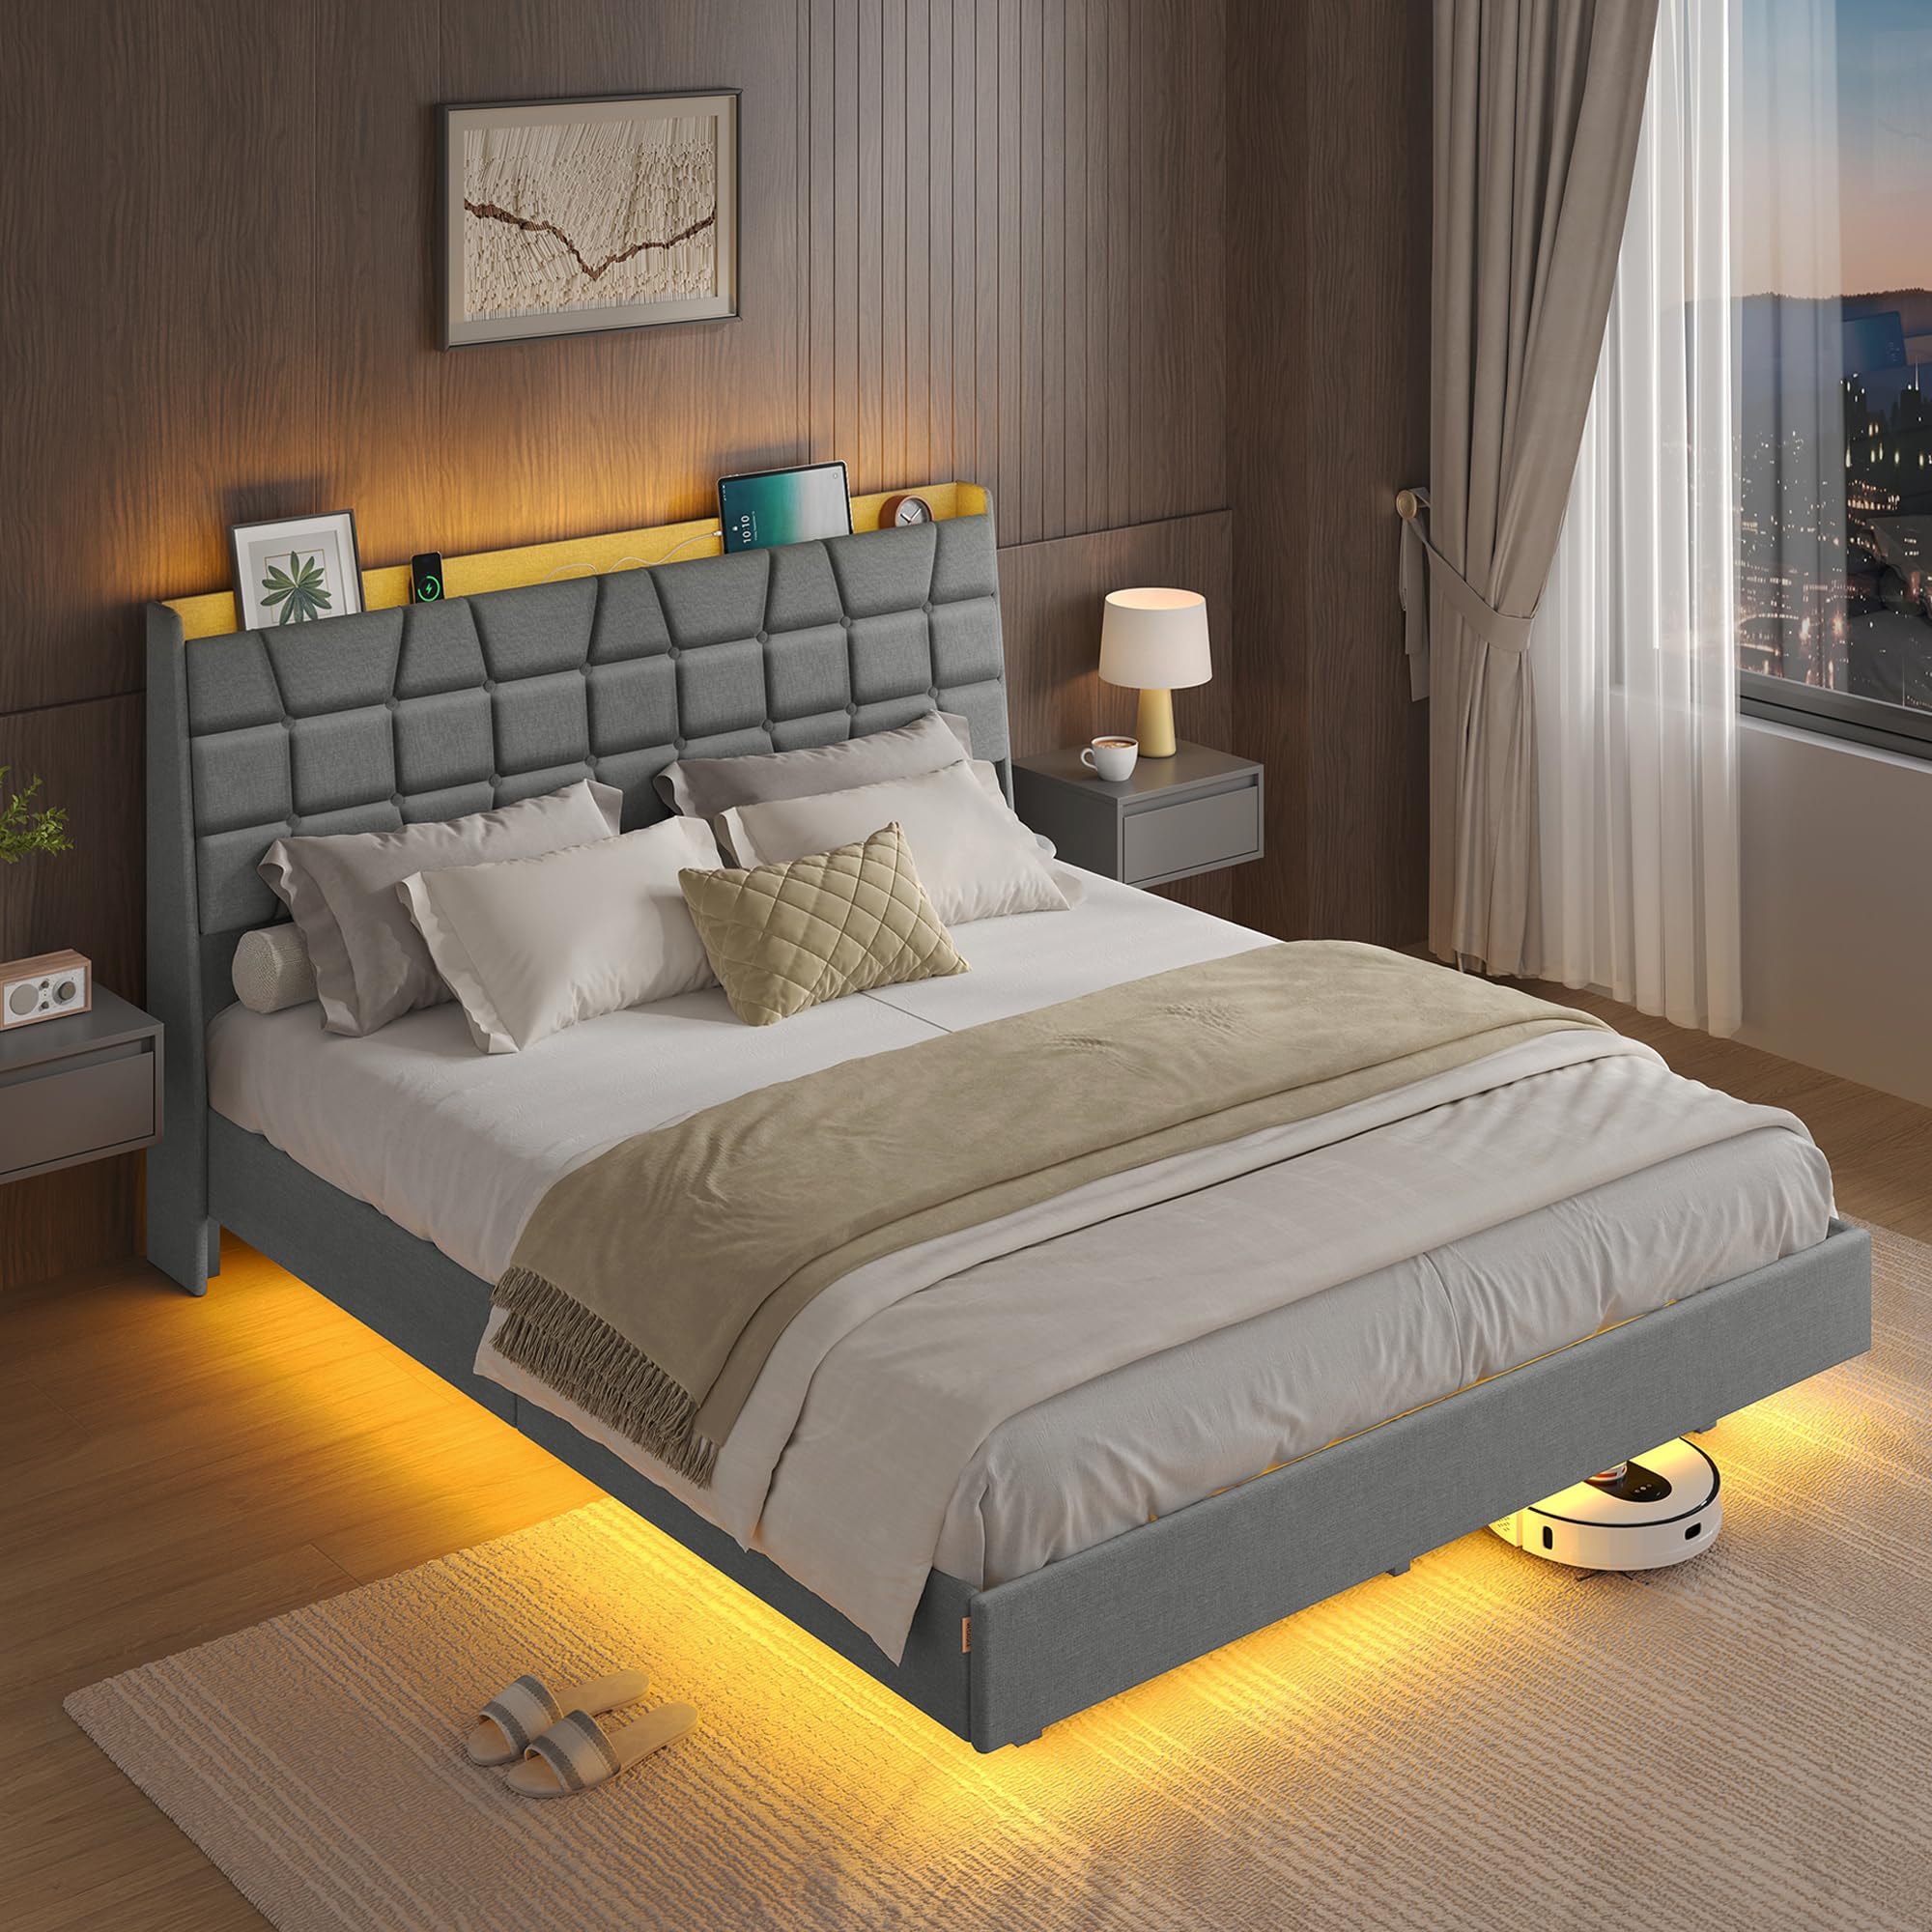
An overview of the assembled VASAGLE Queen Size Floating Bed Frame, showcasing its light gray upholstery, tufted headboard, and under-bed LED lighting.
Key Features:
- Futuristic Floating Design: Hidden legs create an illusion that the bed frame hovers above the floor.
- App-Controlled Mood Lighting: Adjustable LED lights for color and brightness, with music and mic sync capabilities.
- Built-In Charging Station: Features a 20W USB-C port and three USB-A ports for convenient device charging.
- Tall Tufted Storage Headboard: A 43.3-inch tall headboard with an open shelf and hidden compartments for storage.
- Quiet & Strong Support: Robust construction with sound isolators and noise-reducing pads supports up to 1100 lb.
Safety Information
Please read and understand all safety instructions before assembly and use. Failure to follow these instructions may result in injury or damage to the product.
- Do not overload this queen-size bed frame beyond 1100 lb (500 kg).
- Be cautious around sharp edges during assembly and use.
- Ensure all screws and fasteners are securely tightened before use. Periodically check and re-tighten as necessary.
- Keep small parts and packaging materials away from children to prevent choking hazards.
- Assemble the bed frame on a soft, clean surface to prevent scratches or damage.
Product Components
Before beginning assembly, verify that all components listed in your packaging are present and undamaged. Refer to the assembly video for a visual guide to all parts.
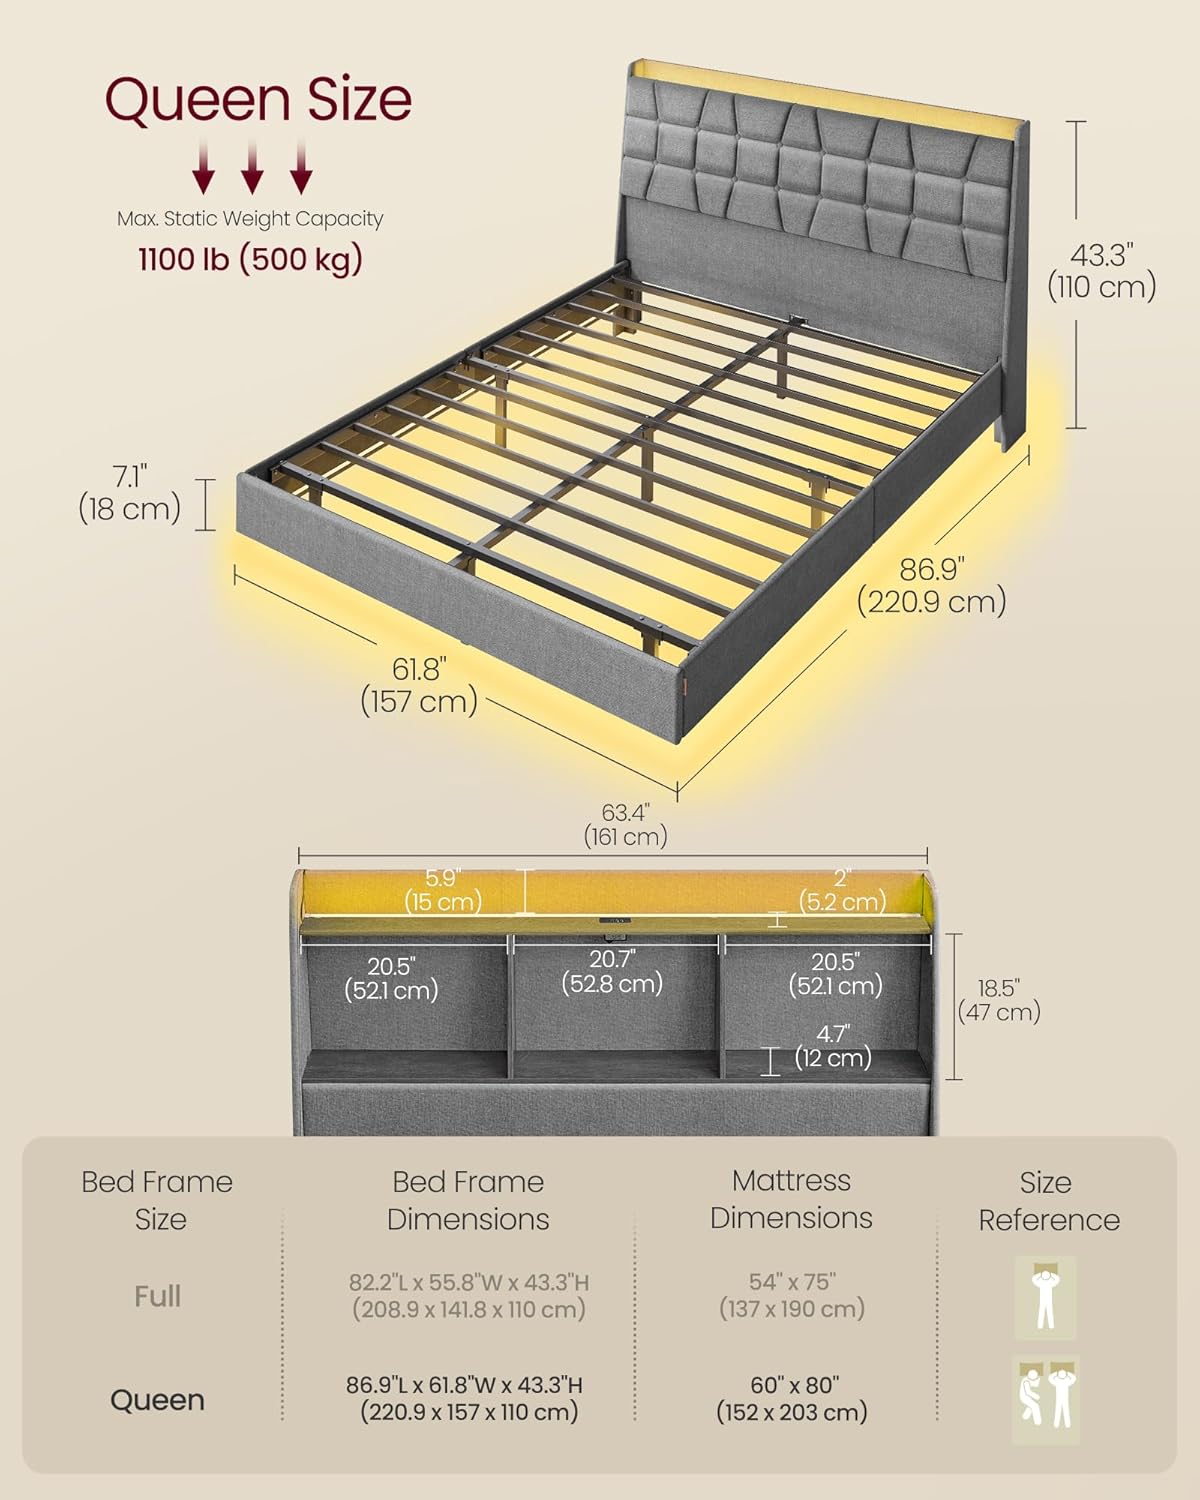
Detailed diagram showing the dimensions of the Queen size bed frame, including length (86.9 inches), width (63.4 inches), headboard height (43.3 inches), and maximum static weight capacity of 1100 lbs (500 kg).

Image illustrating the adjustable LED light features, including app control, remote control, manual control, over 60,000 colors, dimmable function, mic sync, music sync, timer, and dynamic modes.

Close-up view of the tufted storage headboard, highlighting its open compartment for frequently used items and hidden compartments for other essentials.

Illustration demonstrating the hidden leg design of the bed frame, creating a floating illusion and preventing accidental bumps.

Image detailing the built-in charging station with one 20W USB-C port and three 10W/18W USB-A ports, along with a 6.6 ft (2 m) power cord for fast device charging.
Assembly Instructions
Follow these steps carefully to assemble your VASAGLE Floating Bed Frame. It is recommended to have two people for assembly. An Allen wrench and a small wrench are included for your convenience.
Official assembly guide video for the VASAGLE Floating Bed Frame with LED Lights and Charging Station. This video provides step-by-step visual instructions for checking components, assembling the headboard, building the bed frame, attaching the headboard and slats, and connecting the light cables.
Step 1: Check the Component List
Unpack all components and compare them with the provided parts list in your manual to ensure everything is accounted for. Separate hardware by type for easier access.
Step 2: Assemble the Headboard
- Attach the support brackets (Part 28) to the main headboard shelf (Part A) using screws (Part 10) and the provided wrench (Part 16).
- Insert the headboard dividers (Part C) into the main headboard shelf (Part A) and secure them with screws (Part 11) and the wrench (Part 16). Cover screw holes with caps (Part 12).
- Attach the remaining support brackets (Part 28) to the back headboard shelf (Part E) using screws (Part 8) and the Allen wrench (Part 6).
- Secure the upholstered headboard panel (Part D) to the headboard frame using screws (Part 7) and the Allen wrench (Part 6).
- Attach the power strip (Part 21) to the headboard frame using screws (Part 13) and the wrench (Part 16).
- Install the cable clips (Part 17) along the bottom edge of the headboard frame.
- Attach the LED light strip (Part 23) to the underside of the headboard frame, securing it with the cable clips (Part 17).
- Place the upholstered back panel (Part B) onto the headboard frame and secure it with screws (Part 9) and the Allen wrench (Part 15). Attach the small plastic clips (Part 27) to the back panel using screws (Part 14) and the wrench (Part 16).
Step 3: Build the Bed Frame
- Connect the central support beam sections (Part S and Part Y) using screws (Part 3) and the Allen wrench (Part 31).
- Attach the support legs (Part P) to the side support beams (Part U) using screws (Part 3) and the Allen wrench (Part 31).
- Attach the support legs (Part Q) to the other side support beams (Part V) using screws (Part 3) and the Allen wrench (Part 31).
- Assemble the main bed frame structure by connecting the side rails (Part W) to the central support beams and side support beams. Do not fully tighten screws yet.
- Attach the corner brackets (Part 29 and Part 30) to the bed frame corners using screws (Part 5) and the Allen wrench (Part 31).
- Connect the side rails (Part W) to the bed frame structure using screws (Part 4) and the Allen wrench (Part 31). Ensure all connections are aligned before tightening.
- Once all frame components are loosely assembled, tighten all screws securely using the Allen wrench (Part 31) and screws (Part 4).
Step 4: Attach the Headboard and Slats
- Align the headboard with the bed frame. The headboard brackets should slide into the corresponding slots on the bed frame.
- Secure the headboard to the bed frame using screws (Part 4) and the Allen wrench (Part 31).
- Attach the slat holders (Part 26) to the bed frame using screws (Part 16) and the wrench.
- Place the bed slats (Part X) onto the bed frame, ensuring they are properly seated in the slat holders. The slats should fit snugly to prevent movement and noise.
Step 5: Connect Light Cables
- Connect the LED light strip cable (Part 19) to the power adapter (Part 22).
- Connect the power adapter (Part 22) to the power strip (Part 21) located on the headboard.
- Plug the power strip's main cable into a wall outlet.
Operating Instructions
LED Lights Operation
The integrated LED lights can be controlled via a mobile application, a remote control, or a manual switch.
- App Control: Download the designated mobile application (refer to your separate LED light manual for app name and instructions). The app allows for precise control over color (over 60,000 options), brightness, dynamic modes, music synchronization, and mic synchronization.
- Remote Control: Use the included remote control (Part 18) to adjust colors, brightness, and select preset modes. Ensure the remote has working batteries.
- Manual Control: A simple manual switch is available for basic on/off functionality and cycling through a limited number of colors.

Image showing the bed frame with its LED lights, illustrating control options via a mobile app, remote control, and manual switch.

Screenshots of the mobile application interface, demonstrating features like color selection, dynamic modes, music sync, mic sync, and timer functions for the LED lights.
Charging Station Usage
The headboard includes a built-in charging station for your electronic devices.
- Connect your devices to the available 20W USB-C port or the three 10W/18W USB-A ports.
- Ensure the bed frame's power cord is plugged into a live wall outlet for the charging station to function.
Maintenance
Proper care and maintenance will extend the life of your bed frame.
- Cleaning: Wipe the bed frame's surfaces with a dry cloth. For upholstered areas, use a soft brush or vacuum cleaner to remove dust. Spot clean any stains with a mild fabric cleaner, testing on an inconspicuous area first.
- Structural Check: Periodically inspect all screws and connections. Re-tighten any loose fasteners to maintain stability and prevent noise.
- LED Lights: Avoid exposing the LED strip or control unit to excessive moisture. If the lights malfunction, check connections before seeking professional assistance.
Troubleshooting
If you encounter any issues with your bed frame, refer to the following common solutions:
- Bed Frame is Wobbly/Noisy:
- Ensure all assembly screws are fully tightened.
- Check that the bed slats are correctly seated in their holders and that the noise isolators are in place.
- Verify that the bed frame is on a level surface.
- LED Lights Not Working:
- Check if the power cord is securely plugged into both the bed frame and the wall outlet.
- Ensure all cable connections for the LED strip and power adapter are firm.
- If using the remote, check its batteries.
- Charging Station Not Functioning:
- Confirm the bed frame's main power cord is plugged into a live electrical outlet.
- Test with a different device and charging cable to rule out device-specific issues.
If problems persist after attempting these solutions, please contact customer support.
Specifications
| Size | Queen |
| Material | Steel, MDF (Medium Density Fiberboard), Foam, Cotton-Linen Fabric |
| Product Dimensions (L x W x H) | 86.9" x 63.4" x 43.3" (220.9 cm x 161 cm x 110 cm) |
| Style | Floating Bed |
| Special Features | App-Controlled Mood Lighting, Quiet & Strong Support, Built-in Charging Station, Tufted Storage Headboard |
| Included Components | 1 x Queen Bed Frame, 1 x Assembly Kit, 1 x Instructions |
| Maximum Weight Recommendation | 1100 Pounds (500 kg) |
| Item Weight | 93.7 Pounds |
| Color | Light Gray |
| Headboard Material | Cotton-Linen Fabric |
| Product Care Instructions | Wipe with Dry Cloth |
Warranty and Support
For warranty information, replacement parts, or any questions not covered in this manual, please contact VASAGLE customer support. Keep your purchase receipt and model number (URMB851G01SV1) handy for faster service.
You can typically find contact information on the VASAGLE official website or through your original retailer.