Introduction
Welcome to the eleacc 4 Channel Dash Cam user manual. This document provides detailed instructions for the installation, operation, and maintenance of your dash camera system. Please read this manual thoroughly to ensure proper use and optimal performance of your device.
What's in the Box
The eleacc 4 Channel Dash Cam package includes the following components:
- Dash Camera Main Unit
- Rear Camera
- Adhesive Mount
- Charging Cable
- User Manual
- Free TF Card (32GB)

Image: All components included in the eleacc 4 Channel Dash Cam package, neatly arranged.
Product Overview
The eleacc 4 Channel Dash Cam provides comprehensive 360-degree vehicle surveillance. The main unit features a central front-facing camera and two adjustable side cameras. A separate rear camera is also included for complete coverage.
Key Features:
- 4-Channel Recording: Simultaneous recording from front, rear, and two side cameras for 360-degree coverage.
- Adjustable Lenses: Side cameras can rotate 180 degrees to cover blind spots or interior. The front camera is also adjustable.
- High-Resolution Video: Front camera offers 4K/2K/1080P options.
- 5GHz Band WiFi & APP Control: Connect to the 'Viidure' app for seamless operation, live preview, and video download.
- GPS Functionality: Tracks real-time location, speed, time, and route via smartphone GPS.
- Loop Recording: Automatically overwrites oldest files when memory is full, ensuring continuous recording (G-sensor locked files are protected).
- G-Sensor: Automatically initiates emergency recording and locks footage upon sudden impact.
- 24H Parking Mode: Offers Time-lapse (1fps) and Impact Detection modes for continuous vehicle monitoring. Requires a separate hardwire kit.
- Night Vision & WDR: Equipped with 8 IR lights and Wide Dynamic Range (WDR) technology to enhance video clarity and balance exposure in low-light conditions and challenging lighting environments.

Image: The eleacc 4 Channel Dash Cam main unit, showcasing its central screen and two adjustable side cameras.

Image: A visual representation of the 4 Channel Dash Cam's comprehensive 360-degree coverage, highlighting its various features.
Setup & Installation
1. Insert TF Card
Locate the TF card slot on the main dash camera unit. Insert the provided 32GB TF card until it clicks into place. Ensure the card is correctly oriented.
2. Mount the Main Unit
Attach the adhesive mount to the desired location on your windshield, typically behind the rearview mirror. Ensure the area is clean and dry for optimal adhesion. The main unit slides onto this mount.

Image: Diagram illustrating the tool-free, easy-slide mounting mechanism for the dash cam, showing how it attaches to the windshield.
3. Connect Power
Connect the charging cable to the Type-C port on the main unit and plug the other end into your vehicle's 12V power outlet (cigarette lighter). For optimal performance, use the original eleacc car charger.
4. Install Rear Camera
Connect the rear camera cable to the AV input port on the main unit. Route the cable neatly along the vehicle's headliner and A-pillars to the rear of the car. Mount the rear camera on the rear windshield using its adhesive mount.

Image: A diagram illustrating the simple installation process, including connecting the main dash cam unit, rear camera, and power source within a vehicle.
Video: This video provides a visual guide to the unboxing and installation process of the eleacc 4 Channel Dash Cam, demonstrating how to set up the main unit and rear camera in a vehicle.
Operating Instructions
1. Power On/Off
The dash cam will automatically power on and begin recording when the vehicle's engine starts. To manually power on/off, press and hold the power button located on the main unit.
2. Adjust Camera Angles
The two side cameras on the main unit can be manually rotated 180 degrees to capture footage from the vehicle's interior or exterior sides. The front camera is also adjustable. Adjust these to your preferred viewing angles.

Image: An illustration demonstrating the dash cam's 360-degree ultra-wide field of view, highlighting the flexibility of its adjustable cameras to cover all angles around the vehicle.
3. App Control & WiFi Connection
- Download the 'Viidure' app from the Google Play Store or Apple App Store.
- Turn on the dash camera.
- On your smartphone, connect to the dash cam's 5GHz WiFi network (the network name will be displayed on the dash cam screen).
- Open the 'Viidure' app to access live video preview, download recordings, and adjust settings.

Image: A smartphone screen showing live footage from the dash cam and a map interface, demonstrating the 5GHz WiFi connectivity for real-time data transfer and app control.

Image: A driver interacting with the dash cam via a smartphone app, illustrating the convenience of 5GHz Wi-Fi and app control for viewing and managing recordings.
4. GPS Functionality
When connected to your smartphone via the 'Viidure' app, the dash cam utilizes your phone's GPS to record real-time location, speed, time, and route data, which can be viewed on a map within the app.
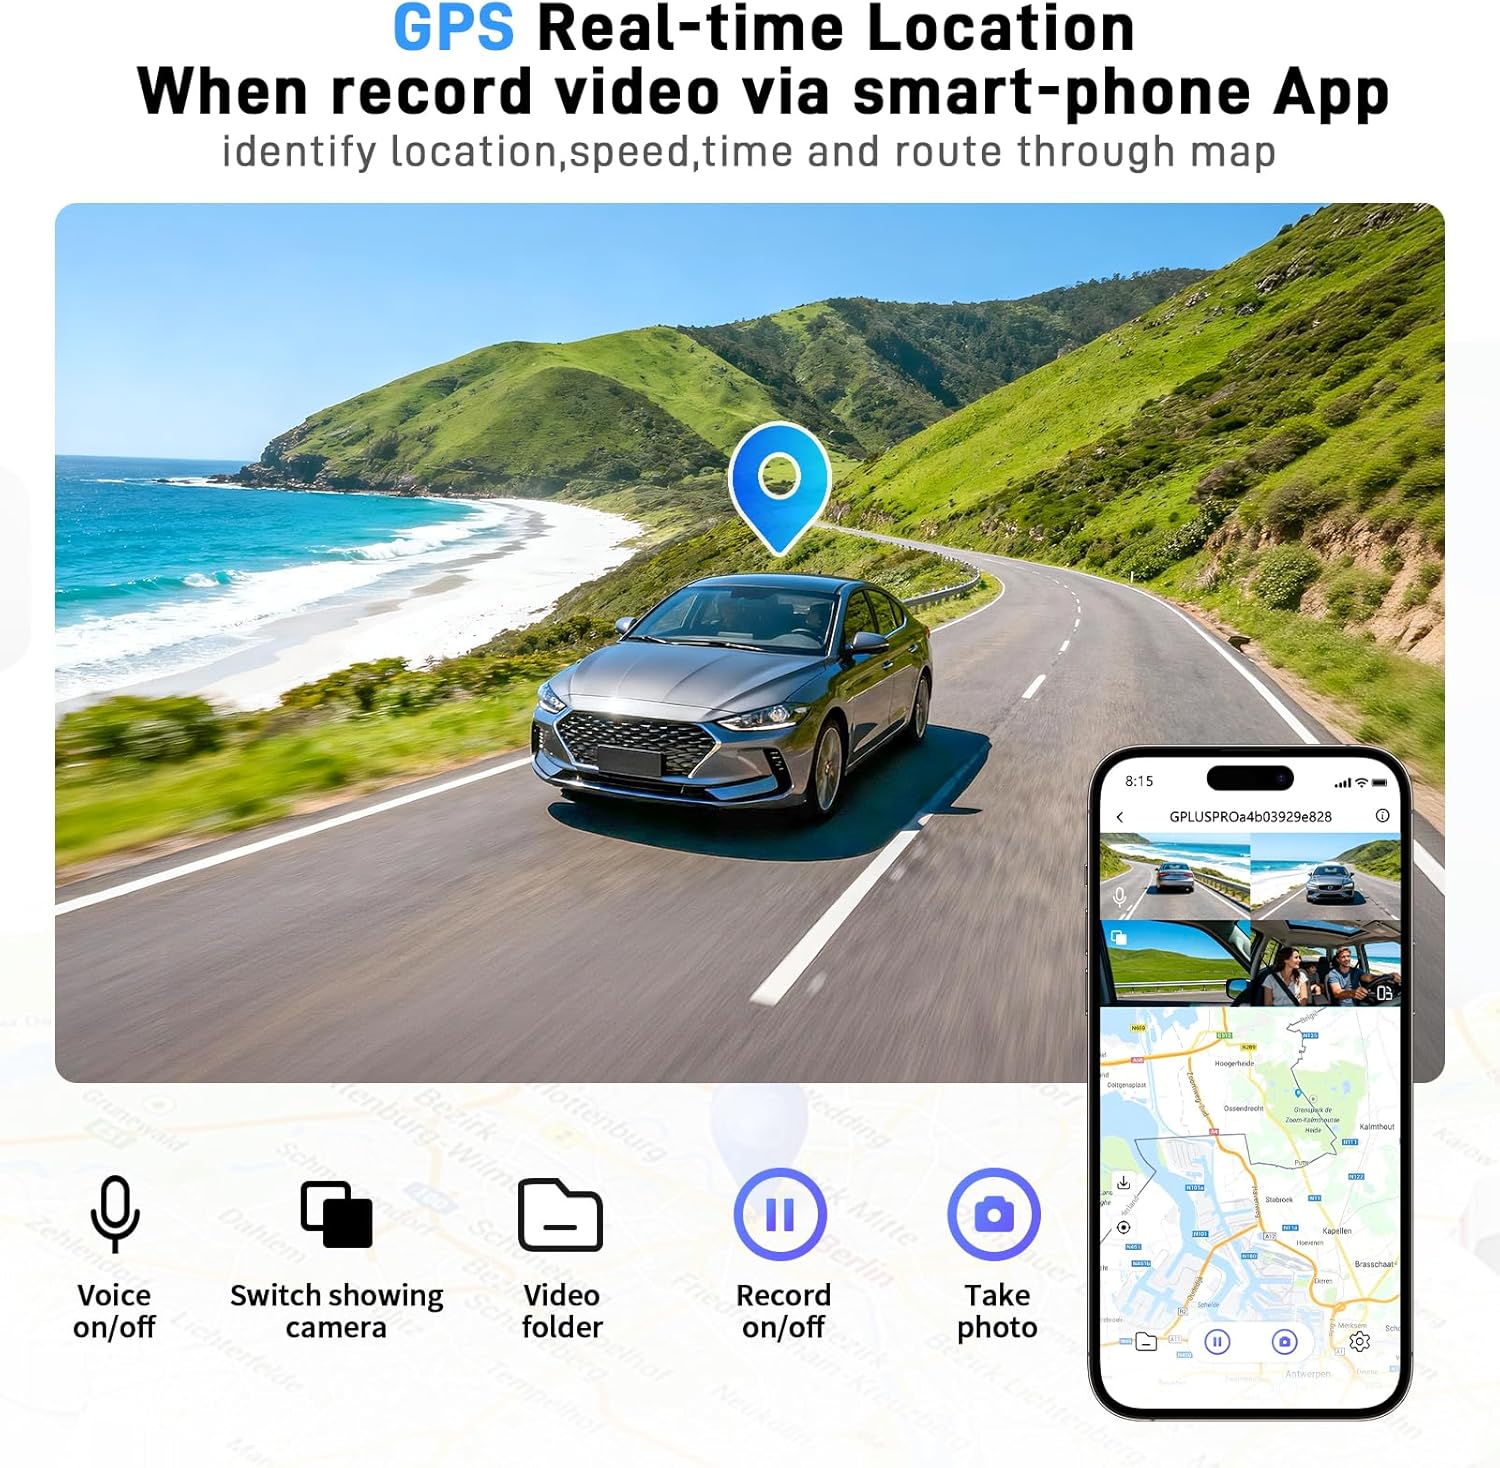
Image: A smartphone screen showing GPS real-time location, speed, and route tracking integrated with the dash cam's video feed.
5. Loop Recording
The dash cam continuously records video in segments. When the TF card's memory is full, the oldest unprotected video files will be automatically overwritten to ensure uninterrupted recording. Files locked by the G-Sensor will not be deleted.

Image: An illustration of the loop recording function, showing how the dash cam continuously records and overwrites old footage to ensure storage space is always available.
6. G-Sensor (Emergency Recording)
The built-in G-Sensor detects sudden impacts or collisions. Upon detection, the dash cam automatically initiates emergency recording, saving and locking the footage in a separate category to prevent it from being overwritten.

Image: A visual representation of the G-Sensor's auto-lock feature, showing how it detects impacts and secures footage, with a smartphone displaying the locked video evidence.
7. 24H Parking Mode
To enable 24-hour parking monitoring, a separate hardwire kit is required (not included). Once installed, you can select between two modes:
- Time-lapse Mode: Records at 1 frame per second to conserve storage while continuously monitoring your parked vehicle.
- Impact Detection Mode: Automatically saves and locks a 10-second video clip if a collision is detected while parked.
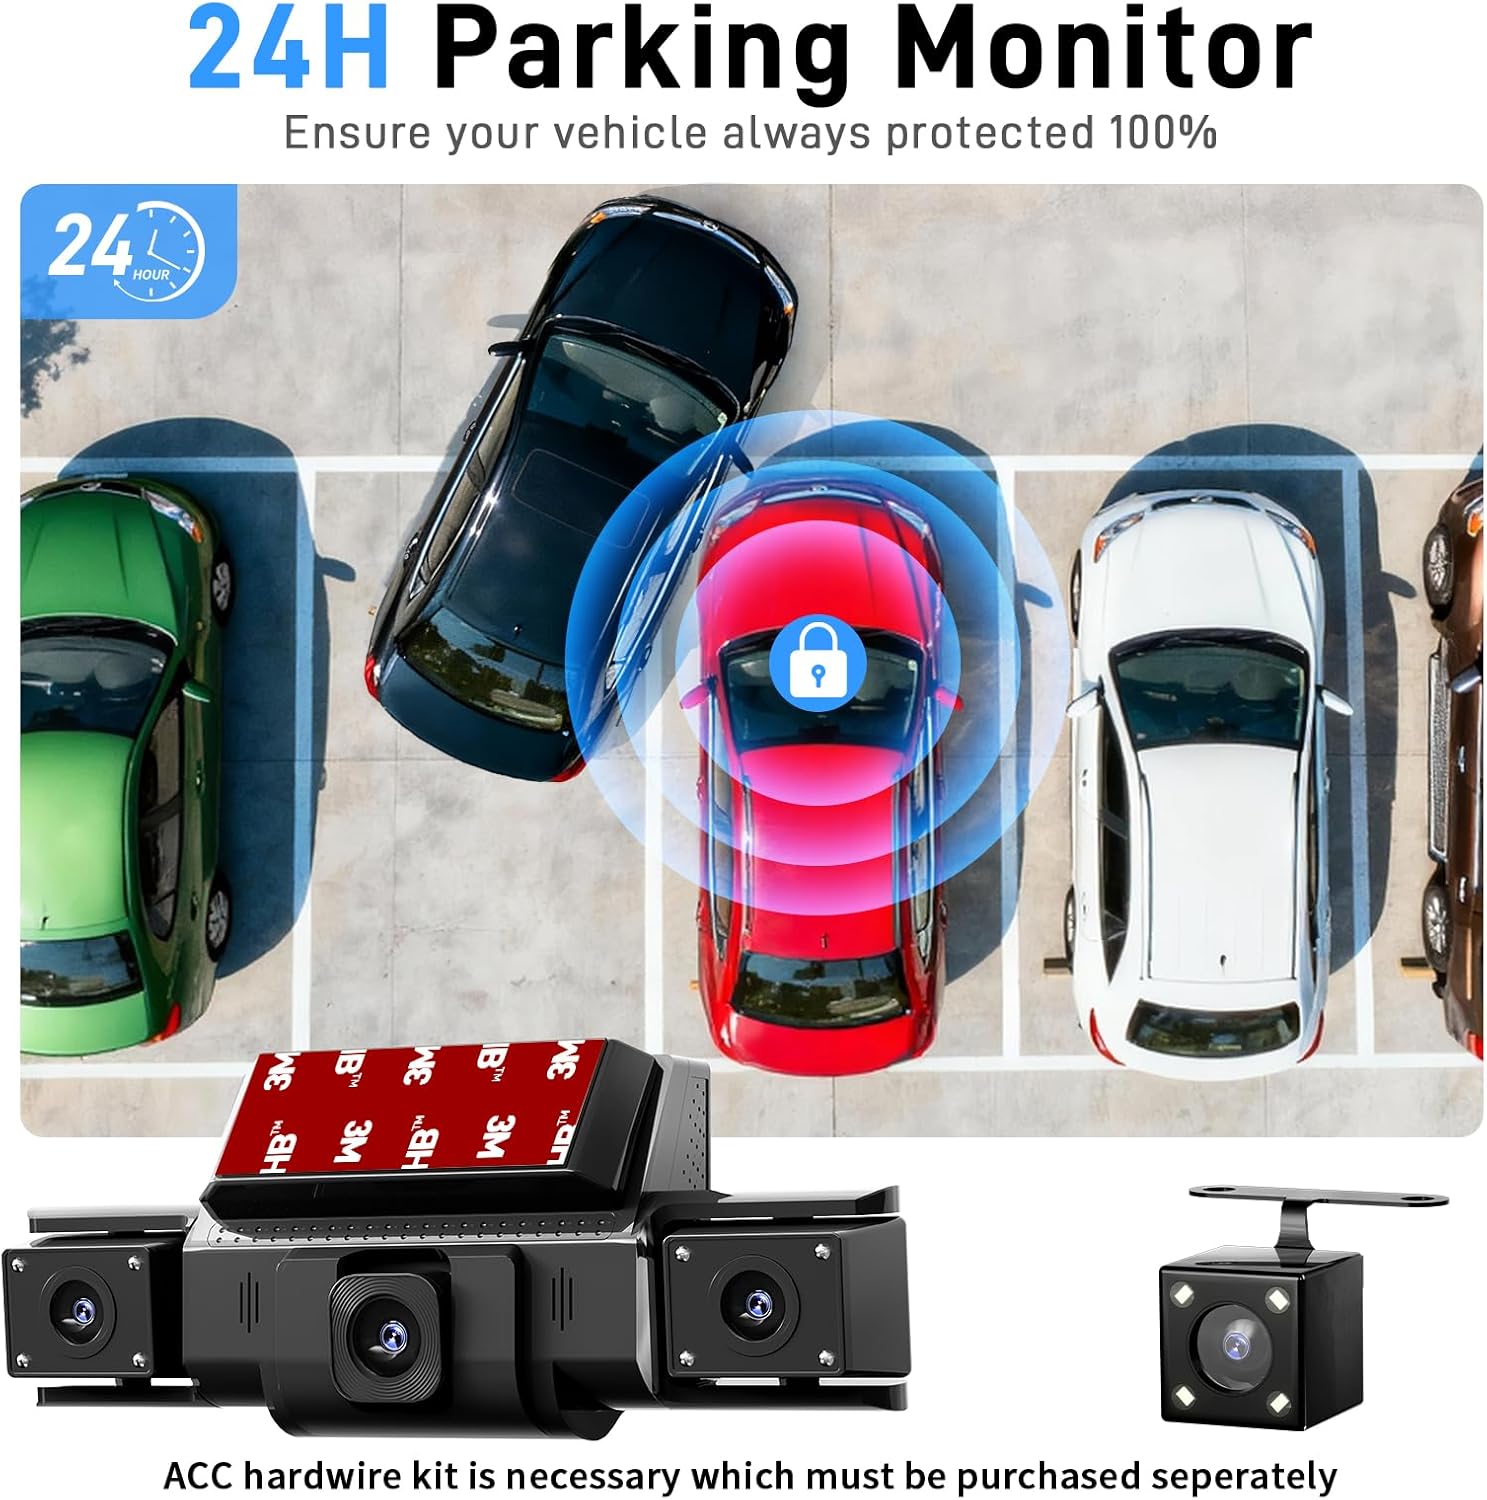
Image: An illustration of the 24H Parking Monitor feature, showing a parked car under surveillance by the dash cam and rear camera, emphasizing continuous protection.
8. Night Vision & WDR
The dash cam features 8 infrared (IR) lights and Wide Dynamic Range (WDR) technology to enhance video clarity and balance exposure in low-light conditions and challenging lighting environments.

Image: A visual demonstration of the Super Night Vision capabilities, highlighting WDR technology, 8 IR lights, and a 3-inch IPS screen for clear night recordings.
Maintenance
- Clean Lenses: Regularly clean the camera lenses with a soft, lint-free cloth to ensure clear video quality.
- Check TF Card: Periodically check the TF card for proper function and ensure sufficient storage space. Format the card regularly (e.g., monthly) to maintain optimal performance, backing up important files first.
- Firmware Updates: Check the 'Viidure' app or eleacc's official website for any available firmware updates to ensure your dash cam has the latest features and improvements.
- Power Source: Always use the original eleacc car charger or a compatible hardwire kit to power the device.
Troubleshooting
- Dash Cam Not Powering On: Ensure the charging cable is securely connected to both the dash cam and the vehicle's power outlet. Check if the vehicle's power outlet is functioning.
- Recording Issues: Verify that the TF card is inserted correctly and is not full. Format the TF card if necessary. Ensure loop recording is enabled in settings.
- WiFi Connection Problems: Confirm the dash cam's WiFi is enabled. Ensure your smartphone is connected to the correct 5GHz WiFi network broadcast by the dash cam. Restart both the dash cam and your phone if issues persist.
- Poor Video Quality: Clean the camera lenses. Check the video resolution settings in the app or on the device. Ensure WDR and night vision features are functioning as expected in relevant conditions.
- App Not Downloading/Working: Ensure your smartphone meets the app's system requirements. Check your phone's internet connection. Contact customer support if the issue persists.
Specifications
| Feature | Detail |
|---|---|
| Brand | eleacc |
| Model | B0FXLT4Z1T |
| Product Dimensions | 3.1 x 1.9 x 2.7 inches |
| Item Weight | 13.7 ounces |
| Connectivity Technology | Wi-Fi (5GHz Band) |
| Special Feature | 360 Degree View, GPS, G-Sensor, 24H Parking Mode, Night Vision, WDR |
| Video Capture Resolution | 1080p (Front camera 4K/2K/1080P optional) |
| Included Components | Dash Cam, Rear Camera, Adhesive Mount, Charging Cable, User Manual, TF Card |
| Mounting Type | Windshield Mount |
| Field Of View | 360 Degrees |
| Control Method | App, Push Button |
| Batteries | 1 Lithium Ion battery required (included) |
Warranty & Support
eleacc provides a 24-month warranty and a 100% satisfaction guarantee. For any questions or technical support, please refer to the contact information provided in your product packaging or visit the official eleacc website.