1. Introduction
Thank you for choosing the TOOLTOP 952D+ Soldering and Hot Air Rework Station. This device combines a powerful soldering iron and a hot air gun, designed for precision electronic repair, including phone repair, and general soldering tasks. It features advanced temperature control for both tools, ensuring compatibility with lead-free solder and various components. Please read this manual thoroughly before operation to ensure safe and efficient use.
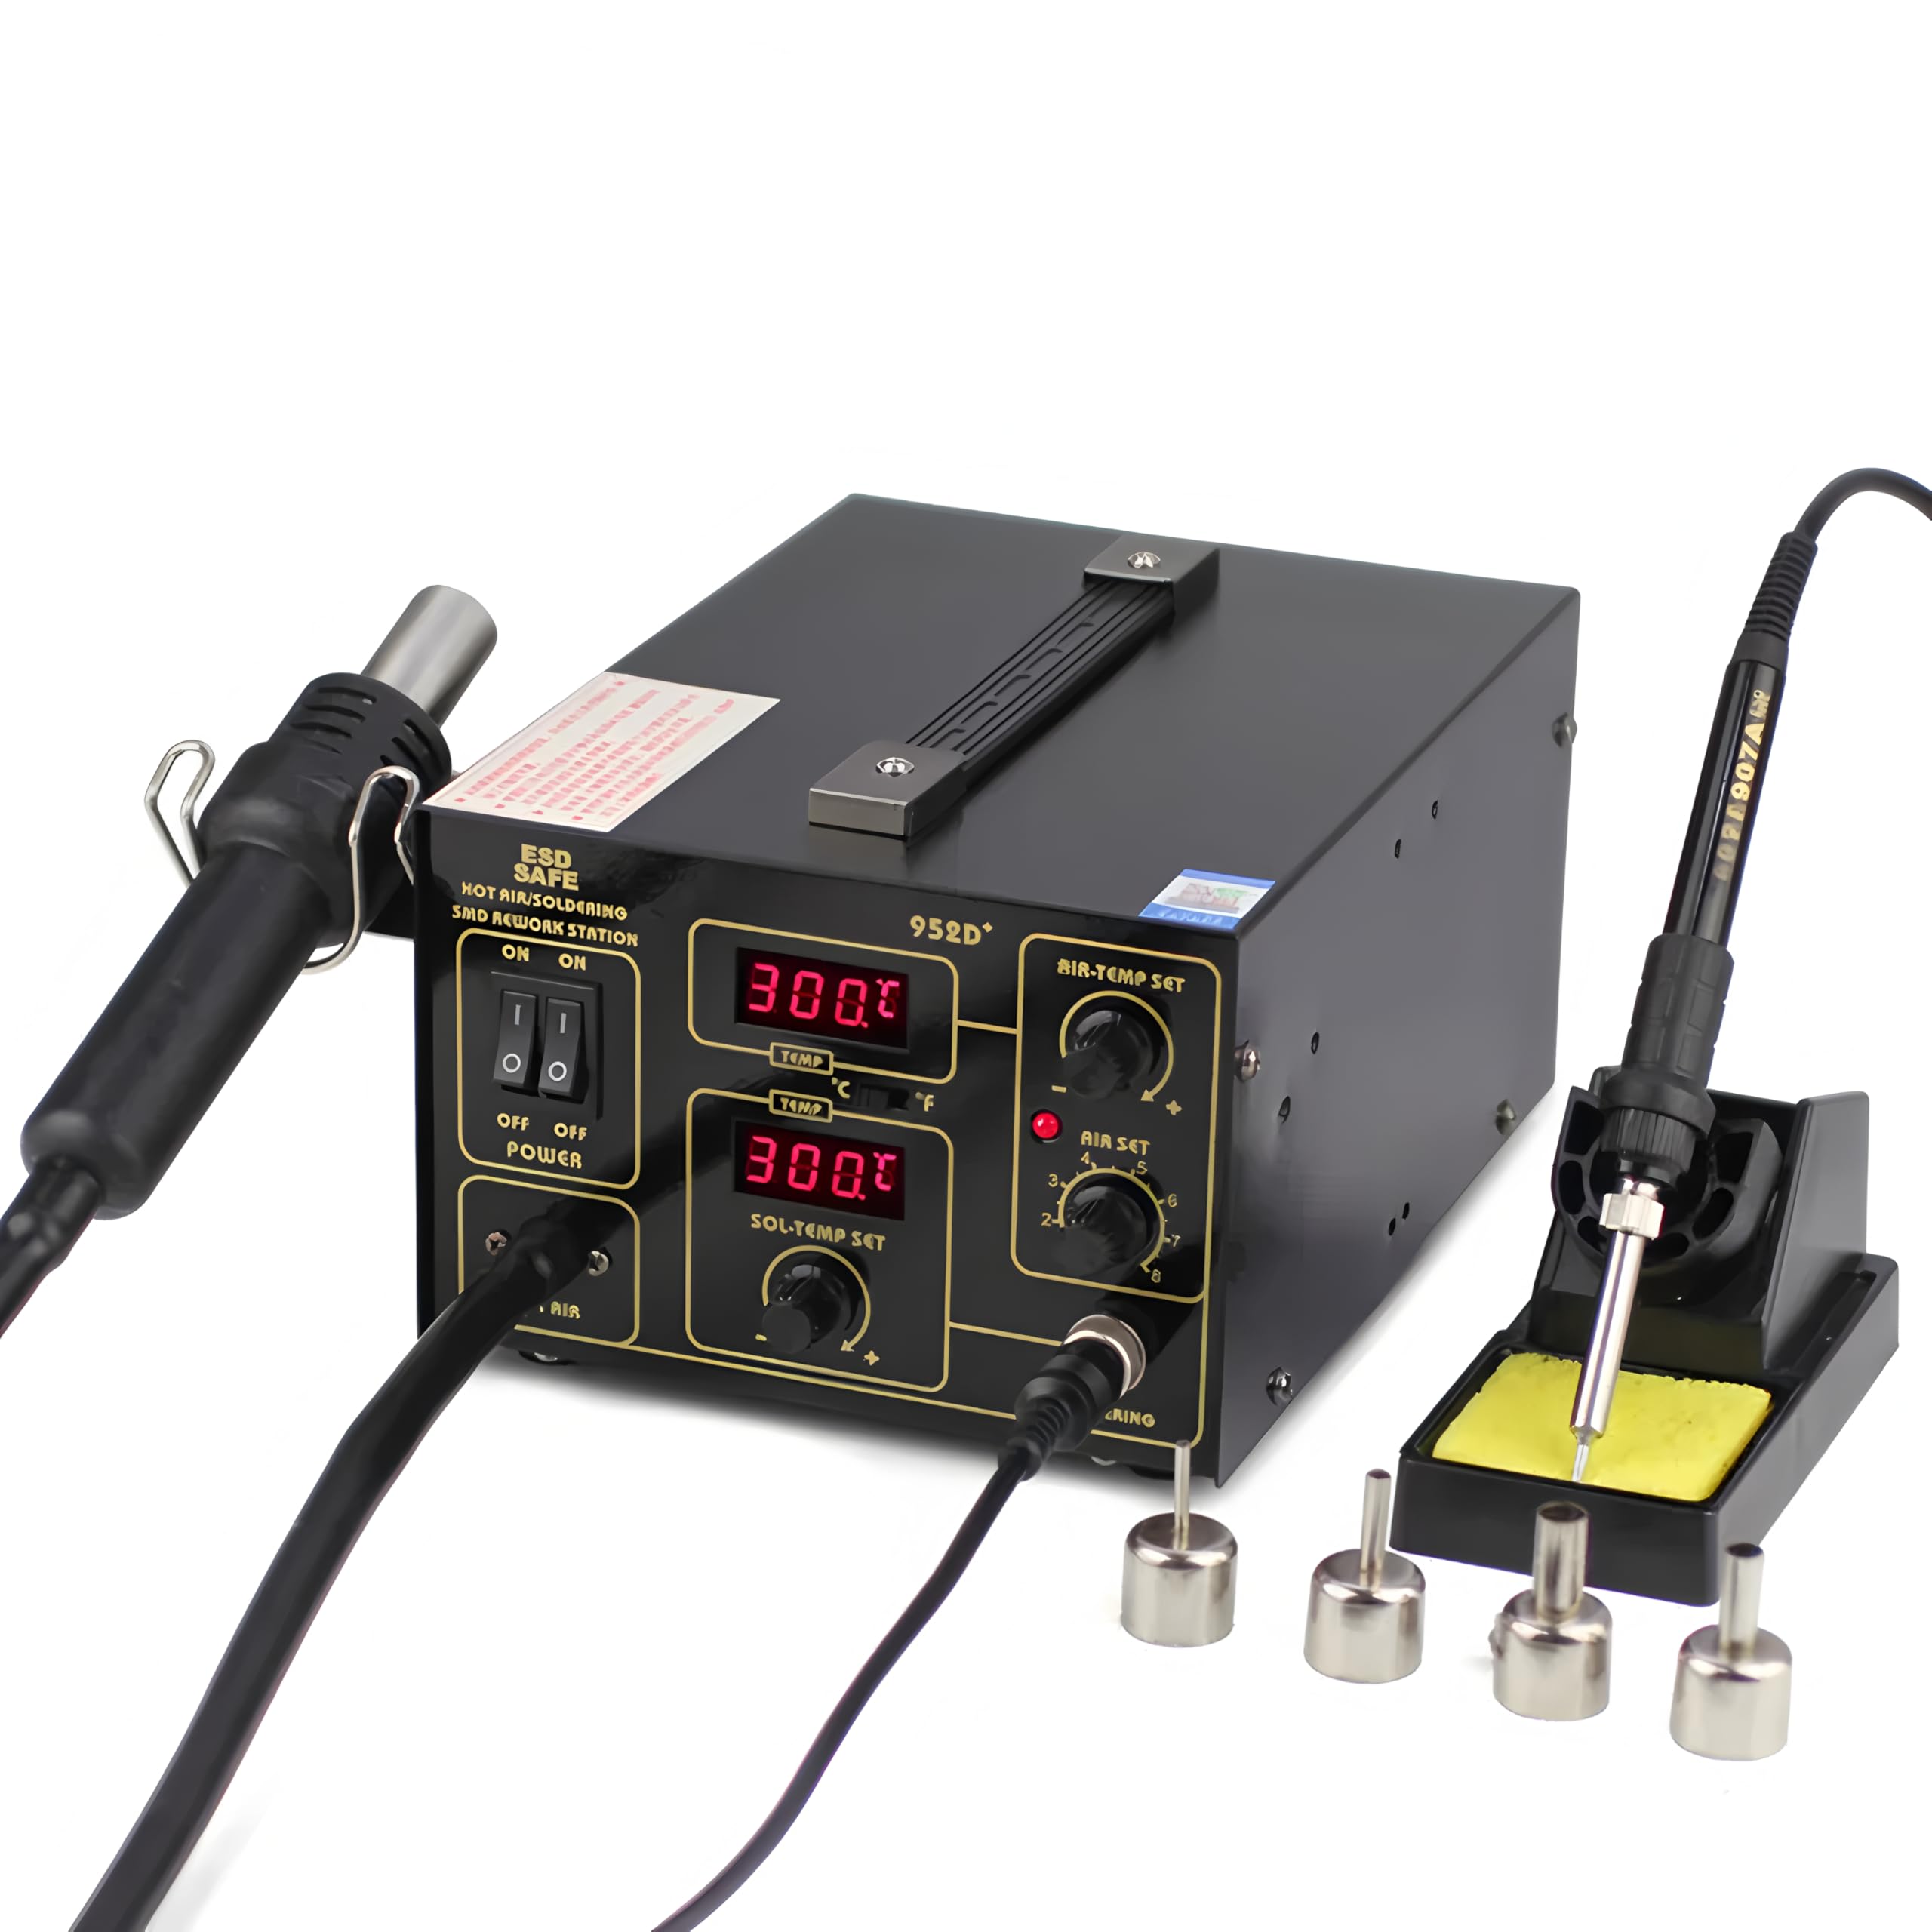
Figure 1: The TOOLTOP 952D+ Soldering and Hot Air Rework Station, showing the main unit, hot air gun, and soldering iron with its stand.
2. Safety Instructions
Always observe the following safety precautions to prevent injury or damage to the equipment:
- Electrical Safety: Ensure the power supply matches the station's requirements (110V/220V). Do not operate with wet hands or in damp environments. Always unplug the unit when not in use or before cleaning.
- Heat Hazard: The soldering iron tip and hot air gun nozzle reach very high temperatures. Avoid direct contact with skin or flammable materials. Use heat-resistant surfaces and tools.
- Fumes: Soldering produces fumes. Always work in a well-ventilated area or use a fume extractor to avoid inhaling harmful vapors.
- Personal Protective Equipment: Wear safety glasses to protect against solder splashes.
- Proper Handling: Place the hot air gun in its bracket and the soldering iron in its stand when not in use. Do not drop or subject the unit to strong impacts.
- Children and Unauthorized Personnel: Keep the device out of reach of children and ensure only trained personnel operate it.
3. Package Contents
Verify that all items are present in the package:
- TOOLTOP 952D+ Main Unit
- Hot Air Gun
- Soldering Iron with Silicone Cable
- Soldering Iron Stand with Cleaning Sponge
- Hot Air Gun Bracket
- 4 x Hot Air Nozzles (various sizes)
- Power Cord
- User Manual

Figure 2: The TOOLTOP 952D+ station with included hot air nozzles.
4. Product Overview
Familiarize yourself with the components of your soldering station.
4.1. Control Panel

Figure 3: Labeled diagram of the control panel, showing switches, displays, and adjustment knobs.
- Air Gun Switch: Turns the hot air gun on/off.
- Soldering Station Switch: Turns the soldering iron on/off.
- Power Switch: Main power for the unit.
- Air Gun Temperature Display: Shows the current hot air temperature.
- Soldering Station Temperature Display: Shows the current soldering iron tip temperature.
- Air Gun Temp Adjustment Knob: Adjusts the hot air gun temperature.
- Air Volume Adjustment Knob: Adjusts the hot air gun's airflow.
- Soldering Station Temp Adjustment Knob: Adjusts the soldering iron tip temperature.
- °C/°F Switch: Toggles temperature display between Celsius and Fahrenheit.
- Soldering Iron Interface: Connection port for the soldering iron.
- Air Gun Indicator: Illuminates when the hot air gun is active.
4.2. Soldering Iron and Stand
Figure 4: Labeled diagram of the soldering iron and its stand, highlighting key parts.
- Iron Handle: Ergonomic grip for comfortable use.
- Silicone Case: Provides insulation and grip.
- Fixing Nut: Secures the soldering tip.
- Stainless Steel Cylinder: Houses the heating element and tip.
- High-temperature Cleaning Sponge: Used for cleaning the soldering iron tip.
- Iron Base: Stable base for the soldering iron stand.
5. Setup
- Unpacking: Carefully remove all components from the packaging.
- Placement: Place the main unit on a stable, heat-resistant, and non-flammable surface. Ensure adequate ventilation around the unit.
- Connect Hot Air Gun: Plug the hot air gun connector into the designated port on the front panel. Secure it by tightening the collar. Place the hot air gun in its bracket on the side of the unit.
- Connect Soldering Iron: Plug the soldering iron connector into the designated port on the front panel (labeled 'SOL'). Secure it by tightening the collar.
- Prepare Soldering Iron Stand: Place the soldering iron stand on a stable surface. Dampen the cleaning sponge with water (do not soak) and place it in the sponge tray.
- Power Connection: Ensure the main power switch on the unit is in the 'OFF' position. Connect the power cord to the unit and then to a grounded electrical outlet.
6. Operating Instructions
6.1. Powering On
- Flip the main 'POWER' switch to 'ON'. The digital displays will illuminate.
- Use the '°C/°F' switch to select your preferred temperature unit.
6.2. Soldering Iron Operation
- Flip the 'SOLDERING STATION' switch to 'ON'.
- Adjust the 'SOL-TEMP SET' knob to set the desired temperature. The display will show the set temperature and then the actual temperature as it heats up.
- Allow the iron to reach the set temperature. This usually takes a few minutes.
- Before soldering, clean the tip on the damp sponge and tin it with a small amount of solder.
- After use, turn off the 'SOLDERING STATION' switch and place the iron back in its stand.
6.3. Hot Air Gun Operation

Figure 5: Various hot air nozzles included with the station.
- Select an appropriate nozzle for your task and attach it to the hot air gun.
- Flip the 'AIR GUN' switch to 'ON'. The 'AIR GUN' indicator will light up.
- Adjust the 'AIR-TEMP SET' knob to set the desired hot air temperature. The display will show the set temperature and then the actual temperature.
- Adjust the 'AIR SET' knob to control the airflow volume. Start with a lower setting and increase as needed.
- Allow the hot air gun to reach the set temperature.
- Direct the hot air stream onto the component or area to be reworked. Maintain a safe distance to avoid overheating components or the PCB.
- After use, turn off the 'AIR GUN' switch. The unit will enter an automatic cooling mode, blowing cool air until the nozzle temperature drops to a safe level. Do not unplug the unit during this cooling process. Once cooled, place the hot air gun back in its bracket.
7. Maintenance
- Soldering Tip Maintenance: Regularly clean the soldering tip on the damp sponge. Re-tin the tip with solder after cleaning and before storage to prevent oxidation. Replace tips when they become excessively worn or corroded.
- Hot Air Nozzle Cleaning: Ensure hot air nozzles are free from debris. Clean them when cool.
- Unit Cleaning: Disconnect power before cleaning. Wipe the main unit with a soft, dry cloth. Do not use abrasive cleaners or solvents.
- Air Filter (if applicable): Check and clean any air filters periodically to ensure proper airflow for the hot air gun.
- Storage: Store the unit in a dry, dust-free environment when not in use.
8. Troubleshooting
| Problem | Possible Cause | Solution |
|---|---|---|
| Unit does not power on. | No power supply; Power switch off; Faulty power cord. | Check power outlet and cord; Ensure all switches are ON. |
| Soldering iron not heating. | Soldering station switch off; Loose connection; Faulty heating element/tip. | Turn on switch; Check connection; Replace heating element/tip if necessary. |
| Hot air gun not heating or no airflow. | Air gun switch off; Loose connection; Air volume set to zero; Faulty heating element/fan. | Turn on switch; Check connection; Adjust air volume knob; Contact support if issue persists. |
| Temperature display error. | Sensor issue; Loose connection. | Check connections; Restart unit. If error persists, contact support. |
If you encounter problems not listed here or if the suggested solutions do not resolve the issue, please contact customer support.
9. Specifications
| Feature | Specification |
|---|---|
| Model | TT-Yihua-952D+ |
| Power Consumption | 65W (Soldering Iron) |
| Soldering Iron Temperature Range | Up to 480°C (896°F) |
| Hot Air Gun Temperature Range | Up to 480°C (896°F) |
| Hot Air Gun Airflow Type | Pump Type |
| Dimensions (L x W x H) | 25.3 x 18.6 x 12.4 cm (approx. 9.96 x 7.32 x 4.88 inches) |
| Weight | 3.3 kg (approx. 7.28 lbs) |
| Safety Standards | CE, RoHS |
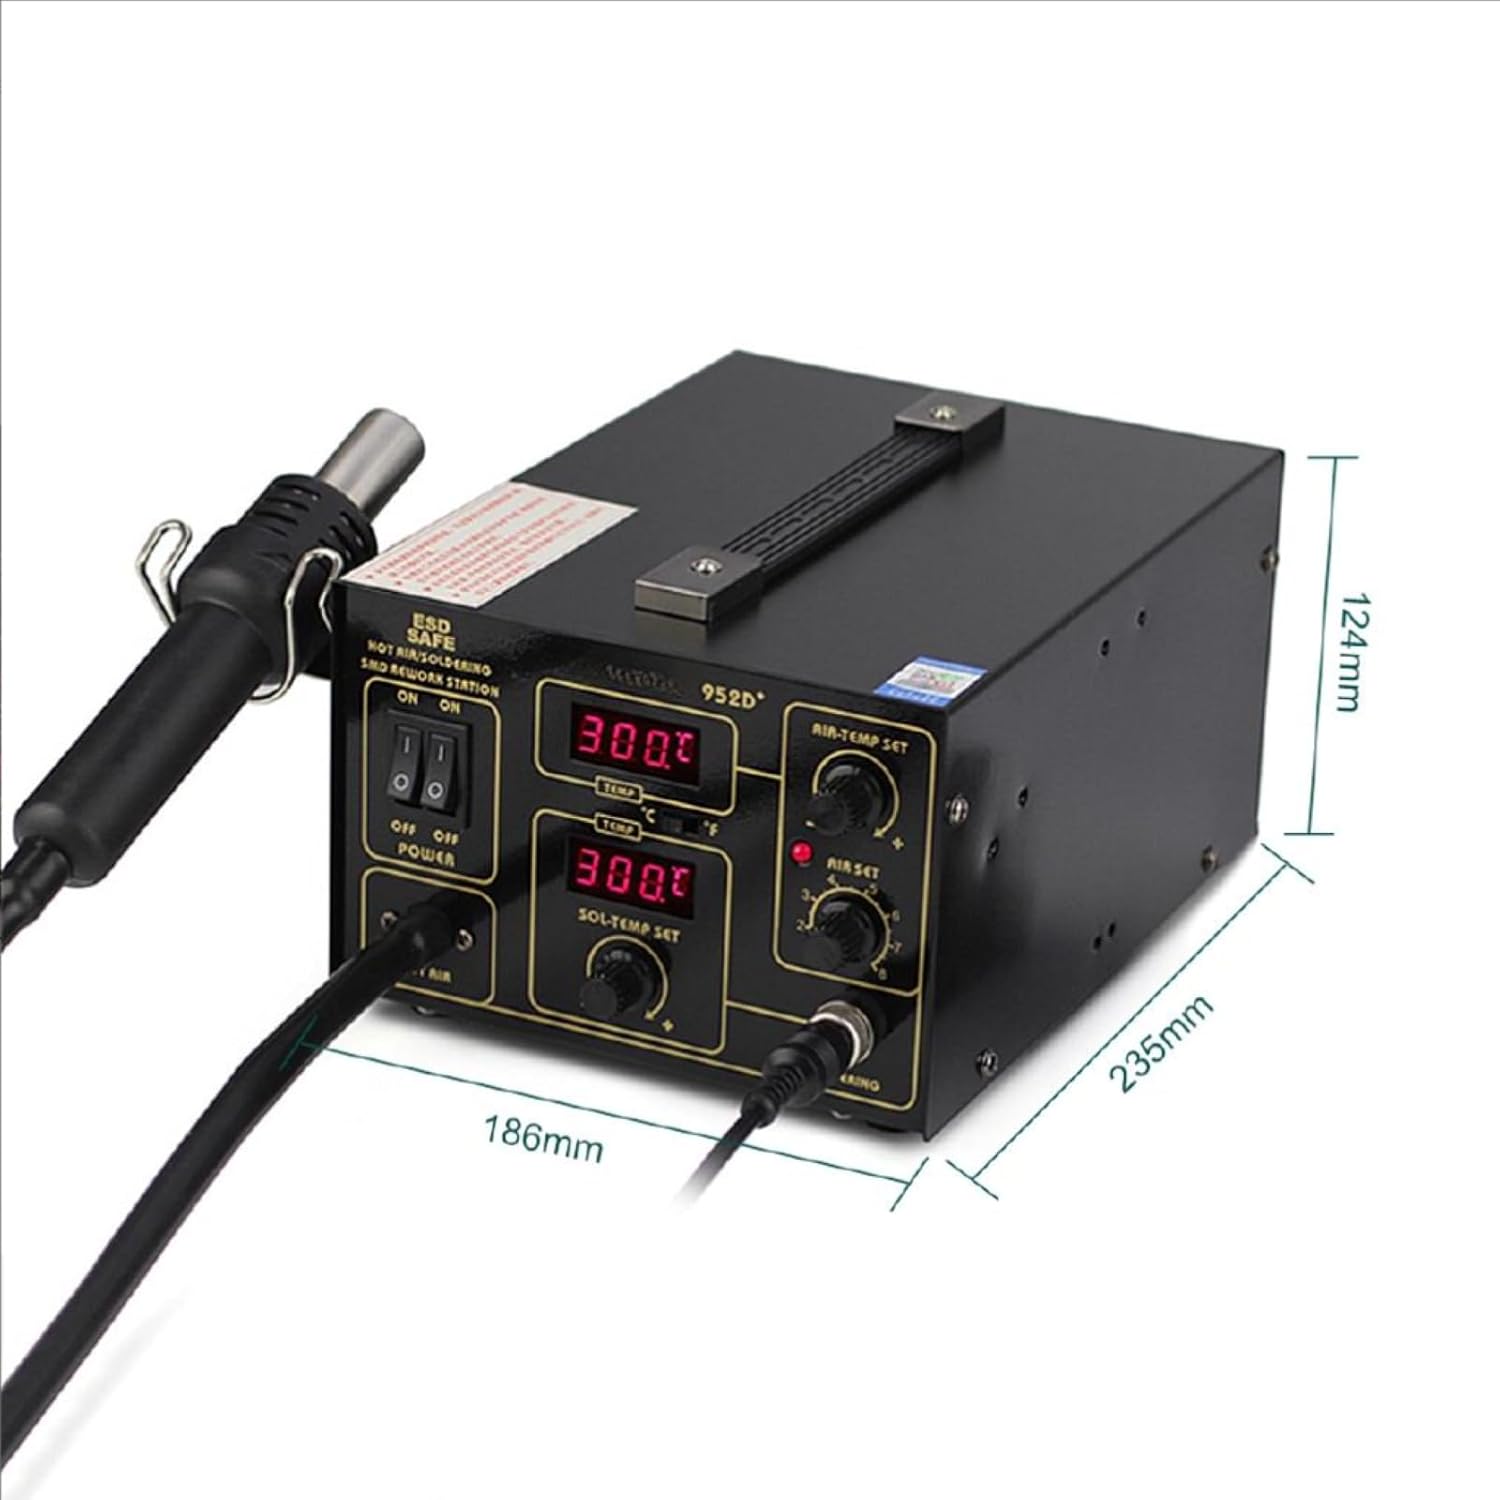
Figure 6: Physical dimensions of the TOOLTOP 952D+ main unit.
10. Warranty and Support
The TOOLTOP 952D+ Soldering and Hot Air Rework Station comes with a 1-year warranty on spare parts, as per EU regulations. This warranty covers manufacturing defects and material faults under normal use. It does not cover damage caused by misuse, accidents, unauthorized modifications, or improper maintenance.
For technical support, warranty claims, or spare parts, please contact your retailer or the manufacturer directly. Please have your model number (TT-Yihua-952D+) and purchase date available when contacting support.


