
1. Introduction
This manual provides instructions for the safe and effective operation, maintenance, and troubleshooting of your TOOLTOP 928D-III 110W Digital Temperature Adjustable Electric Soldering Iron. Please read this manual thoroughly before using the device to ensure proper function and safety.
The TOOLTOP 928D-III is a high-power electric soldering iron designed for various soldering applications. It features an adjustable digital temperature display, rapid heating, and intelligent functions such as sleep mode and temperature correction.
2. Safety Instructions
WARNING: Failure to follow these safety instructions may result in electric shock, fire, or serious injury.
- Always wear appropriate personal protective equipment, including safety glasses, when operating the soldering iron.
- Ensure the work area is well-ventilated to avoid inhaling solder fumes. Use a fume extractor if possible.
- Do not touch the soldering iron tip or heating element when the iron is powered on or cooling down, as temperatures can reach up to 480°C (896°F).
- Always place the soldering iron in its designated stand when not in use.
- Keep the soldering iron away from flammable materials.
- Do not use the soldering iron near water or in damp conditions.
- Unplug the soldering iron from the power outlet when not in use or before performing maintenance.
- Do not modify the soldering iron or use it for purposes other than soldering.
- Keep out of reach of children.
3. Product Overview and Components
Familiarize yourself with the various parts of your soldering iron.

Image: Overview of the TOOLTOP 928D-III soldering iron, highlighting its adjustable temperature, LED digital display, sleep function, temperature correction, C/F switching, and master switch. It also shows the large power heater element and fast heating capability.

Image: Detailed breakdown of the soldering iron components, including the SGS Certified Lead-Free Soldering Iron Tip, Stainless Steel Element Cover, High-Temp. Resistant Bakelite Thread Insert, High-Temperature and Slip Resistant Silicone Grip, Temp. Adjustable Buttons / Functions Switchable Buttons, Master Switch, and Anti-Flex Cable Cover.
- Soldering Iron Tip: The part that heats up and melts solder. Replaceable.
- Stainless Steel Element Cover: Protects the heating element.
- Bakelite Thread Insert: High-temperature resistant component for tip assembly.
- Silicone Grip: Provides a comfortable and heat-resistant hold.
- LED Digital Display: Shows the current temperature and settings.
- Temperature Adjustment Buttons: Used to increase or decrease the temperature and navigate functions.
- Master Switch: Powers the unit on or off.
- Anti-Flex Cable Cover: Protects the power cable connection.
4. Setup
- Unpacking: Carefully remove all components from the packaging. Ensure all parts listed in the "What's in the Box" section are present.
- Tip Installation: Ensure the desired soldering tip is securely screwed into the heating element. Do not overtighten.
- Placement: Place the soldering iron in its stand on a stable, heat-resistant surface. Ensure the stand is firm and will not tip over.

Image: A firm and light soldering iron holder with a silicone base for strong adsorption and good stability.
- Power Connection: Plug the power cord into a suitable electrical outlet.
5. Operating Instructions
- Power On: Flip the Master Switch to the "ON" position. The LED digital display will illuminate.
- Temperature Adjustment:
- Use the Up and Down arrow buttons to adjust the desired temperature. The temperature range is typically 90°C to 480°C (194°F to 896°F).
- The iron heats rapidly, reaching 300°C in approximately 18 seconds.
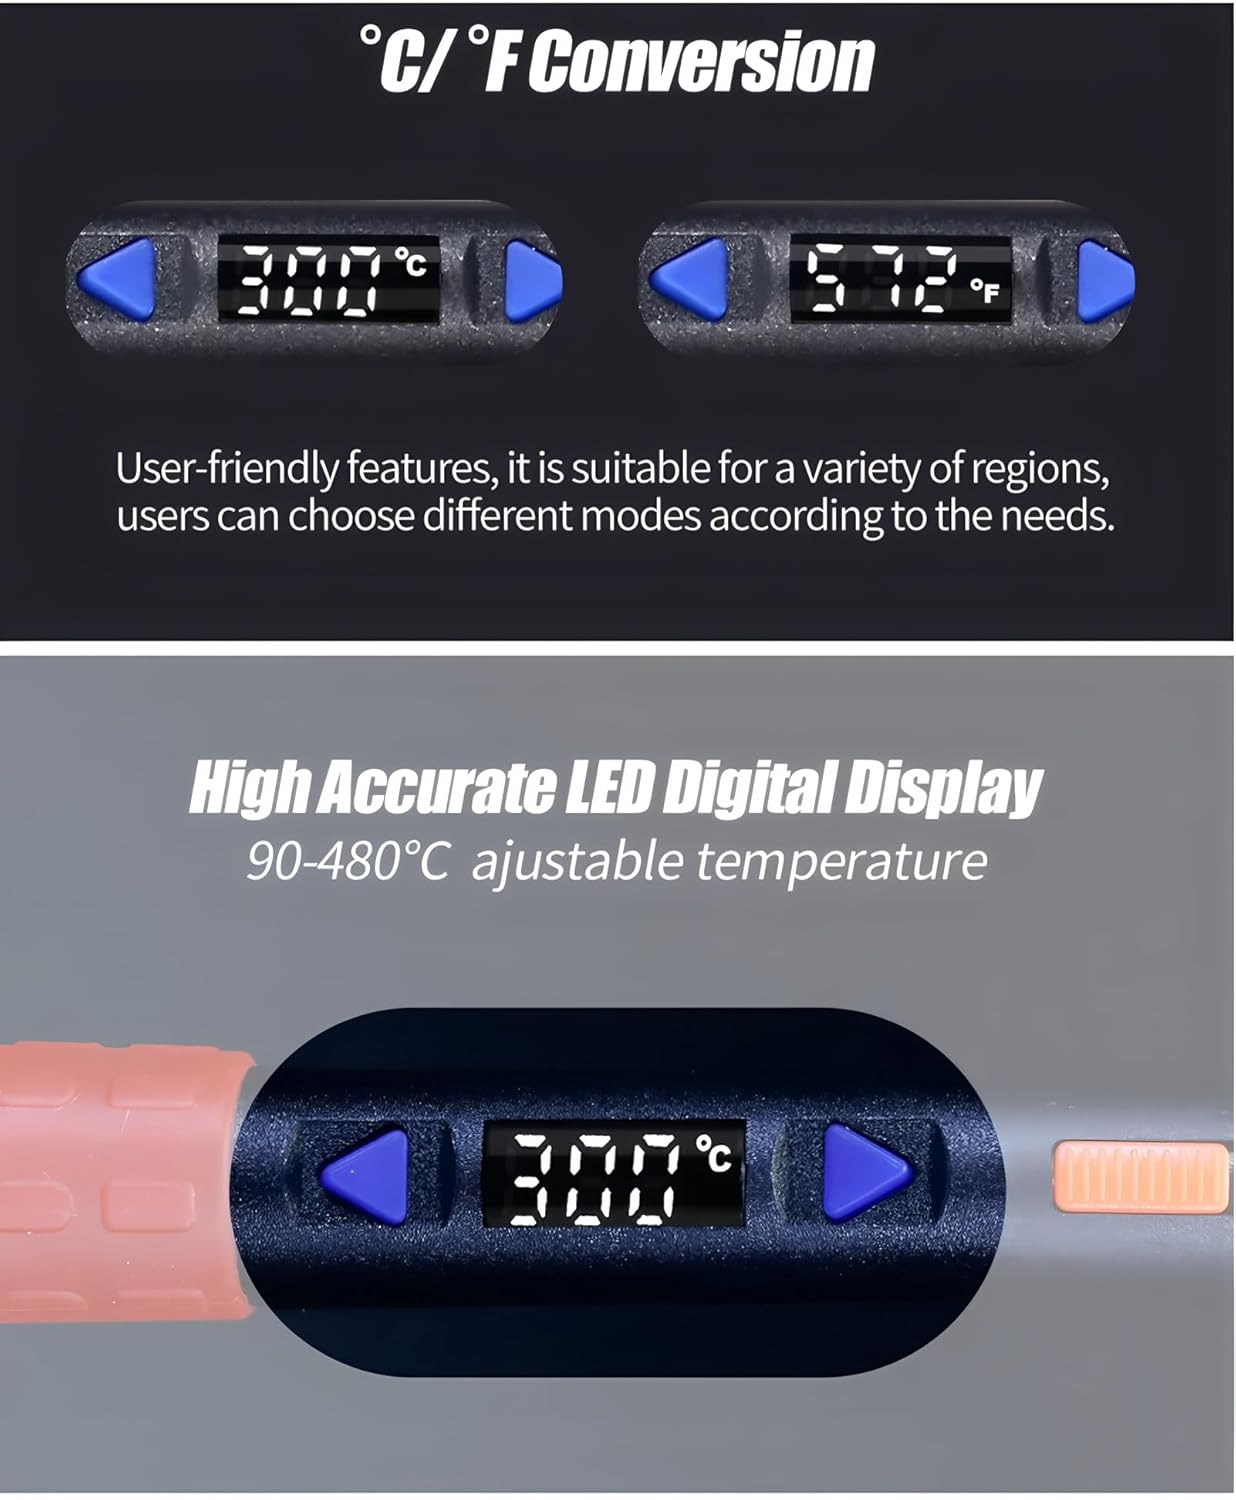
Image: Close-up of the LED digital display showing temperature in Celsius and Fahrenheit, demonstrating the C/F conversion feature and high accuracy.
- Celsius/Fahrenheit Switching:
- To switch between Celsius (°C) and Fahrenheit (°F), press and hold both the Up and Down arrow buttons simultaneously for a few seconds until the unit changes.
- Intelligent Sleep Function:
- The soldering iron features an intelligent sleep function (0-99 minutes). If the iron remains static for the set sleep time, its temperature will automatically drop to 90°C to save energy and prolong tip life.
- To wake the iron from sleep mode, gently shake it. The iron will quickly return to its previously set operating temperature.

Image: Illustration of the intelligent sleep function, showing the display indicating "SLP" and the iron resting in its stand. A hand is shown gently shaking the iron to awaken it.
- Temperature Correction:
- If the displayed temperature deviates from the actual tip temperature, a temperature correction function is available. Refer to the full product manual or manufacturer's website for detailed calibration steps.
- Soldering: Once the desired temperature is reached, the iron is ready for use. Apply solder to the joint, not directly to the iron tip.
- Power Off: When finished, turn off the Master Switch and unplug the iron. Allow it to cool completely in its stand before storing.
6. Maintenance
- Tip Cleaning: Regularly clean the soldering tip using a damp sponge or brass wool. This helps prevent oxidation and ensures efficient heat transfer.
- Tip Tinning: After cleaning and before storage, apply a small amount of solder to the tip (tinning) to protect it from oxidation.
- Tip Replacement: Replace the soldering tip when it becomes excessively worn or corroded. Ensure the iron is cool and unplugged before changing tips.
- General Cleaning: Wipe the body of the soldering iron with a soft, dry cloth. Do not use abrasive cleaners or solvents.
- Storage: Store the soldering iron in a dry, safe place, away from dust and moisture, and out of reach of children.
7. Troubleshooting
| Problem | Possible Cause | Solution |
|---|---|---|
| Iron does not heat up. | Not plugged in; Master Switch off; Faulty power outlet; Damaged heating element. | Check power connection; Turn on Master Switch; Test outlet with another device; Contact support if element is damaged. |
| Temperature display is erratic or incorrect. | Loose tip; Sensor issue; Need for temperature correction. | Ensure tip is securely installed; Perform temperature correction; Contact support if issue persists. |
| Solder does not melt easily. | Temperature set too low; Oxidized tip; Incorrect solder type. | Increase temperature; Clean and re-tin tip; Use appropriate solder for the application. |
| Iron enters sleep mode too quickly/not at all. | Sleep timer setting incorrect. | Adjust the sleep timer setting (refer to full manual for specific steps). |
8. Specifications
- Model: TT-YIHUA 928D-III 110W
- Power Options: 65W, 90W, 110W (depending on model variant)
- Temperature Range: 90°C - 480°C (194°F - 896°F)
- Display: LED Digital Display
- Heating Element: Internal Heating Type Heating Core
- Fast Heating: Reaches 300°C in approx. 18 seconds
- Functions: Intelligent Sleep, Temperature Correction, °C/°F Switching, Microcomputer Temp. Control, Security Master Switch
- Certifications: CE, RoHS
- Manufacturer: TOOLTOP
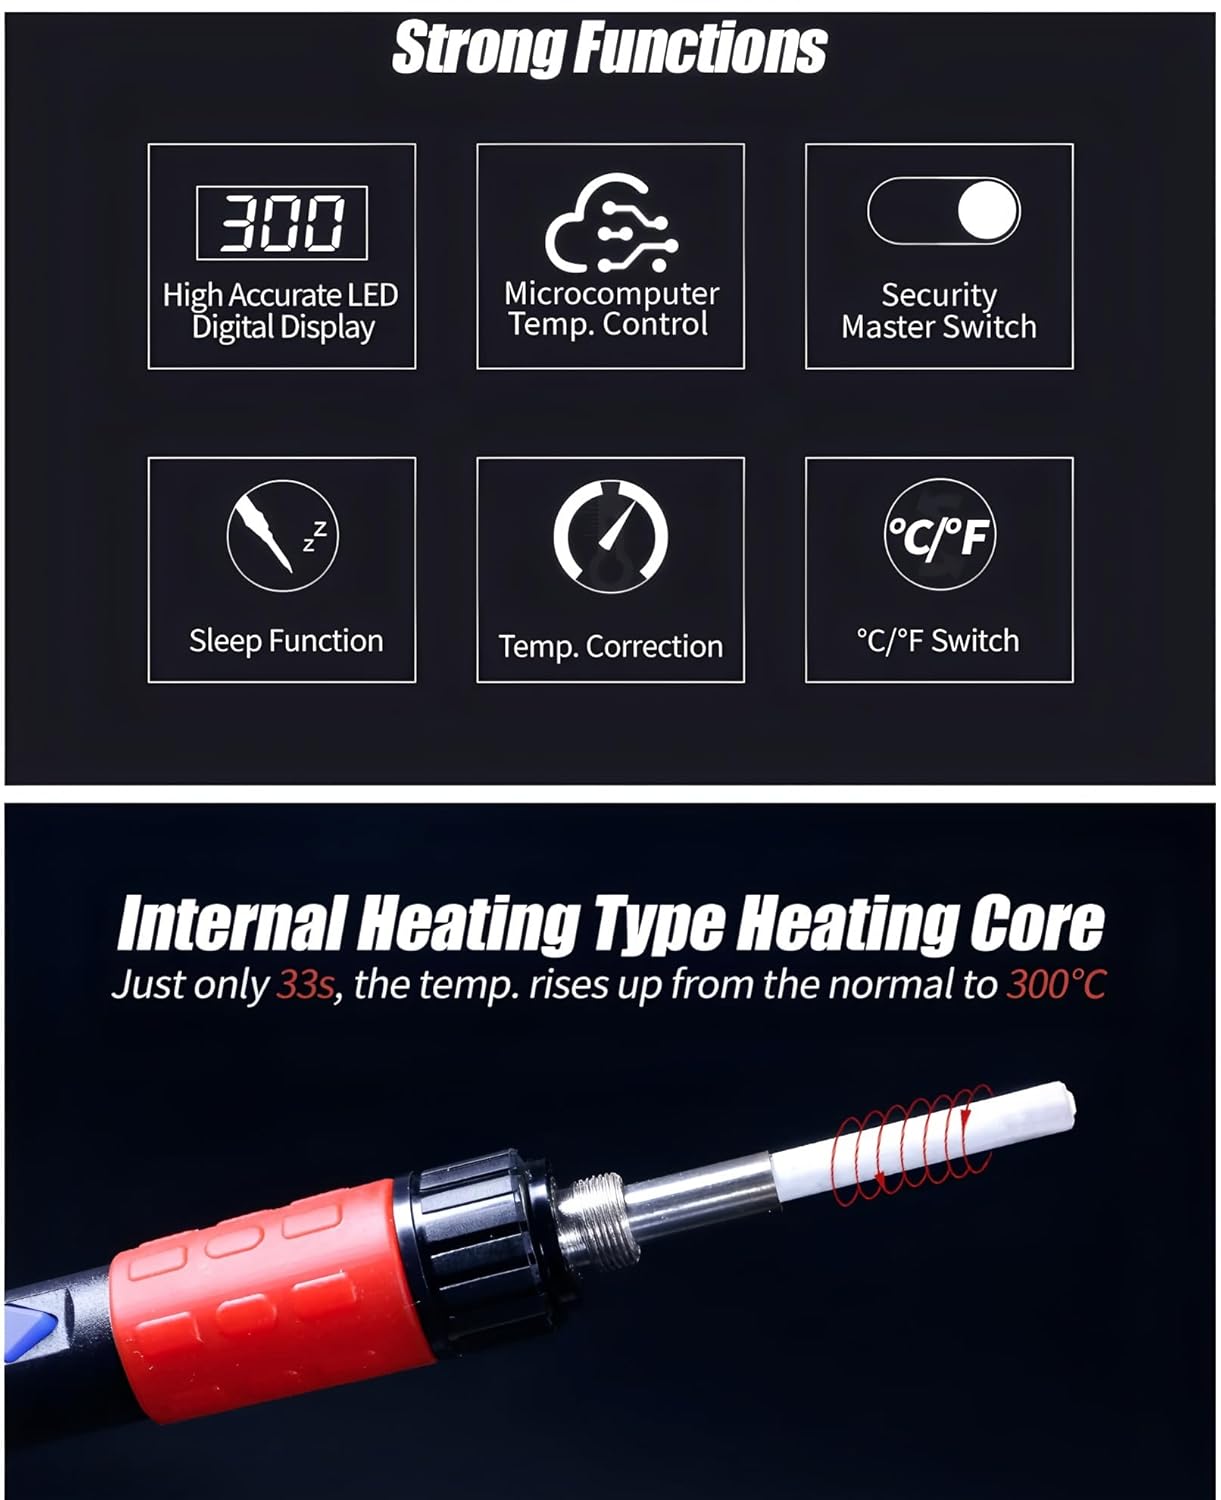
Image: Visual summary of the soldering iron's strong functions, including High Accurate LED Digital Display, Microcomputer Temp. Control, Security Master Switch, Sleep Function, Temp. Correction, and °C/°F Switch.

Image: Shows the internal heating type heating core, which heats up to 300°C in 33 seconds. Also illustrates low temperature application (90-250°C for pyrography) and high temperature application (300-480°C for desoldering).
9. Warranty
This product comes with a 1-year EU Spare Part Availability Duration. For specific warranty terms and conditions, please refer to the documentation included with your purchase or contact TOOLTOP customer support.
10. Support
For technical assistance, troubleshooting not covered in this manual, or warranty claims, please contact TOOLTOP customer support through their official website or the contact information provided with your product packaging.
You can often find additional resources, FAQs, and updated information on the manufacturer's website: www.tooltop.com (Note: This is a placeholder URL, please refer to your product's official documentation for the correct support website.)