1. Introduction
This manual provides detailed instructions for setting up, operating, and maintaining your HIGOLE PC Mini PC Stick J4105. Please read this manual thoroughly before using the device to ensure proper functionality and to prevent damage.
2. Package Contents
Verify that all items listed below are included in your package. If any items are missing or damaged, please contact customer support.
- HIGOLE PC Mini PC Stick J4105
- DC 12V / 3A Power Adapter
- HDMI Extension Cable
- User Manual

Image: Package Contents. This image displays the HIGOLE PC Mini PC Stick, its power adapter, an HDMI extension cable, and the user manual.
Video: Unboxing the HIGOLE PC Mini PC Stick. This video demonstrates the unboxing process and showcases the included components of the Mini PC Stick.
3. Product Overview
The HIGOLE PC Mini PC Stick J4105 is a compact, fanless desktop PC designed for various applications, from business to home entertainment. It features a Celeron J4105 processor, 8GB RAM, and 128GB eMMC storage.
3.1 Device Layout and Ports

Image: Compact Pocket Size PC. This image illustrates the compact dimensions of the PC stick and highlights its various ports on the side, including USB-C, USB 3.0, DC 12V power input, Micro SD card slot, and power button.
- HDMI 2.0 Port: Connects to displays for 4K 60Hz video output.
- USB-C Port: Supports data transfer and power delivery (PD 3.0, 12V/2A).
- USB 3.0 Ports (x2): For connecting peripherals such as keyboards, mice, and external storage.
- RJ45 Gigabit Ethernet Port: Provides a stable wired network connection.
- 3.5mm Audio Jack: For headphones or external speakers.
- Micro SD Card Reader: Supports storage expansion up to 512GB.
- DC 12V Power Input: Connect the included power adapter here.
- Security Lock Slot: For physical security.

Image: HIGOLEPC Mini PC Stick on a desk. This image shows the Mini PC Stick connected to a monitor and peripherals, highlighting its small footprint in a workspace.
4. Setup Guide
Follow these steps for initial setup of your Mini PC Stick.
4.1 Connecting to a Display
- Locate an available HDMI port on your monitor or TV.
- Plug the HDMI connector of the Mini PC Stick directly into the HDMI port of your display. If space is limited, use the provided HDMI extension cable.
- Ensure your display is set to the correct HDMI input source.
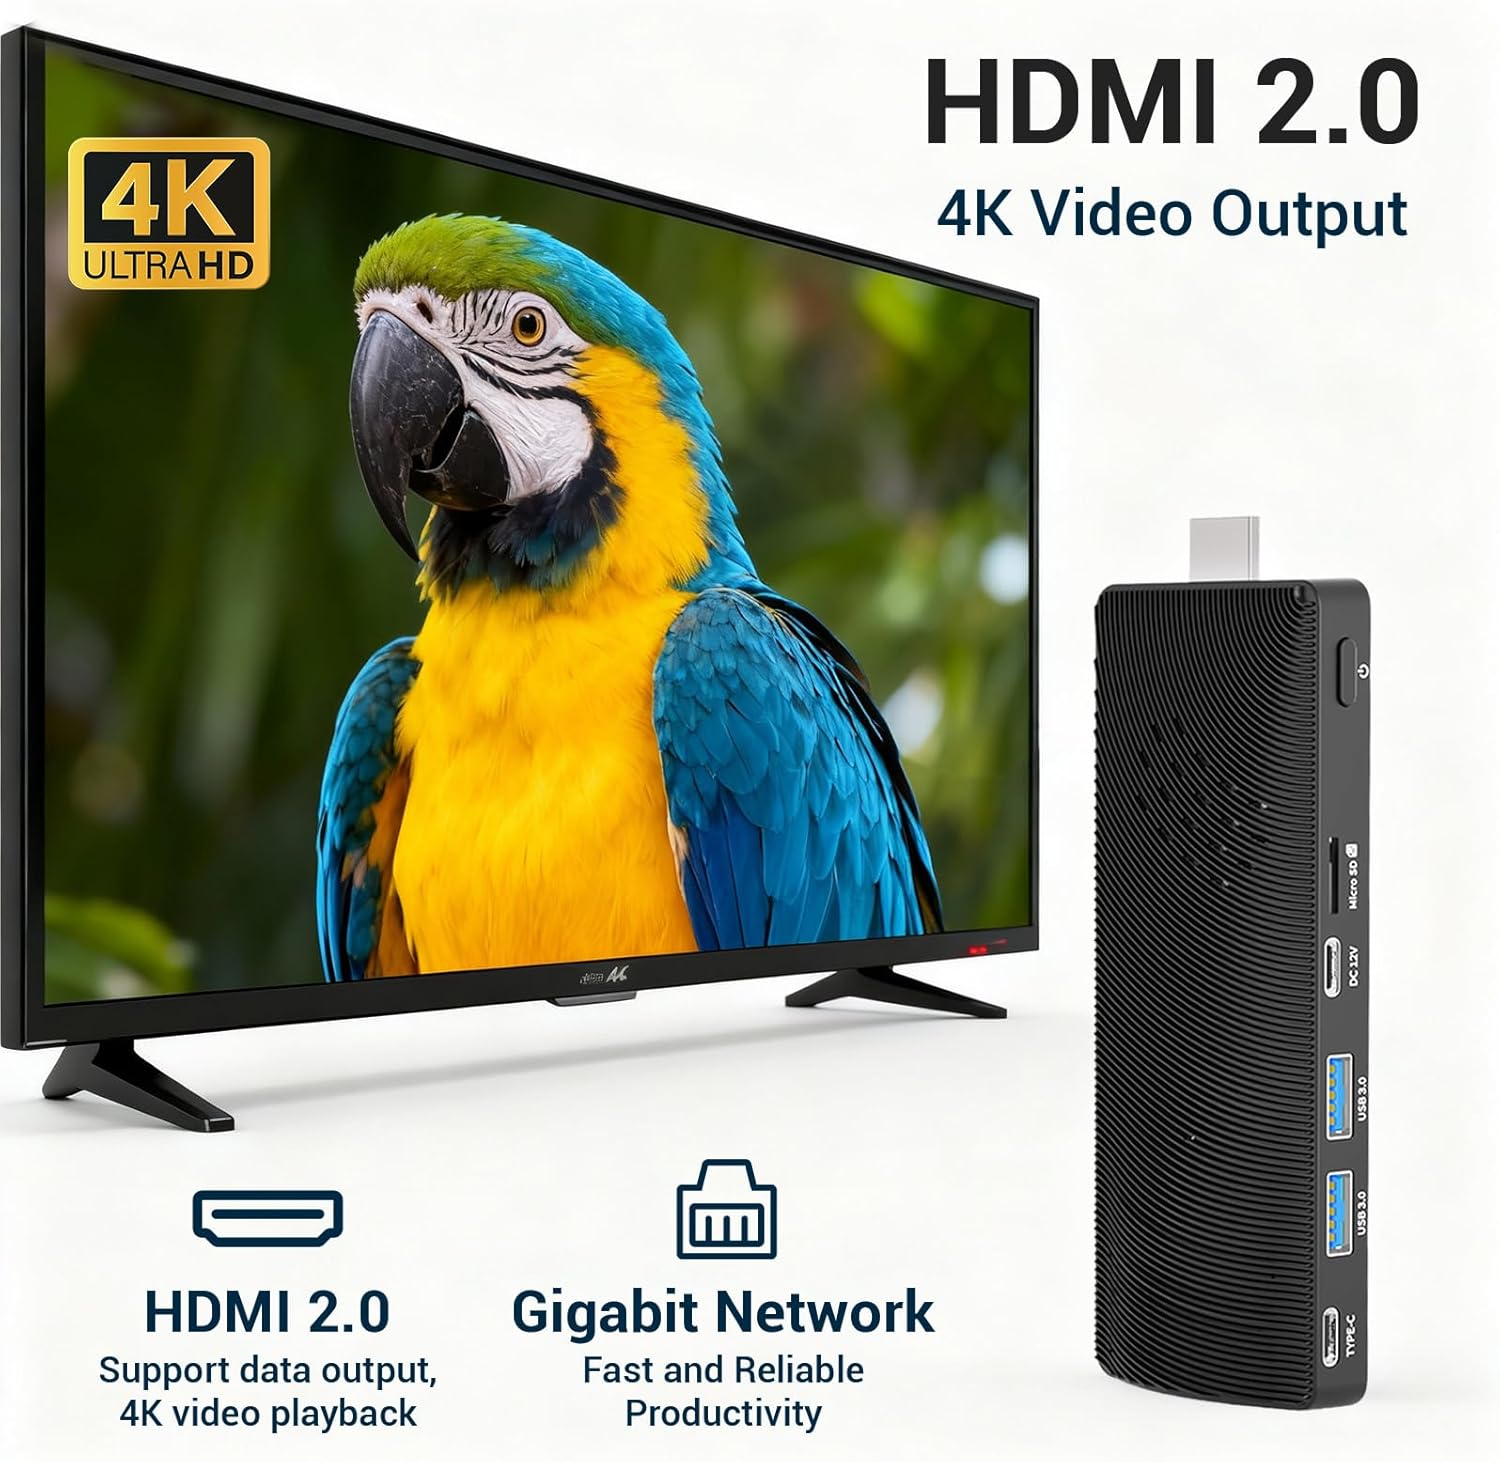
Image: HDMI 2.0 4K Video Output. This image shows the Mini PC Stick connected to a television, illustrating its ability to output 4K Ultra HD video via HDMI 2.0.
4.2 Connecting Power
- Connect the DC 12V / 3A power adapter to the DC 12V input port on the Mini PC Stick.
- Plug the power adapter into a wall outlet. The device will typically power on automatically.
4.3 Connecting Peripherals
- Connect your USB keyboard and mouse to the USB 3.0 ports on the Mini PC Stick.
- For a wired network connection, connect an Ethernet cable to the RJ45 Gigabit Ethernet port.
- Optional: Insert a Micro SD card into the Micro SD card slot for additional storage.

Image: Versatile Connections. This diagram illustrates the various peripheral devices that can be connected to the Mini PC Stick, such as a mouse, keyboard, monitor, and speakers.
5. Operating Instructions
5.1 Initial Boot and Windows Setup
Upon first power-on, the device will guide you through the Windows 11 Pro setup process. Follow the on-screen prompts to configure your language, region, network, and user account.
5.2 Operating System Compatibility
The Mini PC Stick comes pre-installed with Windows 11 Pro. It also supports other operating systems such as Linux and Ubuntu, offering flexibility for various user needs.

Image: Multiple-System Compatibility. This image shows the Mini PC Stick supporting various operating systems, including Windows 11, Ubuntu, and other Linux distributions.
5.3 Network and Wireless Connectivity
The device supports both wired and wireless connections:
- Wi-Fi: Built-in 2.4/5GHz dual-band Wi-Fi for wireless internet access. To connect, go to Windows Settings > Network & Internet > Wi-Fi, select your network, and enter the password.
- Bluetooth 5.0: For connecting wireless peripherals like keyboards, mice, and headphones. To pair, go to Windows Settings > Bluetooth & devices > Add device.
- Gigabit Ethernet: For a stable and high-speed wired network connection via the RJ45 port.

Image: Strong Wireless Connection. This image highlights the device's Wi-Fi 5.0 and Bluetooth 5.0 capabilities for robust wireless connectivity.
5.4 Fanless Design
The Mini PC Stick features a fanless design, ensuring silent operation and efficient heat dissipation. This makes it suitable for environments where noise reduction is critical.
5.5 Multi-Display Support
With its HDMI 2.0 port, the Mini PC Stick supports 4K UHD graphics output at 60Hz, allowing for clear and vivid video images. It can also support dual 4K display output when used with a compatible USB-C hub that supports video output.

Image: Dual Monitor Setup. This image shows the Mini PC Stick connected to two monitors, demonstrating its capability for dual 4K display output, ideal for enhanced productivity.
6. Specifications
| Feature | Specification |
|---|---|
| Brand | HIGOLE PC |
| Model Number | J4105-8+128 |
| Operating System | Windows 11 Pro (supports Linux, Ubuntu) |
| CPU Model | Intel Celeron J4105 |
| CPU Speed | 2.0 GHz (up to 2.7 GHz burst) |
| RAM Memory | 8GB LPDDR4 |
| Storage | 128GB eMMC |
| Graphics | Intel UHD Graphics 600 (Integrated) |
| Video Output | HDMI 2.0 (4K @ 60Hz) |
| Connectivity | Wi-Fi (2.4/5GHz), Bluetooth 5.0, Gigabit Ethernet |
| Ports | 1x USB-C, 2x USB 3.0, 1x HDMI 2.0, 1x RJ45 LAN, 1x 3.5mm Audio Jack, 1x TF Card Reader, 1x DC 12V Input |
| Additional Features | Fanless Design, Security Lock Slot |
| Dimensions | Approx. 5.04 in x 2.01 in x 0.51 in (128mm x 51mm x 13mm) |
| Weight | Approx. 100 grams (0.22 lbs) |

Image: CPU Performance Rating. This image provides details on the Intel J4105 processor and a comparative chart of CPU performance ratings.
7. Troubleshooting
This section addresses common issues you might encounter with your Mini PC Stick.
7.1 No Display Output
- Check HDMI Connection: Ensure the HDMI cable is securely connected to both the Mini PC Stick and the display. Try a different HDMI port on your display or a different HDMI cable.
- Verify Input Source: Make sure your display is set to the correct HDMI input source.
- Power Cycle: Disconnect the power adapter from the Mini PC Stick, wait 10 seconds, then reconnect it.
- Power Adapter: Ensure you are using the provided DC 12V / 3A power adapter. Using an incompatible adapter may prevent the device from powering on or functioning correctly.
7.2 No Internet Connection
- Wi-Fi: Check if Wi-Fi is enabled in Windows settings. Ensure you have selected the correct network and entered the password accurately. Restart your Wi-Fi router.
- Wired Ethernet: Verify the Ethernet cable is securely connected to both the Mini PC Stick and your router/modem. Check the network status in Windows settings.
7.3 Peripherals Not Responding
- USB Devices: Ensure USB devices (keyboard, mouse) are properly connected to the USB 3.0 ports. Try connecting them to different USB ports.
- Bluetooth Devices: Confirm Bluetooth is enabled and the device is correctly paired in Windows settings. Ensure the peripheral has sufficient battery.
7.4 Device Overheating
The Mini PC Stick is designed with a fanless cooling system. If you experience unusual heat, ensure the device is placed in a well-ventilated area and that its ventilation grooves are not obstructed.
8. Maintenance
Proper maintenance helps extend the lifespan of your Mini PC Stick.
- Cleaning: Use a soft, dry cloth to clean the exterior of the device. Do not use liquid cleaners or aerosols.
- Ventilation: Keep the ventilation grooves clear of dust and obstructions to ensure efficient passive cooling.
- Storage: Store the device in a cool, dry place away from direct sunlight and extreme temperatures.
- Software Updates: Regularly update your operating system and drivers to ensure optimal performance and security.
9. Warranty and Support
Your HIGOLE PC Mini PC Stick J4105 comes with a 2-year warranty from the date of purchase. This warranty covers manufacturing defects and malfunctions under normal use. It does not cover damage caused by misuse, accidents, unauthorized modifications, or improper installation.
For technical support, warranty claims, or further assistance, please contact HIGOLE PC customer service through the retailer where you purchased the product or visit the official HIGOLE PC website for contact information.
Please retain your proof of purchase for warranty service.