1. Product Overview
The Targa TG-4.8KZ Competition Series Monoblock Amplifier is designed for high-power subwoofer systems, providing clarity and control. It features a Class D MOSFET power supply, delivering 2000W RMS of efficient power with minimal distortion. The TG-4.8KZ is 1-ohm stable, suitable for demanding audio setups. It includes adjustable gain, low-pass and subsonic filters, and a variable bass boost for precise audio tuning. Heavy-duty terminals and a heat-sink design ensure durability and stable operation.
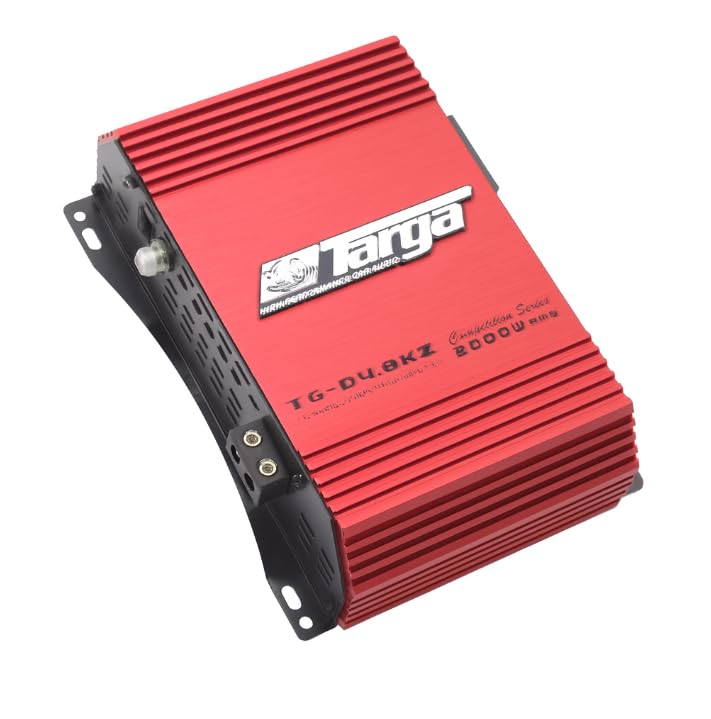
Image 1.1: Front view of the Targa TG-4.8KZ Monoblock Amplifier, showcasing its robust design and connection terminals.
2. Safety Information
Read all instructions carefully before installing and operating the amplifier. Failure to follow these instructions may result in damage to the amplifier, speakers, or vehicle, and may void your warranty.
- Professional Installation Recommended: Due to the complexity of car audio systems and high power requirements, professional installation is highly recommended.
- Power Connections: Always disconnect the vehicle's negative battery terminal before making any power connections. Ensure all power and ground connections are secure and properly insulated to prevent short circuits.
- Wiring: Use appropriate gauge wiring for power, ground, and speaker connections. Undersized wiring can lead to overheating and potential fire hazards.
- Mounting: Mount the amplifier securely in a location that allows for adequate ventilation. Avoid mounting in areas exposed to direct sunlight, excessive heat, moisture, or dust.
- Volume Levels: Prolonged exposure to high volume levels can cause hearing damage. Adjust volume responsibly.
- Fuses: Always replace fuses with the same type and rating. Using incorrect fuses can cause serious damage.
3. Package Contents
Verify that all items are present in the package:
- 1 × Targa TG-4.8KZ Monoblock Amplifier
- User Manual (this document)
- Mounting Hardware (screws, etc. - may vary by package)
4. Features
The Targa TG-4.8KZ Monoblock Amplifier incorporates several features for high-performance audio:
- 2000W RMS Power Output: Delivers substantial power for competition-level subwoofers.
- 1-Ohm Stable: Capable of handling low-impedance loads with reliable performance and stability.
- High-Efficiency Class D Design: Offers a compact size, reduced heat generation, and maximum current flow.
- Adjustable Controls: Includes gain, subsonic filter, and low-pass filter adjustments for precise sound tuning.
- Variable Bass Boost: Allows for custom enhancement of bass frequencies.
- Heavy-Duty Build: Features an aluminum heat sink with integrated over-voltage and thermal protection for durability and safe operation.
- Brushed Aluminium Alloy Enclosure: Provides a robust and efficient heat dissipation solution.
5. Installation and Setup
Proper installation is crucial for optimal performance and safety. It is recommended that installation be performed by a qualified professional.
5.1 Mounting Location
Choose a mounting location that is:
- Dry and free from moisture.
- Well-ventilated to allow for heat dissipation.
- Secure, preventing movement during vehicle operation.
- Away from direct sunlight or heat sources.
5.2 Wiring Connections
Before making any connections, disconnect the vehicle's negative battery terminal.
- Power (B+): Connect a heavy-gauge power cable (e.g., 4 AWG or larger for 2000W RMS) directly from the positive terminal of the vehicle's battery to the amplifier's B+ terminal. Install an appropriate fuse holder (rated for the amplifier's current draw) within 18 inches (45 cm) of the battery.
- Ground (GND): Connect a heavy-gauge ground cable of the same size as the power cable from the amplifier's GND terminal to a clean, unpainted metal surface of the vehicle chassis. Ensure a solid, low-resistance connection.
- Remote Turn-On (REM): Connect a smaller gauge wire (e.g., 18 AWG) from the head unit's remote output to the amplifier's REM terminal. This wire turns the amplifier on and off with the head unit.
- RCA Inputs: Connect RCA cables from the head unit's subwoofer or pre-amp outputs to the amplifier's RCA input jacks.
- Speaker Outputs: Connect your subwoofer(s) to the amplifier's speaker output terminals. Ensure correct polarity (+ to + and - to -) and verify the total impedance of your subwoofer configuration is 1 ohm or higher.
Note: Refer to your subwoofer's specifications for proper wiring configurations (series or parallel) to achieve the desired impedance.
6. Controls and Adjustments
The TG-4.8KZ amplifier features several controls to fine-tune its performance:
- GAIN Control: Adjusts the input sensitivity of the amplifier to match the output voltage of your head unit. Start with the gain at minimum and slowly increase it until the desired volume is achieved without distortion.
- LOW PASS FILTER (LPF): This control sets the upper frequency limit for the amplifier's output. Only frequencies below the set point will be passed to the subwoofer. Typically set between 50Hz and 150Hz for subwoofers.
- SUBSONIC FILTER: This high-pass filter removes extremely low frequencies (below the set point) that are inaudible and can cause damage to subwoofers. Typically set between 10Hz and 30Hz.
- BASS BOOST: Provides an adjustable boost to bass frequencies, usually centered around 45Hz. Use sparingly to avoid distortion and potential speaker damage.
7. Operating Instructions
Once properly installed and configured, operating the Targa TG-4.8KZ amplifier is straightforward:
- Power On: The amplifier will automatically turn on when your head unit is powered on, provided the remote turn-on wire is correctly connected. A power indicator light on the amplifier will illuminate.
- Audio Playback: Begin playing audio through your head unit.
- Volume Adjustment: Adjust the volume from your head unit. The amplifier's gain control should be set to match the head unit's output, not used as a volume control.
- Listening: Listen for clear, undistorted bass. If distortion is heard, reduce the gain setting or bass boost.
- Power Off: The amplifier will turn off automatically when the head unit is powered off.
8. Maintenance
Regular maintenance helps ensure the longevity and performance of your amplifier:
- Cleaning: Periodically clean the amplifier's exterior with a soft, dry cloth. Do not use harsh chemicals or abrasive cleaners. Ensure ventilation fins are free from dust and debris.
- Connection Check: Annually, inspect all power, ground, and speaker connections to ensure they remain tight and free from corrosion.
- Ventilation: Ensure that the amplifier's mounting location continues to provide adequate airflow. Do not obstruct the heat sink.
9. Troubleshooting
If you experience issues with your Targa TG-4.8KZ amplifier, refer to the following troubleshooting guide:
| Problem | Possible Cause | Solution |
|---|---|---|
| Amplifier does not turn on (no power indicator) |
|
|
| No audio output |
|
|
| Distorted audio |
|
|
| Amplifier goes into protection mode (protection light on) |
|
|
If problems persist after attempting these solutions, contact Targa customer support or a qualified car audio technician.
10. Specifications
| Feature | Specification |
|---|---|
| Model Number | TG-4.8KZ |
| Brand | Targa |
| Power Output (RMS) | 2000W |
| Impedance Stability | 1-Ohm Stable |
| Amplifier Class | Class D |
| Power Source | AC adapter (for internal components, vehicle 12V system for main power) |
| Material | Brushed Aluminium Alloy |
| Color | Silver |
| Product Dimensions (L x W x H) | 26L x 16W x 9H centimetres |
| Special Features | High-Power Output with Adjustable Controls and Robust Construction |
| Compatible Devices | Manual audio controls (referring to external head unit/processor) |
| GTIN / UPC | 759649242936 |
11. Warranty and Support
The Targa TG-4.8KZ Monoblock Amplifier comes with a 6-month warranty from the date of purchase. This warranty covers manufacturing defects under normal use. It does not cover damage caused by improper installation, misuse, accident, neglect, unauthorized modification, or normal wear and tear.
For warranty claims or technical support, please contact your authorized Targa dealer or the point of purchase. Ensure you retain your proof of purchase for warranty validation.


