1. Introduction
The VENTION USB-C Mini Wireless Lavalier Microphone system is designed for high-quality audio capture with exceptional portability and ease of use. Featuring 2.4GHz wireless technology, intelligent noise reduction, and a long-lasting charging case, it is ideal for streaming, video recording, and karaoke. This manual provides detailed instructions to help you get the most out of your device.
2. What's in the Box
- Charging Case x 1
- Microphone x 2
- Receiver x 1 (USB-C or Lightning, depending on model)
- Plush Windshield Cap x 2
- USB-C Cable x 1
- IEMs (In-Ear Monitors) x 2
- User Manual x 1
- Warranty Card x 1

3. Product Overview
3.1 Charging Case
The charging case serves as both a protective container and a power bank for your microphones and receiver. It features an indicator light and a USB-C port for charging.
- Indicator Light: Displays charging status and battery level of the case.
- USB-C Port: For charging the case.

3.2 Microphone & Receiver
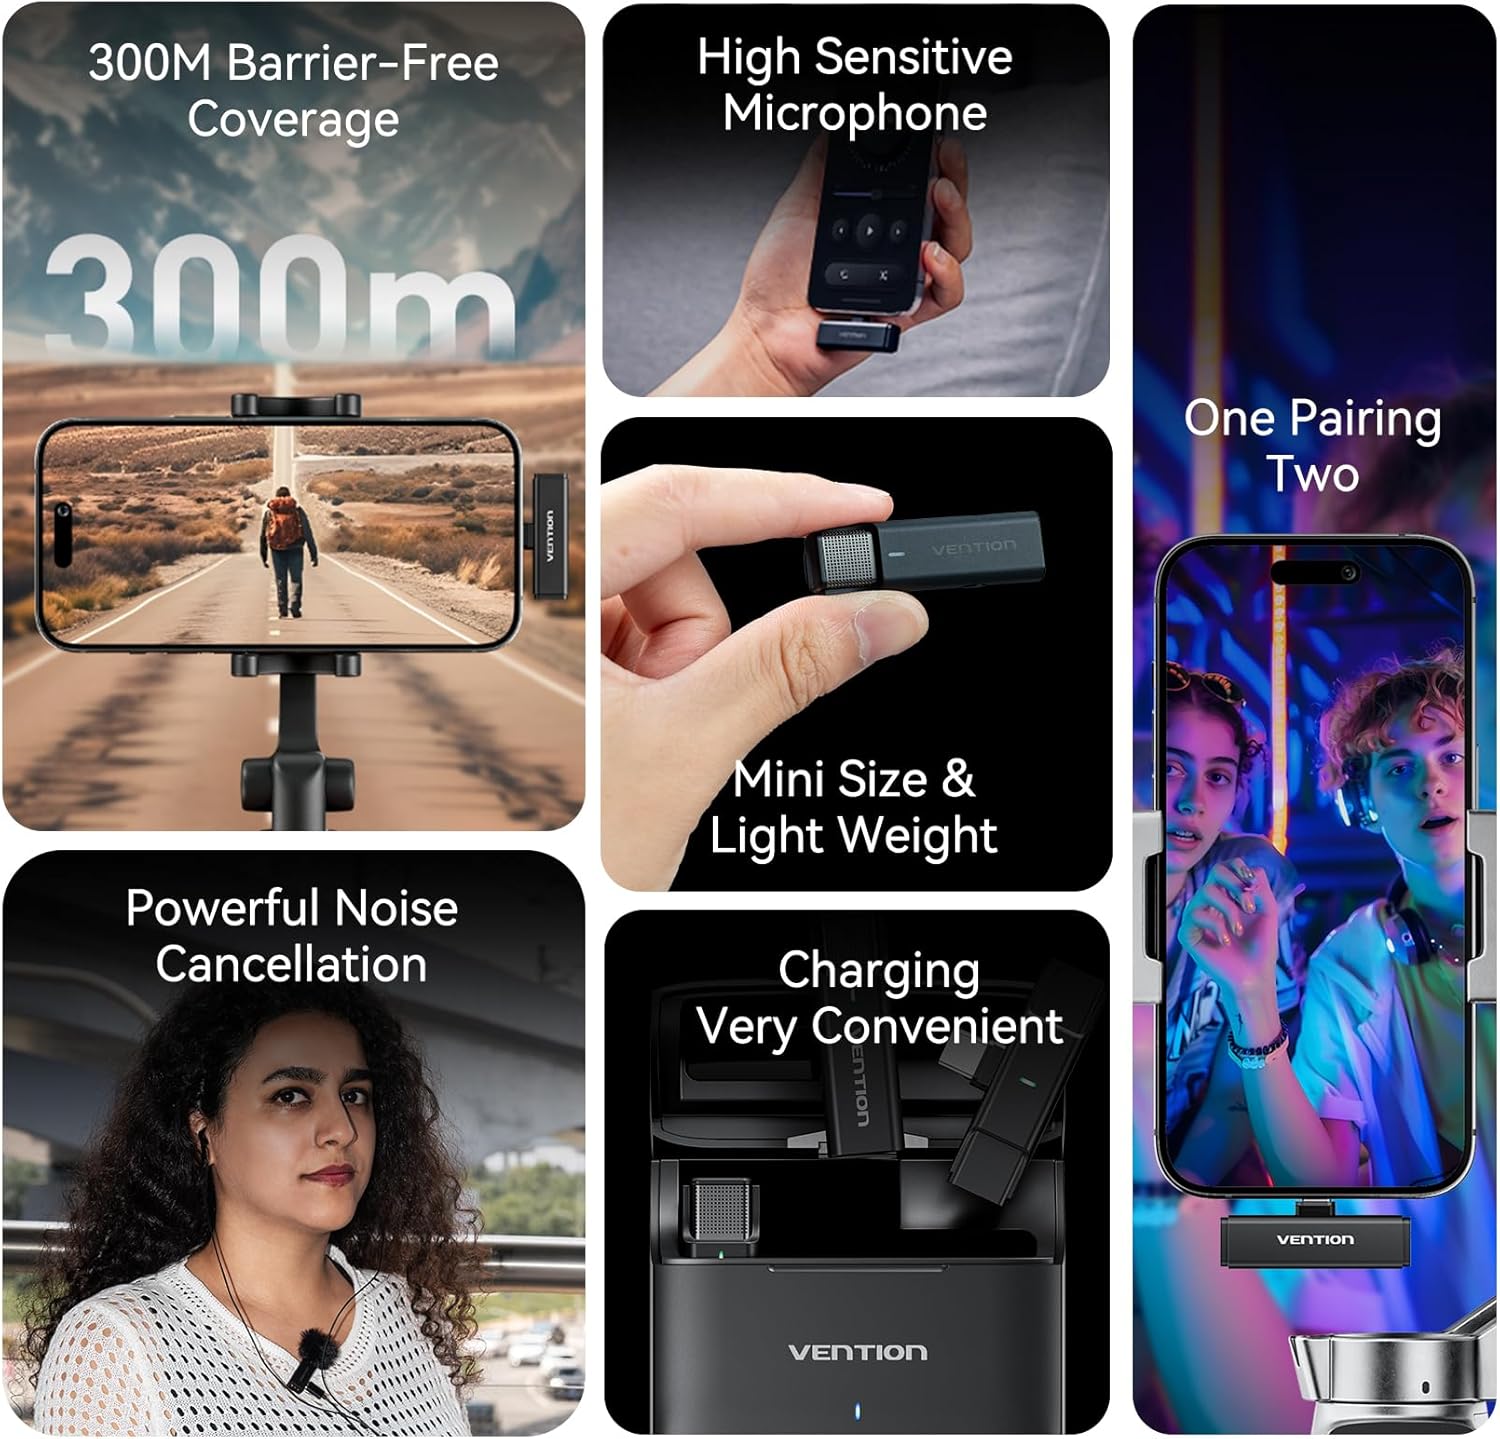
Each microphone is equipped with a clip for easy attachment and a power button that also controls noise reduction modes. The receiver connects directly to your recording device.
- Microphone Clip: For attaching the microphone to clothing.
- Indicator Light (Mic): Shows pairing status and noise reduction mode.
- Power Button (Mic): Controls power and toggles noise reduction/AI voice modes.
- USB-C/IEM Port (Mic): For charging or real-time monitoring with IEMs.
- USB-C Interface (Receiver): Connects to your smartphone or other compatible device.
- Reset Button (Receiver): For resetting the receiver if needed.
- Indicator Light (Receiver): Shows power on/pairing status.

4. Setup
4.1 Charging the Device
Before first use, ensure all components are fully charged.
- Charging the Case: Connect the provided USB-C cable to the charging case's USB-C port and a power adapter. The red indicator light will be on during charging and turn off when fully charged.
- Charging Microphones: Place the microphones into the charging case. The green indicator light on the microphones will blink slowly during charging and turn off when fully charged.
4.2 Connecting to Your Device
The VENTION microphone system offers a plug-and-play experience.
- Insert the receiver (USB-C or Lightning) directly into the charging port of your smartphone or compatible recording device.
- Take the microphones out of the charging case. They will automatically power on and attempt to pair with the receiver.
- The receiver's indicator light will blink slowly during pairing and turn solid green once successfully paired. The microphone's indicator light will also turn solid green.
5. Operating Instructions
5.1 Noise Reduction (NR) Modes
The microphone features intelligent noise reduction to ensure clear audio in various environments. By default, the microphone starts in noise reduction mode.
- Toggle NR: Press the power button on the microphone once to cycle through different noise reduction levels (weak, medium, strong). The green indicator light on the microphone will blink 1, 2, or 3 times to indicate the current NR strength.
- Disable NR: Continue pressing the power button until the green light stops blinking and remains solid, indicating standard mode.

5.2 AI Voice Modes (Reverb Effects)
Enhance your audio with built-in AI voice effects, including reverb.
- Activate AI Voice: Double-press the power button on the microphone. The indicator light will turn blue.
- Toggle AI Voice Effects: While in AI voice mode (blue light), press the power button once to cycle through different AI voice effects. The blue indicator light will blink 1, 2, or 3 times to indicate the current effect.
- Disable AI Voice: Double-press the power button again to return to standard or noise reduction mode (green light).
5.3 Real-time Audio Monitoring
For precise audio control, use the included IEMs (In-Ear Monitors) to monitor your sound in real-time.
- Connect the IEMs to the USB-C/IEM port on the microphone.
- This allows you to hear your audio as it's being recorded, ensuring optimal sound quality.


6. Maintenance
6.1 Cleaning
To maintain optimal performance, regularly clean your microphone and charging case.
- Use a soft, dry cloth to wipe down the exterior of the microphones, receiver, and charging case.
- Avoid using harsh chemicals or abrasive materials.
- Ensure no moisture enters the ports or microphone grilles.
6.2 Storage
When not in use, store the microphone system properly to prolong its lifespan.
- Always store the microphones and receiver in the charging case.
- Keep the charging case in a cool, dry place away from direct sunlight and extreme temperatures.
7. Troubleshooting
If you encounter any issues, try the following steps:
- No Sound: Ensure the receiver is fully inserted into your device and the microphones are powered on and paired (solid green light). Check your device's audio input settings.
- Not Pairing: Make sure both microphones and the receiver are charged. Try resetting the receiver using the reset button.
- Low Battery: Charge the microphones and charging case as described in Section 4.1.
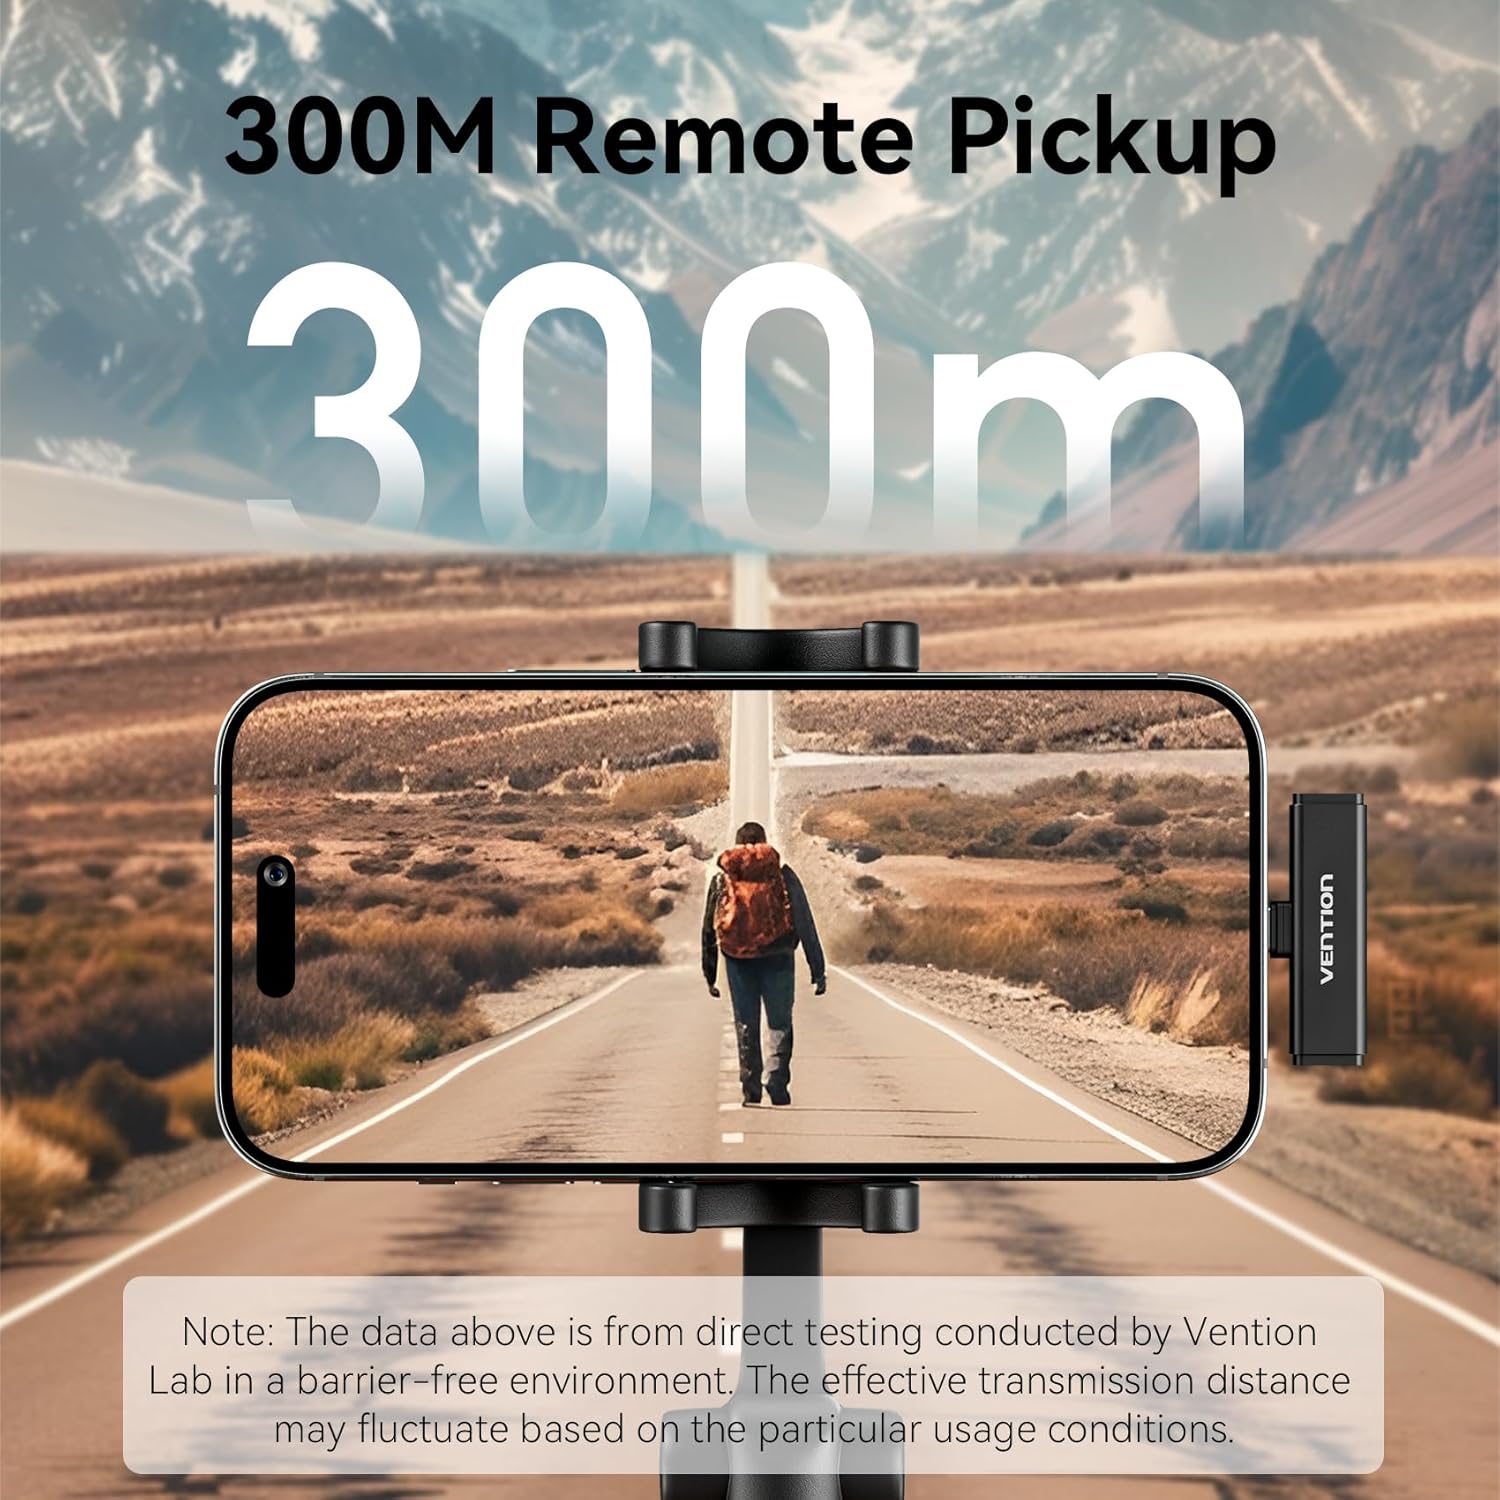
- Interference: Move away from other 2.4GHz wireless devices or sources of electromagnetic interference.
8. Specifications
| Feature | Specification |
|---|---|
| Brand | VENTION |
| Model Name | NCAB0 |
| Connectivity Technology | RF (2.4GHz) |
| Connector Type | USB Type-C |
| Special Feature | Noise Reduction |
| Compatible Devices | Smartphone |
| Color | Black |
| Item Weight | 114 Grams |
| Microphone Form Factor | Lavalier |
| Power Source | Battery Powered |
| Number of Batteries | 2 Nonstandard Battery batteries required. (included) |
| Signal-to-Noise Ratio | 64 dB |
| Recommended Uses | Speech, Video Recording, Streaming |
9. Warranty & Support
9.1 Warranty Information
This VENTION product comes with a 2 Year Manufacturer Warranty. Please refer to the included Warranty Card for full details on coverage and claims.
9.2 Customer Support
For further assistance, technical support, or warranty claims, please contact VENTION customer service through the official VENTION Store on Amazon or visit the VENTION website for contact information.