
1. Introduction
This manual provides detailed instructions for the installation, operation, and maintenance of your AOOCOO Dual Monitor KVM Switch. This device allows you to control two computers using a single set of keyboard and mouse, and display their output on two monitors. It supports resolutions up to 8K@30Hz or 4K@144Hz.
2. Package Contents
Please verify that all items are present in your package:
- 1x AOOCOO Dual Monitor USB 3.0 DisplayPort KVM Switch
- 2x USB 3.0 Cables (1.5m / 4.92ft)
- 1x Wired Controller
- 1x User Manual
- 1x Power Cable (1.5m / 4.92ft)

Image: Contents of the AOOCOO Dual Monitor KVM Switch package, including the KVM unit, USB cables, wired controller, user manual, and power cable.
3. Product Overview
The AOOCOO Dual Monitor KVM Switch is designed for efficient management of multiple computers. It features multiple input and output ports for seamless connectivity.
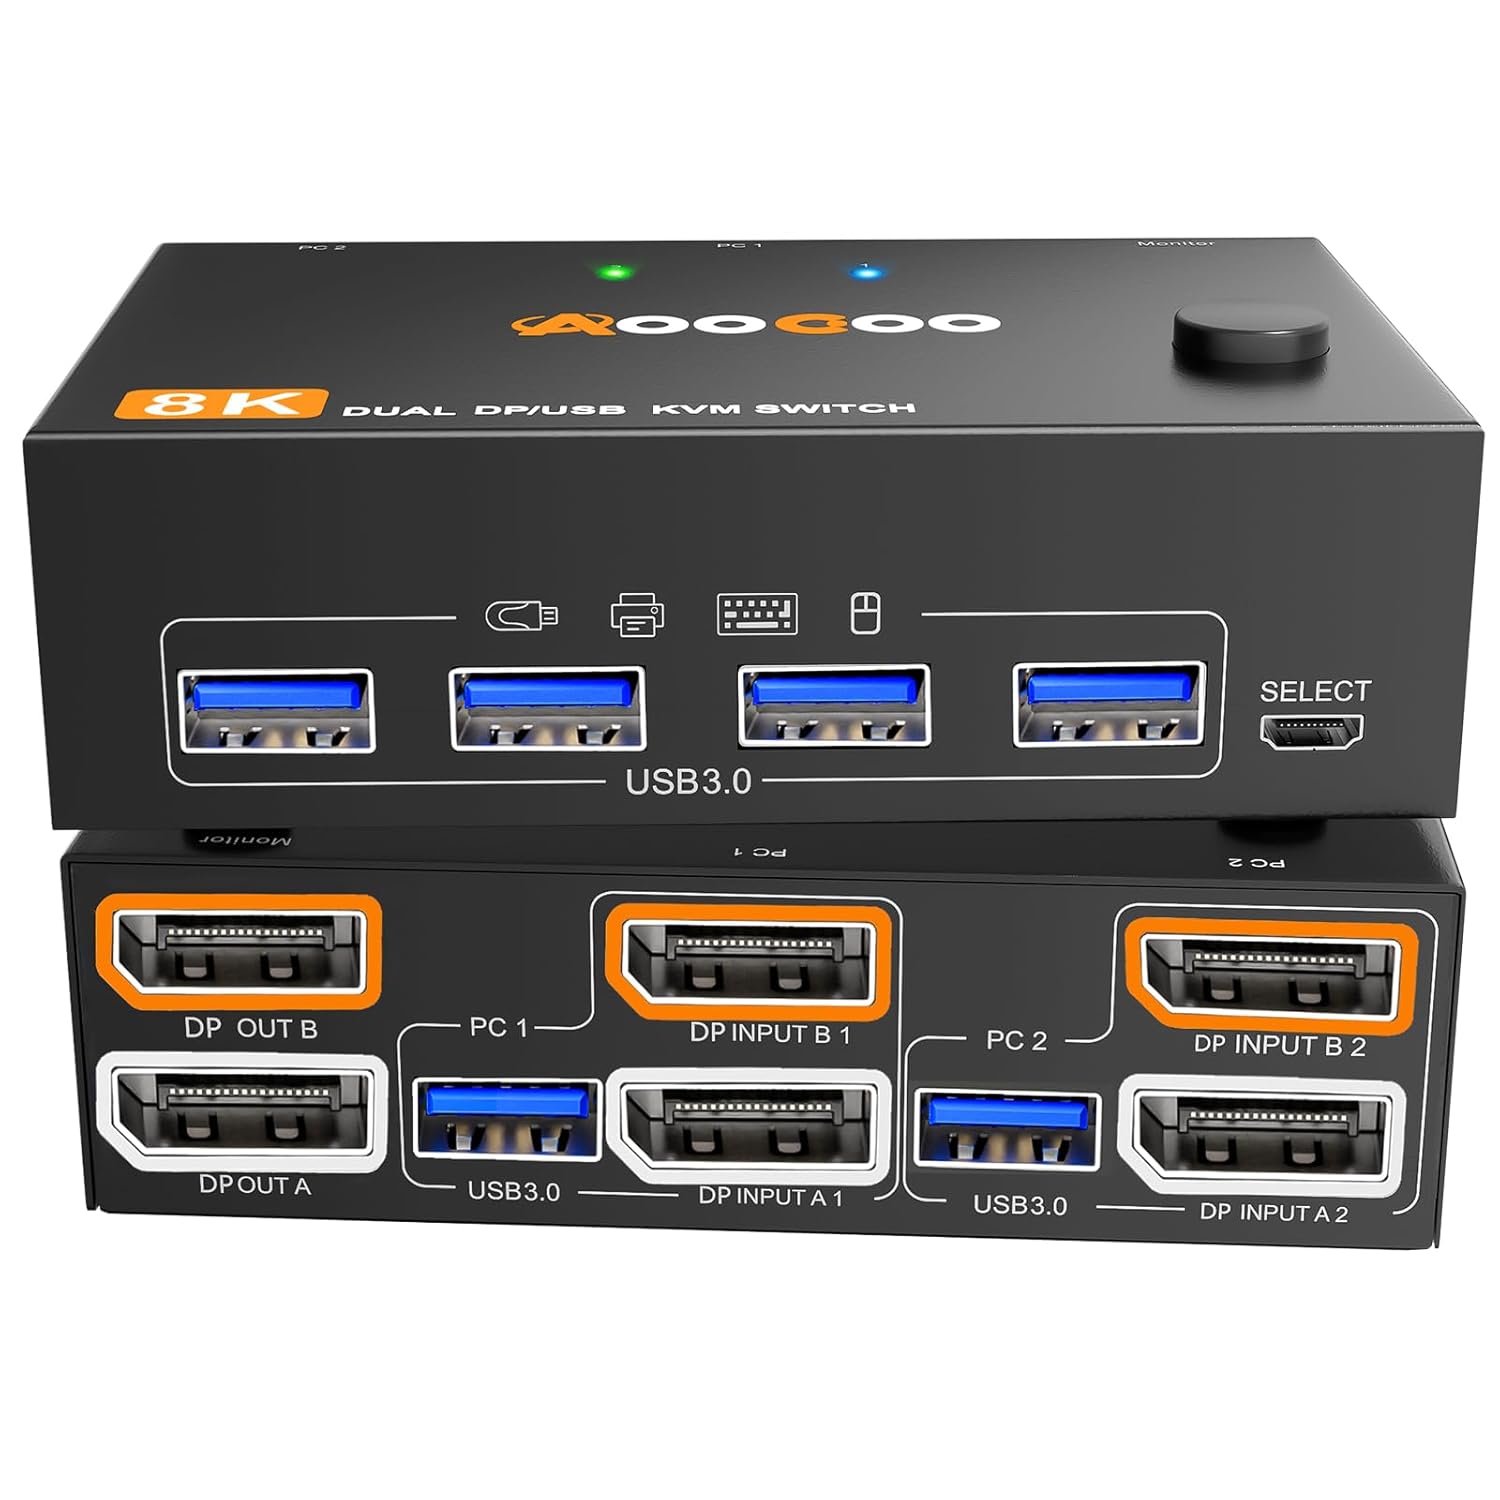
Image: Front and top view of the AOOCOO Dual Monitor KVM Switch, showing the USB 3.0 ports, select button, and indicator lights.

Image: Rear view of the AOOCOO Dual Monitor KVM Switch, illustrating the DisplayPort outputs (DP OUT A, DP OUT B), USB 3.0 inputs for PC1 and PC2, and DisplayPort inputs (DP INPUT A1, DP INPUT B1 for PC1; DP INPUT A2, DP INPUT B2 for PC2).
4. Setup Instructions
Follow these steps to connect your KVM switch:
- Connect Monitors: Connect your two monitors to the KVM switch's DisplayPort output ports (DP OUT A and DP OUT B).
- Connect Computers:
- For PC1: Connect the DisplayPort outputs from PC1 to DP INPUT A1 and DP INPUT B1 on the KVM switch. Connect one of the included USB 3.0 cables from PC1 to the USB 3.0 input for PC1 on the KVM switch.
- For PC2: Connect the DisplayPort outputs from PC2 to DP INPUT A2 and DP INPUT B2 on the KVM switch. Connect the second included USB 3.0 cable from PC2 to the USB 3.0 input for PC2 on the KVM switch.
Note: Each connected computer requires two DisplayPort outputs for dual monitor functionality. If your computer lacks a DisplayPort, an adapter (e.g., USB-C to DisplayPort) may be necessary. For computers with both discrete and integrated graphics cards, ensure that both DisplayPort connections originate from the discrete graphics card for optimal performance.
- Connect USB Devices: Plug your keyboard, mouse, printer, or other USB 3.0 devices into the USB 3.0 ports on the front of the KVM switch.
- Connect Wired Controller: Plug the wired controller into the designated port on the KVM switch.
- Power On: Connect the power cable to the KVM switch and a power outlet.
Important: Use high-quality DisplayPort cables and keep cable lengths as short as possible to ensure a stable signal, especially for high resolutions.

Image: A detailed diagram illustrating the connection of two computers and two monitors to the AOOCOO KVM switch, along with USB peripherals.
5. Operating Instructions
5.1 Switching Between Computers
You can switch between the two connected computers using one of two methods:
- Physical Button: Press the 'SELECT' button located on the front panel of the KVM switch.
- Wired Controller: Press the button on the wired remote control.
The two-color indicator light on the KVM switch will illuminate to show which computer is currently active.
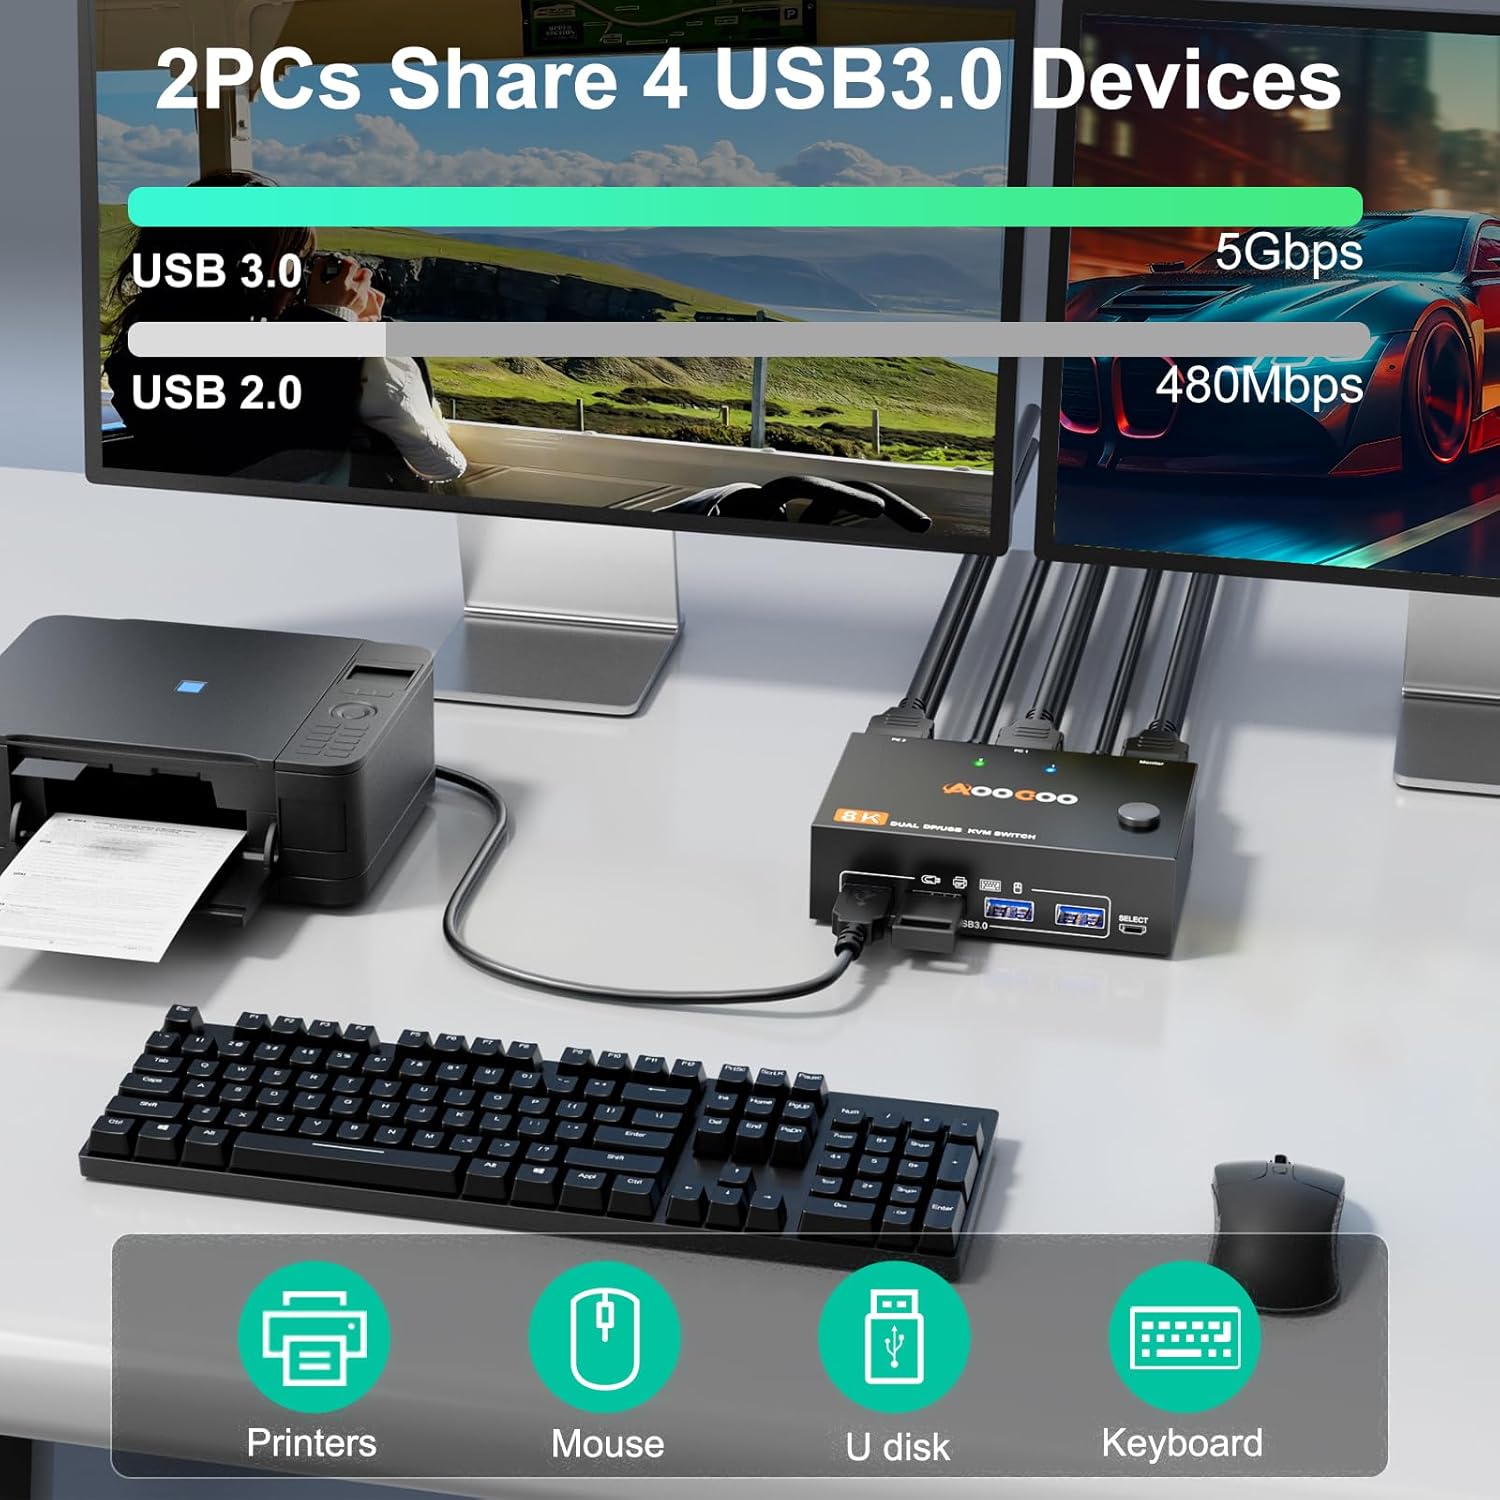
Image: Demonstrates the two methods for switching between computers: using the physical button on the KVM unit and using the wired remote control.
5.2 Display Modes (Extended/Copy)
The KVM switch supports both Extended Display and Copy Display modes for your monitors:
- Extended Mode: Two monitors display different images, allowing you to drag windows between them.
- Copy Mode: Both monitors display the same image from the active computer.
To select your desired display mode, press the 'Windows + P' keys on your keyboard. A small window will appear, allowing you to choose between 'Copy' mode or 'Extend' mode.

Image: Visual representation of Extended Display mode (two different images across monitors) and Copy Display mode (same image on both monitors), with instructions to use 'Windows + P' to switch.
5.3 USB 3.0 Ports
The KVM switch includes four USB 3.0 ports, offering data transfer speeds of up to 5Gbps. These ports are compatible with various USB devices such as keyboards, mice, printers, and scanners.

Image: Illustrates the speed advantage of USB 3.0 (5Gbps) compared to USB 2.0 (480Mbps), highlighting the KVM's USB 3.0 ports.
6. Compatibility
This KVM switch is driver-free and operates on a plug-and-play basis. It is compatible with multiple operating systems, including Windows, macOS, and Chrome OS.

Image: Icons representing Windows, Chrome OS, and Mac OS, indicating broad operating system compatibility for the KVM switch.
7. Power Supply
For stable operation, especially when using high-power USB devices such as external hard drives or headphones, it is recommended to connect the included DC/5V power supply to the KVM switch.

Image: Close-up of the DC/5V power input port on the KVM switch, with a note advising its use for high-power USB devices to ensure stability.
8. Maintenance
To ensure the longevity and optimal performance of your KVM switch, follow these maintenance guidelines:
- Keep the device in a clean, dry environment, away from dust and moisture.
- Avoid exposing the device to extreme temperatures or direct sunlight.
- Clean the exterior with a soft, dry cloth. Do not use liquid cleaners or solvents.
- Ensure all cables are securely connected to prevent signal loss or intermittent issues.
9. Troubleshooting
If you encounter issues with your KVM switch, refer to the following troubleshooting tips:
- No Display or Intermittent Signal:
- Ensure all DisplayPort cables are securely connected and are of high quality (DP1.4 recommended).
- Verify that the cable length is as short as possible to maintain signal integrity.
- If using a computer with both discrete and integrated graphics, confirm that both DisplayPort connections for that computer are from the discrete graphics card.
- Try restarting the connected computers and the KVM switch.
- USB Devices Not Recognized:
- Ensure the USB 3.0 input cables from your computers are correctly connected to the KVM switch.
- If using high-power USB devices (e.g., external hard drives), connect the DC/5V power supply to the KVM switch for stable operation.
- Try connecting the USB device directly to the computer to confirm functionality.
- Incorrect Display Mode (Extended/Copy):
- On your keyboard, press 'Windows + P' and select the desired display mode (Extend or Copy).
- Switching Delay:
- A brief delay (2-3 seconds) during switching is normal as the KVM re-establishes connections with the new active computer.
10. Specifications
| Model | 8K30Hz 2 PC 2 Monitor KVM 10cm |
| Brand | AOOCOO |
| Input Ports | 4x DisplayPort (2 per PC), 2x USB 3.0 (1 per PC) |
| Output Ports | 2x DisplayPort, 4x USB 3.0 |
| Video Resolution | Up to 8K@30Hz, 4K@144Hz |
| USB Data Transfer | USB 3.0 (up to 5Gbps) |
| Switching Methods | Physical Button, Wired Controller |
| Operating Voltage | 5 Volts |
| Control Method | Push Button, Remote |
| Dimensions (Approx.) | 10.1cm x 6.5cm x 2.9cm (3.97in x 2.55in x 1.14in) |
| Weight (Approx.) | 1.12 Pounds |
11. Warranty and Support
For warranty information or technical support, please refer to the contact details provided with your purchase documentation or visit the official AOOCOO website. Keep your purchase receipt as proof of purchase for any warranty claims.