1. Important Safety Information
Read all instructions carefully before assembling and using the training bench. Keep this manual for future reference.
- Consult a physician before starting any exercise program.
- Ensure all bolts and nuts are securely tightened before each use.
- Do not exceed the maximum user weight of 120 kg (264 lbs).
- Place the bench on a flat, stable surface.
- Keep children and pets away from the equipment during use.
- Inspect the bench for worn or damaged parts before each use. Do not use if damaged.
- Use proper lifting techniques to avoid injury.
2. Package Contents
Verify that all components are present before assembly. If any parts are missing or damaged, contact customer support.
- Main Frame Assembly
- Backrest Pad
- Seat Pad
- Front Support Leg
- Rear Support Leg
- Adjustment Pins/Knobs
- Assembly Hardware (bolts, washers, nuts)
- End Caps for Feet
3. Assembly Instructions
Follow these steps to assemble your Rebel Electro RBA-2003-S Training Bench. It is recommended to have two people for assembly.
- Step 1: Attach Front and Rear Support Legs
Securely attach the front and rear support legs to the main frame using the provided bolts and nuts. Ensure they are stable.
Image: The training bench frame with its front and rear support legs securely attached, ready for further assembly.
- Step 2: Install Seat Pad
Attach the seat pad to the designated area on the main frame using the appropriate hardware. Ensure it is firmly secured. - Step 3: Install Backrest Pad
Connect the backrest pad to the adjustable mechanism on the main frame. Ensure the pivot points are correctly aligned and secured with pins or bolts.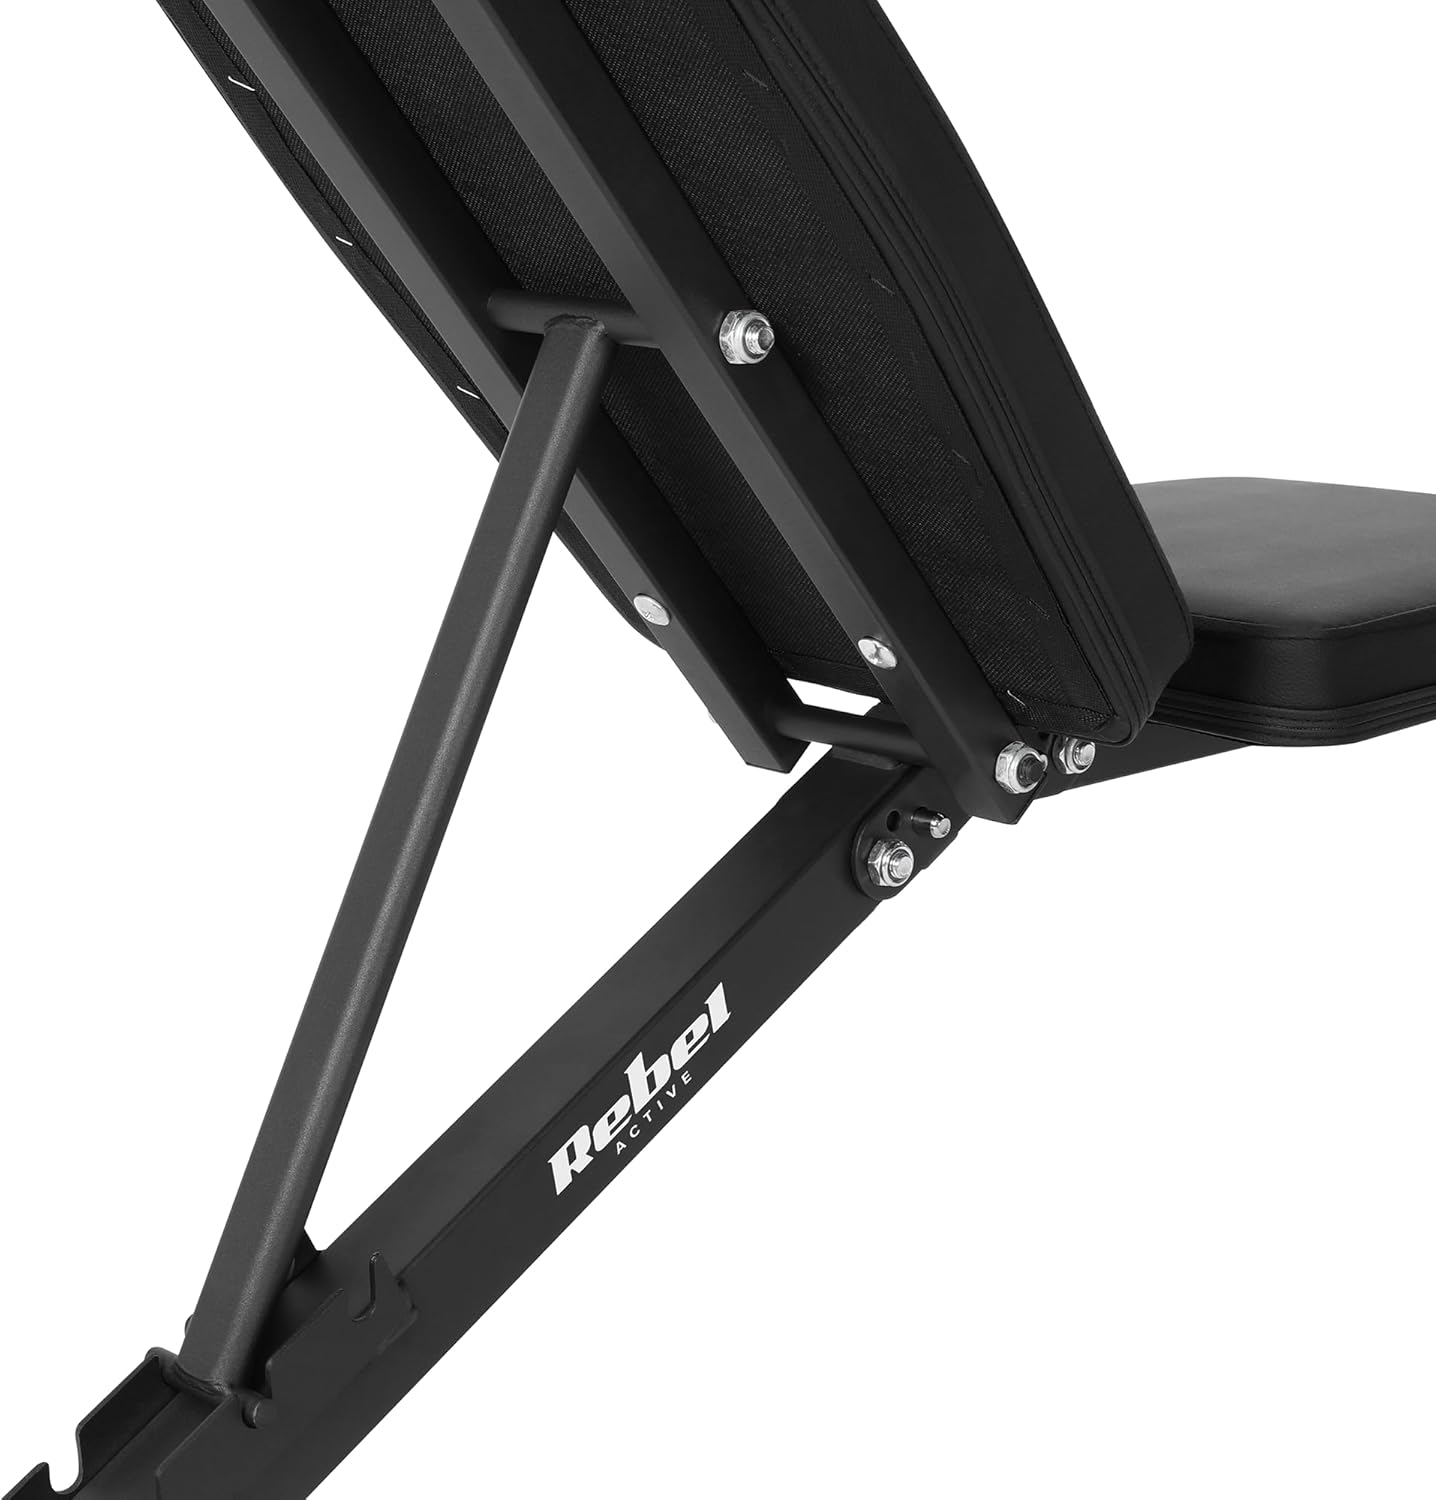
Image: A close-up view of the backrest adjustment mechanism, showing the pin inserted into one of the adjustment slots.
- Step 4: Attach End Caps
Press the plastic end caps onto the ends of the support legs to protect floors and provide stability. - Step 5: Final Check
Before first use, double-check all connections to ensure they are tight and secure. Test the stability of the bench.
4. Operating Instructions: Adjusting the Bench
The Rebel Electro RBA-2003-S bench offers 7 levels of backrest tilt adjustment and a fixed seat position for various exercises.
4.1 Backrest Adjustment
To adjust the backrest angle:
- Locate the adjustment pin or knob at the base of the backrest support.
- Pull the pin out or loosen the knob to disengage it from the adjustment rail.
- Carefully move the backrest to your desired angle. The bench offers 7 distinct tilt levels.
- Once the desired angle is reached, re-insert the pin or tighten the knob securely into one of the adjustment slots. Ensure it is fully engaged before use.
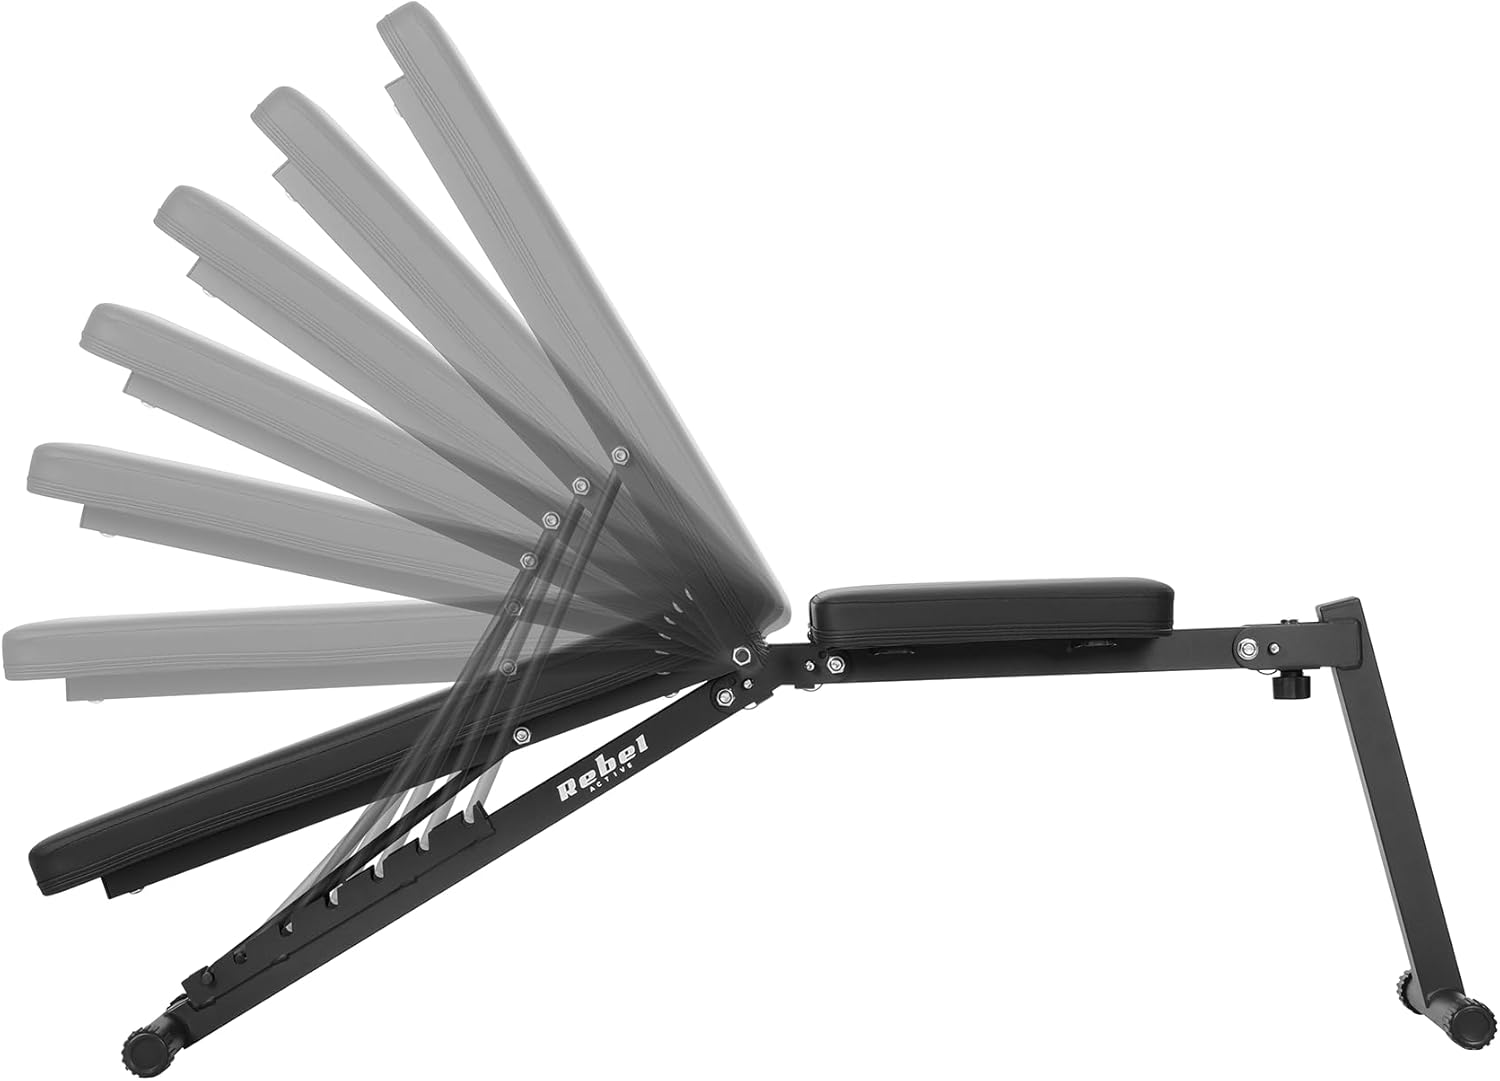
Image: Side view of the training bench illustrating the backrest adjustment rail with multiple slots for different angles.


Image: The training bench shown in an upright position (left) and an inclined position (right), demonstrating two of the available backrest angles.

Image: The training bench fully flattened, suitable for exercises requiring a horizontal surface.
4.2 Folding for Storage
To fold the bench for compact storage:
- Ensure the backrest is in its lowest (flat) position.
- Identify any quick-release pins or folding mechanisms on the frame.
- Disengage these mechanisms and carefully fold the bench components inward.
- Secure any locking pins to keep the bench in its folded state.

Image: The training bench in a folded configuration, demonstrating its compact form for storage.
5. Maintenance
Regular maintenance ensures the longevity and safe operation of your training bench.
- Cleaning: Wipe down the faux leather seat and backrest with a damp cloth after each use to remove sweat and dirt. Use mild soap if necessary, then wipe dry.
- Inspection: Periodically check all bolts, nuts, and adjustment pins for tightness. Tighten any loose fasteners. Inspect the frame for cracks or damage, and the upholstery for tears or excessive wear.
- Lubrication: If adjustment mechanisms become stiff, apply a small amount of silicone-based lubricant to the moving parts.
- Storage: Store the bench in a dry, cool place away from direct sunlight and extreme temperatures.
6. Troubleshooting
If you encounter issues with your training bench, refer to the following common problems and solutions:
- Bench feels unstable:
Ensure all assembly bolts are fully tightened. Verify the bench is on a flat, level surface. Check that all four feet are making firm contact with the floor.
- Difficulty adjusting backrest:
Ensure the adjustment pin is fully disengaged before attempting to change the angle. Check for any obstructions in the adjustment rail. Apply a small amount of lubricant if the mechanism is stiff.
- Squeaking noises during use:
Tighten all bolts and nuts. Lubricate any pivot points or moving parts with a silicone-based lubricant.
7. Specifications
| Brand | Rebel Electro |
| Model | RBA-2003-S |
| Material | Alloy Steel (Construction), Faux Leather (Seat/Backrest) |
| Color | SC BLACK |
| Backrest Adjustment Levels | 7 levels |
| Maximum User Weight | 120 kg (264 lbs) |
| Product Dimensions (L x W x H) | 138 x 43 x 30 cm (54.33"D x 16.93"W x 11.81"H) |
| Seat Dimensions (L x W x H) | 30 x 34 x 5 cm |
| Backrest Dimensions (L x W x H) | 68.5 x 30 x 5 cm |
| Item Weight | 9.2 kg (20.28 lbs) |
| Manufacturer | LECHPOL ELECTRONICS LESZEK Spółka komandytowa |
8. Warranty and Support
This product is covered by a manufacturer's warranty. For specific warranty details, please refer to the documentation included with your purchase or contact the retailer.
For technical support, missing parts, or warranty claims, please contact Rebel Electro customer service through their official website or the retailer where the product was purchased.
Please retain your proof of purchase for warranty purposes.