1. Introduction
This manual provides detailed instructions for the safe and effective operation of your BetterSub 3-in-1 Tumbler Mug Heat Press Machine. This versatile machine is designed for sublimation heat transfer onto various cylindrical items, including tumblers, mugs, and shot glasses. Please read this manual thoroughly before initial use to ensure proper setup, operation, and maintenance.
2. Important Safety Instructions
To prevent injury or damage to the machine, always follow these safety precautions:
- Read all instructions before using the heat press.
- Keep the machine away from children and pets.
- Ensure the machine is placed on a stable, heat-resistant surface.
- Do not touch the heating elements during operation or immediately after use, as they will be extremely hot. Use heat-resistant gloves.
- Never operate the machine with a damaged power cord or plug.
- Unplug the machine from the power outlet when not in use and before cleaning or maintenance.
- Do not immerse the machine in water or other liquids.
- Use only accessories and attachments recommended by the manufacturer.
- Ensure adequate ventilation in the work area to dissipate heat and fumes.
3. Package Contents
Verify that all items listed below are included in your package:
- BetterSub 3-in-1 Tumbler Mug Heat Press Machine (Pink)
- 30 oz Tumbler Heat Press Attachment
- 20 oz Tumbler Heat Press Attachment (Pre-installed or separate)
- 16 oz Tumbler Heat Press Attachment
- Shot Glass Heat Press Attachments (1.5 oz, 3 oz)
- Mug Heat Press Attachments (11 oz, 15 oz, 16 oz)
- 6 x 20oz Sublimation Tumblers
- 6 x Leak-proof Lids
- 6 x Metal Straws
- 6 x Cleaning Brushes
- 6 x Non-slip Bases
- 6 x Individual Gift Boxes
- Power Cord
- User Manual (this document)
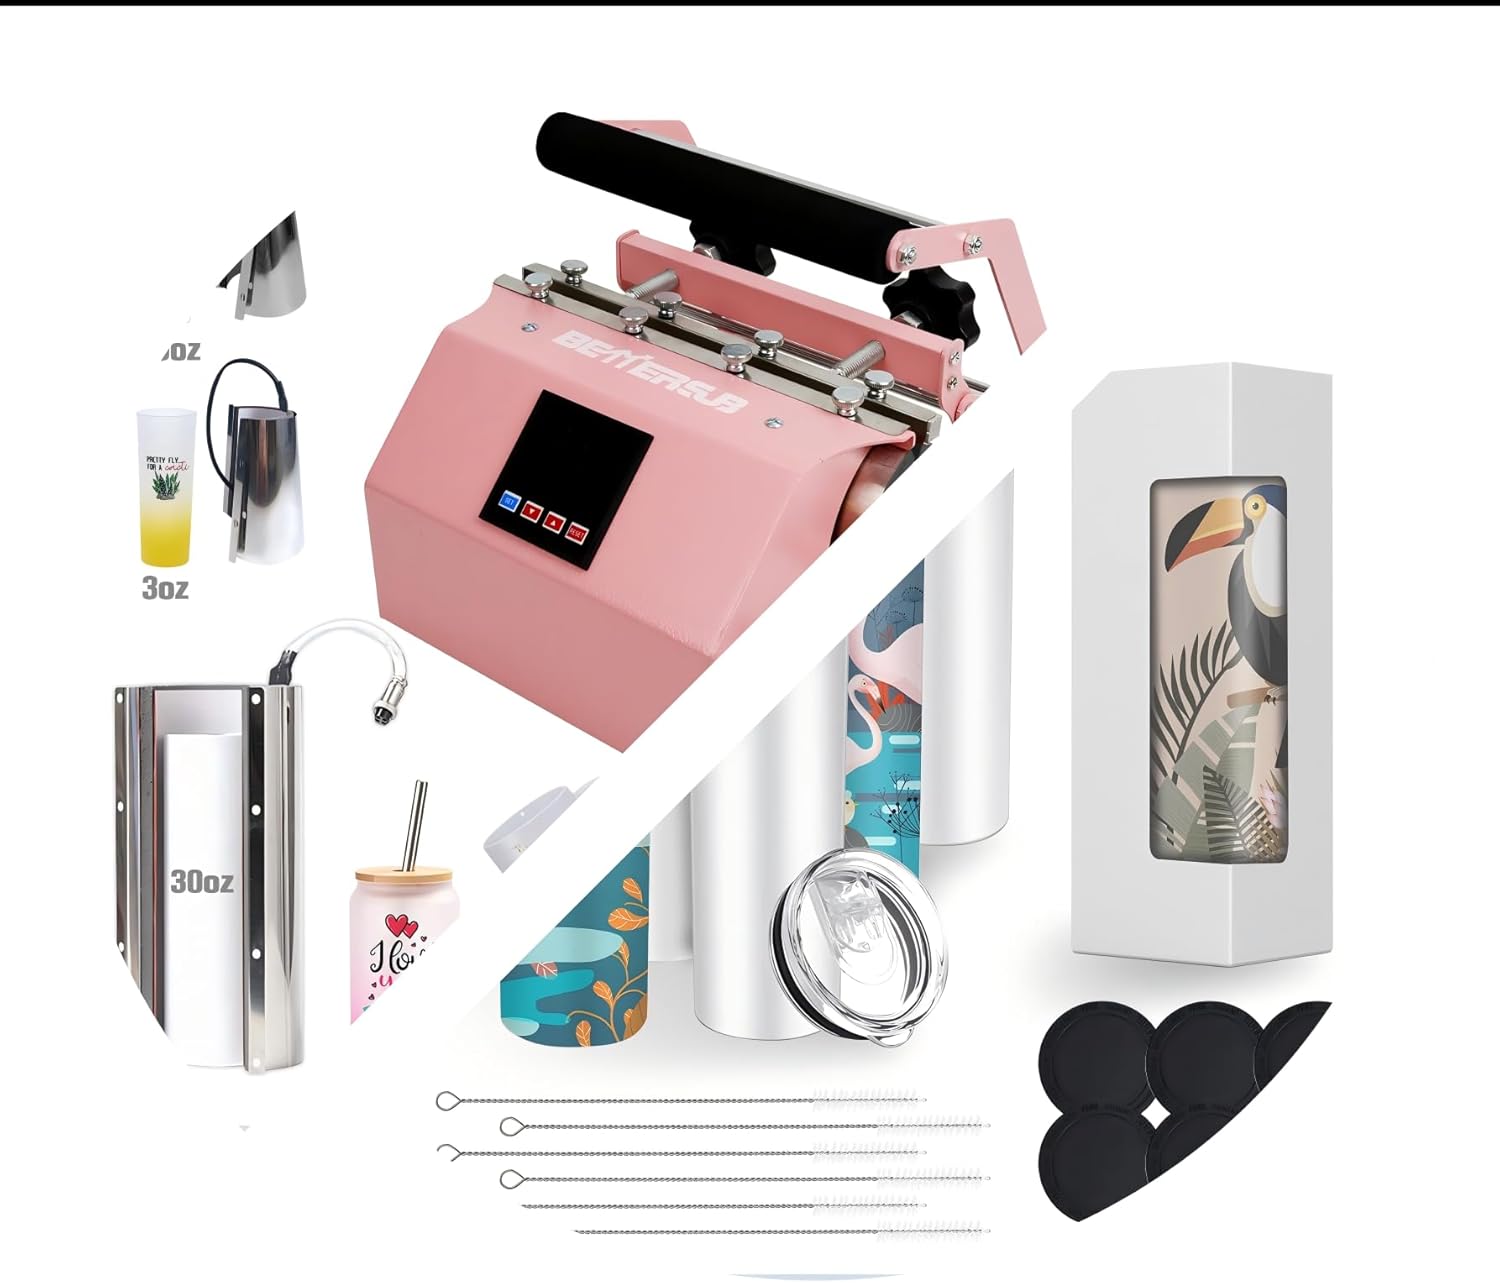
Image 3.1: Overview of the BetterSub 3-in-1 Tumbler Mug Heat Press Machine and its comprehensive kit, including various heat press attachments and 20oz sublimation tumblers with accessories.

Image 3.2: The heat press machine shown with different size attachments for 1.5oz, 3oz, and 30oz items, alongside various sublimation blanks like tumblers and mugs.

Image 3.3: A view of the six 20oz sublimation tumblers, complete with lids, straws, cleaning brushes, non-slip bases, and individual gift boxes.
4. Product Specifications
| Feature | Specification |
|---|---|
| Model | B0FX3S69CX |
| Product Type | 3-in-1 Tumbler Mug Heat Press Machine |
| Color | Pink |
| Compatible Cup Diameter | 2.6 - 3.4 inches (6.7 - 8.7 cm) |
| Supported Tumbler/Mug Sizes | 1.5oz, 3oz, 6oz, 10oz, 11oz, 12oz, 15oz, 16oz, 17oz, 20oz, 30oz |
| Machine Dimensions (Approx.) | 35.5cm (14in) Length x 23.5cm (9.3in) Width x 35cm (13.8in) Height |
| Date First Available | March 30, 2022 |

Image 4.1: Detailed dimensions of the heat press machine and various attachments, including the 30oz tumbler attachment and shot glass attachments.
5. Setup Instructions
Follow these steps to set up your heat press machine:
- Unpack the Machine: Carefully remove all components from the packaging. Retain packaging for future storage or transport.
- Placement: Place the heat press on a sturdy, level, and heat-resistant workbench or table. Ensure there is sufficient space around the machine for ventilation and safe operation.
- Attachment Installation:
- Identify the appropriate heat press attachment for the size of tumbler or mug you intend to press.
- Connect the attachment to the main unit by aligning the electrical connector and securing any locking mechanisms (e.g., screws or clamps). Refer to the machine's specific design for attachment connection.
- Ensure the attachment is securely fastened before proceeding.
- Power Connection: Plug the power cord into the machine's power inlet, then plug the other end into a grounded electrical outlet. Ensure the outlet meets the machine's power requirements.
- Initial Power On: Turn on the machine using the power switch. The digital display should illuminate.
- Temperature and Time Settings:
- Consult your sublimation paper and blank manufacturer's recommendations for optimal temperature and time settings.
- Use the control panel buttons to set the desired temperature (usually in Fahrenheit or Celsius) and pressing time.
- Allow the machine to preheat to the set temperature. This may take several minutes.
6. Operating Instructions (Sublimation Process)
This section outlines the general steps for sublimating a design onto a tumbler or mug. Always refer to your specific sublimation paper and blank instructions for precise temperature, time, and pressure settings.
- Prepare Your Design:
Print your sublimation design using a sublimation printer and sublimation ink onto sublimation paper. Ensure the design is mirrored before printing.
- Prepare the Tumbler/Mug:
Clean the surface of your sublimation blank (tumbler or mug) to remove any dust, oils, or fingerprints. Wrap the printed sublimation paper tightly around the tumbler/mug, ensuring the design is flat and smooth against the surface. Secure the paper with heat-resistant tape to prevent shifting during pressing.
- Heat Transfer:
Once the heat press reaches the set temperature, carefully open the press. Insert the prepared tumbler/mug into the heating element. Close the press, ensuring even pressure is applied across the entire surface of the design. Start the timer. Wear heat-resistant gloves when handling hot items.
- Finishing:
When the timer signals completion, carefully open the press and remove the hot tumbler/mug using heat-resistant gloves. Place it on a heat-resistant surface to cool. Once cooled, carefully peel off the sublimation paper to reveal your finished design.

Image 6.1: A visual guide illustrating the four key steps for sublimating a design onto a tumbler, from printing to the final product.
The included 20oz sublimation tumblers come with leak-proof lids, metal straws, cleaning brushes, and non-slip bases, making them ready for personalization and gifting.

Image 6.2: Examples of different sublimation finishes on tumblers, including glitter, semi-printed, full-printed, and decal styles, showcasing the versatility of the machine.
7. Maintenance
Proper maintenance ensures the longevity and optimal performance of your heat press machine:
- Cleaning: Ensure the machine is unplugged and completely cool before cleaning. Wipe down the exterior with a soft, damp cloth. Do not use abrasive cleaners or solvents.
- Heating Element: Avoid scratching or damaging the heating element. If any residue builds up, gently wipe it with a soft cloth. For stubborn residue, consult the manufacturer's recommendations or a specialized cleaning product for heat presses.
- Storage: Store the machine in a clean, dry place away from direct sunlight and extreme temperatures.
- Regular Inspection: Periodically check the power cord for any signs of damage. Ensure all connections are secure.
8. Troubleshooting
If you encounter issues with your heat press, refer to the following common problems and solutions:
| Problem | Possible Cause | Solution |
|---|---|---|
| Machine does not power on | Power cord unplugged, faulty outlet, power switch off. | Check power cord connection, try a different outlet, ensure power switch is on. |
| Uneven heat transfer / Faded image | Insufficient pressure, incorrect temperature, insufficient time, faulty heating element. | Adjust pressure, verify temperature and time settings, ensure blank is centered, contact support if heating element is suspected. |
| Image ghosting / Blurry image | Sublimation paper shifted during pressing, blank moved. | Securely tape the sublimation paper to the blank, ensure the blank is stable in the press. |
| Scorching / Burnt image | Too high temperature, too long pressing time. | Reduce temperature or pressing time. Always test on a scrap blank first. |
| Error code on display | Sensor issue, heating element issue, internal fault. | Refer to the machine's specific error code manual (if provided) or contact customer support. |
9. Warranty and Customer Support
For specific warranty information, please refer to the documentation included with your purchase or visit the official BetterSub website. If you require technical assistance, have questions about operation, or need to report a defect, please contact BetterSub customer support through their official channels. When contacting support, please have your product model number (B0FX3S69CX) and purchase date available.
You can often find support information on the BetterSub Store on Amazon.