
1. Introduction
Thank you for purchasing the NULA RC ERA A60 Mini Bell206 RC Helicopter. This manual provides essential information for the safe operation, setup, and maintenance of your helicopter. Please read this manual thoroughly before operating the device to ensure proper function and to prevent damage or injury.

Figure 1: NULA RC ERA A60 Mini Bell206 RC Helicopter in flight.
2. Safety Guidelines
Operating an RC helicopter requires caution. Adhere to the following safety guidelines:
- Age Recommendation: This product is recommended for users aged 15 to 50 years. Adult supervision is advised for younger users.
- Flight Environment: Fly in open, clear areas away from people, animals, buildings, and power lines. Avoid flying in strong winds or adverse weather conditions.
- Pre-Flight Check: Always inspect the helicopter for any damage, loose parts, or obstructions before each flight. Ensure propellers are securely attached.
- Battery Safety: Use only the provided or recommended batteries. Do not overcharge or short-circuit batteries. Disconnect batteries when not in use.
- Rotor Blades: Keep hands, face, and loose clothing away from rotating rotor blades. The blades can cause serious injury.
- Low Voltage Alarm: Pay attention to the low voltage alarm and land the helicopter immediately when it activates to prevent loss of control.
- Out-of-Control Protection: The helicopter features out-of-control protection. If signal is lost, the helicopter will attempt a safe landing.
3. Package Contents
Verify that all components are present in the package:
- NULA RC ERA A60 Mini Bell206 RC Helicopter
- Remote Controller (Mando)
- Modular Batteries (Quantity may vary based on purchase)
- USB Charging Cable
- Spare Propeller Blades (if included)
- Instruction Manual
4. Product Overview and Core Functions
The NULA RC ERA A60 Mini Bell206 is designed for stable and precise flight. Key features include:
- Pressure Constant Height: Maintains a stable altitude automatically.
- Six-Axis Gyroscope: Provides enhanced stability and control.
- One-Key Takeoff/Landing: Simplifies flight initiation and termination.
- Modular Battery System: Easy to install and replace, extending flight time.
- Three-Speed Adjustment: Allows users to select flight speed based on skill level.
- Multi-Directional Flight: Offers unrestricted movement in various directions.
- Intelligent Anti-Jamming Protection: Prevents propeller damage if blocked.
- Low Voltage Alarm: Alerts the user when battery power is low.

Figure 2: Icons representing core technical functions of the helicopter.
5. Setup
5.1 Charging the Battery
- Connect the USB charging cable to the helicopter's modular battery.
- Plug the USB cable into a compatible USB power source (e.g., computer, USB wall adapter).
- The charging indicator light will show the charging status (refer to the battery or charger for specific light indications).
- Charging typically takes approximately 60-90 minutes. Do not leave batteries charging unattended.
5.2 Installing the Helicopter Battery
- Ensure the helicopter and remote controller are powered off.
- Locate the battery compartment on the helicopter.
- Insert the fully charged modular battery into the compartment, ensuring it clicks into place securely.
- Close the battery compartment cover.

Figure 3: Modular battery installation and one-key functions.
5.3 Remote Controller Battery Installation
- Open the battery compartment on the back of the remote controller.
- Insert the required batteries (e.g., AA batteries, not included) according to the polarity markings.
- Close the battery compartment cover.
5.4 Pairing the Helicopter and Controller
- Place the helicopter on a flat, level surface.
- Turn on the helicopter's power switch. The indicator lights will flash.
- Turn on the remote controller.
- Move the throttle stick (left stick) all the way up, then all the way down.
- The helicopter's indicator lights will become solid, indicating successful pairing.
6. Operating Instructions
6.1 Pre-Flight Checks
- Ensure batteries in both helicopter and controller are fully charged.
- Check for any physical damage to the helicopter, especially propellers.
- Confirm the flight area is clear of obstacles and people.
6.2 One-Button Takeoff/Landing
- After pairing, press the one-button takeoff button on the controller. The helicopter will automatically ascend to a stable hovering altitude.
- To land, press the one-button landing button. The helicopter will slowly descend and land automatically.
6.3 Basic Flight Controls
- Throttle (Left Stick Up/Down): Controls ascent and descent.
- Yaw (Left Stick Left/Right): Controls left and right rotation of the helicopter.
- Forward/Backward (Right Stick Up/Down): Controls forward and backward movement.
- Left/Right Sideways Flight (Right Stick Left/Right): Controls sideways movement.
6.4 Altitude Hold Function
The helicopter is equipped with an altitude hold function, which automatically maintains a set altitude, allowing for easier control and stable hovering. This feature is active by default after takeoff.
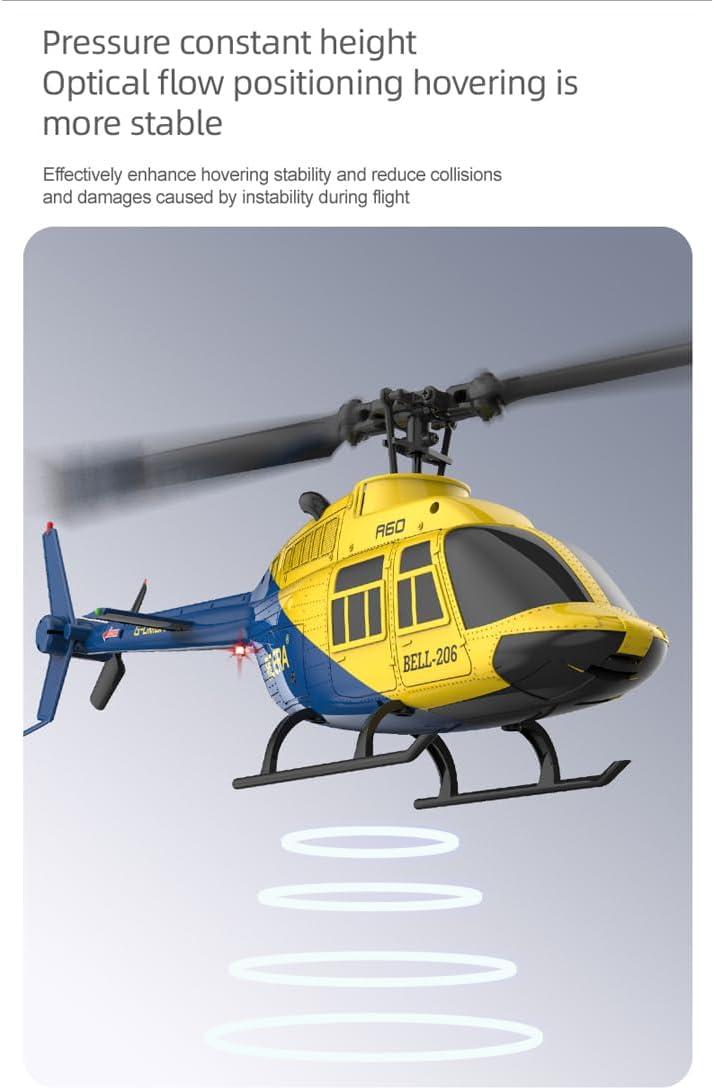
Figure 4: Stable hovering with pressure constant height.
6.5 Three-Speed Adjustment
The remote controller allows you to switch between three flight speeds (low, medium, high) to match your skill level and flight environment. Refer to your controller's manual for the specific button to change speeds.

Figure 5: Three-speed adjustment settings.
6.6 Multi-Directional Flight
Once the flight mode is activated, the helicopter can perform multi-directional flight maneuvers. Practice in an open area to master these movements.

Figure 6: Multi-directional flight capabilities.
7. Maintenance
Regular maintenance ensures the longevity and optimal performance of your helicopter:
- Cleaning: Use a soft, dry cloth to clean the helicopter after each flight. Avoid water or harsh chemicals.
- Propeller Inspection: Regularly check propellers for cracks, bends, or damage. Replace damaged propellers immediately. The intelligent anti-jamming protection helps prevent damage.
- Battery Care: Store batteries in a cool, dry place. Do not fully discharge batteries. Charge them periodically if not used for extended periods.
- Storage: Store the helicopter and controller in a safe place, away from direct sunlight and extreme temperatures.

Figure 7: Intelligent anti-jamming protection for propellers.
8. Troubleshooting
If you encounter issues, refer to the following common problems and solutions:
| Problem | Possible Cause | Solution |
|---|---|---|
| Helicopter does not respond to controller. | Not paired; low battery in controller or helicopter. | Re-pair the helicopter and controller. Charge or replace batteries. |
| Helicopter cannot take off or flies unstably. | Damaged propellers; low helicopter battery; uneven takeoff surface. | Check and replace propellers. Charge helicopter battery. Take off from a flat surface. |
| Short flight time. | Battery not fully charged; old battery. | Ensure battery is fully charged. Consider replacing old batteries. |
| Loss of control during flight. | Out of range; signal interference; low battery. | Fly within specified range (80-120m). Avoid areas with strong interference. Land immediately if low voltage alarm sounds. |
9. Specifications
| Feature | Detail |
|---|---|
| Brand | NULA |
| Model Name | A60 Mini Bell206 (RC Hubschrauber) |
| Manufacturer Reference | NULA1029781YTDE202501018 |
| Product Dimensions (L x W x H) | 23.8 x 5.3 x 8 cm (9.4 x 2.1 x 3.1 inches) |
| Weight | 789.25 g |
| Material | PA/PC |
| Color | Blue and Yellow |
| Channels | 6CH |
| Gyroscope | 6G (6-Axis) |
| Control Range | 80-120 meters |
| Flight Time | 8-10 minutes (per battery) |
| Recommended Age | 15 - 50 years |
10. Warranty and Support
For warranty information and technical support, please refer to the documentation provided with your purchase or contact NULA customer service through their official channels. Specific warranty terms and support contacts are not detailed in this manual.