ROCAM CR1030DAB
ROCAM CR1030DAB Solar DAB+/FM Emergency Radio User Manual
Model: CR1030DAB
Introduction
Thank you for purchasing the ROCAM CR1030DAB Solar DAB+/FM Emergency Radio. This portable radio is designed for reliable communication and power in various situations, from daily use to outdoor adventures and emergencies. It features DAB+/FM radio reception, Bluetooth connectivity, multiple charging options including solar and hand crank, a powerful 12000 mAh battery, and integrated lighting functions. Please read this manual thoroughly before use to ensure proper operation and to maximize the product's lifespan.
Safety Instructions
- Do not expose the device to extreme temperatures, direct sunlight for prolonged periods (beyond charging), or high humidity.
- Avoid dropping or subjecting the radio to strong impacts.
- Do not disassemble or attempt to repair the unit yourself. Refer all servicing to qualified personnel.
- Keep the device away from water and other liquids, except for its IPX6 water resistance which protects against strong jets of water. Do not submerge.
- Ensure the USB-C port cover is securely closed when not in use, especially in wet conditions.
- When using the hand crank, turn it at a steady, moderate pace. Excessive force or speed can damage the mechanism.
- The SOS alarm is very loud. Avoid activating it unnecessarily or near sensitive ears.
- Dispose of batteries according to local regulations.
Package Contents
Verify that all items are present in the package:
- 1 × ROCAM CR1030DAB Radio
- 1 × USB-C Charging Cable
- 1 × Portable Strap
- 1 × User Manual
Product Overview
Familiarize yourself with the radio's components and controls.

Image: Front view of the ROCAM CR1030DAB radio, highlighting its display, control buttons, and extended antenna. The radio is shown in an outdoor setting, emphasizing its portable and robust design.
Key Components:
- 2.4-inch Color Display: Shows station information, battery level, time, and menu options.
- Control Buttons: Power, Mode, Menu, Scan, Volume, Navigation (Up/Down/Left/Right/OK), SOS.
- Telescopic Antenna: For optimal DAB+/FM signal reception.
- Solar Panel: Located on top for solar charging.
- Hand Crank: On the side for manual power generation.
- Flashlight: Integrated LED light on one end.
- Reading Lamp: Foldable panel with 12 LEDs.
- USB-C Input/Output Port: For charging the radio and charging external devices.
- Headphone Jack (3.5mm): For private listening.
- Battery Compartment: For AAA backup batteries.

Image: A detailed view of the radio's 2.4-inch color display, illustrating its clarity and the information presented, such as station name and signal strength.
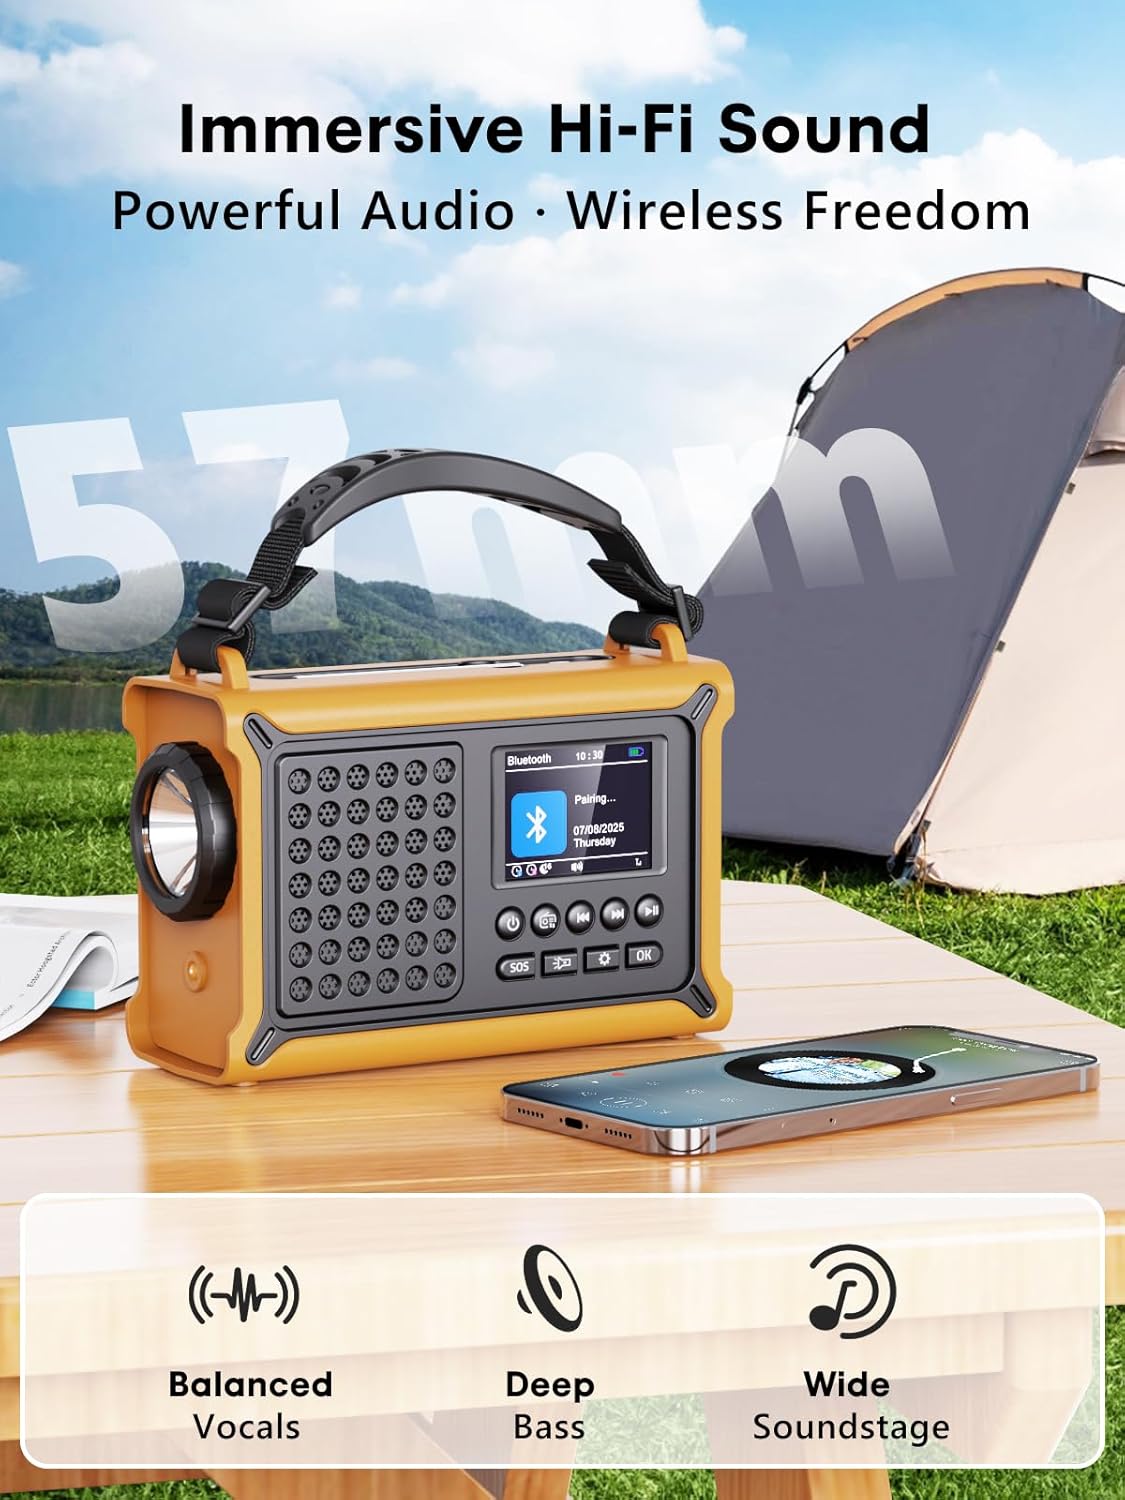
Image: The radio highlighting its audio capabilities, featuring 57mm speakers designed for clear, powerful sound with balanced vocals and deep bass.

Image: The radio held in hand, illustrating its ultra-portable design and compact dimensions (17.3 cm length, 12.1 cm height, 7.4 cm width), along with its IPX6 water resistance.
Setup
1. Initial Charging
Before first use, it is recommended to fully charge the radio's internal 12000 mAh battery using the supplied USB-C cable. Connect the USB-C cable to the radio's USB-C input port and the other end to a standard USB power adapter (not included) or a computer USB port. The charging indicator on the display will show the charging status. A full charge ensures maximum battery life and optimal performance.
2. Inserting AAA Batteries (Optional Backup)
For an additional power backup, you can insert 3 AAA batteries (not included) into the battery compartment. This provides an alternative power source if the internal rechargeable battery is depleted and other charging methods are unavailable.
3. Power On and Language Selection
Press and hold the Power button to turn on the radio. Upon first power-on, you may be prompted to select your preferred language from the 12 available options. Use the navigation buttons to select and the OK button to confirm.
Operating Instructions
Powering On/Off
- To turn on: Press and hold the Power button.
- To turn off: Press and hold the Power button again.
DAB+/FM Radio Operation
- Select Mode: Press the Mode button to switch between DAB+ and FM radio modes.
- Extend Antenna: Fully extend the telescopic antenna for best reception.
- Auto Scan: In DAB+ or FM mode, press the Scan button to automatically search for available stations. The radio will store up to 40 DAB+ and 40 FM stations.
- Manual Tuning/Station Selection: Use the Up/Down navigation buttons to browse through scanned stations or manually tune frequencies.
- Volume Control: Use the Volume +/- buttons to adjust the sound level.
- Presets: To save a station, tune to the desired station, then press and hold the OK button. Use navigation buttons to select a preset number and press OK to save. To recall a preset, briefly press the OK button, then use navigation to select the preset.
Bluetooth Connectivity
- Enter Bluetooth Mode: Press the Mode button until "Bluetooth" appears on the display. The radio will enter pairing mode, indicated by a blinking Bluetooth icon.
- Pairing: On your smartphone or other Bluetooth device, enable Bluetooth and search for available devices. Select "ROCAM CR1030DAB" from the list.
- Connected: Once paired, the radio will emit a confirmation sound, and the Bluetooth icon will stop blinking. You can now play audio from your device through the radio.
Charging the Radio
The radio offers multiple charging methods for its internal 12000 mAh battery:

Image: The radio demonstrating its versatile charging capabilities, including the solar panel, USB-C input, hand crank, and the option for AAA batteries.
- USB-C Charging: Connect the supplied USB-C cable to a 5V/2A (or higher) USB power source. This is the fastest charging method.
- Solar Charging: Place the radio with the solar panel facing direct sunlight. The solar charging indicator will illuminate. This method is ideal for maintaining charge or slow charging in emergencies. The 8500 mm² panel provides 350 mA.
- Hand Crank Charging: Rotate the hand crank clockwise or counter-clockwise at a steady pace (approx. 120-150 RPM). Cranking for 1 minute can provide several minutes of radio playback. The hand crank generates 650 mA.
- AAA Batteries: If the internal battery is depleted, the radio can operate using 3 AAA batteries (not included) inserted into the battery compartment.
External Device Charging (Power Bank Function)
The radio can act as a power bank to charge external devices like smartphones. Connect your device's charging cable to the radio's USB-C output port. The radio's 12000 mAh battery provides a 5V/1A output.
Lighting Functions

Image: A composite image illustrating the radio's versatile lighting options: a powerful 5W flashlight, the SOS red flashing light, and a soft 12-LED reading lamp.
- Flashlight: Press the Flashlight button once to turn on the 5W LED flashlight. Press again to cycle through brightness levels (if available) or turn off.
- Reading Lamp: Lift the reading lamp panel. Press the Reading Lamp button (often combined with flashlight button or a separate one) to activate the 12-LED reading lamp. Press again to cycle through brightness levels or turn off.
SOS Alarm Function
In an emergency, press and hold the SOS button. The radio will emit a loud 120 dB siren and flash a red light to attract attention. Press the SOS button again to deactivate the alarm.
Maintenance
- Cleaning: Wipe the radio with a soft, damp cloth. Do not use abrasive cleaners or solvents.
- Storage: When not in use for extended periods, store the radio in a cool, dry place. It is recommended to fully charge the internal battery every 3-6 months to maintain its health.
- Battery Care: Avoid completely draining the internal battery frequently. Recharge it as soon as possible when the low battery indicator appears.
Troubleshooting
| Problem | Possible Cause | Solution |
|---|---|---|
| Radio does not turn on. | Battery is depleted. | Charge the radio via USB-C, solar, or hand crank. Ensure AAA batteries are inserted correctly if using them. |
| Poor radio reception. | Antenna not extended, weak signal area, interference. | Fully extend the telescopic antenna. Reposition the radio to a location with better signal. Perform an auto scan again. |
| Bluetooth device cannot connect. | Radio not in pairing mode, device too far, already connected to another device. | Ensure the radio is in Bluetooth pairing mode. Move the device closer to the radio. Disconnect from other Bluetooth devices. |
| External device not charging. | Radio battery too low, incorrect cable, device not compatible. | Ensure the radio has sufficient charge. Use a compatible USB-C cable. Some devices may draw too much power. |
| Hand crank is stiff or not charging. | Mechanism obstruction, incorrect cranking speed. | Check for any obstructions. Rotate the crank at a steady, moderate pace. Do not force it. |
Specifications
| Model | CR1030DAB |
| Radio Bands | DAB+, FM |
| Bluetooth Version | 5.0 |
| Battery Capacity | 12000 mAh (Lithium) |
| Charging Methods | USB-C, Solar, Hand Crank, 3x AAA Batteries (backup) |
| Solar Panel Size | 8500 mm² (350 mA output) |
| Hand Crank Output | 650 mA |
| USB Output | 5V/1A |
| Display | 2.4-inch Color LCD |
| Presets | 80 (40 DAB+, 40 FM) |
| Water Resistance | IPX6 |
| SOS Alarm | 120 dB |
| Flashlight | 5W LED |
| Reading Lamp | 12-LED |
| Dimensions | 12L x 17.2W x 7.3H cm (approx.) |
| Weight | 820 grams (approx.) |

Image: A comparison chart detailing the specifications of the ROCAM CR1030DAB against generic alternatives, emphasizing its advanced features like a larger color display, higher battery capacity, and more efficient charging.
Warranty and Support
ROCAM products are designed for reliability and performance. This product comes with a standard manufacturer's warranty. For specific warranty details, please refer to the documentation provided with your purchase or contact ROCAM customer support.
If you encounter any issues or have questions regarding the operation or maintenance of your ROCAM CR1030DAB radio, please contact our customer support team.
- Customer Support: Refer to your product packaging or the ROCAM official website for contact information.
- Online Resources: Visit the ROCAM website for FAQs, product registration, and additional support materials.
Ask a question about this manual
Ask about setup, troubleshooting, compatibility, parts, safety, or missing instructions. Manuals+ will review the question and use this page’s manual context to help answer it.