
1. Product Overview
The K500 MAX Dual-Screen Camera Drone is a quadcopter designed for aerial photography and flight. It is equipped with an HD camera capable of capturing images and video footage. Real-time viewing is available on both the remote control's built-in screen and a connected mobile phone via a dedicated drone application. The remote control is USB rechargeable. The drone includes features such as 360° stunt rolls, altitude hold, and one-touch takeoff/landing. Its modular battery system allows for easy replacement. Constructed from high-quality ABS material, the K500 MAX Drone offers durability and impact resistance. Its lightweight design (260g) supports agile flight performance and structural integrity. ABS construction also contributes to energy efficiency and heat resistance, suitable for both indoor and outdoor use.
Key Features:
- HD Camera: Captures high-resolution photos and videos with intelligent light sensing and HDR support.
- Dual-Screen Viewing: Live footage can be viewed simultaneously on the remote control screen and a connected mobile phone.
- Rechargeable Remote Control: USB charging supported, no AAA batteries required.
- 360° Rolling Flight: Performs aerial stunts with full rotation capability.
- Altitude Hold: Air pressure-based altitude hold for stable hovering.
- 2.4G Signal Control: Provides a reliable remote connection up to 70 meters.
- One-Touch Takeoff & Landing: Simplifies flight control.
- Modular Battery: Easy to install and replace, contributing to extended battery life.
- Indoor & Outdoor Use: Versatile flight modes for various environments.
- Durable ABS Construction: Offers excellent durability, impact resistance, and lightweight design (260g) for agile flight.
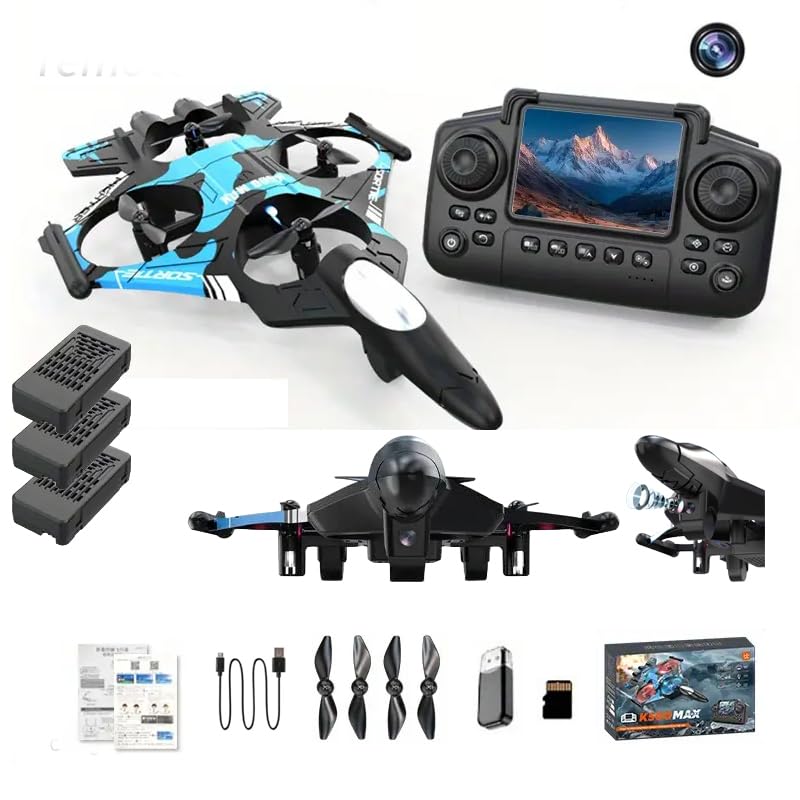
Image: The K500 MAX drone shown with its remote control, highlighting its sleek design and dual-screen capability.
2. Package Contents
Before proceeding with setup, please ensure all items listed below are present in your package:
- Drone x 1
- Remote Control x 1
- USB Charging Cable x 1
- Battery x 3
- Spare Propeller Blades x 4
- Memory Card x 1
- Card Reader x 1
- Instruction Manuals x 2 (This document is one of them)
3. Setup Guide
3.1 Charging the Remote Control
The remote control features a built-in rechargeable battery. Connect the provided USB charging cable to the remote control's charging port and to a USB power source (e.g., computer, USB wall adapter). The charging indicator will illuminate during charging and turn off when fully charged.
3.2 Installing Drone Batteries
The K500 MAX drone uses modular batteries. Ensure the battery is fully charged before installation. Carefully slide the charged battery into the drone's battery compartment until it clicks into place. To remove, press the release tab and slide the battery out.
3.3 Propeller Installation (if necessary)
If propellers are not pre-installed or need replacement, match the propellers with the corresponding motor shafts. Ensure they are securely fastened. Refer to the markings on the propellers (A or B) and drone arms for correct placement.
3.4 App Installation and Connection
Download the dedicated drone application from your mobile device's app store. Power on the drone and then your remote control. Connect your mobile device to the drone's Wi-Fi network (usually named "K500 MAX" or similar). Open the app to establish a connection and view live footage.
4. Operating Instructions
4.1 Remote Control Guide

Image: Detailed diagram of the K500 MAX remote control, showing the function of each button and joystick.
- Left Stick: Controls altitude (up/down) and rotation (left/right).
- Right Stick: Controls forward/backward and left/right movement.
- One-Click Takeoff/Landing: Press to automatically take off or land.
- 360° Roll: Press the roll button and move the right stick in the desired direction to perform a stunt roll.
- Headless Mode: Activates headless mode, simplifying flight orientation.
- Speed Adjustment: Toggles between different flight speeds.
- Emergency Stop: Press to immediately stop the drone in an emergency.
- Recording/Photo: Short press for photo, long press for video recording.
- Screen Switch: Long press to switch between remote screen and mobile phone screen display.
4.2 Basic Flight Operations
- Power On: Place the drone on a flat surface. Power on the drone, then power on the remote control.
- Pairing: Push the left joystick up then down to pair the remote with the drone. The drone's lights will stop flashing and become solid.
- Takeoff: Press the one-touch takeoff button or slowly push the left joystick up to ascend.
- Controlling Flight: Use the left joystick for altitude and rotation, and the right joystick for directional movement.
- Landing: Press the one-touch landing button or slowly pull the left joystick down to descend and land.
4.3 Advanced Flight Features
Trajectory Flight
Activate the track flight function within the drone's mobile application. Draw a desired flight path on your screen, and the drone will automatically follow it, simplifying complex maneuvers.
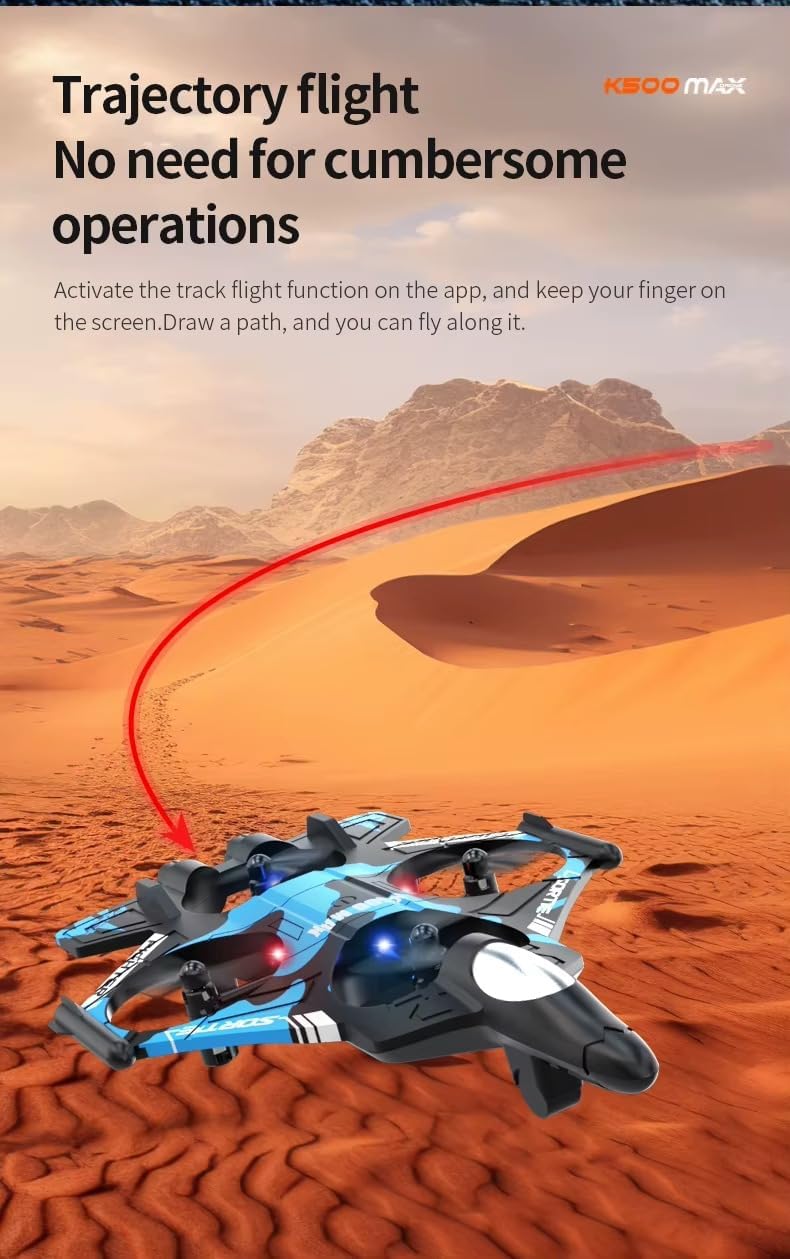
Image: The K500 MAX drone illustrating its trajectory flight capability, where a path drawn on a screen guides its movement.
360° Rolling Flight
Engage the 360° roll function on the remote control and use the right joystick to execute impressive aerial flips and rolls. Ensure sufficient altitude and clear surroundings before attempting stunts.

Image: Two K500 MAX drones depicted mid-air, one performing a 360-degree rolling stunt, showcasing its acrobatic capabilities.
4.4 Camera Operation and Dual-Screen Viewing
The drone's HD camera captures high-quality images and videos. Use the dedicated buttons on the remote control for taking photos or starting/stopping video recording. The dual-screen feature allows you to view the live camera feed on both the remote control's built-in screen and your connected mobile phone simultaneously. Long press the screen switch button on the remote to toggle between these viewing modes.

Image: A close-up view of the K500 MAX drone's HD camera, highlighting its lens and imaging capabilities.

Image: The K500 MAX remote control and a smartphone side-by-side, both displaying the drone's live camera feed, demonstrating the dual-screen viewing feature.
5. Maintenance
5.1 Cleaning
Regularly clean the drone and remote control with a soft, dry cloth. Avoid using harsh chemicals or solvents. Ensure no dust or debris accumulates in the motors or camera lens.
5.2 Propeller Replacement
Inspect propellers for damage before each flight. If a propeller is bent, cracked, or chipped, replace it immediately with a spare blade from the package. Ensure correct orientation (A or B) when installing new propellers.
5.3 Battery Care
- Always use the provided USB charging cable for the remote control.
- Do not overcharge or over-discharge the drone batteries.
- Store batteries in a cool, dry place away from direct sunlight and extreme temperatures.
- If not using the drone for an extended period, charge the batteries to about 50% capacity for optimal storage.
6. Troubleshooting
- Drone not responding: Ensure both drone and remote control are powered on and properly paired. Check battery levels.
- Unstable flight: Calibrate the drone before flight. Check for damaged propellers and replace if necessary. Ensure flight is in a calm environment.
- No camera feed: Verify the drone's Wi-Fi connection to your mobile device. Ensure the app is open and connected. Check if the memory card is correctly inserted.
- Short flight time: Ensure batteries are fully charged. Flight time can be affected by aggressive maneuvers or strong winds.
- Remote control not charging: Check the USB cable and power source. Ensure the charging port is clean and free of debris.
7. Specifications
| Feature | Detail |
|---|---|
| Brand | Generic |
| Model Name | K500 MAX Drone |
| Color | Black |
| Connectivity Technology | USB |
| Item Weight | 260 grams (Drone only) / 500 grams (Package weight) |
| Product Dimensions (L x W x H) | 21.5 cm x 17 cm x 8 cm |
| Manufacturer | zoshcart |
| ASIN | B0FWZRBM25 |

Image: A diagram illustrating the physical dimensions of the K500 MAX drone.
8. Warranty and Support
Information regarding specific warranty terms and customer support contact details is not provided in this manual. Please refer to the product packaging or contact your retailer for warranty information and technical assistance.


