1. Introduction
This manual provides detailed instructions for the installation, operation, and maintenance of your Noaheye 4G LTE Cellular Security Camera. Please read this manual thoroughly before using the product to ensure proper function and safety. Keep this manual for future reference.
2. Product Overview
The Noaheye 4G LTE Cellular Security Camera is a solar-powered, wireless outdoor surveillance solution designed for areas without Wi-Fi access. It features 2K HD resolution, color night vision, 360° pan-tilt-zoom (PTZ) capabilities, two-way audio, and PIR human detection with alerts.
2.1 Package Contents
- Noaheye 4G LTE Cellular Security Camera
- Solar Panel (integrated or separate, depending on model)
- Mounting Bracket and Screws
- Built-in SIM Card (with initial data)
- User Manual (this document)
2.2 Camera Components
Familiarize yourself with the main components of your camera:

Figure 1: Noaheye 4G LTE Cellular Security Camera. This image displays the main camera unit, a connected solar panel, and an icon representing a SIM card, highlighting its key features.
- Camera Lens: Captures video footage.
- Infrared/White LEDs: Provide night vision and spotlight functionality.
- PIR Sensor: Detects human motion.
- Microphone: For audio input during two-way talk.
- Speaker: For audio output during two-way talk and siren alarm.
- Solar Panel: Charges the internal battery.
- SIM Card Slot: Houses the 4G LTE SIM card.
- SD Card Slot: For local video storage (MicroSD card not included).
- Reset Button: Used for factory reset.
3. Setup Guide
3.1 Initial Charging
Before first use, ensure the camera's internal battery is sufficiently charged. Connect the camera to a power source using a standard USB charger (not included) or allow the solar panel to charge it for several hours in direct sunlight.
3.2 SIM Card Activation and Installation
The camera comes with a built-in SIM card. This SIM card is pre-activated with 100MB of free data for initial use. Additional data plans can be purchased through the AJcloud app.
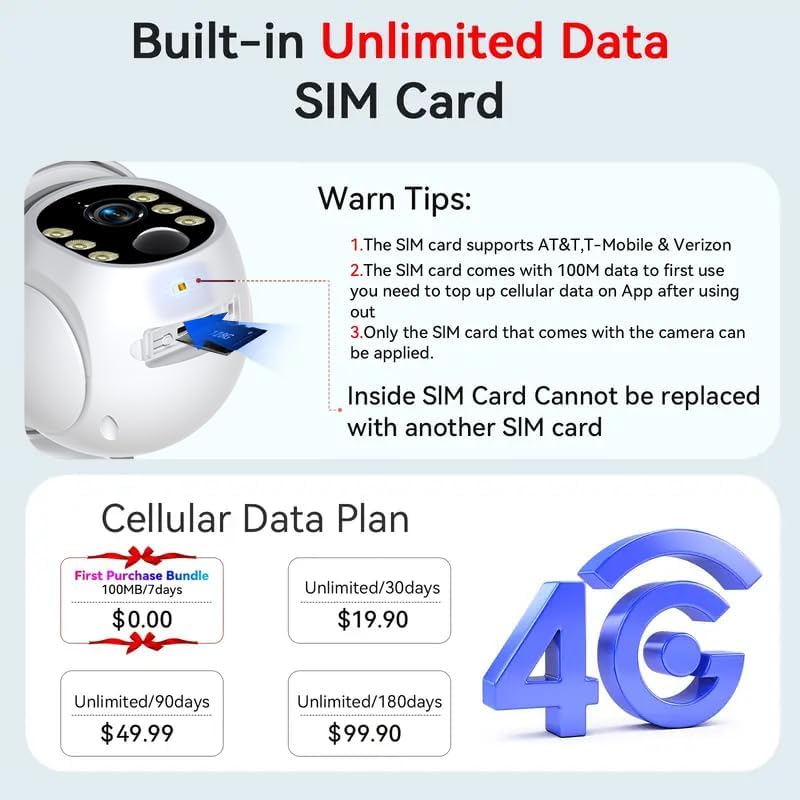
Figure 2: SIM Card Slot and Data Plan Information. This image illustrates the location of the SIM card slot on the camera and provides details about the included data and options for purchasing additional data plans.
- The built-in SIM card supports AT&T, T-Mobile, and Verizon networks.
- The SIM card is integrated and cannot be replaced with another SIM card.
3.3 MicroSD Card Installation (Optional)
For local storage, insert a MicroSD card (up to 128GB, not included) into the designated slot. Ensure the camera is powered off before inserting or removing the card.
3.4 App Download and Account Registration
- Download the AJcloud app from your smartphone's app store (iOS or Android).
- Open the app and register for a new account using your email address.
- Follow the on-screen prompts to complete the registration process.
3.5 Adding the Camera to the App
- Ensure your smartphone is connected to the internet.
- Open the AJcloud app and tap the "+" icon to add a new device.
- Select the option for a 4G cellular camera.
- Power on the camera. The camera will emit a prompt sound indicating it's ready for pairing.
- Follow the app's instructions to scan the QR code on the camera or manually enter the device ID.
- Once connected, you can name your camera and begin live viewing.
3.6 Mounting the Camera
Select a suitable outdoor location for mounting. Consider areas with good cellular signal strength and direct sunlight exposure for optimal solar charging. The camera is IP65 weatherproof.
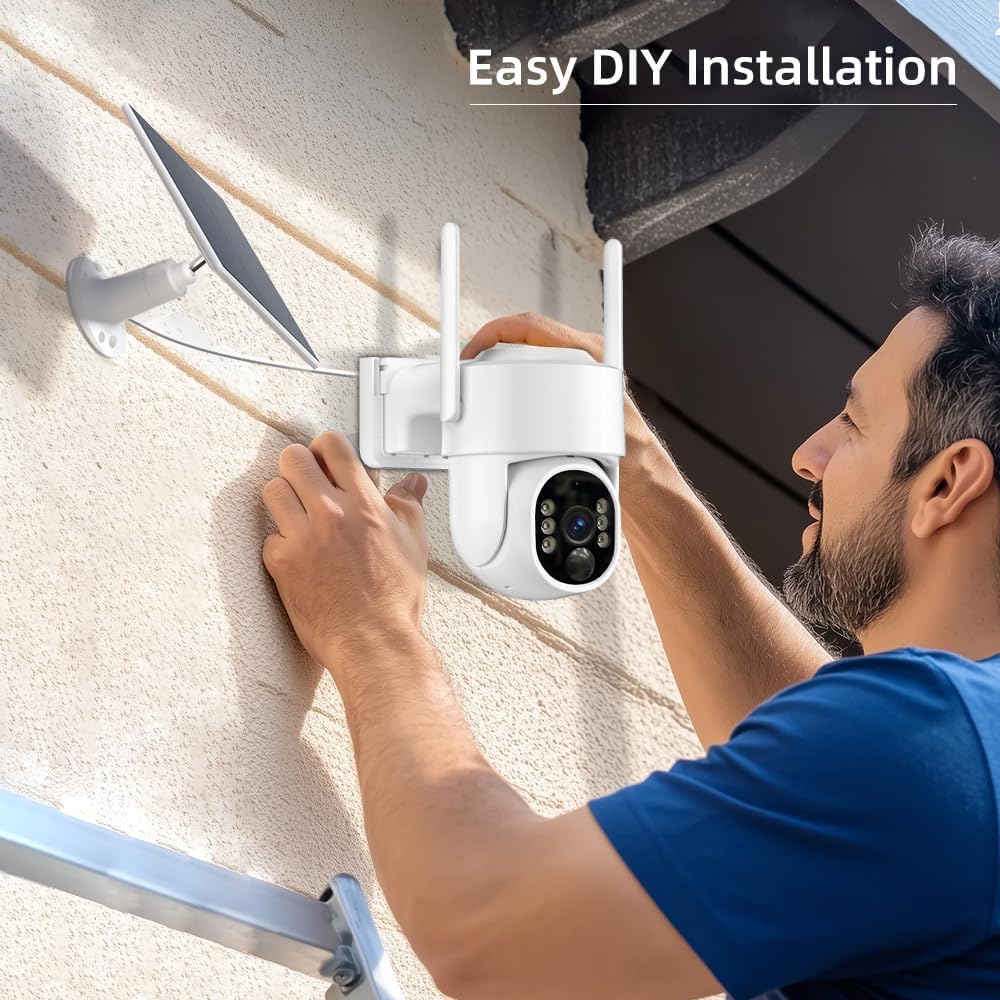
Figure 3: Camera Installation. This image shows a person installing the camera on an exterior wall, demonstrating the ease of DIY installation.
- Use the provided mounting bracket and screws to securely attach the camera to a wall or other stable surface.
- Adjust the angle of the camera and solar panel to ensure maximum sunlight exposure and desired viewing area.
4. Operating Instructions
4.1 Live View
Open the AJcloud app and select your camera from the device list to access the live video feed. You can view real-time footage from anywhere with cellular coverage.
4.2 Pan-Tilt-Zoom (PTZ) Control
The camera supports 270° pan and 90° tilt rotation, allowing for a 360° viewing angle.
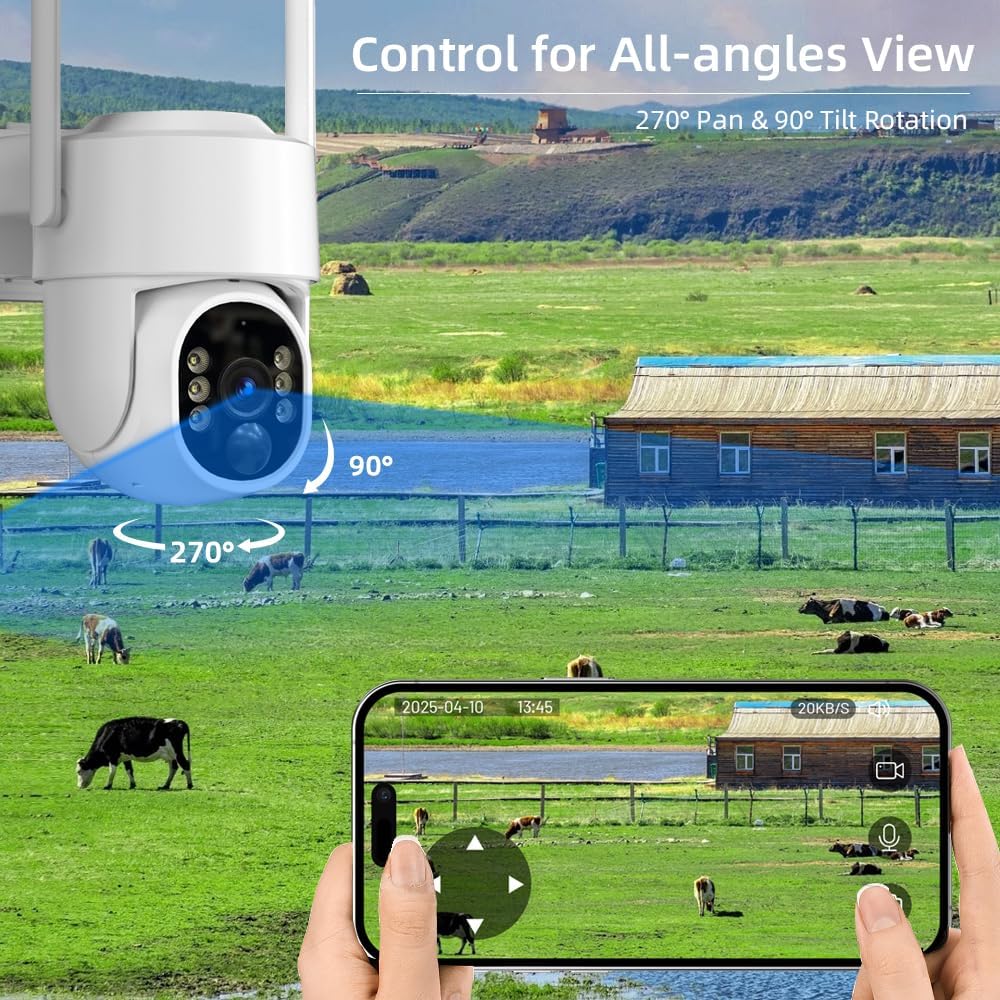
Figure 4: PTZ Control Interface. This image displays a smartphone screen with directional controls for panning and tilting the camera, illustrating its 270° pan and 90° tilt capabilities over a wide outdoor landscape.
- On the live view screen in the app, use the directional controls to adjust the camera's viewing angle.
- Pinch to zoom in or out on the video feed.
4.3 Two-Way Audio
The built-in microphone and speaker enable two-way communication.
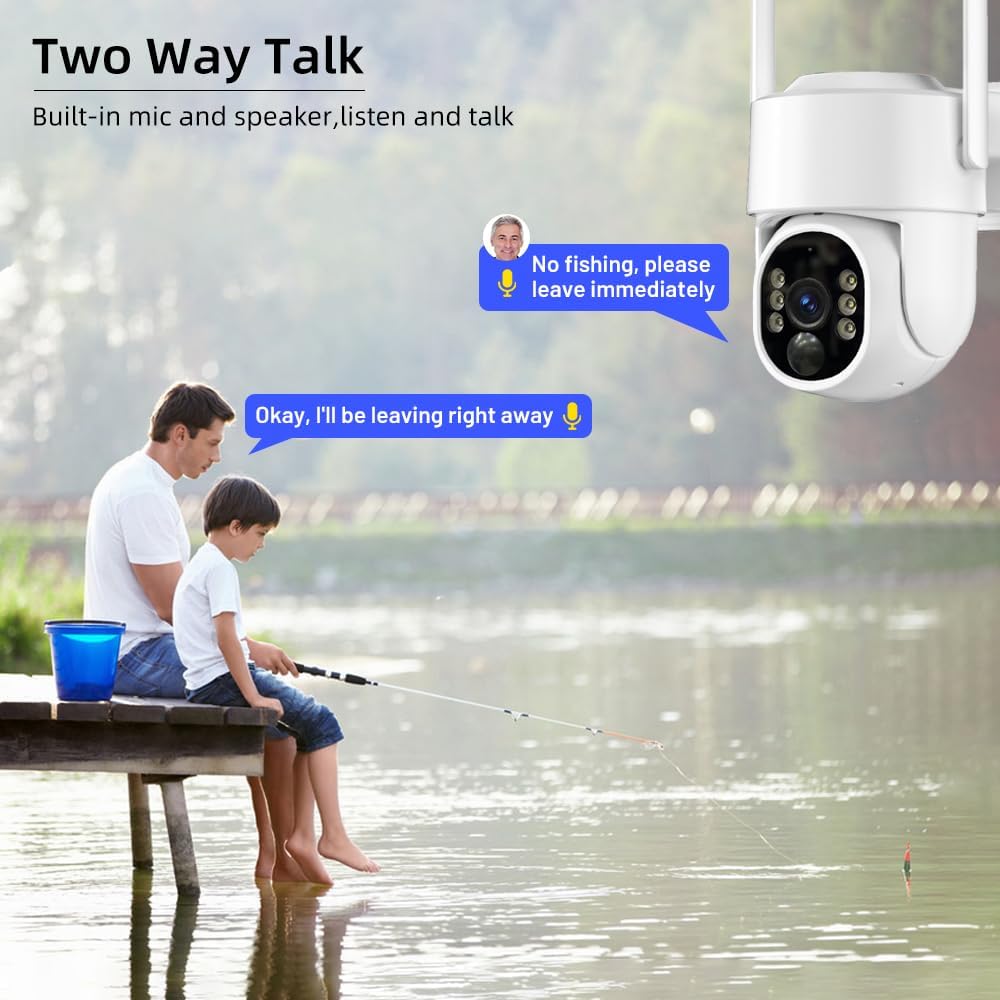
Figure 5: Two-Way Talk Functionality. This image depicts a scenario where a person is communicating through the camera to individuals near a lake, demonstrating the camera's two-way audio capability.
- Tap the microphone icon in the app to speak through the camera's speaker.
- Tap the speaker icon to listen to audio from the camera's location.
4.4 PIR Human Detection & Alerts
The camera uses PIR (Passive Infrared) motion detection to identify human movement and trigger alerts.

Figure 6: PIR Human Detection and Alerts. This image shows the camera detecting a person in an outdoor setting, triggering a siren, spotlight, and an instant push notification on a smartphone.
- When human motion is detected, the camera can activate a siren and spotlight.
- Instant push notifications will be sent to your smartphone via the AJcloud app.
- Adjust detection sensitivity and alert settings within the app.
4.5 Recording and Storage
The camera supports both local MicroSD card storage and cloud storage.
- MicroSD Card: Recordings are saved directly to the inserted MicroSD card.
- Cloud Storage: A subscription service available through the AJcloud app for secure off-site storage.
- Access recorded footage through the playback feature in the AJcloud app.
4.6 2K Color Night Vision
The camera provides clear 2K resolution video with color night vision capabilities.

Figure 7: 2K Color Night Vision. This image illustrates the difference between daytime and nighttime surveillance, showcasing the camera's ability to provide clear 2K resolution with full-color night vision.
- The camera automatically switches to night vision mode in low-light conditions.
- Color night vision provides more detail than traditional black and white infrared night vision.
5. Maintenance
5.1 Solar Panel Charging
The integrated solar panel continuously charges the camera's battery. Ensure the solar panel remains clean and free from obstructions (e.g., leaves, dirt) to maximize charging efficiency.

Figure 8: Solar Powered Charging. This image visually represents the solar panel converting sunlight into energy to charge the camera's internal battery, ensuring continuous operation.
- Periodically wipe the solar panel with a soft, damp cloth.
- If the camera is installed in a shaded area, supplemental charging via USB may be required during prolonged periods of low sunlight.
5.2 Cleaning the Camera
- Gently clean the camera lens with a soft, lint-free cloth to ensure clear image quality.
- Wipe the camera body with a damp cloth as needed. Avoid using harsh chemicals.
6. Troubleshooting
| Problem | Possible Cause | Solution |
|---|---|---|
| Camera not powering on | Low battery; Power issue | Charge the camera via solar panel or USB. Check power connections. |
| No cellular signal | Poor network coverage; SIM card issue | Relocate the camera to an area with better 4G LTE coverage. Ensure SIM card is properly inserted and activated. Check data plan status in AJcloud app. |
| Cannot connect to app | Incorrect pairing steps; App error | Ensure camera is powered on and in pairing mode. Restart the app and camera. Try re-pairing. Check phone's internet connection. |
| Poor video quality | Dirty lens; Low light; Weak signal | Clean the camera lens. Ensure adequate lighting for optimal night vision. Check cellular signal strength. |
| Motion alerts not received | Detection settings incorrect; App notifications disabled | Verify PIR detection settings and notification preferences in the AJcloud app. Check phone's notification settings for the app. |
7. Specifications
| Feature | Detail |
|---|---|
| Model Name | T-CQ4011S-G30A |
| Indoor/Outdoor Usage | Outdoor |
| Power Source | Solar Powered |
| Connectivity Protocol | Cellular (4G LTE) |
| Controller Type | iOS, Android (via AJcloud App) |
| Mounting Type | Wall Mount |
| Video Resolution | 2K HD (Effective Still Resolution: 3 MP) |
| Night Vision | Color Night Vision (Range: 50 Feet) |
| PTZ Rotation | 270° Pan, 90° Tilt |
| Audio | 2-Way Talk (Built-in Microphone & Speaker) |
| Detection | PIR Human Detection |
| Storage Options | MicroSD Card (up to 128GB, not included), Cloud Storage (subscription required) |
| Weatherproof Rating | IP65 |
| Operating Temperature | -4°F to 130°F (-20°C to 54°C) |
| Material | Acrylonitrile Butadiene Styrene (ABS) |
| Item Weight | 1.7 pounds |
8. Warranty and Support
Noaheye provides a 2-year warranty for this product. For technical assistance, troubleshooting, or warranty claims, please contact Noaheye customer support. Lifetime technical support is available.
Contact Information:
- Refer to the AJcloud app for in-app support options.
- Visit the official Noaheye website for contact details.