1. Introduction
This manual provides detailed instructions for the installation, operation, and maintenance of your Dpofirs 1080P Night Vision Security Camera. Please read this manual thoroughly before using the product to ensure proper functionality and safety. This camera is designed for both indoor and outdoor surveillance, offering high-definition video and advanced features for comprehensive monitoring.
2. Product Overview
2.1 Key Features
- 1080P High Definition Video: Provides clear and detailed images with a 120° wide-angle lens for complete monitoring.
- Motion Detection Alerts: Automatically records moving objects and sends alerts, enhancing security.
- Enhanced Night Vision: Captures clear video in low-light environments for reliable day and night surveillance.
- Heavy Duty and Waterproof Design: IP66 rating ensures protection against rain and reliable performance in various weather conditions.
- Versatile Application: Suitable for both indoor and outdoor environments.
2.2 What's in the Box
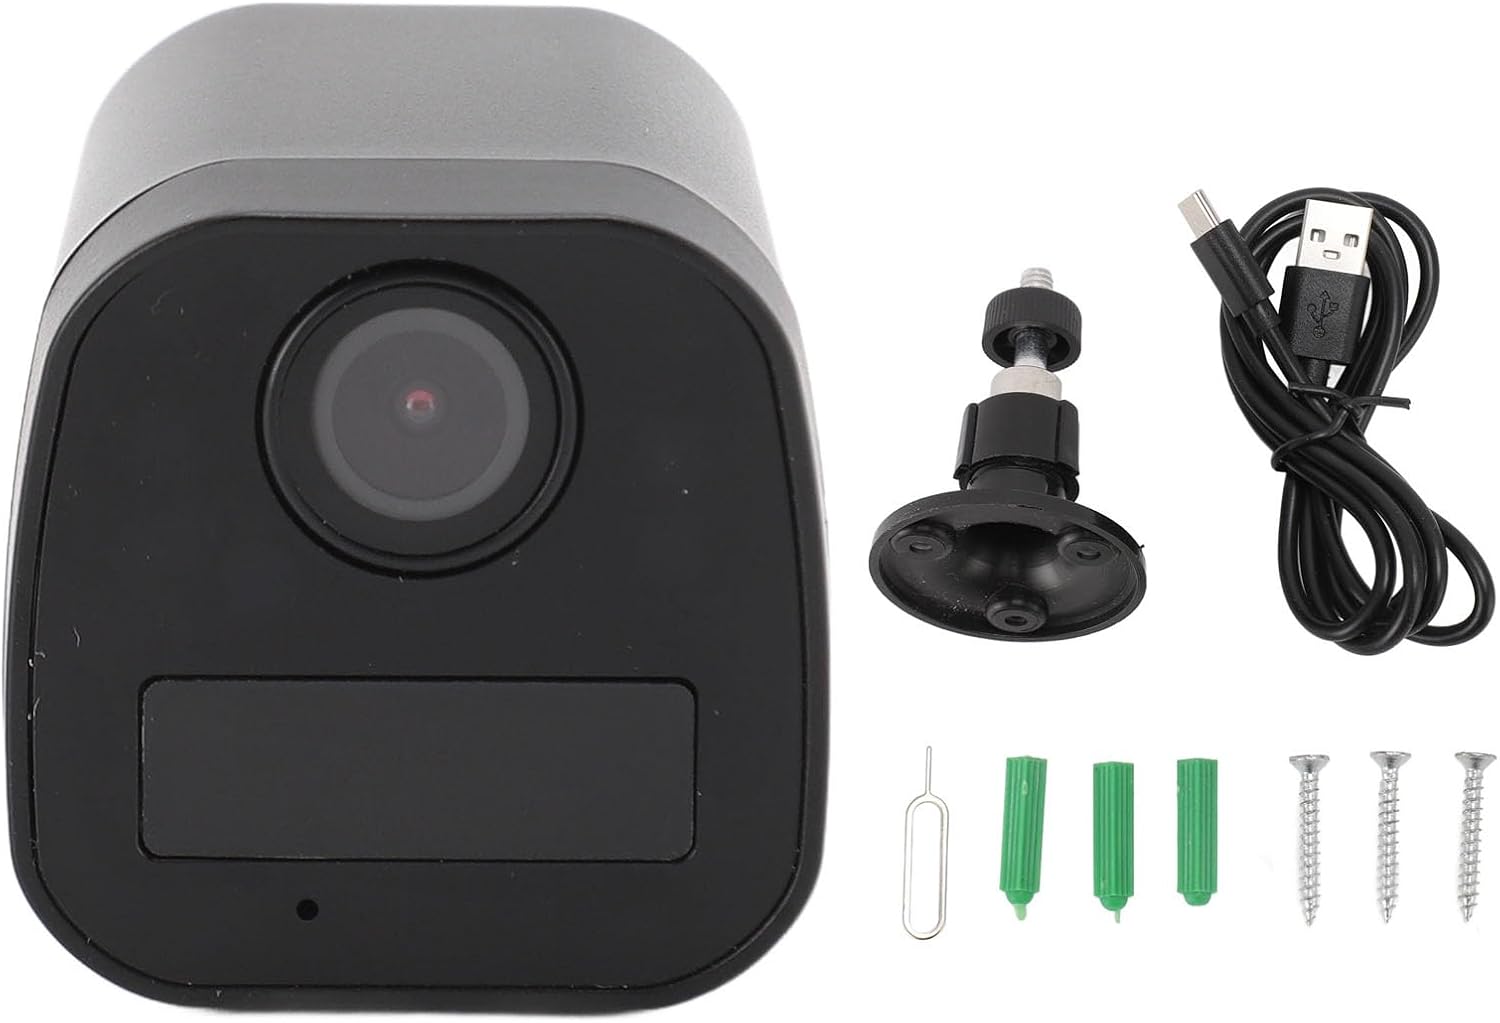
Image: Contents of the Dpofirs 1080P Night Vision Security Camera package, including the camera, mounting stand, USB data cable, and installation hardware.
- Security Camera
- Mounting Stand
- USB Data Cable
- Map Pin (for reset)
- Screws (3x)
- Screw Covers (3x)
- User Manual (this document)
3. Setup
3.1 Camera Components

Image: Rear view of the camera, illustrating the location of the Micro SD card slot, power port, and reset button.
Familiarize yourself with the camera's ports and buttons. Typically, these include a power input, a Micro SD card slot for local storage, and a reset button.
3.2 Micro SD Card Installation
- Locate the Micro SD card slot on the camera (refer to the image above).
- Gently insert a Micro SD card (up to 128GB, not included) into the slot until it clicks into place. Ensure the card is inserted in the correct orientation.
- The camera will automatically format the card upon first use or when detected.
3.3 Mounting the Camera

Image: The Dpofirs security camera attached to its adjustable mounting stand, ready for installation.
- Choose a suitable location for installation, considering the desired viewing angle and proximity to a power source.
- Attach the mounting stand to the camera.
- Using the provided screws and screw covers, securely fasten the mounting stand to a wall or ceiling.
- Adjust the camera angle using the adjustable stand to achieve optimal coverage.
3.4 Powering On
Connect the USB data cable to the camera's power input and then to a suitable power adapter (not included) or USB power source. The camera will power on automatically.
4. Operating Instructions
4.1 Live View and Recording

Image: The camera demonstrating its 120° wide-angle field of view, capturing a broad area.
Once connected to your network (via the accompanying app, if applicable), you can access the live video feed from your smartphone or other devices. The camera records in 1080P resolution, providing clear visuals. Recordings are typically stored on the inserted Micro SD card.
4.2 Motion Detection
The camera features automatic motion detection. When movement is detected within its field of view, the camera will automatically begin recording and can send alerts to your linked device. This feature helps in monitoring activity and ensuring security.
4.3 Night Vision

Image: The camera illustrating its night vision capability, showing a clear view of a house at night.
The enhanced night vision functionality allows the camera to capture clear video even in complete darkness or low-light conditions. This ensures continuous surveillance around the clock.
5. Maintenance
5.1 Cleaning
To maintain optimal performance, periodically clean the camera lens and housing. Use a soft, dry cloth to wipe away dust and dirt. Avoid using harsh chemicals or abrasive materials that could damage the lens or finish.
5.2 Weather Protection
The camera has an IP66 rating, indicating it is protected against dust and powerful water jets. While designed for outdoor use, ensure it is mounted securely to prevent damage from strong winds or direct impact. Regularly check the mounting for stability, especially after severe weather.
5.3 Firmware Updates
Check the manufacturer's website or the accompanying mobile application for any available firmware updates. Keeping your camera's firmware updated ensures you have the latest features and security enhancements.
6. Troubleshooting
6.1 No Power
- Ensure the power cable is securely connected to both the camera and the power source.
- Verify that the power outlet is functional.
- Try using a different USB power adapter and cable.
6.2 No Video Feed
- Check your internet connection and ensure the camera is properly connected to your Wi-Fi network (if applicable).
- Restart the camera by disconnecting and reconnecting the power.
- Ensure the accompanying mobile application is up to date.
6.3 Motion Detection Not Working
- Verify that motion detection is enabled in the camera's settings via the mobile application.
- Adjust the motion sensitivity settings.
- Ensure there are no obstructions blocking the camera's view.
6.4 Poor Night Vision Quality
- Ensure the camera lens is clean and free from smudges or dirt.
- Check for any reflective surfaces close to the camera that might interfere with infrared illumination.
6.5 Resetting the Camera
If issues persist, you may need to reset the camera to its factory settings. Use the provided map pin to press and hold the reset button (usually located near the Micro SD card slot) for approximately 5-10 seconds until you hear a prompt or see an indicator light change.
7. Specifications
| Feature | Detail |
|---|---|
| Resolution | 1080P HD |
| Camera Angle | 120° Wide Angle |
| Storage | Supports Micro SD cards up to 128GB (not included) |
| Battery Type | Built-in 600mAh lithium-ion battery |
| Waterproof Rating | IP66 |
| Material | ABS |
| Item Weight | 4.5 ounces (approx. 125g) |
| Package Dimensions | 4.72 x 3.15 x 1.97 inches |
| Manufacturer | Dpofirs |
8. Warranty and Support
For warranty information and technical support, please refer to the purchase documentation or contact Dpofirs customer service directly. Keep your purchase receipt as proof of purchase for warranty claims.
For further assistance, visit the official Dpofirs website or contact their support team through the contact information provided with your product or on their website.