1. Introduction
This manual provides essential information for the installation, operation, and maintenance of the Generic ZP.256E.818R00 LCD TV Motherboard. This product is designed as a universal replacement part for various LCD television models, ensuring stable signal transmission and reliable performance. Please read this manual thoroughly before proceeding with installation or use.
2. Safety Information
Always observe the following safety precautions to prevent damage to the product or injury to yourself:
- Professional Installation Recommended: Installation of this motherboard requires technical knowledge and experience with electronic components. If you are not confident in your abilities, seek assistance from a qualified technician.
- Power Disconnection: Always disconnect the television from the main power supply before attempting any installation, removal, or maintenance procedures.
- Static Electricity: Electronic components are sensitive to static electricity. Use anti-static precautions (e.g., anti-static wrist strap) when handling the motherboard.
- Handle with Care: Avoid touching the integrated circuits and connectors directly. Hold the board by its edges.
- Ventilation: Ensure adequate ventilation around the television after installation to prevent overheating.
- Moisture: Keep the motherboard and the television away from moisture and liquids.
3. Product Overview
The ZP.256E.818R00 LCD TV Motherboard is a durable circuit board designed for reliable performance. It features various ports and components necessary for television functionality, including signal processing and display control.
- Compatible TV Mainboard: Works with multiple television models for easy replacement.
- Stable Signal Transmission: Ensures clear picture and smooth performance.
- Durable Circuit Board: High-quality materials for long-lasting reliability.
- Universal Replacement Part: Suitable for various TV brands and types.
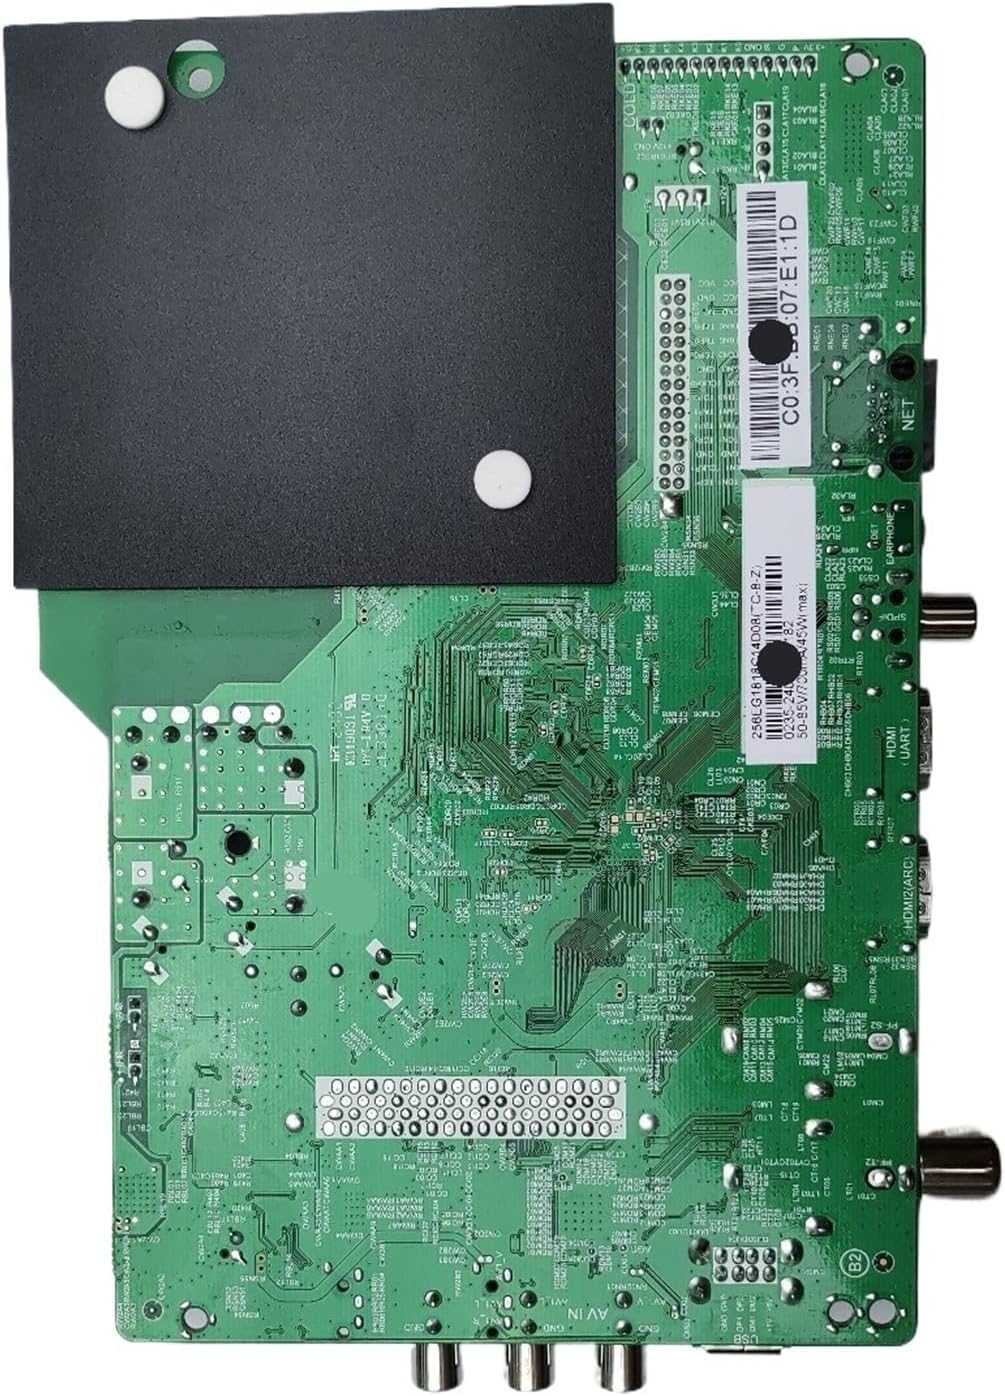
Figure 3.1: Top view of the ZP.256E.818R00 LCD TV Motherboard. This image displays the main integrated circuits, capacitors, resistors, and various input/output ports such as HDMI, USB, and antenna connections.

Figure 3.2: Bottom view of the ZP.256E.818R00 LCD TV Motherboard. This image highlights the intricate circuit traces, solder points, and mounting holes, with a black heat sink covering a portion of the board.
4. Setup and Installation
This motherboard is designed for easy installation, often referred to as a plug-and-play setup for quick repairs. However, due to the nature of electronic components, caution and proper procedure are essential.
- Preparation: Ensure the television is completely unplugged from the power outlet. Place the TV face down on a soft, clean surface to protect the screen.
- Access the Motherboard: Carefully remove the back panel of the television to expose the internal components. Note the location and connection of the existing motherboard.
- Disconnect Old Motherboard: Gently disconnect all cables (power, ribbon, antenna, HDMI, etc.) from the old motherboard. Take photos if necessary to remember connection points. Unscrew and remove the old motherboard.
- Install New Motherboard: Position the new ZP.256E.818R00 motherboard in the same location. Secure it with the appropriate screws.
- Reconnect Cables: Carefully reconnect all cables to their corresponding ports on the new motherboard. Ensure all connections are firm and correctly oriented.
- Initial Test: Before reattaching the back panel, temporarily plug in the TV and power it on to verify basic functionality (e.g., power indicator, display). If issues arise, refer to the Troubleshooting section.
- Final Assembly: Once functionality is confirmed, unplug the TV, reattach the back panel, and secure all screws.
5. Operating Instructions
The ZP.256E.818R00 motherboard functions as the central processing unit for your LCD TV. Once correctly installed, its operation is integrated with the television's overall system. It is responsible for:
- Signal Processing: Receiving and processing input signals from various sources (antenna, HDMI, USB) to convert them into a displayable format.
- Display Control: Managing the display panel to render images and video with clear picture quality.
- Audio Output: Processing audio signals for sound output through the TV's speakers or external audio systems.
- System Control: Handling user inputs from the remote control and TV buttons to navigate menus and adjust settings.
No direct user interaction with the motherboard itself is required after installation. All operations are performed via the television's standard controls.
6. Maintenance
The ZP.256E.818R00 motherboard is designed for long-lasting reliability and generally requires minimal maintenance. Adhering to the following guidelines can help ensure its longevity:
- Keep Clean: Periodically, and with the TV unplugged, gently clean the TV's internal area (if accessible) to remove dust accumulation, which can impede cooling. Use compressed air or a soft brush.
- Avoid Overheating: Ensure the television's ventilation openings are not blocked. Do not place the TV in enclosed spaces without proper airflow.
- Protect from Spills: Prevent liquids from coming into contact with the television, as moisture can cause severe damage to electronic components.
- Stable Power Supply: Use a surge protector to safeguard the television and its internal components from power fluctuations.
7. Troubleshooting
If you encounter issues after installing the ZP.256E.818R00 motherboard, refer to the following common troubleshooting steps. Always ensure the TV is unplugged before performing any internal checks.
| Problem | Possible Cause | Solution |
|---|---|---|
| No Power / TV does not turn on | Loose power connection, faulty power supply unit (PSU), incorrectly installed motherboard. | Check all power connections. Verify the PSU is functioning. Re-check motherboard installation and cable connections. |
| No Picture / Blank Screen | Loose display panel cable (LVDS), incorrect input source, faulty backlight. | Ensure the LVDS cable is securely connected. Verify the correct input source is selected. Check for backlight issues (e.g., shine a flashlight on the screen to see faint images). |
| No Sound | Loose speaker cables, incorrect audio settings, faulty audio output. | Check speaker connections. Adjust TV audio settings. Test with external speakers if possible. |
| Distorted Picture / Signal Issues | Loose antenna/HDMI cable, interference, faulty input port. | Ensure all input cables are securely connected. Try a different input source or cable. Check for external interference. |
If these steps do not resolve the issue, it is recommended to consult a professional television repair technician.
8. Specifications
- Model: ZP.256E.818R00
- Item Model Number: VAVLLABYD
- Product Dimensions: 0.39 x 0.39 x 0.39 inches
- Item Weight: 3.53 ounces
- Manufacturer: Generic
- Compatible Devices: Designed for LCD TVs (Note: Product data incorrectly lists "Camera" for compatible devices, but context indicates LCD TV motherboard).
- Category: Television Replacement Parts
9. Warranty and Support
This product is typically covered by a standard return policy. For specific warranty details, please refer to the purchase agreement or contact your retailer. Extended protection plans may be available for purchase separately, offering additional coverage beyond the standard return period.
For technical support or further assistance, please contact the seller or a qualified electronics technician.