Introduction
This manual provides comprehensive instructions for the installation, operation, and maintenance of the Luminor RC-B4.01 Replacement Controller. This controller is specifically designed for use with Luminor BLACKCOMB 4.1 series UV water disinfection systems, ensuring optimal performance and monitoring of your UV system.
Please read this manual thoroughly before attempting any installation or operation to ensure safe and correct usage.
Product Overview
The Luminor RC-B4.01 is a sophisticated replacement controller that serves as the central monitoring and control unit for your BLACKCOMB 4.1 UV system. It provides critical information regarding the system's operational status and UV lamp performance.
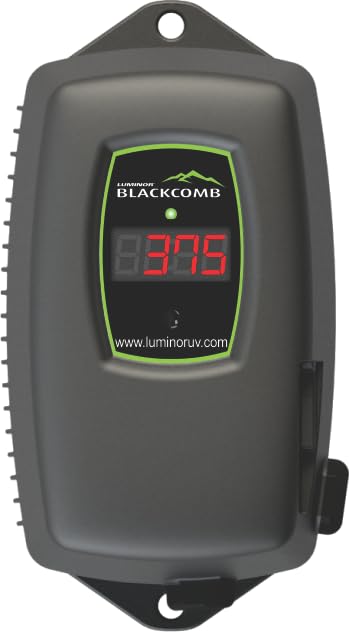
Figure 1: Luminor RC-B4.01 Replacement Controller. This image shows the front view of the controller with its 4-digit LED display and splash-proof casing.
Key Features:
- Monitors UV light intensity to ensure effective disinfection.
- Converts native power supply to the necessary voltage for the UV lamp.
- Tracks and displays days remaining until the next lamp replacement is due.
- Monitors overall lamp functionality and alerts to potential issues.
- Designed for seamless integration with LUMINOR BLACKCOMB 4.1 series UV water disinfection systems.
- Features a 4-digit LED display for clear status indication.
- Equipped with a splash-proof case for enhanced durability.
- Auto-ranging 90-265 V operation for versatile power compatibility.
Safety Information
Always observe the following safety precautions to prevent injury or damage to the product:
- Electrical Hazard: Disconnect power to the UV system before installing, servicing, or replacing any components. Failure to do so may result in electric shock.
- UV Radiation: Never look directly at an illuminated UV lamp. UV radiation can cause severe eye and skin damage.
- Water Damage: Ensure all connections are secure and watertight to prevent leaks and potential water damage to electrical components.
- Qualified Personnel: Installation and servicing should only be performed by qualified personnel familiar with UV water treatment systems and electrical safety procedures.
- Original Parts: Use only genuine Luminor replacement parts to ensure proper operation and maintain warranty validity.
Package Contents
Verify that all items are present and undamaged upon unpacking:
- Luminor RC-B4.01 Replacement Controller (1 unit)
- Instruction Manual (this document)
- Mounting hardware (if applicable, not specified in product data)
Specifications
| Attribute | Value |
|---|---|
| Model Number | RC-B4.01 |
| Compatibility | Luminor BLACKCOMB 4.1 series UV systems |
| Input Voltage | 90-265 V (Auto-Range) |
| Frequency | 50-60 Hz |
| Display | 4-Digit LED |
| Enclosure | Splash-Proof Case |
| Monitoring Functions | Lamp Life, UV Intensity, Total Operating Time |
| Item Weight | 1 pound |
| Product Dimensions | 6.8 x 4 x 3.6 inches |
Setup and Installation
Follow these steps to properly install your Luminor RC-B4.01 controller. Ensure the main power to the UV system is disconnected before beginning.
- Power Disconnection: Locate the main power supply for your BLACKCOMB 4.1 UV system and turn it off. Verify that no power is reaching the system.
- Mounting: Choose a suitable location for the controller, ensuring it is protected from direct sunlight, extreme temperatures, and excessive moisture. Use appropriate mounting hardware (not included, typically) to secure the controller to a wall or panel.
- Connect UV Lamp: Connect the UV lamp cable from your BLACKCOMB 4.1 system to the designated port on the RC-B4.01 controller. Ensure a firm and secure connection.
- Connect UV Sensor (if applicable): If your BLACKCOMB 4.1 system includes a UV intensity sensor, connect its cable to the corresponding port on the controller.
- Power Connection: Connect the power cord from the RC-B4.01 controller to a grounded electrical outlet.
- Restore Power: Once all connections are secure, restore power to the UV system. The controller's LED display should illuminate.
Figure 2: Rear view of the RC-B4.01 controller (representative image). This image would ideally show the connection ports for the UV lamp and sensor, and the power input.
Operating Instructions
The RC-B4.01 controller provides real-time feedback on your UV system's status via its 4-digit LED display.
LED Display Readings:
- Lamp Life Remaining: The display will typically show the number of days remaining until the UV lamp needs replacement. This countdown helps you plan for timely maintenance.
- UV Intensity: If a UV sensor is connected, the display may show the current UV intensity as a percentage or a specific value, indicating the effectiveness of the UV disinfection.
- Total Operating Time: The controller also tracks the total hours or days the UV system has been operational.
- Error Codes: In case of a malfunction (e.g., lamp failure, low UV intensity), the display will show specific error codes. Refer to the Troubleshooting section for details.
Consult your BLACKCOMB 4.1 UV system manual for specific details on interpreting all display codes and indicators.
Maintenance
Regular maintenance ensures the longevity and effectiveness of your UV water disinfection system. The RC-B4.01 controller assists in monitoring key maintenance intervals.
UV Lamp Replacement:
- The controller will count down the days until the UV lamp reaches its recommended operational lifespan (typically 9,000 hours or approximately 1 year).
- When the lamp life reaches zero or an alert is displayed, replace the UV lamp according to the instructions provided in your BLACKCOMB 4.1 UV system manual.
- After replacing the lamp, reset the lamp life counter on the RC-B4.01 controller as per your system's instructions (often involves pressing and holding a button or a specific sequence).
Quartz Sleeve Cleaning:
While the controller monitors lamp performance, it is crucial to regularly clean the quartz sleeve that encases the UV lamp. Refer to your BLACKCOMB 4.1 UV system manual for detailed instructions on cleaning frequency and procedure.
Troubleshooting
This section provides solutions to common issues you might encounter with your RC-B4.01 controller or connected UV system.
| Problem | Possible Cause | Solution |
|---|---|---|
| Controller display is off. | No power supply; loose connection. | Check power outlet and ensure power cord is securely connected. Verify main power to the UV system is on. |
| "LAMP" or "ERR" displayed. | UV lamp failure; lamp nearing end of life. | Replace the UV lamp. Reset the lamp life counter after replacement. |
| Low UV intensity reading. | Dirty quartz sleeve; aging UV lamp; faulty UV sensor. | Clean the quartz sleeve. If issue persists, replace the UV lamp. If still low, the UV sensor may need replacement or calibration. |
| Inaccurate lamp life countdown. | Lamp life counter not reset after lamp replacement. | Refer to your BLACKCOMB 4.1 system manual for instructions on resetting the lamp life counter. |
If you encounter an issue not listed here or if the suggested solutions do not resolve the problem, please contact Luminor customer support.
Warranty and Support
Warranty Information:
Luminor products are manufactured to high-quality standards and are backed by a manufacturer's warranty. Specific warranty terms and conditions may vary. Please refer to the warranty card included with your original BLACKCOMB 4.1 UV system or visit the official Luminor website for detailed warranty information.
Customer Support:
For technical assistance, troubleshooting, or to inquire about replacement parts, please contact Luminor customer support. Have your product model number (RC-B4.01) and the serial number of your BLACKCOMB 4.1 UV system ready when contacting support.
You can typically find contact information on the official Luminor website: www.luminoruv.com (example link, verify actual URL).


