Introduction
This manual provides essential instructions for the safe and efficient use of your Coleman Miami 2 to 4 Person Inflatable Hot Tub. Please read this guide thoroughly before setting up or operating your hot tub. Proper installation, operation, and maintenance are crucial for optimal performance and longevity of the product.
The Coleman SaluSpa Miami hot tub features a soothing AirJet massage system with 120 bubble jets, designed for relaxation. It incorporates an energy-efficient design with insulated walls and cover, and a Freeze Shield automatic heating function for year-round use.
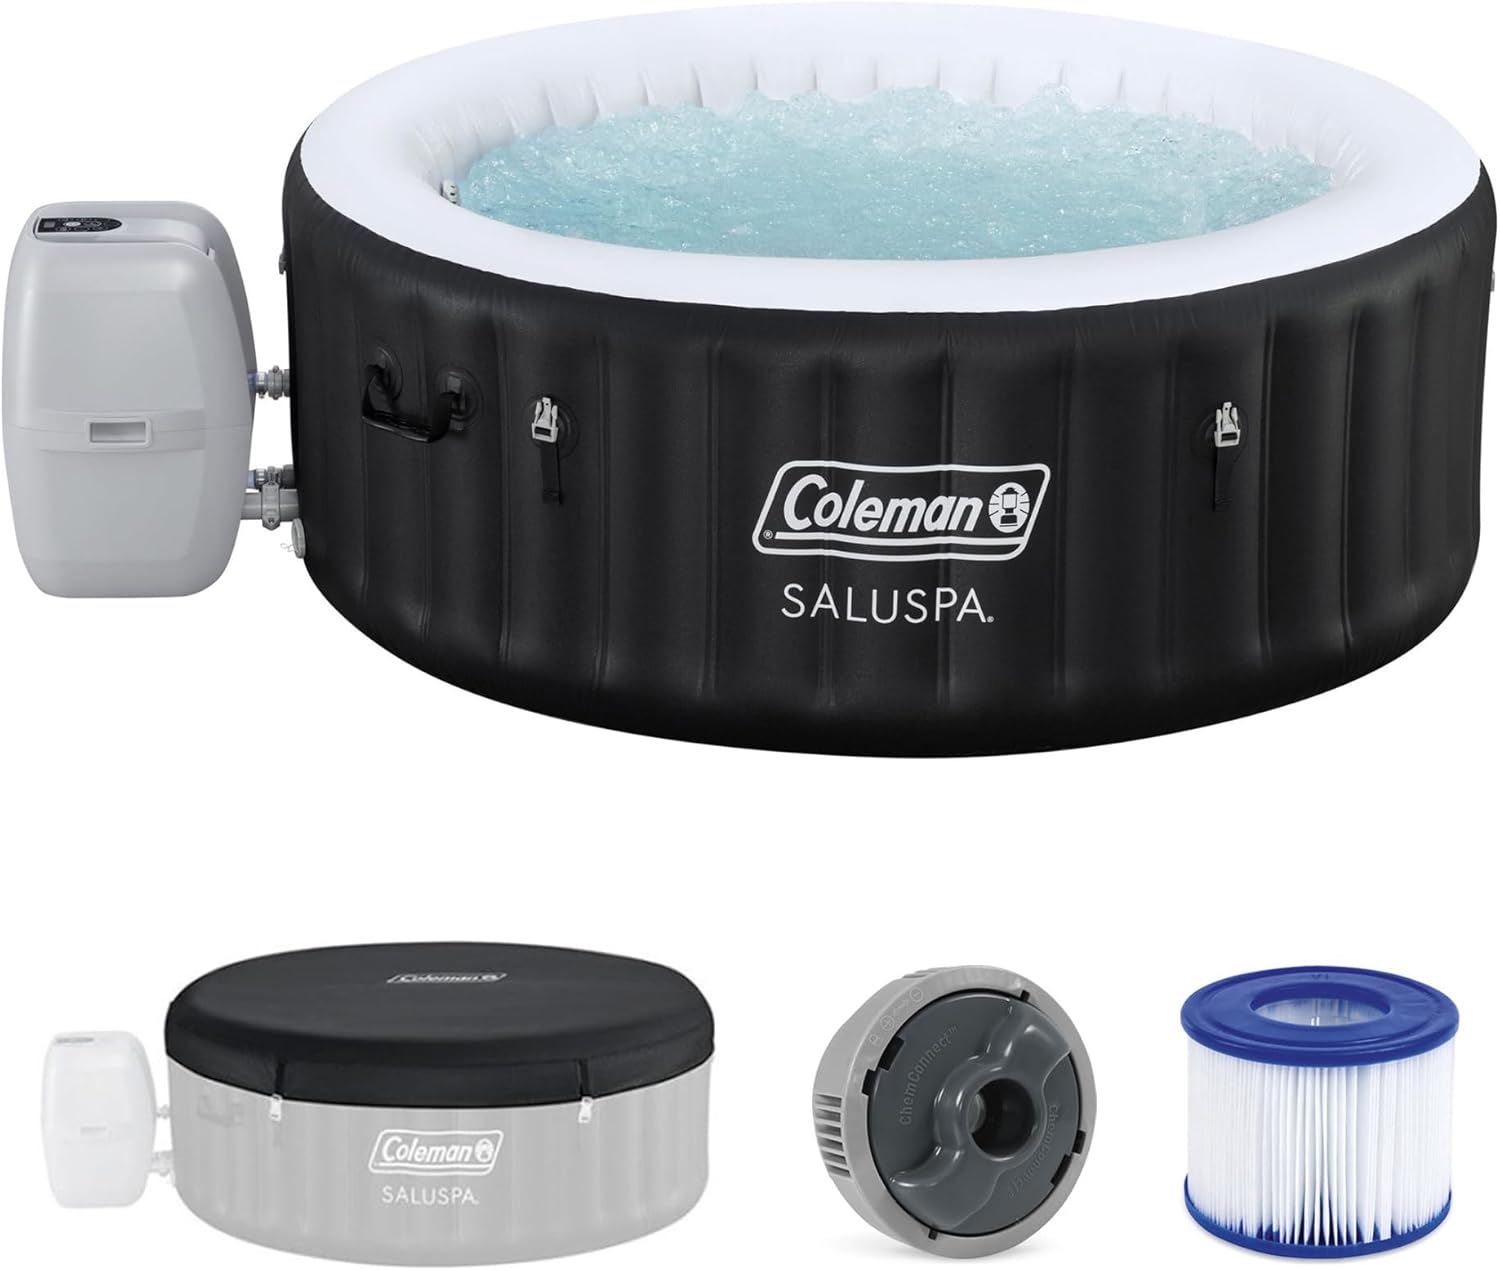
Image: The Coleman Miami Inflatable Hot Tub, showcasing its design and size in an outdoor environment.
Safety Information
WARNING: Always supervise children. To reduce the risk of injury, do not permit children to use this product unless they are closely supervised at all times.
- Consult a physician before use if you have health conditions, are pregnant, or are elderly.
- Do not use the hot tub if you are under the influence of alcohol, drugs, or anticoagulants.
- Water temperature should not exceed 104°F (40°C). Lower temperatures are recommended for extended use.
- Exit the hot tub immediately if you feel uncomfortable, dizzy, or sleepy.
- Always use the cover when the hot tub is not in use to prevent accidental drowning and heat loss.
- Ensure the hot tub is placed on a flat, stable surface capable of supporting its weight when filled.
- Keep all electrical components dry and away from water.
- Do not operate the hot tub if there is any damage to the power cord or plug.
Package Contents
Verify that all components listed below are present in your package. If any parts are missing or damaged, please contact customer support.

Image: Visual representation of the items included in the box: Heater Pump, ChemConnect Dispenser, Type VI Filter Cartridge, and EnergySense Cover.
- Inflatable Hot Tub Liner
- Heater Pump Unit
- ChemConnect Dispenser
- Filter Cartridge (Type VI)
- EnergySense Insulated Cover
- Repair Patch Kit
- Instruction Manual (this document)
Setup Instructions
- Choose a Location: Select a flat, level surface free of sharp objects. The area must be able to support the weight of the filled hot tub (approximately 177 gallons of water plus occupants). Ensure there is access to a grounded electrical outlet.
- Unpack and Lay Out: Carefully remove the hot tub and pump from the packaging. Spread the hot tub liner on the chosen location.
- Inflate the Hot Tub: Connect the inflation hose from the pump to the hot tub's air valve. Use the pump's inflation function to inflate the hot tub until it is firm but not over-inflated.

Image: The hot tub being set up, illustrating the quick inflation process.
- Connect the Pump Unit: Attach the pump unit to the hot tub liner following the diagrams in the separate setup guide. Ensure all connections are secure.

Image: The SaluSpa AirJet hot tub heater pump, designed for reliability and durability.
- Fill with Water: Fill the hot tub with water using a garden hose. Do not fill above the maximum fill line indicated on the liner. The capacity is approximately 177 gallons.
- Install Filter and ChemConnect: Insert the Type VI filter cartridge into the filter housing. Place the ChemConnect dispenser in the designated area and add appropriate chemicals (not included).
Operating Instructions
Control Panel Overview
The digital control panel allows you to manage all hot tub functions. Refer to the pump unit for specific button layouts.
- Power Button: Turns the hot tub system on/off.
- Temperature Adjustment: Use the up/down arrows to set the desired water temperature (up to 104°F / 40°C).
- AirJet Button: Activates the 120 bubble jets for a soothing massage. Press again to turn off.
- Filter Button: Activates the water filtration system.
- Heat Button: Turns the heating function on/off.
- Timer Button: Program the power-saving timer to control heating cycles up to 40 days in advance.
Heating the Water
Once filled, press the Heat button on the control panel. The water will begin to heat to your set temperature. Heating time varies based on ambient temperature and initial water temperature.
The hot tub features an EnergySense Insulated Cover & Liner which helps retain heat, making it up to 40% more energy-efficient. Always keep the cover on when not in use to maintain temperature and reduce energy consumption.

Image: An illustration demonstrating how the insulated cover and liner contribute to energy efficiency by retaining heat.
Using the AirJet System
Press the AirJet button on the control panel to activate the 120 bubble jets. Enjoy the relaxing massage. Press the button again to turn off the jets.

Image: A cutaway diagram illustrating the placement and function of the 120 bubble jets within the hot tub liner.
Maintenance
Water Chemistry
Maintain proper water chemistry using the ChemConnect dispenser. This device evenly disperses the correct amount of chlorine (or other sanitizers) to keep the water clean and clear. Regularly test the water pH and sanitizer levels and adjust as needed.
Filter Cartridge Cleaning and Replacement
The filter cartridge should be cleaned regularly (daily or every other day depending on usage) by rinsing it with a garden hose. Replace the filter cartridge (Type VI) every 1-2 weeks or when it remains dirty after cleaning.
Draining the Hot Tub
To drain the hot tub, connect a garden hose to the drain valve located on the bottom of the hot tub liner. Open the valve to allow water to drain. Ensure the drainage area can handle the volume of water.
Winterization (Freeze Shield)
The Freeze Shield automatic heating function protects the pump and liner from damage caused by cold weather. If you plan to use the hot tub in temperatures below 40°F (4°C), ensure this function is active. For long-term storage in freezing conditions, it is recommended to drain, clean, and store the hot tub indoors.

Image: The hot tub covered in snow, demonstrating the Freeze Shield automatic heating function's ability to protect the unit in cold weather.
Troubleshooting
| Problem | Possible Cause | Solution |
|---|---|---|
| Hot tub not heating | Heater not activated, low water level, dirty filter, error code on pump. | Ensure heater is on. Check water level. Clean or replace filter. Consult pump manual for error codes. |
| Water is cloudy or dirty | Insufficient filtration, improper chemical balance, heavy usage. | Run filter longer. Test and adjust water chemistry (pH, sanitizer). Clean or replace filter. |
| Hot tub losing air pressure | Loose air valve cap, small puncture, extreme temperature changes. | Ensure valve caps are tight. Check for punctures and use repair patch kit. Air pressure can fluctuate with temperature. |
| AirJet system not working | Air pump not activated, blockage in air jets. | Ensure AirJet button is pressed. Check for any visible blockages in the jets. |
Specifications
| Feature | Detail |
|---|---|
| Brand | Coleman |
| Model Name | Coleman Miami Energy-Efficient AirJet Inflatable Hot Tub 2-4 Person |
| Model Number | 90557E |
| Product Dimensions (L x W x H) | 71"L x 71"W x 26"H |
| Seating Capacity | 2-4 People |
| Water Capacity | 177 Gallons |
| Maximum Water Temperature | 104°F (40°C) |
| Number of AirJets | 120 |
| Material | Fabric, Plastic (Tritech outer layer, MaxHold fabric internal beams) |
| Power Source | AC |
| Energy Efficiency | Insulated walls and cover (up to 40% more energy-efficient), APSP-14 and Title 20 compliant. |
| Special Features | Freeze Shield Automatic Heating, Power-Saving Timer, ChemConnect Dispenser |
Warranty and Support
For warranty information, please refer to the warranty card included with your product or visit the official Coleman website.
If you encounter any issues or have questions not covered in this manual, please contact Coleman customer support for assistance.
Coleman Official Website: www.coleman.com