Introduction
This manual provides detailed instructions for the safe and efficient operation of your APDOE HatchPro 18 Automatic Egg Incubator. Please read all instructions carefully before use to ensure optimal hatching results and product longevity. This incubator is designed for incubating eggs from various poultry species, including chickens, quails, ducks, and turkeys.
Package Contents
Verify that all items listed below are included in your package:
- Incubator Unit
- Water Bottles (2)
- Water Fill Connectors
- Standard Egg Tray (18-slot)
- Large Egg Tray (8-slot)
- Foam Box (for insulation)
- Power Cord
- Power Adapter
- User Manual (this document)
- Hatching Guide
- Cleaning Brush

Image: All components of the APDOE HatchPro 18 Egg Incubator, including the main unit, two water bottles, two egg trays, power cord, adapter, user manual, hatching guide, and cleaning brush.
Product Overview
The APDOE HatchPro 18 is an advanced automatic egg incubator designed to simplify the hatching process. It features precise temperature and humidity control, automatic egg turning, and a built-in egg candler for monitoring embryo development. The transparent lid provides a 360° clear view of the eggs.
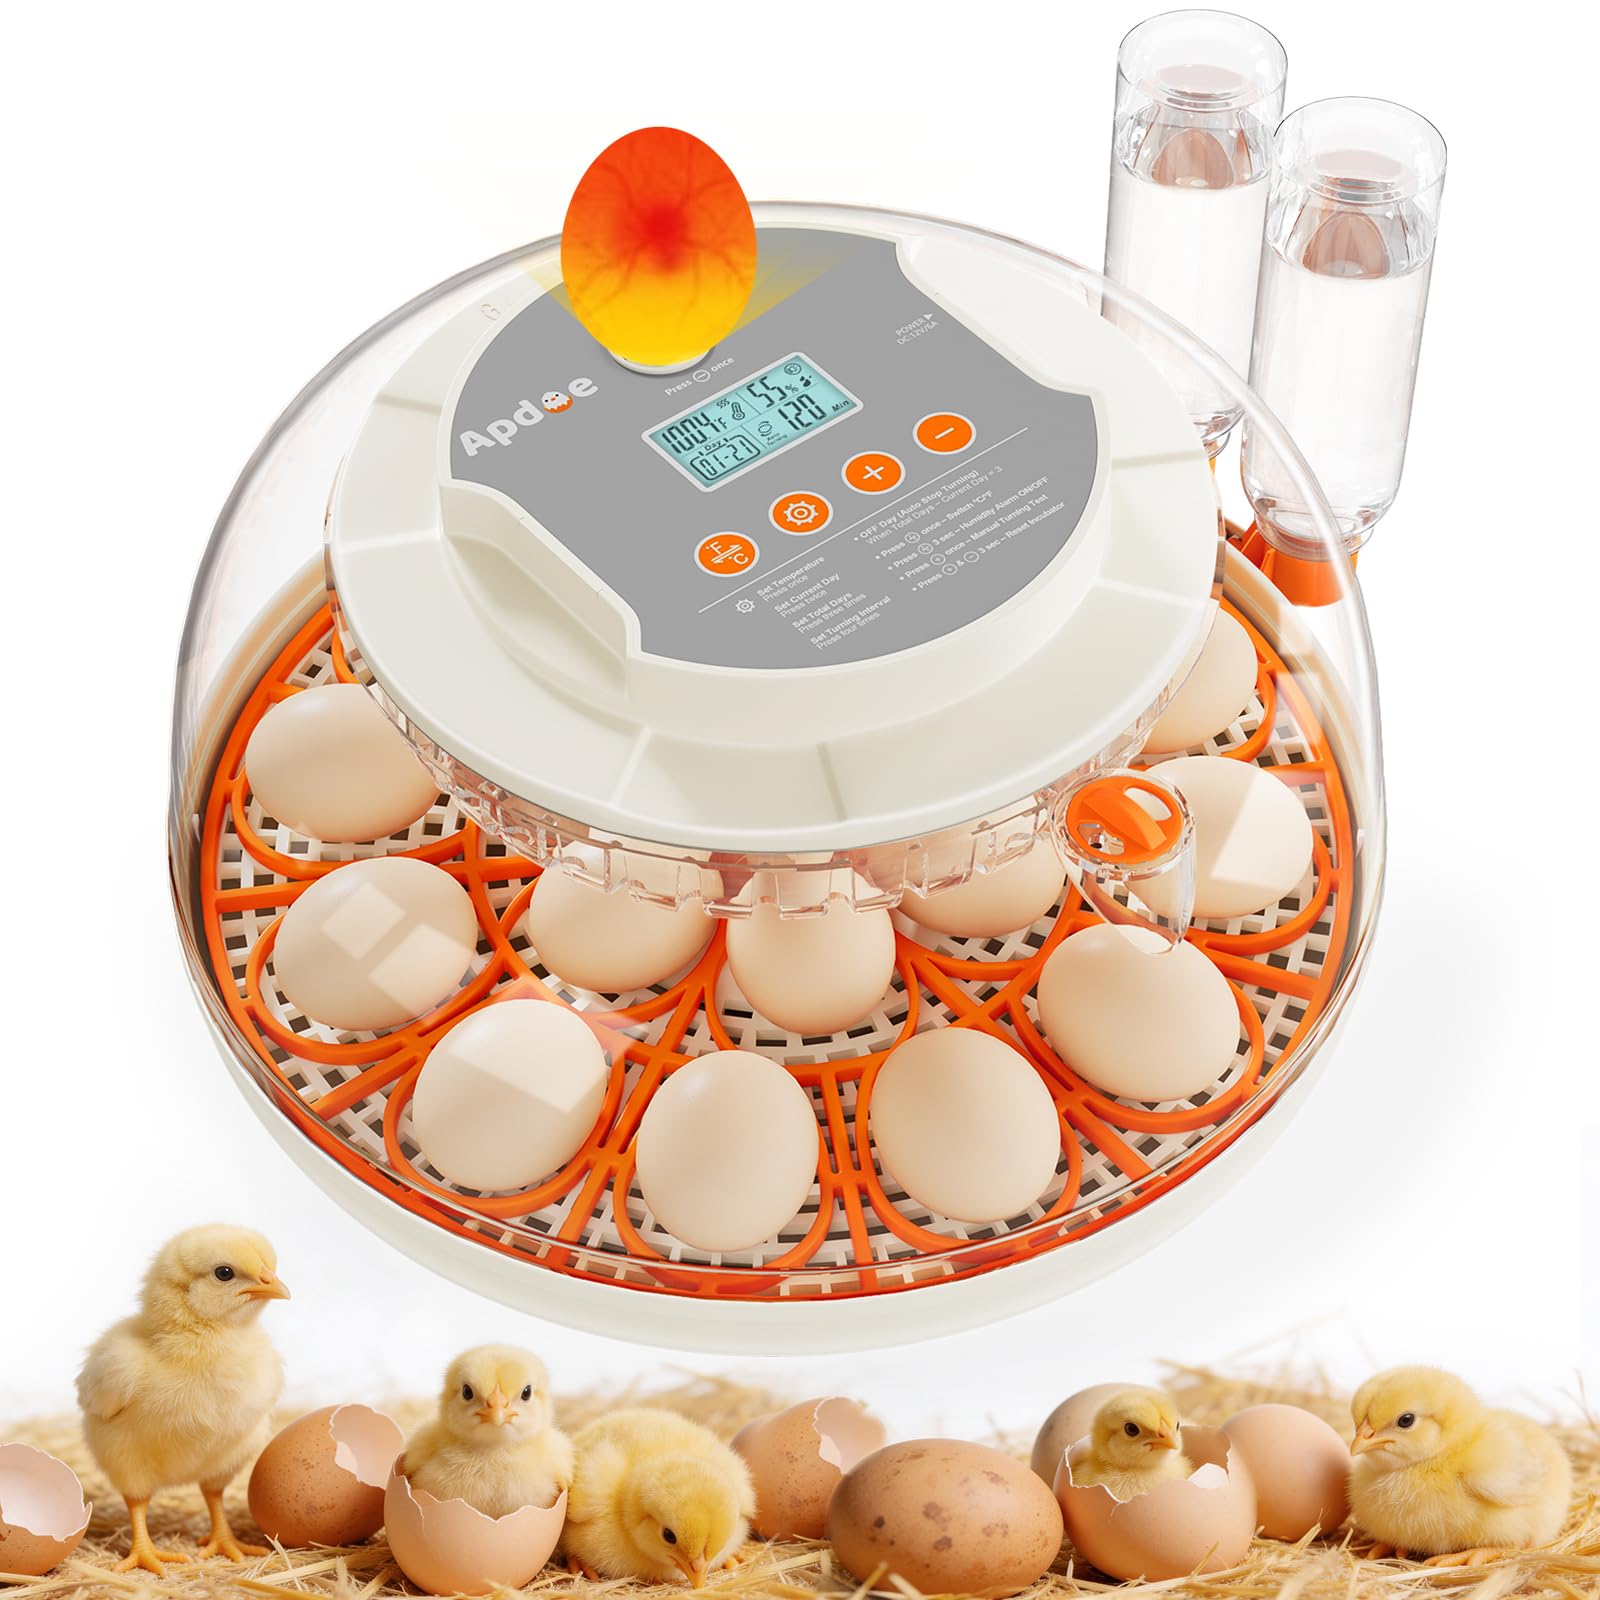
Image: Top-down view of the APDOE HatchPro 18 Egg Incubator, showing the digital display with temperature and humidity readings, control buttons, and eggs arranged in the turning tray.
Video: An official product video demonstrating the features and components of the APDOE HatchPro 18 Egg Incubator, including its automatic egg turning and dual egg tray system.
Setup
- Unpack and Inspect: Carefully remove all components from the packaging. Inspect for any damage.
- Install Small Gear: For first-time use, unscrew the top cover counterclockwise. Install the small gear onto the D-shaped shaft of the turner motor. Tighten the top cover clockwise.
- Choose Egg Tray: Select the appropriate egg tray (18-slot for standard/small eggs or 8-slot for large/oversized eggs) and place it into the base.
- Add Water: Fill one or two water bottles (depending on desired humidity) and attach them to the external water refill ports. Ensure water flows into the designated channels in the base.
- Place Eggs: Gently place fertilized eggs into the egg tray with the pointed end facing down.
- Connect Power: Plug the power cord into the incubator and then into a power outlet. The display will light up.

Image: Two different egg trays are shown: an 18-slot tray for standard and small eggs (chicken, quail, bird) and an 8-slot tray for large and oversized eggs (duck, goose, turkey).
Operating Instructions
Temperature and Humidity Control
The incubator comes with preset temperature and humidity levels. You can adjust these settings as needed for different species. The digital display shows real-time temperature and humidity. The external water refill system automatically maintains humidity, requiring only 2-3 refills throughout incubation. An adjustable air vent allows for fine-tuning humidity levels.

Image: The APDOE HatchPro 18 Incubator with an external water bottle connected, illustrating the automatic water refill and multi-level humidity control system. Eggs are visible inside.
Automatic Egg Turning
The incubator automatically turns eggs horizontally at adjustable intervals (1h, 2h, or 3h). This is crucial for proper embryo development. The turning function automatically stops during the last 3 days of incubation (Lockdown period) to prepare for hatching.
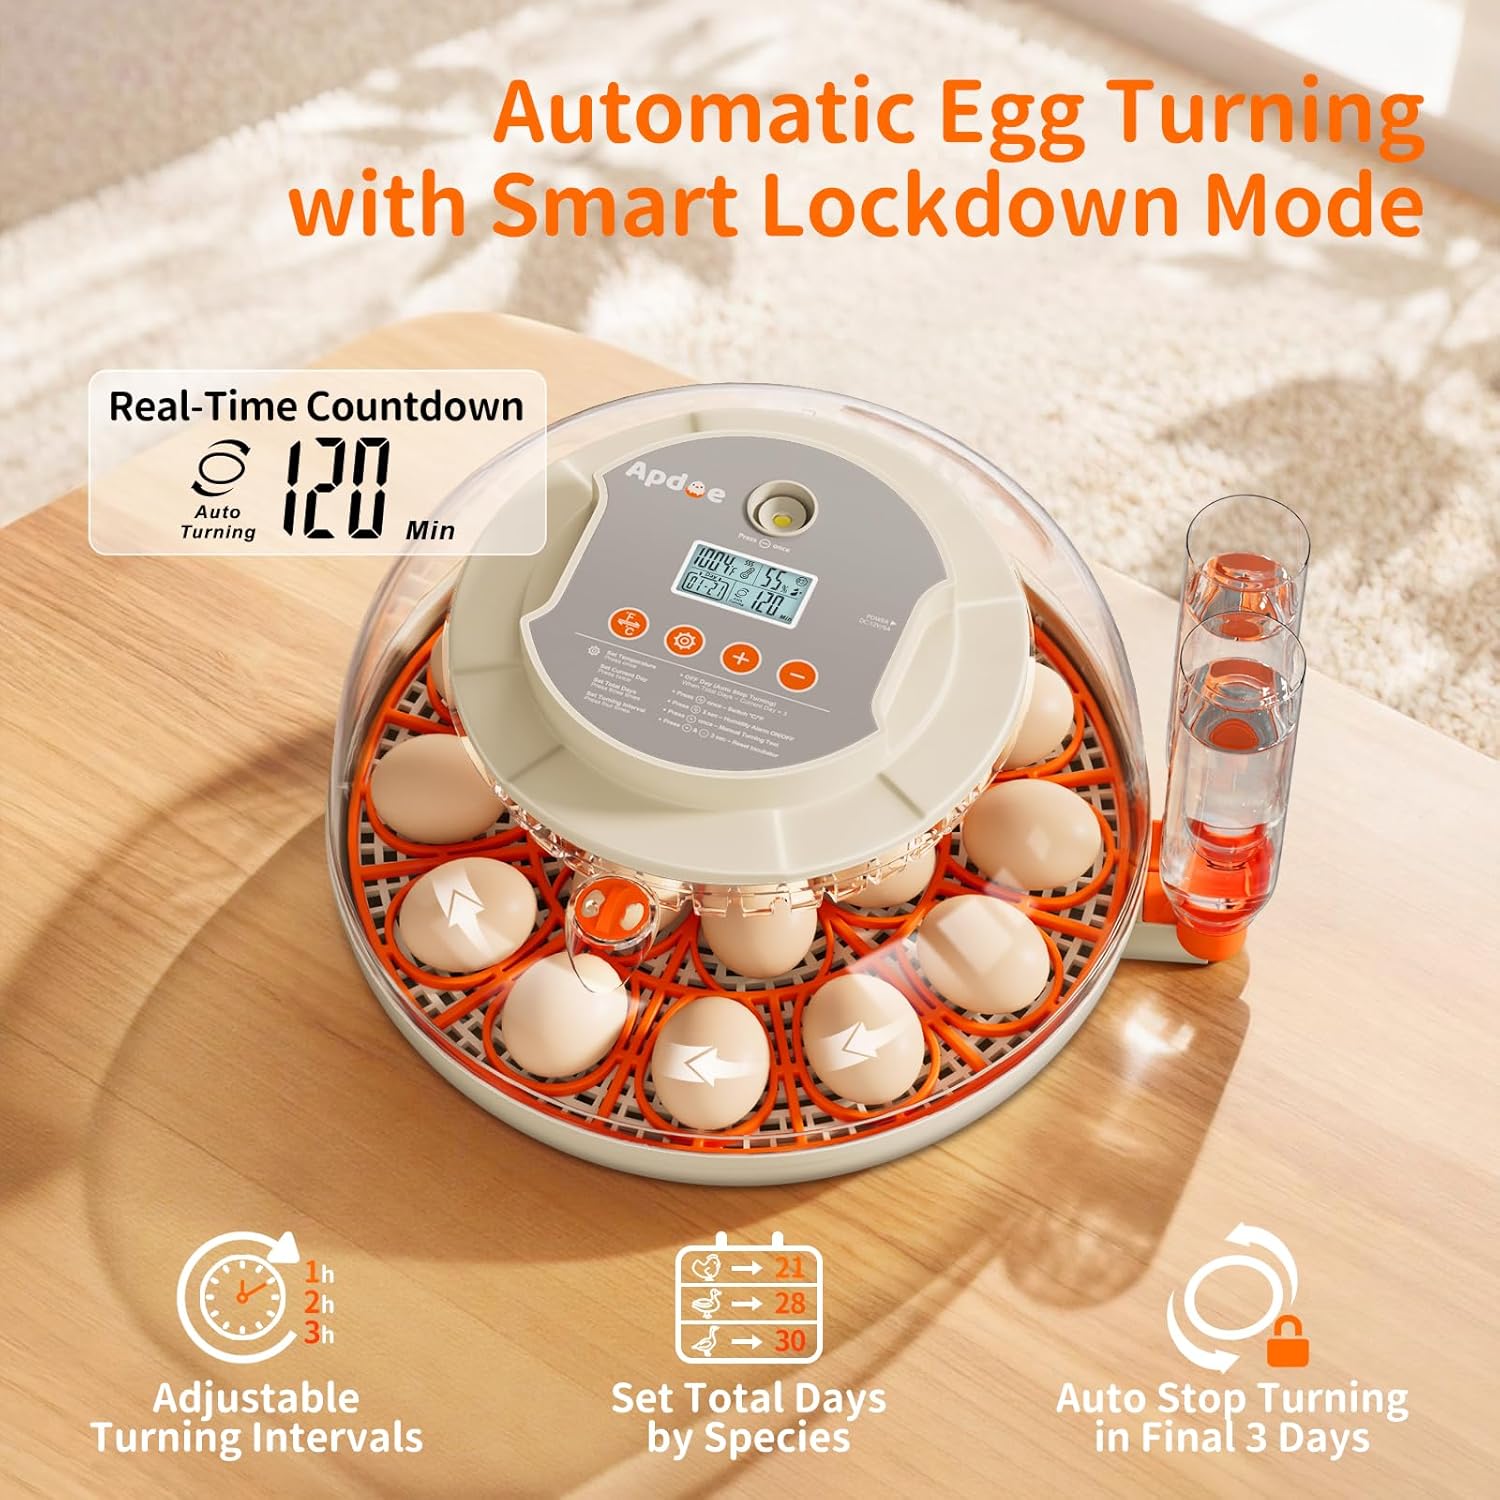
Image: The automatic egg turning mechanism inside the APDOE HatchPro 18 Incubator, with eggs being gently rotated. The digital display shows a real-time countdown to the next rotation.
Built-In Egg Candler
Use the integrated egg candler to observe embryo development without opening the incubator. This allows you to track progress and identify infertile eggs.

Image: A built-in egg candler on the APDOE HatchPro 18 Incubator illuminates an egg, allowing observation of embryo development. A child is shown watching the process.
Incubation Parameters for Different Species
Refer to the table below for recommended incubation days, temperature, and humidity settings for common poultry eggs:
| Species | Incubation Days | Incubation Period Temperature | Incubation Period Humidity | Hatching Period (Last 3 days) Temperature | Hatching Period (Last 3 days) Humidity |
|---|---|---|---|---|---|
| Chicken | 21 | 99.5-100.5°F (37.5-38°C) | 40-55% | 99-100°F (37.2-37.8°C) | 65-80% |
| Duck | 28 | 99.5-100°F (37.5-37.8°C) | 50-60% | 99°F (37.2°C) | 70-85% |
| Quail | 18 | 99.5-101°F (37.5-38.3°C) | 45-55% | 99-100°F (37.2-37.8°C) | 65-75% |
| Goose | 30 | 99-100°F (37.2-37.8°C) | 45-55% | 99-100°F (37.2-37.8°C) | 65-75% |
Table: Recommended incubation parameters for various poultry species, including hatching days, temperature, and humidity for both the incubation and hatching periods.
Maintenance
Regular cleaning is essential for hygiene and optimal performance. All components are hand-wash only. Do not place any parts in the dishwasher, as this may cause deformation or damage to electrical components.
- Cleaning: The egg trays, lid, and internal fan are fully removable for deep cleaning. Use the included cleaning brush for the fan to prevent dust or feathers from causing noise or damage.
- Storage: After each use, thoroughly clean the incubator. Then, fully open the air vent and plug it in to run for 6 hours without adding water. This ensures that the incubator is completely dry before storage.

Image: The APDOE HatchPro 18 Incubator disassembled, showing the detachable lid, egg tray, and base. A hand is using a small brush to clean the internal fan, highlighting the ease of cleaning.
Troubleshooting
If you encounter any issues with your incubator, please refer to the following common solutions:
- Temperature/Humidity Alerts: The incubator will notify you of temperature or humidity issues. Alerts can be turned off if desired. Check water levels and ensure the air vent is adjusted correctly.
- Egg Turning Malfunction: Ensure the small gear is correctly installed on the D-shaped shaft. If the issue persists, perform a manual turning test or reset the incubator.
- Inconsistent Humidity: Ensure the incubator is placed in a stable environment away from drafts or direct sunlight. Verify water bottle connections and check for any blockages in the water channels.
Specifications
| Feature | Detail |
|---|---|
| Model | HatchPro 18 |
| Material | Acrylonitrile Butadiene Styrene |
| Item Weight | 5.9 Pounds |
| Manufacture Year | 2026 |
| Included Components | Water Bottles, Power Cord, Foam Box, Hatching Guide, User Manual, Cleaning Brush |
Warranty and Support
Your APDOE HatchPro 18 Egg Incubator comes with a 3-year warranty. Additionally, lifetime expert technical support is available to assist with any incubation-related questions or issues you may encounter. Please refer to the contact information provided in your user manual for support.