
1. Important Safety Information
Please read all instructions carefully before operating the kpasafe Biometric Handgun Safe. Failure to follow these guidelines may result in injury, damage to the product, or loss of security.
- Always keep the emergency keys in a secure location away from the safe and out of reach of children. Do not store them inside the safe.
- Ensure the safe is securely mounted or tethered to prevent unauthorized removal.
- Do not store loaded firearms in the safe unless local laws and regulations permit. Always follow safe firearm handling practices.
- Keep the fingerprint sensor and keypad clean and dry for optimal performance.
- Regularly check the battery level and replace batteries as needed to ensure continuous operation.
- This safe is designed to deter theft and provide quick access to contents. It is not fireproof or waterproof unless explicitly stated.
2. Setup
2.1 Unpacking and Initial Inspection
Carefully remove the safe from its packaging. Inspect the safe for any signs of damage. Ensure all included components are present:
- Biometric Handgun Safe (1)
- Emergency Keys (2)
- Adapter (1)
- Data Line (1)
- Security Cable (1)
2.2 Powering the Safe
The safe can be powered by the included adapter or by 4 AAA batteries (not included).
- Using the Adapter: Connect the provided adapter to the DC9V IN port on the back of the safe and plug it into a wall outlet.
- Using Batteries: Open the battery compartment (usually located inside the safe or on the back) and insert 4 new AAA batteries, ensuring correct polarity.
Note: For continuous power and wireless charging functionality, using the adapter is recommended. Batteries serve as a backup power source.

Figure 1: Rear view of the safe, highlighting the power input and emergency keyhole.
2.3 Mounting the Safe (Optional)
To enhance security, the safe can be secured using the included security cable.
- Locate the security cable port on the back of the safe.
- Thread the security cable through the port and around a fixed object (e.g., bed frame, heavy furniture leg).
- Secure the cable using its locking mechanism.
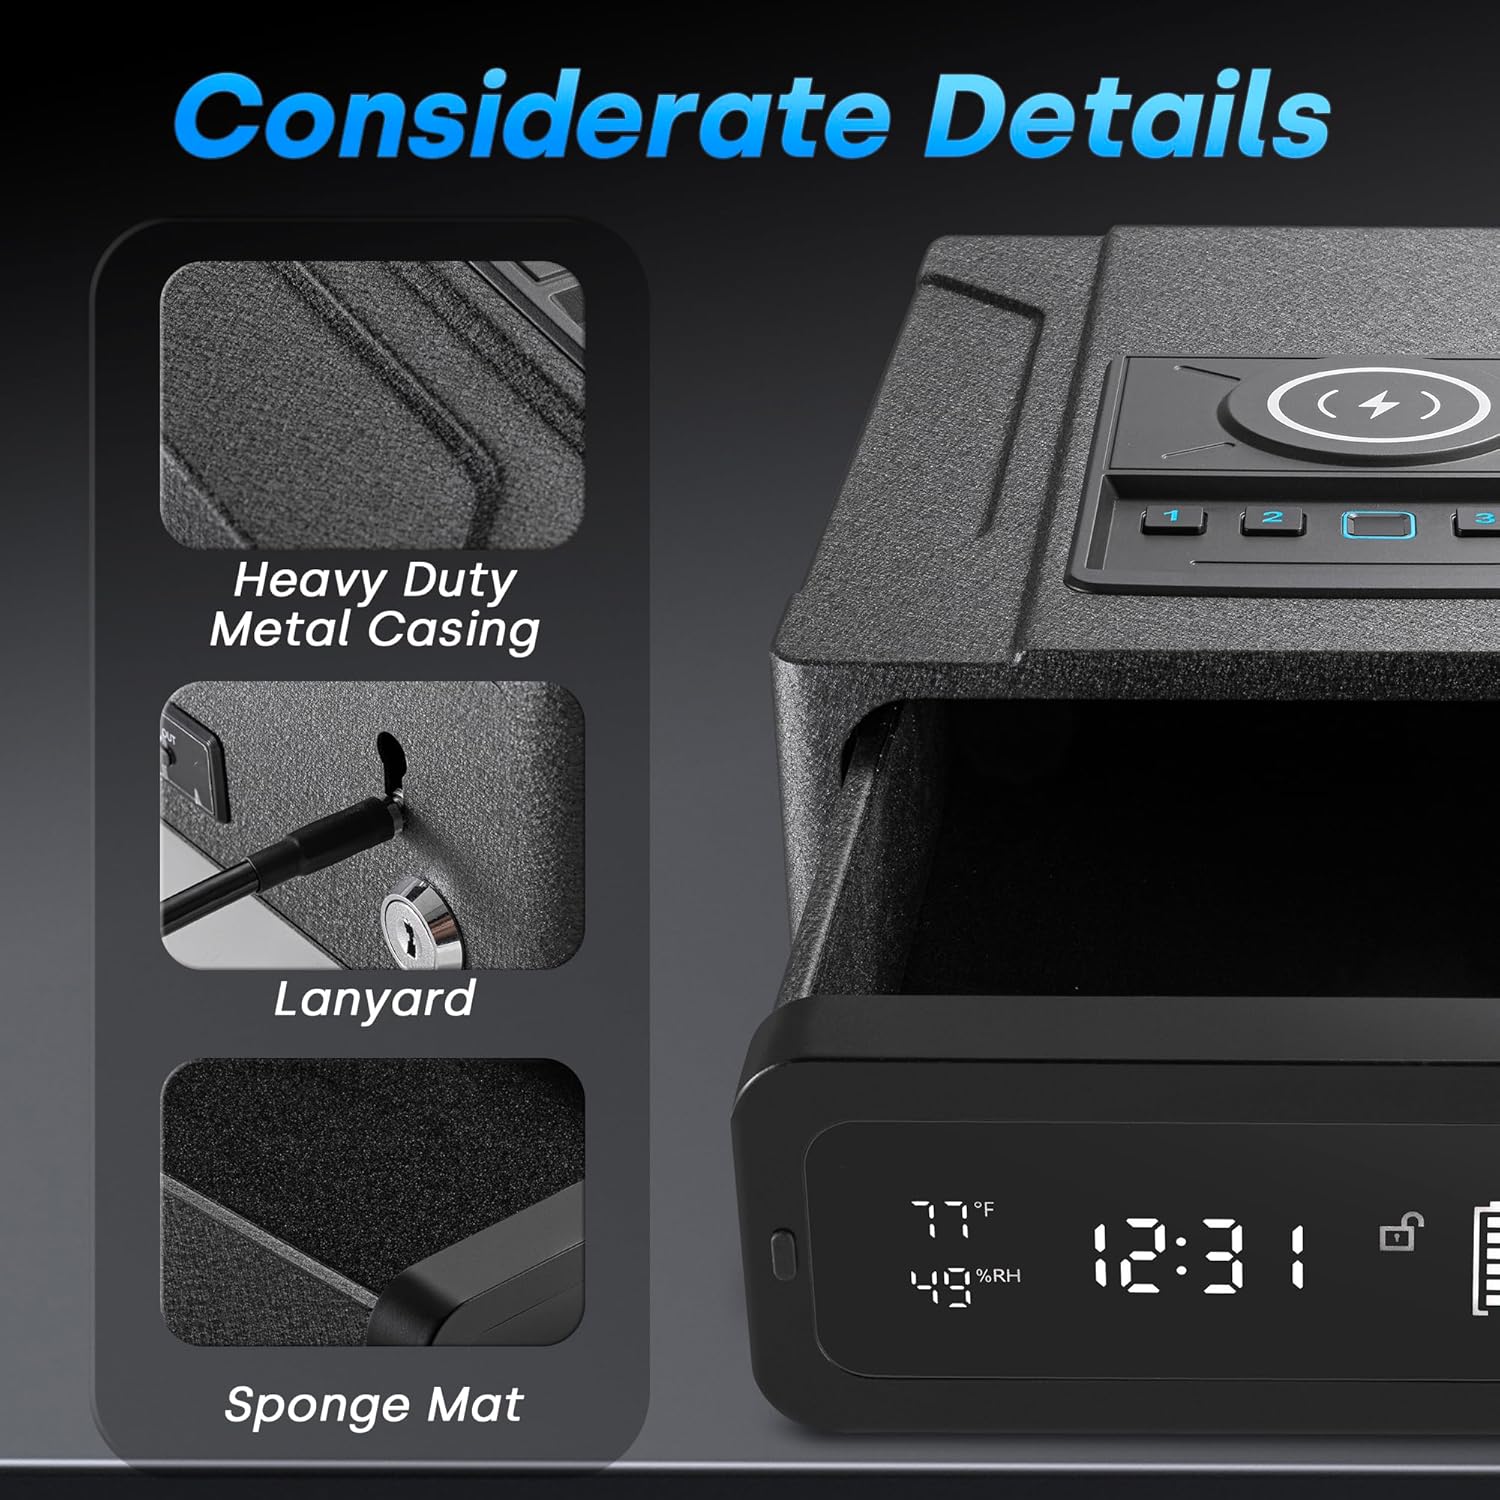
Figure 2: Detail of the security cable attachment point on the safe.
2.4 Setting the Time and Date
Refer to the specific instructions in the included quick start guide for setting the digital alarm clock's time and date. This typically involves pressing and holding a specific button on the keypad until the display flashes, then using the number keys to adjust the values.
3. Operating Instructions
3.1 Unlocking Methods
The kpasafe Biometric Handgun Safe offers three primary methods for quick access:
- Fingerprint Recognition: Provides 0.2-second quick access.
- Password Code: A numerical combination for entry.
- Emergency Key: For manual override in unexpected situations.

Figure 3: Overview of the three quick access methods: fingerprint, keypad, and emergency key.
3.2 Setting Fingerprints
The safe can store up to 50 unique fingerprints.
- Press and hold the setting button (usually marked with a gear or 'SET') for 3 seconds until the indicator light changes.
- Place your finger on the fingerprint sensor. Lift and place your finger again, repeating this process 4 times from different angles to ensure a complete scan.
- The safe will confirm successful registration. Repeat for additional fingerprints.
Video 1: Demonstrates how to set up and use the fingerprint recognition feature for quick access.
3.3 Setting Passwords
The safe supports one password combination.
- Press and hold the setting button for 3 seconds.
- Enter your desired numerical password using the keypad buttons (1-4).
- Press the setting button again to confirm and save the password.
3.4 Wireless Charging Function
The safe features a wireless charging pad on its top surface.
- Ensure the safe is connected to power via the adapter.
- Place your compatible wireless charging device (e.g., smartphone) on the charging pad.
- The device should begin charging automatically.

Figure 4: A smartphone being wirelessly charged on the safe's top surface.
3.5 LED Display Features
The front LED display provides useful information:
- Digital Alarm Clock: Displays the current time.
- Temperature and Humidity: Shows ambient conditions inside the safe.
- Power Level: Indicates the current battery status.
- Brightness Adjustment: The display brightness can be adjusted to three levels (100%, 66%, 30%) for comfort.
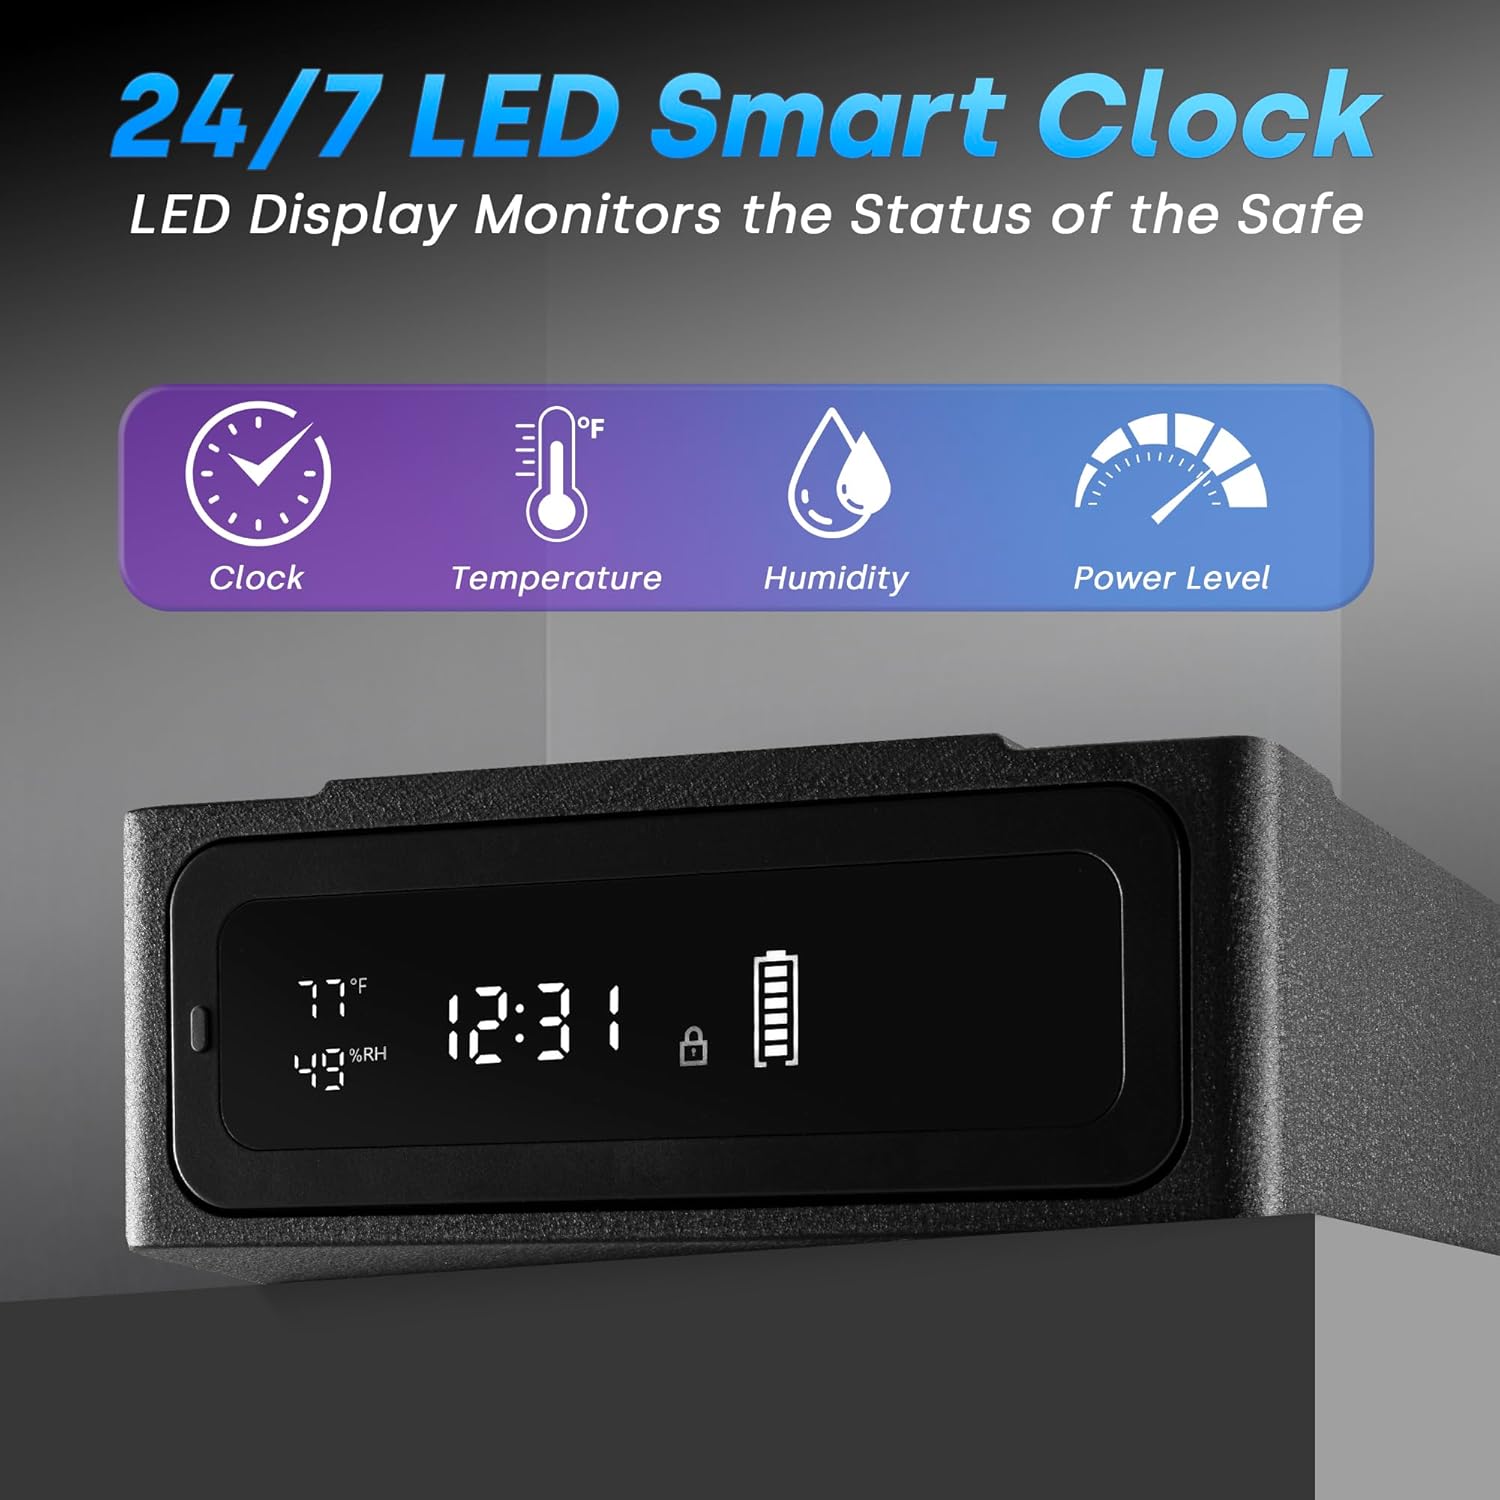
Figure 5: The LED display showing various environmental and operational data.

Figure 6: The LED display with adjustable brightness settings.
3.6 Silent Mode
The safe features a silent mode for discreet access. Refer to the quick start guide for instructions on how to activate and deactivate this feature. Typically, it involves a combination of button presses on the keypad.
Video 2: Demonstrates the quick access features, including fingerprint unlock and the silent operation of the safe.
4. Maintenance
4.1 Battery Replacement
When the battery indicator on the LED display shows low power, replace the 4 AAA batteries immediately to ensure continued functionality. Use only high-quality alkaline batteries.
4.2 Cleaning
Wipe the exterior of the safe with a soft, damp cloth. Do not use abrasive cleaners or solvents. Keep the fingerprint sensor and keypad free of dust and debris.
4.3 Interior Care
The safe's interior features a sponge mat to protect contents. Periodically remove the mat and clean the interior with a dry cloth. Ensure the interior is completely dry before placing items back inside.
Figure 7: The interior of the safe with its protective sponge mat.
5. Troubleshooting
| Problem | Possible Cause | Solution |
|---|---|---|
| Safe does not open with fingerprint. | Finger not properly scanned or sensor is dirty. | Ensure finger is clean and dry. Re-register fingerprint if necessary. Try different angles. |
| Safe does not open with password. | Incorrect password entered. | Verify the password. Re-enter carefully. If forgotten, use emergency key. |
| Wireless charging not working. | Safe not connected to adapter power; device not compatible or misaligned. | Ensure safe is plugged in. Check device compatibility. Reposition device on charging pad. |
| LED display is dim or off. | Low battery or brightness setting. | Replace batteries or connect to adapter. Adjust display brightness settings. |
| Alarm sounds unexpectedly. | Tampering detected or alarm settings activated. | Check for unauthorized access attempts. Review alarm settings in the manual. |
6. Specifications
| Feature | Detail |
|---|---|
| Brand | kpasafe |
| Model Number | SH-SQ |
| Product Dimensions | 12.7"D x 10.2"W x 4.1"H |
| Capacity | 0.3 Cubic Feet |
| Lock Type | Biometric, Electronic Combination Lock, Key |
| Color | Black |
| Material | Alloy Steel |
| Special Features | Alarm Clock, Alarm System, Anti-Theft, Biometric Fingerprint, Wireless Charging, LED Light, Silent Mode |
| Mounting Type | Floor Mount (with security cable) |
| Included Components | Adapter, Biometric Handgun Safe, Data Line, Emergency Key, Security Cable |
| Power Source | DC9V Adapter, 4x AAA Batteries (not included) |
7. Warranty and Support
kpasafe products are manufactured to high-quality standards and are backed by a manufacturer's warranty. For specific warranty details, including coverage period and terms, please refer to the warranty card included with your product or visit the official kpasafe website.
If you encounter any issues or have questions regarding your kpasafe Biometric Handgun Safe, please contact our customer support team:
- Website: www.kpasafe.com (Example URL, please replace with actual if available)
- Email: support@kpasafe.com (Example Email, please replace with actual if available)
- Phone: [Insert Customer Service Phone Number Here] (If available)
Please have your model number (SH-SQ) and purchase date ready when contacting support.