1. Introduction
Thank you for choosing the Katerk Professional Rotary Tool Set. This versatile tool is designed for a wide range of applications, including carving, engraving, cutting, grinding, sanding, polishing, and drilling. With its powerful 160W motor and adjustable speeds up to 35,000 RPM, it provides the precision and control needed for both intricate detail work and more demanding tasks. This manual provides essential information for safe and effective operation, setup, maintenance, and troubleshooting.
2. Safety Instructions
Always prioritize safety when operating any power tool. Failure to follow these instructions may result in electric shock, fire, and/or serious injury.
- Eye Protection: Always wear appropriate eye protection (safety glasses or goggles) to shield against flying debris.
- Work Area: Keep your work area clean, well-lit, and free from clutter. Ensure adequate ventilation, especially when working with materials that produce dust or fumes.
- Secure Workpiece: Always secure your workpiece with clamps or a vise to prevent movement during operation. Never hold the workpiece by hand.
- Proper Attire: Avoid loose clothing, jewelry, or long hair that could get caught in moving parts.
- Tool Condition: Inspect the tool and accessories before each use for any damage. Do not use if any part is damaged.
- Electrical Safety: Ensure the power cord is intact and avoid operating in wet conditions. Disconnect the tool from the power source before changing accessories or performing maintenance.
- Avoid Overloading: Do not force the tool. Let the tool work at its intended speed and power.
- Keep Clear: Keep hands and fingers away from rotating accessories.
3. Package Contents
Your Katerk Professional Rotary Tool Set includes the following components:
- Katerk Rotary Tool (Model S1J-FE7-10)
- Flexible Shaft Attachment
- Cutting Guide Attachment
- Protective Shield Attachment
- Wrench and Collets
- 155-Piece Accessory Kit (including grinding stones, polishing pads, cutting wheels, drilling bits, sanding drums, carving/engraving bits, and more)
- Durable Storage Case
- User Manual

Figure 1: Overview of the Katerk Rotary Tool Set and its 155 accessories.
4. Setup & Assembly
4.1 Tool Overview

Figure 2: Key features and components of the Katerk Rotary Tool.
4.2 Attaching/Detaching Accessories
The Katerk Rotary Tool features a 1/8" chuck for broad compatibility with various accessories.
- Press and hold the spindle lock button.
- Loosen the collet nut using the provided wrench.
- Insert the accessory shank fully into the collet.
- Tighten the collet nut securely with the wrench while holding the spindle lock button. Do not overtighten.

Figure 3: Installation of Grinder Heads, Drill Bits, or Brushes.

Figure 4: Installation of Sanding Bands.

Figure 5: Installation of Cutting Blades.
4.3 Installing the Flexible Shaft
The flexible shaft provides enhanced control for intricate and detailed work.
- Remove the locking cap from the main rotary tool.
- Loosen the collet nut and align the flexible shaft with the rotary tool's chuck.
- Securely screw the flexible shaft onto the rotary tool.
- Attach the required accessory to the other end of the flexible shaft and tighten with a collet wrench.

Figure 6: Flexible Shaft Installation Steps.
4.4 Balancing Accessories
For optimal performance and reduced vibration, especially with larger accessories or precision work, balancing is crucial.
- Slightly loosen the collet nut to allow the accessory to move freely.
- Give the accessory a quarter turn.
- Re-tighten the collet nut.
- Run the rotary tool and judge the balance by sound and feel. Adjust as needed until optimal balance is achieved.

Figure 7: Steps for Balancing Accessories.
4.5 Attaching the Cutting/Drilling Guide
The cutting/drilling guide helps maintain consistent depth and angle for precise cuts and holes.
- Ensure the desired cutting or drilling bit is securely installed in the rotary tool.
- Slide the cutting/drilling guide over the tool's head and align it.
- Tighten the guide's screw to secure it in place. Adjust the depth as needed for your project.

Figure 8: Katerk Rotary Tool with Precision Cutting/Drilling Guide.
5. Operation
5.1 Power and Speed Control
The Katerk Rotary Tool features a 7-speed adjustment dial, allowing you to select the optimal RPM for different materials and tasks. Speeds range from 8,000 RPM to 35,000 RPM.
- Lower Speeds (1-3): Ideal for polishing, delicate carving, and working with softer materials.
- Medium Speeds (4-5): Suitable for sanding, grinding, and general engraving.
- High Speeds (6-MAX): Best for cutting, drilling, and working with harder materials.
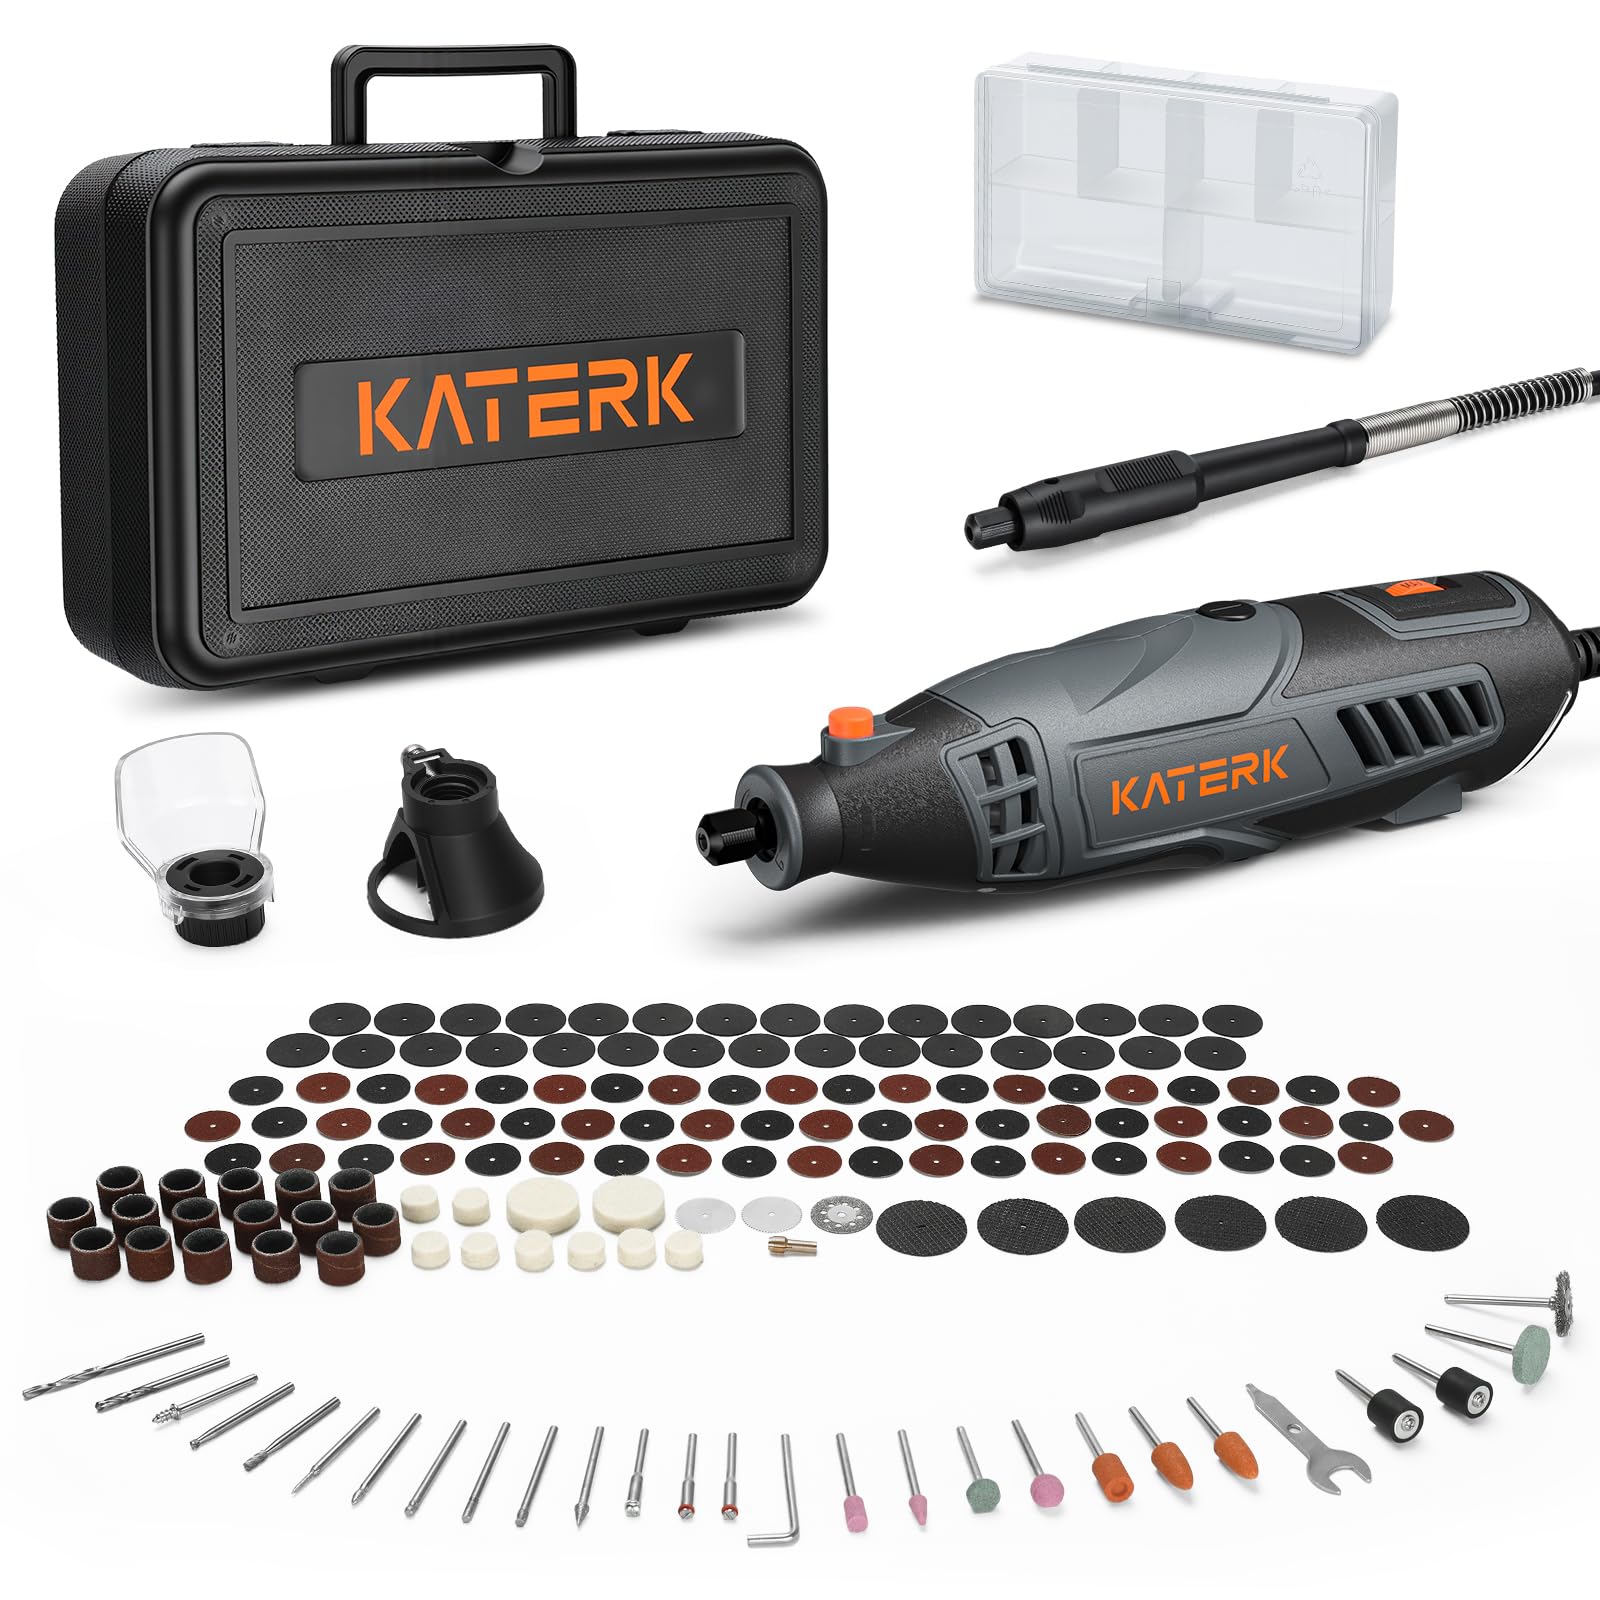
Figure 9: Power and 7-Speed Adjustment Dial.

Figure 10: Internal view showing Power & Precision Control.
5.2 Using the Flexible Shaft
The flexible shaft transforms your rotary tool into a pen-like instrument, offering superior control for fine detail work, especially in tight spaces. This is particularly useful for intricate carving, jewelry repair, and model building.

Figure 11: Using the Flexible Shaft for Precision.
5.3 Using the Cutting Guide
The protective shield and cutting guide enhance safety and precision when performing cutting operations, preventing debris from flying towards the user.

Figure 12: Rotary Tool with Protective Shield for Cutting.
5.4 Common Applications
The Katerk Rotary Tool is suitable for a variety of tasks:
- Drilling: Achieve accurate holes in wood and plastic with the drilling guide.
- Cutting: Cut metal and other materials with confidence using the appropriate cutting discs and safety cover.
- Sanding: Smooth, prepare, or refine wood, plastic, and metal surfaces.
- Polishing: Restore luster on metal, plastic, glass, and more for flawless finishes.
- Cleaning: Effectively remove rust from metal surfaces and restore items.

Figure 13: Drilling with the Rotary Tool.

Figure 14: Cutting with the Rotary Tool.

Figure 15: Sanding with the Rotary Tool.

Figure 16: Polishing with the Rotary Tool.

Figure 17: Cleaning with the Rotary Tool.
Video 1: Demonstrates the Katerk Rotary Tool's precision and power across various applications, including cutting, carving with the flex shaft, and using the cutting guide.
6. Maintenance
6.1 Replacing Carbon Brushes
The Katerk Rotary Tool is designed with replaceable carbon brushes to extend its service life. Refer to the tool's diagram (Figure 2) for the location of the carbon brush covers. When the tool's performance decreases or it stops working, the carbon brushes may need replacement. Always use genuine Katerk replacement brushes.
6.2 General Cleaning
Regular cleaning ensures optimal performance and longevity of your tool.
- Disconnect the tool from the power source before cleaning.
- Use a soft brush or compressed air to clean dust and debris from the ventilation openings.
- Wipe the tool's body with a clean, damp cloth. Do not use harsh chemicals or abrasive cleaners.
- Clean accessories after each use to maintain their effectiveness.
7. Troubleshooting
If you encounter issues with your Katerk Rotary Tool, refer to the following common troubleshooting tips:
- Tool Not Starting: Ensure the power cord is securely plugged in and the power switch is in the 'ON' position. Check the power outlet.
- Reduced Power/Performance: The carbon brushes may be worn and require replacement. Ensure accessories are clean and not dull.
- Excessive Vibration: Check if the accessory is properly balanced (refer to Section 4.4) and securely tightened in the collet. Ensure the accessory is not bent or damaged.
- Overheating: Ensure the ventilation channels are clear of debris. Avoid prolonged heavy-duty use without breaks.
- Accessory Slipping: Ensure the collet nut is tightened securely and the accessory shank is fully inserted.
If the problem persists, please contact Katerk customer support.
8. Specifications
| Feature | Specification |
|---|---|
| Brand | Katerk |
| Model Number | S1J-FE7-10 |
| Power Source | Corded Electric |
| Voltage | 120 Volts |
| Wattage | 160 Watts |
| Maximum Rotational Speed | 35,000 RPM |
| Minimum Speed | 8,000 RPM |
| Speed Adjustment | 7-Speed Dial |
| Chuck Size | 1/8 inch (Universal Fit) |
| Item Weight | 4.11 pounds |
| Included Components | Rotary Tool, Flexible Shaft, Cutting Guide, Protective Shield, 155 Accessories, Storage Case |
9. Warranty & Support
For warranty information, technical support, or replacement parts, please contact Katerk customer service through their official website or the retailer where the product was purchased. Keep your purchase receipt as proof of purchase.