1. Introduction
Thank you for choosing the COUPLUX CP6200SU Professional 4-in-1 Espresso Machine. This manual provides essential information for the safe and efficient operation, maintenance, and troubleshooting of your new espresso machine. Please read this manual thoroughly before first use and keep it for future reference.
2. Safety Instructions
Always follow basic safety precautions when using electrical appliances to reduce the risk of fire, electric shock, and injury to persons.
- Read all instructions before operating the appliance.
- Do not touch hot surfaces. Use handles or knobs.
- To protect against fire, electric shock, and injury to persons, do not immerse cord, plugs, or appliance in water or other liquid.
- Close supervision is necessary when any appliance is used by or near children.
- Unplug from outlet when not in use and before cleaning. Allow to cool before putting on or taking off parts, and before cleaning the appliance.
- Do not operate any appliance with a damaged cord or plug or after the appliance malfunctions, or has been damaged in any manner.
- The use of accessory attachments not recommended by the appliance manufacturer may result in fire, electric shock, or injury to persons.
- Do not use outdoors.
- Do not let cord hang over edge of table or counter, or touch hot surfaces.
- Do not place on or near a hot gas or electric burner, or in a heated oven.
- Always attach plug to appliance first, then plug cord into the wall outlet. To disconnect, turn any control to 'off', then remove plug from wall outlet.
- Do not use appliance for other than intended use.
3. Package Contents
Your COUPLUX CP6200SU Espresso Machine package includes the following items:

Image: COUPLUX CP6200SU Espresso Machine with all included accessories laid out on a wooden counter, including portafilter, filters, tamper, milk frothing pitcher, and cleaning tools.
- 1 x Espresso Machine
- 1 x Removable Water Tank
- 1 x Detachable Bean Hopper
- 1 x Milk Frothing Pitcher
- 1 x Removable Drip Tray
- 1 x Stainless Steel Tamper
- 1 x Portafilter (58mm)
- 1 x Single-Wall Filter (1 Cup)
- 1 x Single-Wall Filter (2 Cup)
- 1 x Dual-Wall Filter (2 Cup)
- 1 x Dosing Funnel
- 1 x Silicone Bellow Air Blower
- 1 x Cleaning Brush
- 1 x Blind Disk
4. Product Overview
The COUPLUX CP6200SU is an all-in-one espresso machine designed for consistent grinds, optimal pressure, stable temperature control, and barista-quality microfoam.
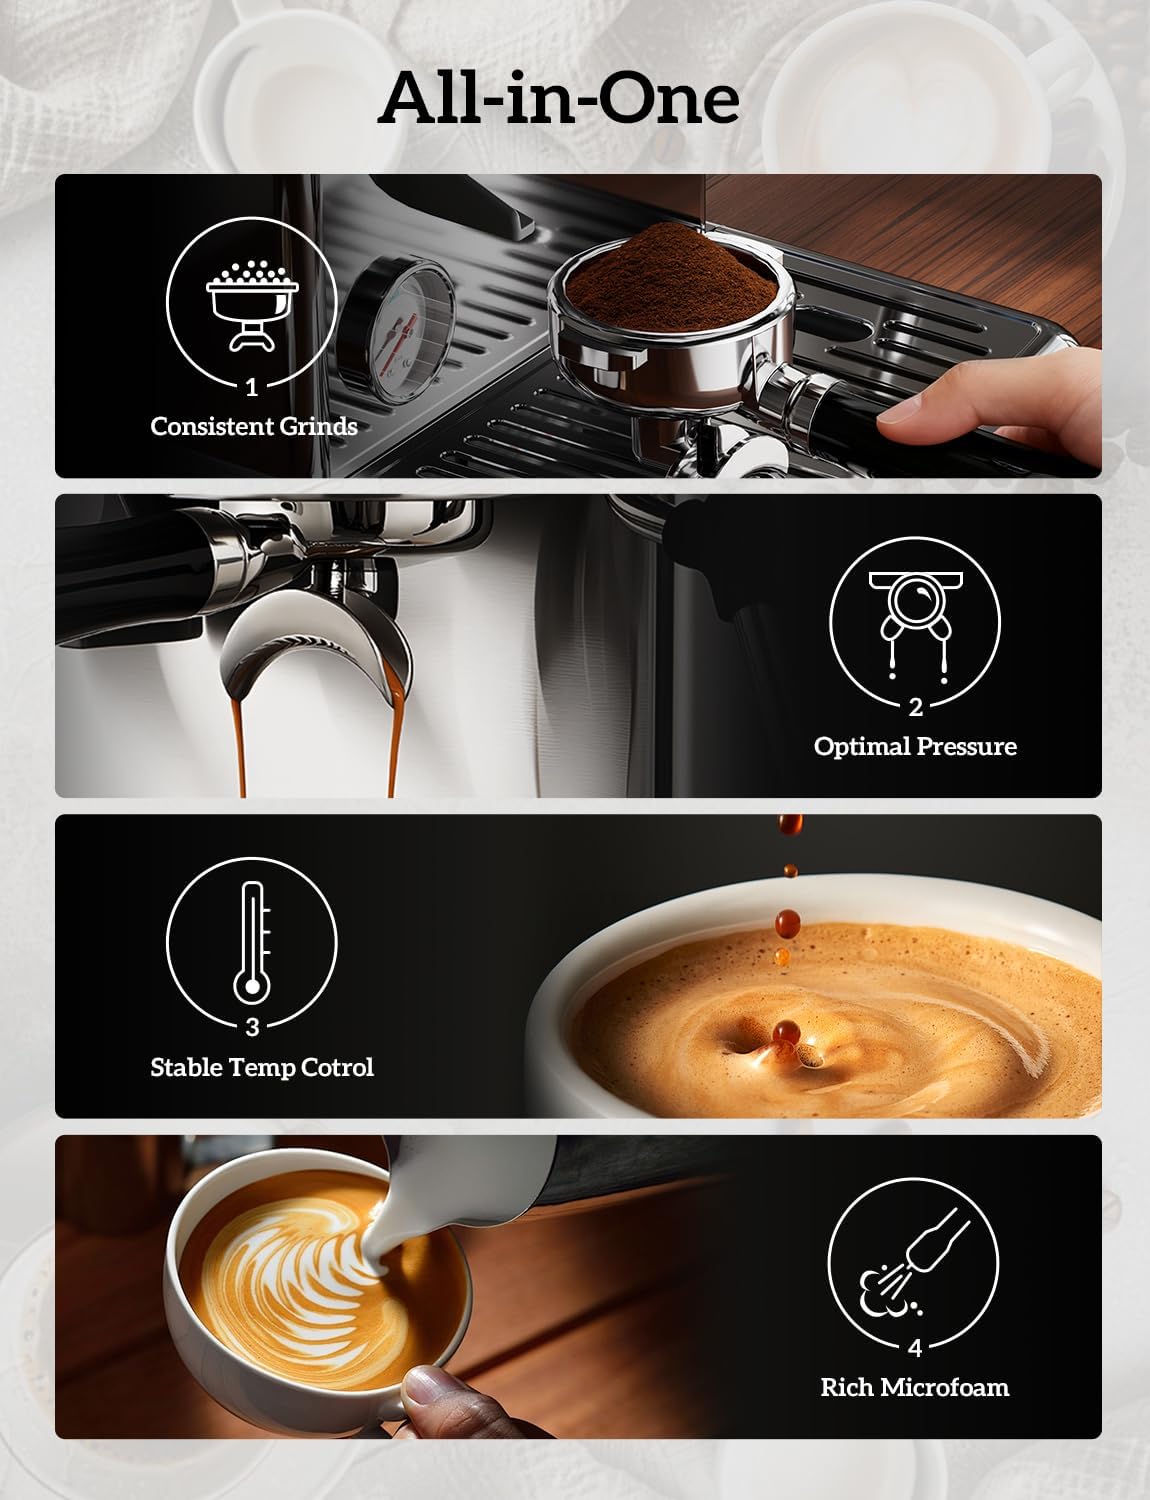
Image: Diagram illustrating the four core capabilities of the COUPLUX espresso machine: Consistent Grinds, Optimal Pressure, Stable Temperature Control, and Rich Microfoam.
4.1 Key Features
- Integrated Burr Grinder: Features an upgraded conical burr system with 30 precise grind settings.
- Professional 58MM System: Includes a 58mm stainless steel group head and portafilter, with a 15-bar Italian pump.
- One-Touch Operation: Effortless brewing with selections for Americano, espresso, and hot water.
- Barista-Level Microfoam: Upgraded 10MM commercial steam wand for stronger, drier steam.
- Precise Temperature Control: 5 levels of brewing temperatures from 191°F to 205°F.
Video: An overview of the COUPLUX 4-IN-1 Espresso Machine with Grinder, demonstrating its key features and ease of use.
5. Setup
5.1 Initial Cleaning
Before first use, clean all removable parts and accessories (water tank, bean hopper, portafilter, filter baskets, milk frothing pitcher) with warm water and mild dish soap. Rinse thoroughly. Wipe the drip tray and exterior of the unit with a soft, damp cloth and dry thoroughly.
5.2 Water Tank Installation
- Remove the water tank located at the back of the machine.
- Fill the water tank with cold, filtered water. Do not exceed the MAX line.
- Replace the tank firmly into its position.
5.3 Bean Hopper & Grinder Assembly

Image: Close-up of the upgraded conical burr grinder system, highlighting the 30 grind settings and the detachable burr for easy cleaning.
- Place the detachable bean hopper onto the grinder. Ensure it is securely locked.
- Fill the bean hopper with fresh coffee beans.
- Adjust the grind setting by rotating the bean hopper. Start at setting 10 and adjust as needed for your preferred coffee type.
5.4 Portafilter Assembly
- Select the desired filter basket (1-cup, 2-cup single-wall, or 2-cup dual-wall) and insert it into the 58mm portafilter.
- Ensure the filter basket is completely dry before placing it in the portafilter.
6. Operating Instructions
6.1 Grinding & Dosing
- Place the portafilter with the dosing funnel (if desired) into the grinding cradle.
- Rotate the adjustment knob to select the desired grind time.
- Press the grind button to start grinding. The machine will automatically stop after the set time.
- Remove the portafilter from the cradle. Tap the portafilter gently to settle the grounds.
- Use the provided tamper to tamp the coffee grounds with approximately 30lbs of pressure.
6.2 Brewing Espresso

Image: Close-up of espresso extraction, highlighting the 58mm commercial system and the pressure gauge.
- Insert the portafilter into the group head. Align the handle with the INSERT position and rotate it towards the center until resistance is felt.
- Place your cup(s) under the portafilter spouts.
- Press the Espresso button (single or double shot) to begin extraction. The machine will pre-infuse for 2 seconds, pause for 3 seconds, then continue extraction.
- Extraction stops automatically when the preset time is reached. You can also press the button again to stop manually.
- Monitor the pressure gauge during extraction. Optimal pressure is typically within the blue zone.
6.3 One-Touch Americano & Hot Water

Image: The espresso machine's display showing one-touch options for Americano, Espresso, and Hot Water, with prepared beverages.
- To make an Americano, first brew an espresso shot as described above.
- Then, press the Hot Water button. The machine will dispense hot water for a preset time to create an Americano.
- To dispense hot water only, press the Hot Water button.
6.4 Precise Temperature Control

Image: The espresso machine's control panel showing temperature adjustment options, ranging from 191°F to 205°F for customized coffee flavor.
- Long press the Espresso button for 3 seconds to enter temperature adjustment mode.
- Rotate the adjustment knob to select your desired brewing temperature (191°F, 194°F, 198°F, 201°F, 205°F).
- Press the adjustment knob to confirm your selection.
6.5 Milk Frothing

Image: The 10MM commercial steam wand in action, designed for creating silky microfoam for latte art.
- Fill the milk frothing pitcher with cold milk (dairy or non-dairy).
- Position the steam wand into the milk.
- Turn the steam lever to the ON position to start steaming.
- Move the pitcher up and down to create microfoam.
- Once desired texture and temperature are reached, turn the steam lever to the OFF position.
- Wipe the steam wand immediately with a damp cloth after use to prevent milk residue buildup.
7. Maintenance
7.1 Cleaning the Grinder
- Ensure the bean hopper is empty.
- Remove the bean hopper and the upper burr.
- Use the cleaning brush to remove any residual coffee grounds from the burrs and the grinding chamber.
- Reassemble the grinder components.
7.2 Cleaning the Portafilter and Filter Baskets
- After each use, remove the portafilter and discard the used coffee grounds.
- Rinse the portafilter and filter basket under hot water.
- For deeper cleaning, use the blind disk with a cleaning tablet (not included) and backflush the group head according to the instructions in the full manual.
7.3 Cleaning the Steam Wand
- Immediately after frothing milk, wipe the steam wand with a damp cloth.
- Purge the steam wand briefly to clear any residual milk from inside.
7.4 Cleaning the Drip Tray
- The drip tray should be emptied and cleaned regularly.
- Remove the drip tray and grid, wash with warm soapy water, rinse, and dry.
7.5 Descaling
Regular descaling is crucial to maintain machine performance and extend its lifespan. Refer to the full manual for detailed descaling instructions and recommended descaling solutions.
8. Troubleshooting
If you encounter issues with your espresso machine, please refer to the following common troubleshooting steps:
| Problem | Possible Cause | Solution |
|---|---|---|
| No water comes out | Water tank empty or not properly seated; air trapped in pump. | Fill/reseat water tank. Purge air by running hot water or steam. |
| Espresso extracts too slowly or not at all | Coffee grounds too fine or tamped too hard; clogged filter. | Adjust grind setting coarser; reduce tamping pressure; clean filter. |
| Espresso extracts too fast | Coffee grounds too coarse or not enough coffee; insufficient tamping. | Adjust grind setting finer; increase coffee dose; increase tamping pressure. |
| Steam wand not producing steam | Steam wand clogged; machine not heated to steam temperature. | Clean steam wand nozzle; wait for machine to reach steam temperature. |
For more detailed troubleshooting, please consult the comprehensive user manual or contact customer support.
9. Specifications
| Feature | Detail |
|---|---|
| Brand | COUPLUX |
| Model Number | CP6200SU |
| Product Dimensions | 12.4"D x 10.7"W x 15.8"H |
| Item Weight | 13.6 pounds |
| Capacity | 2.1 Liters (Water Tank) |
| Voltage | 120 Volts |
| Operation Mode | Semi-Automatic |
| Pressure Pump | 15 Bar Italian Pump |
| Grinder Type | Conical Burr Grinder |
| Grind Settings | 30 Precise Settings |
| Brewing Temperature | 5 Levels (191°F to 205°F) |
| Steam Wand | 10MM Commercial Steam Wand |
| Portafilter Size | 58MM Stainless Steel |
| Display Type | OLED |
10. Warranty & Support
COUPLUX offers a 1-year service commitment for this espresso machine. If you have any questions, concerns, or require assistance, please do not hesitate to contact our friendly customer support team. We aim to respond within 24 hours to help you brew better.
For further assistance, please visit the COUPLUX Store on Amazon.