Introduction
Thank you for purchasing the Delmodes 8K 64MP Camcorder. This manual provides detailed instructions for the setup, operation, maintenance, and troubleshooting of your new device. Please read this manual carefully before use to ensure optimal performance and longevity of your camcorder.
The Delmodes 8K 64MP Camcorder is designed to capture high-quality video and photos, featuring 8K video resolution, 64MP image resolution, 18X digital zoom, Wi-Fi connectivity, and IR night vision. It is suitable for various applications, from vlogging to capturing family events.
Package Contents
Please check the package contents upon opening to ensure all items are present:
- 1 x Delmodes 8K Camcorder
- 1 x 32GB SD Card
- 2 x Lithium Batteries
- 1 x 2.4G Remote Control
- 1 x USB Cable
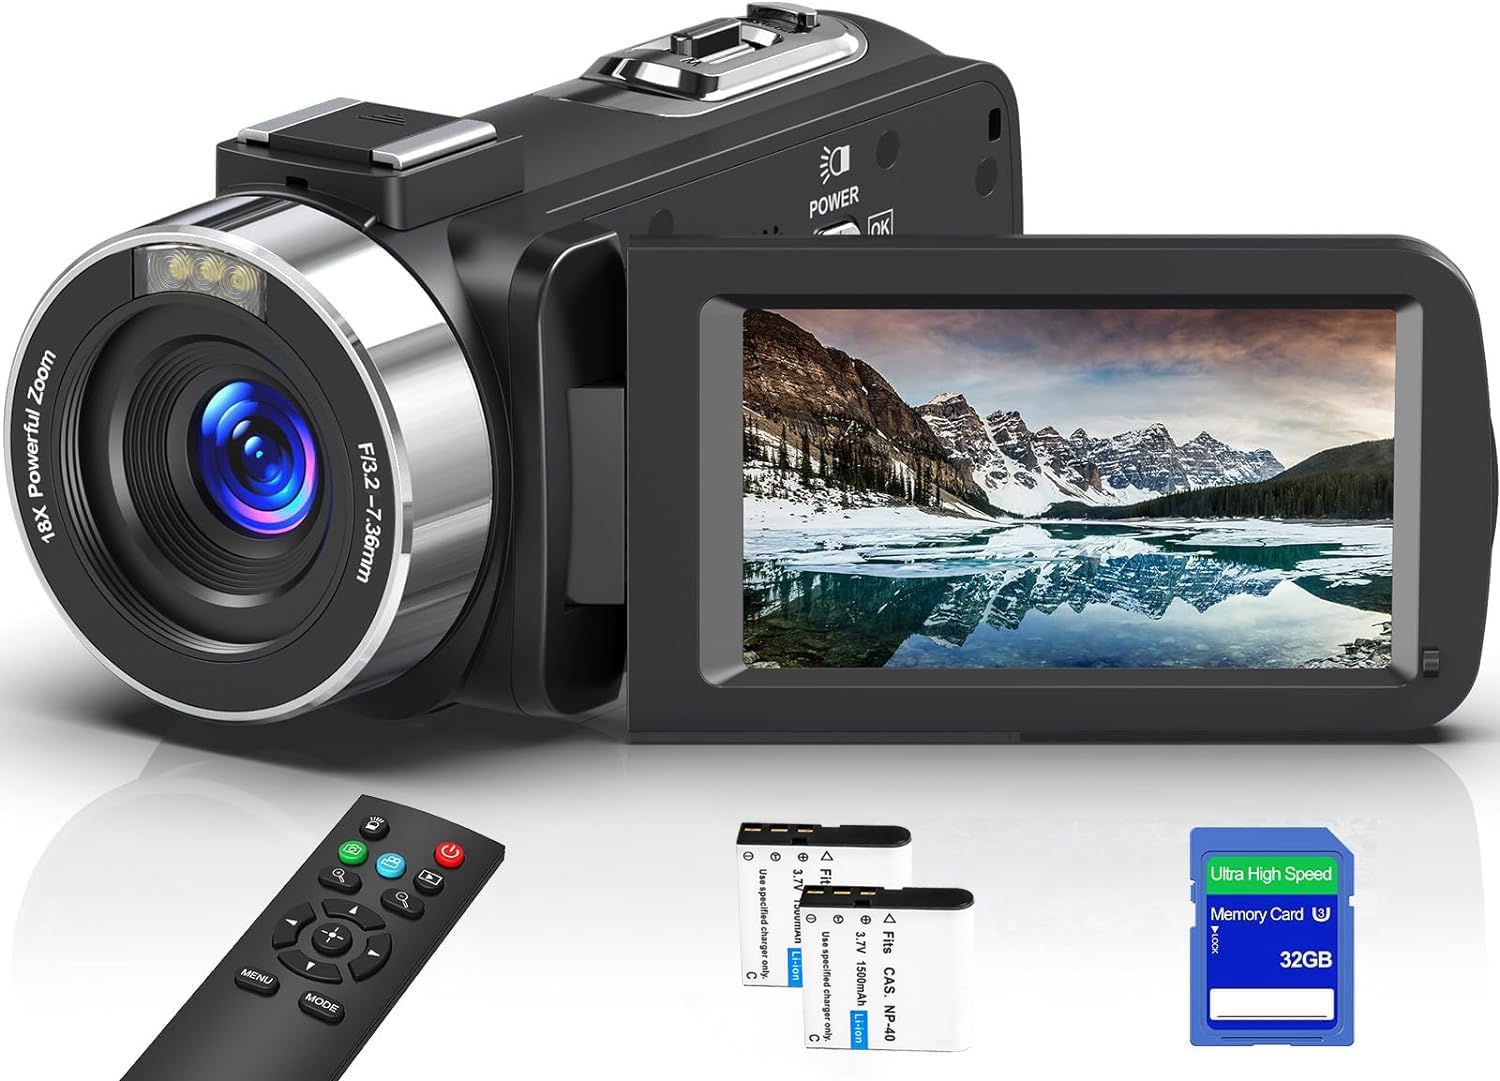
Image: The Delmodes 8K 64MP Camcorder shown with its included accessories, including the camcorder unit, remote control, and cables.
Setup Guide
1. Charging the Battery
Before first use, fully charge both lithium batteries. Insert a battery into the camcorder and connect the camcorder to a power source using the provided USB cable. The charging indicator will illuminate. A full charge typically takes several hours.
2. Inserting the SD Card
Open the SD card slot cover. Insert the 32GB SD card (or another compatible SD card, Class 10 or higher, 32-256GB) into the slot with the metal contacts facing the front of the camcorder until it clicks into place. Close the cover.
Important: The camcorder may prompt you to format the SD card upon first insertion or if a new card is detected. Always format new SD cards using the camcorder's menu to ensure compatibility and optimal performance. Formatting will erase all data on the card.
3. Powering On/Off
To power on the camcorder, open the LCD screen. To power off, close the LCD screen or press and hold the power button.
4. Remote Control Setup
The 2.4G remote control comes pre-paired. Ensure the battery in the remote control is functional. The remote allows for control up to 15 meters (60 feet) without direct line of sight.

Image: The camcorder displaying its 3.0-inch touch screen and the included 2.4G remote control, highlighting its 360-degree control capability.
Operating Instructions
1. Basic Video Recording and Photo Capture
Once powered on, the camcorder is typically in video recording mode. Press the REC/STOP button to start recording. Press it again to stop. To switch to photo mode, navigate through the menu using the touch screen or physical buttons. Press the Photo button to capture a still image.

Image: The camcorder's main view, illustrating its 8K and 64MP capabilities, with a clear display of the screen interface during recording and various camera angles.
2. Zoom Operation
The camcorder features an 18X digital zoom. Use the zoom lever (usually located near the top of the camcorder) to zoom in or out. Digital zoom magnifies the image electronically, which may reduce image quality at higher zoom levels.

Image: A visual representation of the camcorder's 18X digital zoom, showing the difference between unzoomed and digitally zoomed images of a lighthouse.
3. IR Night Vision and Fill Light
For low-light conditions, activate the IR Night Vision mode to capture clear black and white footage. The camcorder also includes a fill light for improved visibility in dark environments. These functions can be toggled via the camcorder's menu settings.

Image: Comparison shots demonstrating the effect of the fill light (on/off) and IR night vision (on/off) in low-light scenarios, showing the camcorder's ability to capture clear images in darkness.
4. Wi-Fi Connection and "Hello Cam" App
Connect your camcorder to a smartphone or tablet via Wi-Fi using the "Hello Cam" application (available for Android and iOS). This allows for remote control of the camcorder, live view, and direct transfer of photos and videos to your mobile device.
To connect:
- Download and install the "Hello Cam" app on your mobile device.
- Enable Wi-Fi on the camcorder via its menu.
- On your mobile device, connect to the camcorder's Wi-Fi network (SSID will be displayed on the camcorder screen).
- Open the "Hello Cam" app to establish the connection.

Image: The camcorder connected to a TV via HDMI and demonstrating Wi-Fi connectivity with a smartphone, showing the "Hello Cam" app interface and a QR code for app download. The QR code links to https://qr04.cn/B9lhOx.
5. Webcam and HDMI Output
The camcorder can function as a webcam when connected to a computer via the USB cable. Select "PC Cam" mode on the camcorder when prompted. It is compatible with Windows 7/8/10/11 and MAC systems.
For viewing content on a larger screen, connect the camcorder to a TV or monitor using an HDMI cable (not included). This allows for direct playback of your recorded videos and photos.
6. Multifunctional Features
The camcorder offers several advanced features:
- Time-lapse Photography: Capture events over a long period and condense them into a short video.
- Slow Motion: Record high-speed actions in slow motion for detailed analysis.
- Loop Recording: Continuously record, overwriting the oldest files when the memory card is full.
- Burst Photos: Capture a rapid sequence of still images.
- Selfie Mode: Utilize the rotatable screen for easy self-recording.
- Motion Detection: Automatically start recording when motion is detected.
- Filters: Apply various color filters (Normal, Negative Gray, Sepia, Brown, Warm, Cold, Vivid, Red, Green, Blue) to your photos and videos.
- Recording While Charging: The camcorder supports recording while connected to a power source.

Image: A collage illustrating the camcorder's diverse functionalities, including burst photography, video playback, loop recording, selfie mode, slow motion, and time-lapse photography.
Maintenance
1. Cleaning the Camcorder
- Use a soft, dry cloth to clean the camcorder body.
- For the lens, use a specialized lens cleaning cloth and solution. Avoid touching the lens with your fingers.
- Clean the LCD screen with a soft, lint-free cloth.
- Do not use strong detergents or solvents.
2. Battery Care
- Store batteries in a cool, dry place when not in use.
- Avoid exposing batteries to extreme temperatures.
- Do not short-circuit battery terminals.
- If the camcorder will not be used for an extended period, remove the battery.
3. Storage
Store the camcorder in a dry, dust-free environment, away from direct sunlight and extreme temperatures. Use the provided carrying case or a padded bag for protection during transport.
Troubleshooting
| Problem | Possible Cause | Solution |
|---|---|---|
| Camcorder does not power on. | Battery is depleted or incorrectly inserted. | Ensure battery is fully charged and correctly inserted. Try using the second battery. |
| Cannot record video/take photos. | SD card is full, not inserted, or not formatted. | Insert a compatible SD card, format it via the menu, or delete unnecessary files to free up space. |
| Poor image/video quality. | Lens is dirty, insufficient lighting, or incorrect settings. | Clean the lens. Ensure adequate lighting or use IR Night Vision/Fill Light. Check resolution settings. |
| Wi-Fi connection fails. | Incorrect Wi-Fi settings or app issues. | Ensure Wi-Fi is enabled on the camcorder. Reinstall the "Hello Cam" app. Check your mobile device's Wi-Fi settings. |
| Remote control not working. | Remote battery is dead or out of range. | Replace the remote control battery. Ensure you are within the 15-meter operating range. |
Specifications
| Feature | Detail |
|---|---|
| Video Resolution | 8K (7168x4032p)/15fps, 6K (5760x3240p)/30fps, 5K (5120x2880p)/30fps, 4.7K (4608x2592p)/30fps, 4K (3840x2160p)/(60/30fps), 2.7K (2688x1520p)/30fps, FHD (1920x1080p)/(60/30fps), HD (1280x720p)/(120/60/30fps) |
| Video Format | MP4 |
| Image Resolution | 64MP/56MP/48MP/30MP/24MP/20MP/12MP/8MP |
| Image Format | JPG |
| Digital Zoom | 18X |
| Display | 3.0-inch UHD Touch Screen |
| Wi-Fi | Supported |
| HD Output | HDMI Interface |
| Lens | F/3.2, f=7.36mm |
| White Balance | Auto/Sunny/Cloudy/Tungsten/Fluorescent |
| Exposure | -3.0 EV to +3.0 EV |
| Self-Timer | 3s/5s/10s/20s |
| Auto Power Off | Off/60s/180s/300s/600s |
| Filters | Normal, Negative Gray, Sepia, Brown, Warm, Cold, Vivid, Red, Green, Blue |
| Supported Storage | SD Card (32GB-256GB, Class 10 or higher) |
| Battery Type | Lithium-ion |
| Compatible Devices | Smartphone, Tablet, Laptop, Personal Computer, Television |
| Dimensions (Package) | 8 x 8 x 6 cm; 500 grams |
| Water Resistance | Not waterproof |
Warranty Information
This Delmodes camcorder comes with a manufacturer's warranty of 1 year from the date of purchase. Please retain your proof of purchase for warranty claims. The warranty covers defects in materials and workmanship under normal use. It does not cover damage caused by misuse, accidents, unauthorized modifications, or natural disasters.
For detailed warranty terms and conditions, please refer to the warranty card included in your package or contact customer support.
Customer Support
If you encounter any issues or have questions regarding your Delmodes 8K 64MP Camcorder that are not addressed in this manual, please contact our customer support team. Please have your model number (8K) and purchase information ready when contacting support.
Contact information for customer support can typically be found on the product packaging, the official Delmodes website, or your purchase receipt.