1. Introduction
This manual provides comprehensive instructions for the Generic 250W Household Four Thread Lockstitch Overlock Sewing Machine (Model GJ00331). It covers essential information for safe setup, operation, maintenance, and troubleshooting, ensuring optimal performance for home use sewing projects. Please read this manual thoroughly before operating the machine to ensure safe and efficient use.

Figure 1: Overview of the Generic 250W Household Four Thread Lockstitch Overlock Sewing Machine.
2. Safety Instructions
Always follow basic safety precautions when using electrical appliances to reduce the risk of fire, electric shock, or injury to persons.
- Read all instructions before using the machine.
- Keep fingers away from all moving parts. Special care is required around the sewing machine needle.
- Always unplug the sewing machine from the electrical outlet when removing covers, lubricating, or when making any other user servicing adjustments mentioned in the instruction manual.
- Never operate the sewing machine if it has a damaged cord or plug, if it is not working properly, or if it has been dropped or damaged.
- Do not use outdoors.
- Never drop or insert any object into any opening.
3. Product Overview
3.1 Key Features
- Power Options: Available in 180W, 250W, and 300W variants to suit different sewing needs. This specific model is 250W.
- Four-Thread Lockstitch: Capable of producing durable and professional four-thread overlock stitches.
- Adjustable Stitch Settings: Foot length adjustable from 1-4 mm, and stitch width from 4.7-5.7 mm.
- High Speed: Maximum sewing speed of 1200 rpm for efficient work.
- Needle System: Uses DP5X80-95 needles, with a total of 4 needles for overlock stitching.
- Presser Foot Height: 3 mm presser foot height.
3.2 Components
Familiarize yourself with the main components of your overlock sewing machine.

Figure 2: White 250W Four-Wire Overlock Sewing Machine with LED Light Motor and external controller.
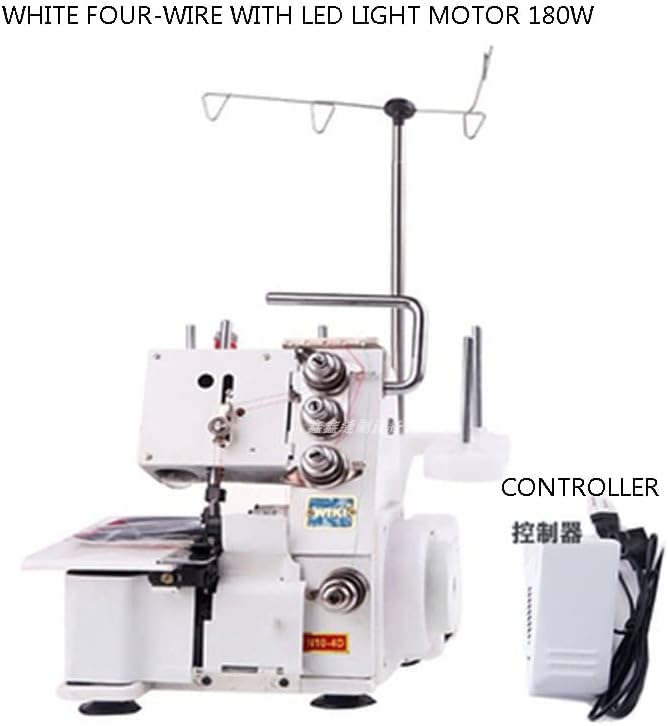
Figure 3: White 180W Four-Wire Overlock Sewing Machine with LED Light Motor and external controller.
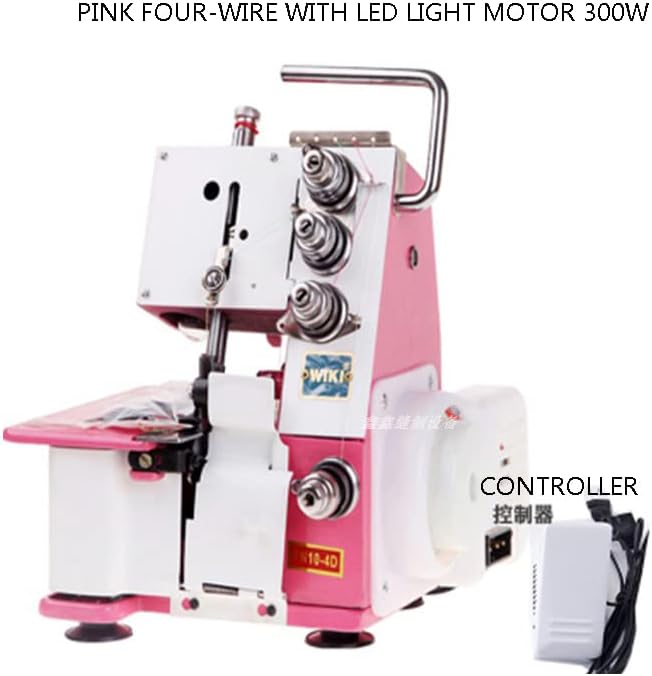
Figure 4: Pink 300W Four-Wire Overlock Sewing Machine with LED Light Motor and external controller.

Figure 5: Overlock Sewing Machine with thread spools mounted on the thread stand.
4. Setup
4.1 Unpacking and Placement
- Carefully remove the machine from its packaging. The package weighs approximately 11 kg.
- Place the machine on a stable, level surface. Ensure there is adequate space around the machine for fabric handling.
- Connect the foot controller and power cord to the machine and a suitable electrical outlet.
4.2 Threading the Machine
Correct threading is crucial for proper stitch formation. Refer to the threading diagram usually found on the machine or in a separate guide. This machine uses four threads.
- Place four spools of thread on the thread stand.
- Follow the numbered or color-coded threading path for each thread, guiding them through the tension discs, thread guides, and loopers, finally through the needles.
- Ensure all threads are seated correctly in their respective tension discs.
5. Operating Instructions
5.1 Basic Sewing Operation
- Raise the presser foot using the presser foot lifter.
- Place the fabric under the presser foot, aligning the edge with the cutting blade.
- Lower the presser foot.
- Gently press the foot controller to start sewing. Guide the fabric smoothly.
- After sewing, raise the presser foot and pull the fabric away from the needles, cutting the thread tails.
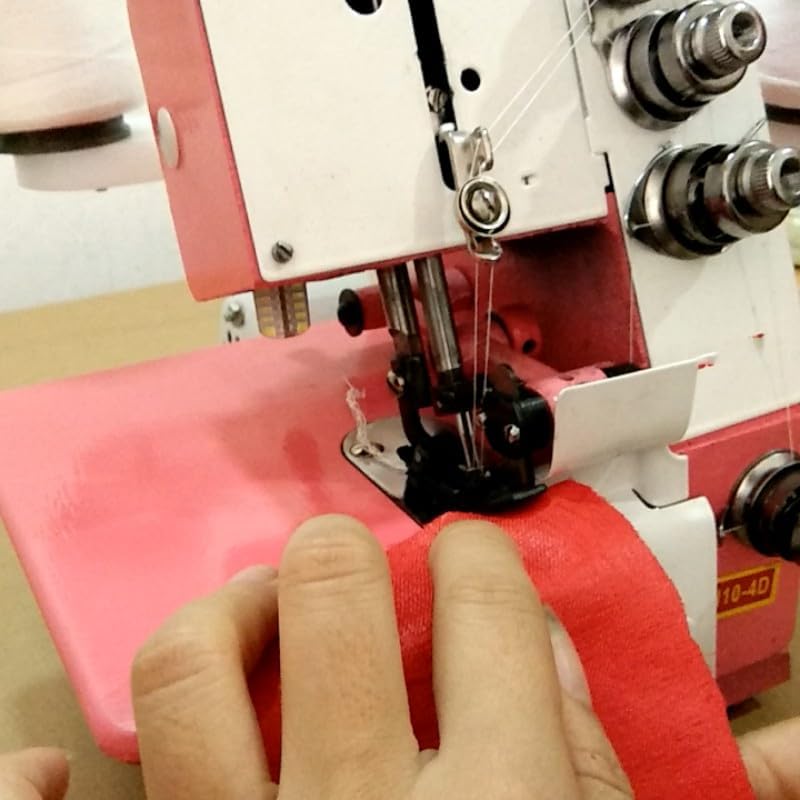
Figure 6: Fabric being guided through the overlock machine during sewing.
5.2 Adjusting Stitch Settings
The machine allows for adjustment of stitch length and width to suit different fabric types and desired finishes.
- Stitch Length: The foot length can be adjusted from 1 mm to 4 mm. Refer to the machine's dial or lever for stitch length adjustment.
- Stitch Width: The stitch width ranges from 4.7 mm to 5.7 mm. Adjust the cutting blade position or stitch finger as per machine design.
- Tension Adjustment: Each thread has a tension dial. Adjust tension as needed to achieve balanced stitches. Uneven stitches often indicate incorrect tension.
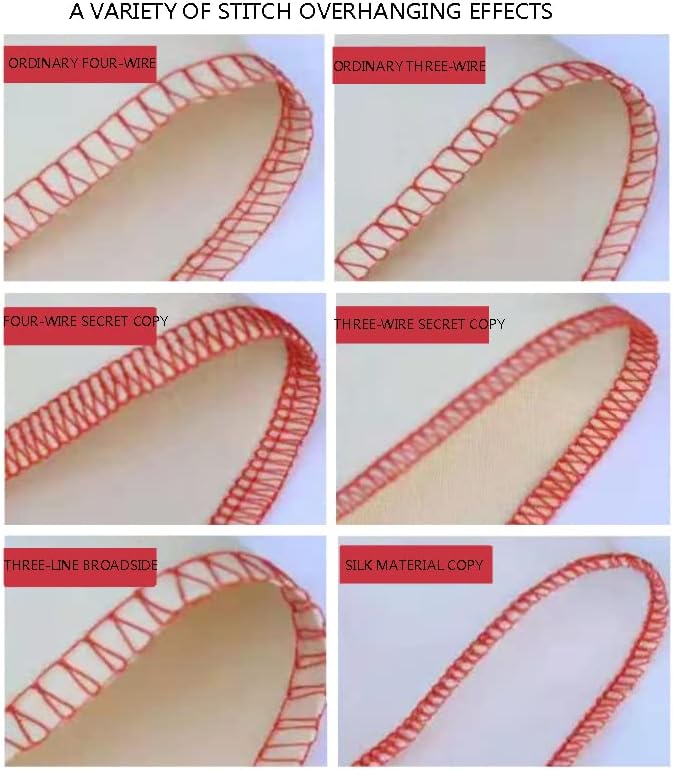
Figure 7: Examples of different stitch overhanging effects achievable with the machine, including ordinary four-wire, three-wire, secret copy, and three-line broadside.
6. Maintenance
Regular maintenance ensures the longevity and optimal performance of your sewing machine.
- Cleaning: Regularly clean lint and dust from the feed dogs, needle plate, and looper area using a brush. Unplug the machine before cleaning.
- Oiling: Apply a small amount of sewing machine oil to designated oiling points as indicated in the machine's specific diagram (if available).
- Needle Replacement: Replace needles frequently, especially when they become dull or bent. Use needle size DP5X80-95.
- Blade Maintenance: The cutting blades may need occasional cleaning or replacement if they become dull.
7. Troubleshooting
This section addresses common issues you might encounter. For problems not listed here, contact customer support.
| Problem | Possible Cause | Solution |
|---|---|---|
| Skipped Stitches | Incorrect needle insertion, bent needle, wrong needle type, improper threading. | Re-insert needle correctly, replace needle, ensure correct needle type (DP5X80-95), re-thread machine. |
| Thread Breakage | High thread tension, poor quality thread, burrs on thread path, incorrect threading. | Reduce tension, use good quality thread, check thread path for obstructions, re-thread. |
| Uneven Stitches | Incorrect tension settings, improper threading, dull needle. | Adjust tension dials, re-thread, replace needle. |
| Machine Not Starting | Power cord not plugged in, foot controller not connected, power switch off. | Check all power connections, ensure power switch is on. |
8. Specifications
| Model Number | GJ00331 |
| Power Options | 180W / 250W / 300W (This model: 250W) |
| Motor Power | 100W |
| Foot Length Adjustment | 1 - 4 mm |
| Stitch Width Range | 4.7 - 5.7 mm |
| Presser Foot Height | 3 mm |
| Needle Type | DP5X80-95 |
| Number of Needles | 4 |
| Maximum Sewing Speed | 1200 rpm |
| Approximate Package Weight | 11 kg |
| Date First Available | October 11, 2025 |
9. Warranty and Support
This product is manufactured by Generic. For specific warranty information and customer support, please refer to the documentation provided at the time of purchase or contact your retailer. Keep your purchase receipt as proof of purchase.
For technical assistance or inquiries, please contact the seller or manufacturer directly. Ensure you have your model number (GJ00331) and purchase details ready.