1. Introduction
This manual provides detailed instructions for the installation, operation, and maintenance of your Young Electric 1-Ebike Rack Hitch Mount with Ramp. Please read this manual thoroughly before installation and use to ensure safe and proper operation. This product is designed to transport one electric bicycle or conventional bicycle securely on a vehicle's hitch receiver.
2. Safety Information
- Always ensure the hitch rack is securely installed on your vehicle's hitch receiver before loading any bicycle.
- Do not exceed the maximum weight capacity of 100 lbs (45 kg) for the bike rack.
- Verify that all straps, cradles, and securing mechanisms are properly tightened and engaged before driving.
- Check local and state regulations regarding vehicle length, width, and visibility requirements when transporting bicycles.
- Be aware of the increased length and width of your vehicle when the bike rack is installed, especially when backing up or maneuvering in tight spaces.
- Regularly inspect the rack for any signs of wear, damage, or loose components. Do not use if damaged.
- Keep hands and fingers clear of moving parts during installation, folding, and operation.
- Remove any loose items from the bicycle before transport, such as water bottles, bags, or child seats.
3. Package Contents
Please ensure all components are present before beginning installation. If any parts are missing or damaged, contact customer support.
- Main Hitch Rack Assembly
- Loading Ramp
- M16 Anti-Rattle Lock Hitch Pin with Keys
- Adjustable Arm Bar
- Front Wheel Cradle
- Adjustable Sliders (pre-installed)
- Wheel Straps
- User Manual
4. Setup and Installation
4.1 Attaching the Rack to Your Vehicle Hitch
- Insert the main hitch rack assembly into your vehicle's hitch receiver.
- Align the hitch pin hole on the rack with the hole on your vehicle's hitch receiver.
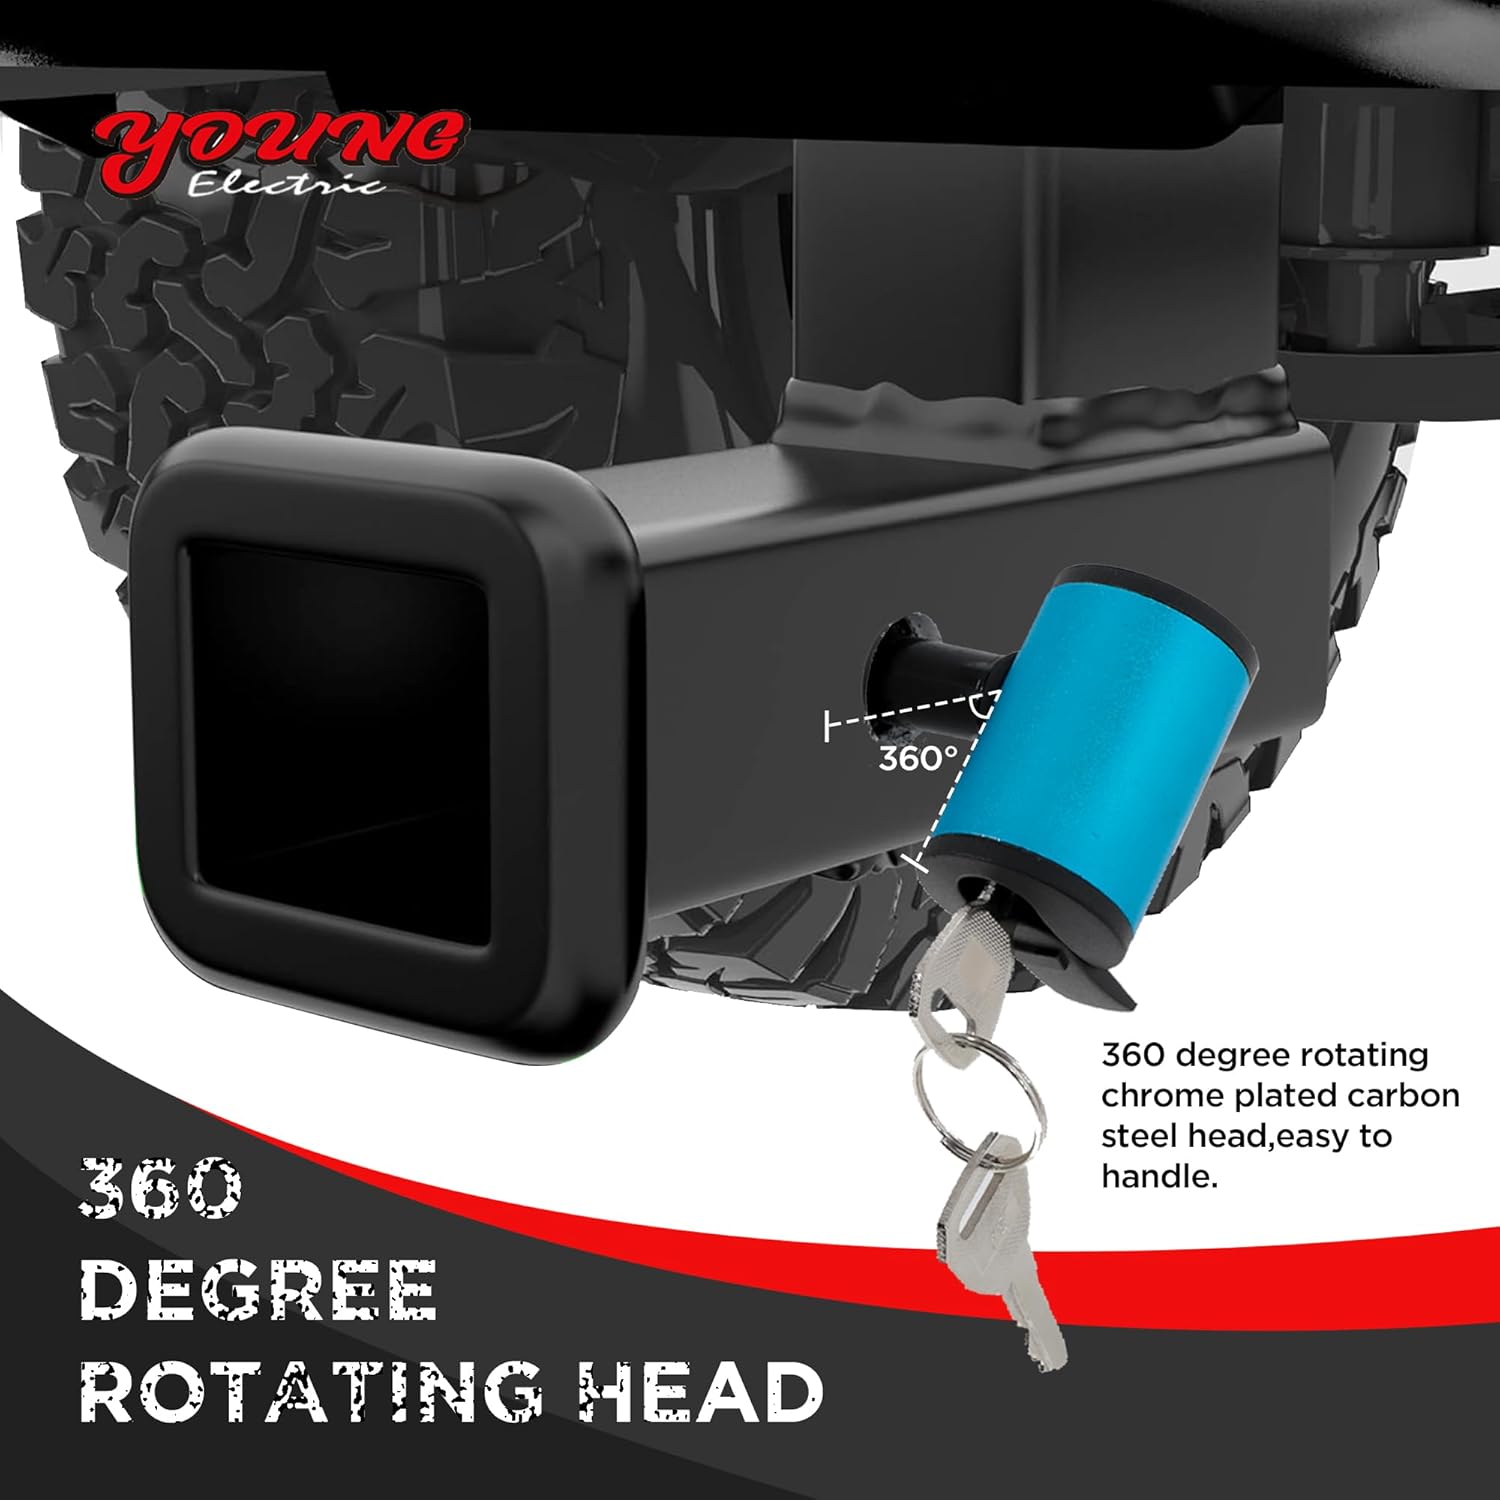
- Insert the M16 Anti-Rattle Lock Hitch Pin through both holes. Secure it with the provided lock. The hitch pin features a 360-degree rotating head for ease of use and a keyless locking mechanism for convenience.
- Ensure the rack is firmly seated and does not wobble. The anti-rattle design minimizes movement.

4.2 Preparing the Rack for Bicycle Loading
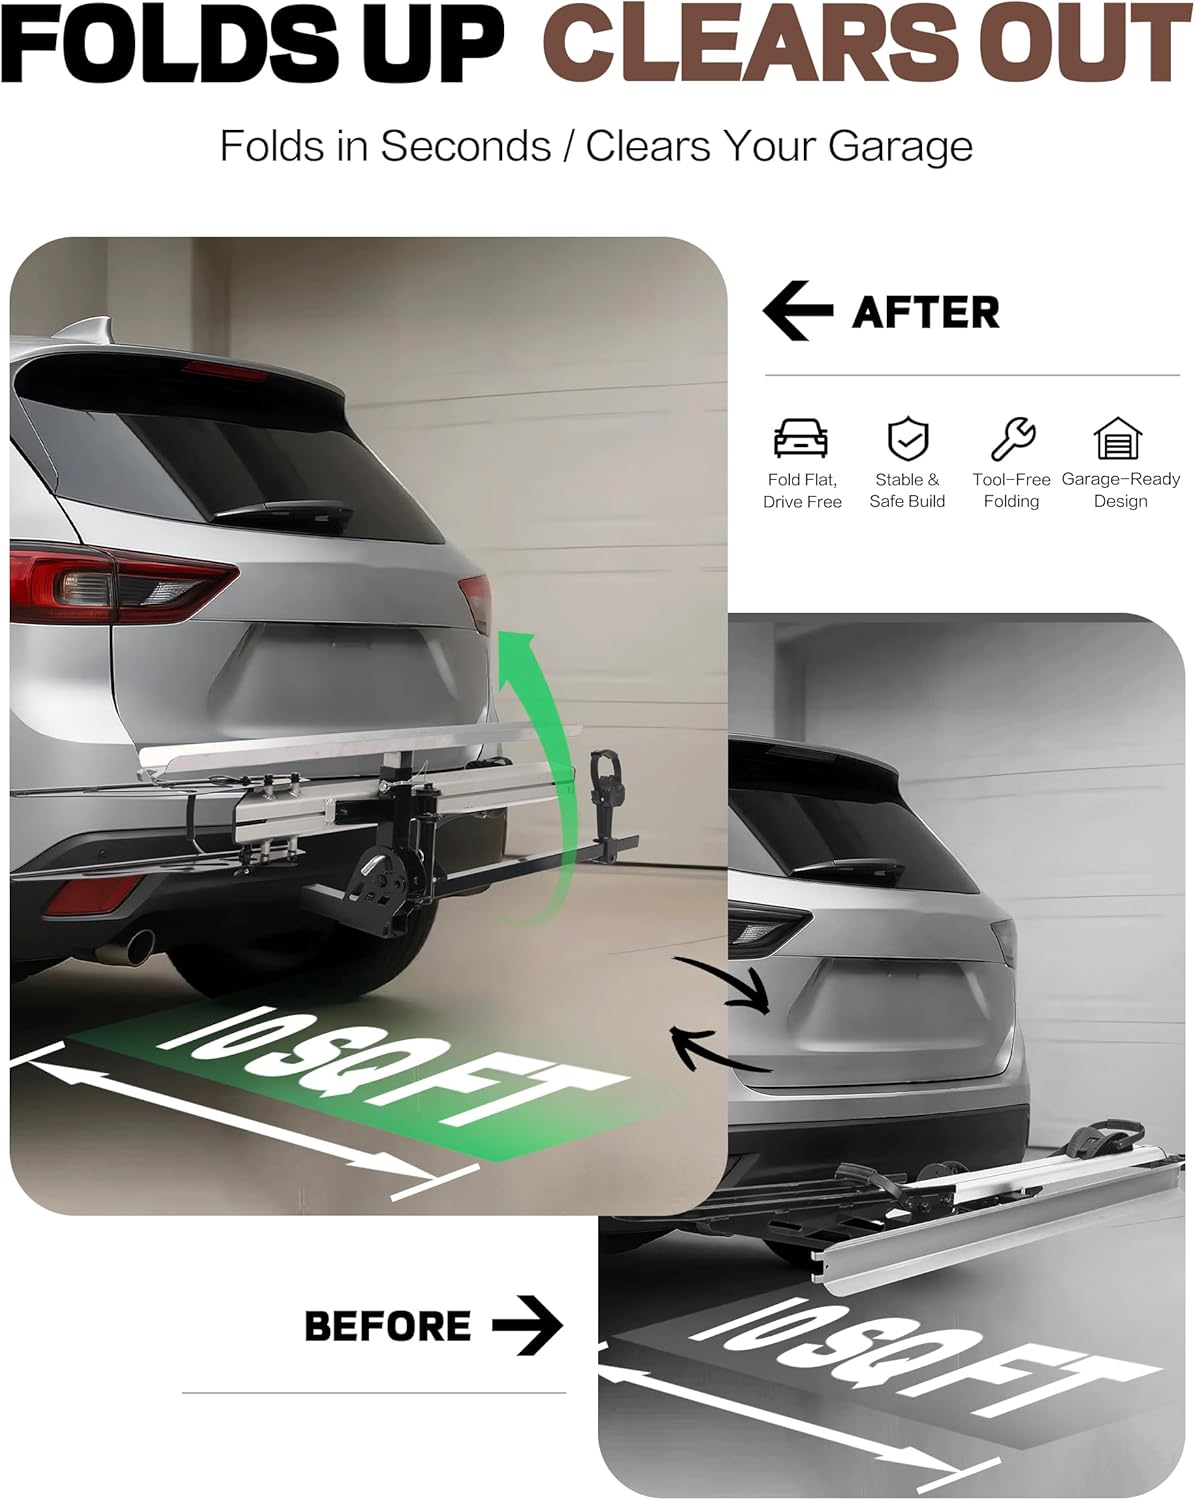
- Unfold the rack into its operational position. The rack is designed to fold up for compact storage and clear garage space when not in use.
- Attach the loading ramp to the designated slot on the rack. Ensure it is securely fastened before attempting to load a bicycle.

5. Operating Instructions
5.1 Loading a Bicycle
- Ensure the rack is in the unfolded, operational position and the ramp is securely attached.
- Carefully roll your bicycle up the ramp onto the rack. Position the wheels into the wheel cradles.
- Secure the front wheel using the front wheel cradle.
- Adjust the arm bar to firmly hold the bicycle frame. The arm bar is adjustable to accommodate various bike sizes and shapes.
- Use the adjustable sliders to ensure a snug fit for your bike's wheelbase, up to 50 inches.
- Fasten the wheel straps around both bicycle wheels and the rack cradles to prevent movement during transit.
- Double-check all three securing points: front wheel cradle, adjustable arm bar, and adjustable sliders/wheel straps, to ensure the bike is stable and secure.


5.2 Unloading a Bicycle
- Ensure the vehicle is parked on a level surface and the parking brake is engaged.
- Release the wheel straps and loosen the adjustable arm bar.
- Carefully roll the bicycle down the ramp.
- Remove the ramp and fold the rack if not in immediate use.
6. Maintenance
- Cleaning: Clean the rack regularly with mild soap and water. Rinse thoroughly and dry to prevent corrosion.
- Inspection: Periodically inspect all bolts, nuts, straps, and moving parts for tightness and wear. Tighten any loose fasteners. Replace worn or damaged parts immediately.
- Lubrication: Apply a light lubricant to hinges and moving joints as needed to ensure smooth operation.
- Storage: When not in use, store the bike rack in a dry, protected area to prolong its lifespan.
7. Troubleshooting
- Rack wobbles excessively: Ensure the M16 Anti-Rattle Lock Hitch Pin is fully inserted and tightened. Check that the hitch receiver is free of debris.
- Bicycle is not stable on the rack: Verify that the adjustable arm bar is firmly clamped to the bike frame, the front wheel cradle is engaged, and all wheel straps are tightened. Adjust sliders to match the bike's wheelbase.
- Ramp is difficult to attach/detach: Check for any obstructions or debris in the ramp's attachment points. Ensure proper alignment.
- Difficulty folding/unfolding the rack: Inspect hinges for dirt or damage. Apply lubricant if necessary. Ensure no components are obstructing the folding mechanism.
8. Specifications
- Product Name: 1-Ebike Rack Hitch Mount with Ramp
- Brand: Young Electric
- Model: 1-Ebike Rack Hitch Mount with Ramp
- Capacity: 1 Bicycle
- Maximum Weight Capacity: 100 lbs (45 kg)
- Hitch Pin: M16 Anti-Rattle Lock Hitch Pin
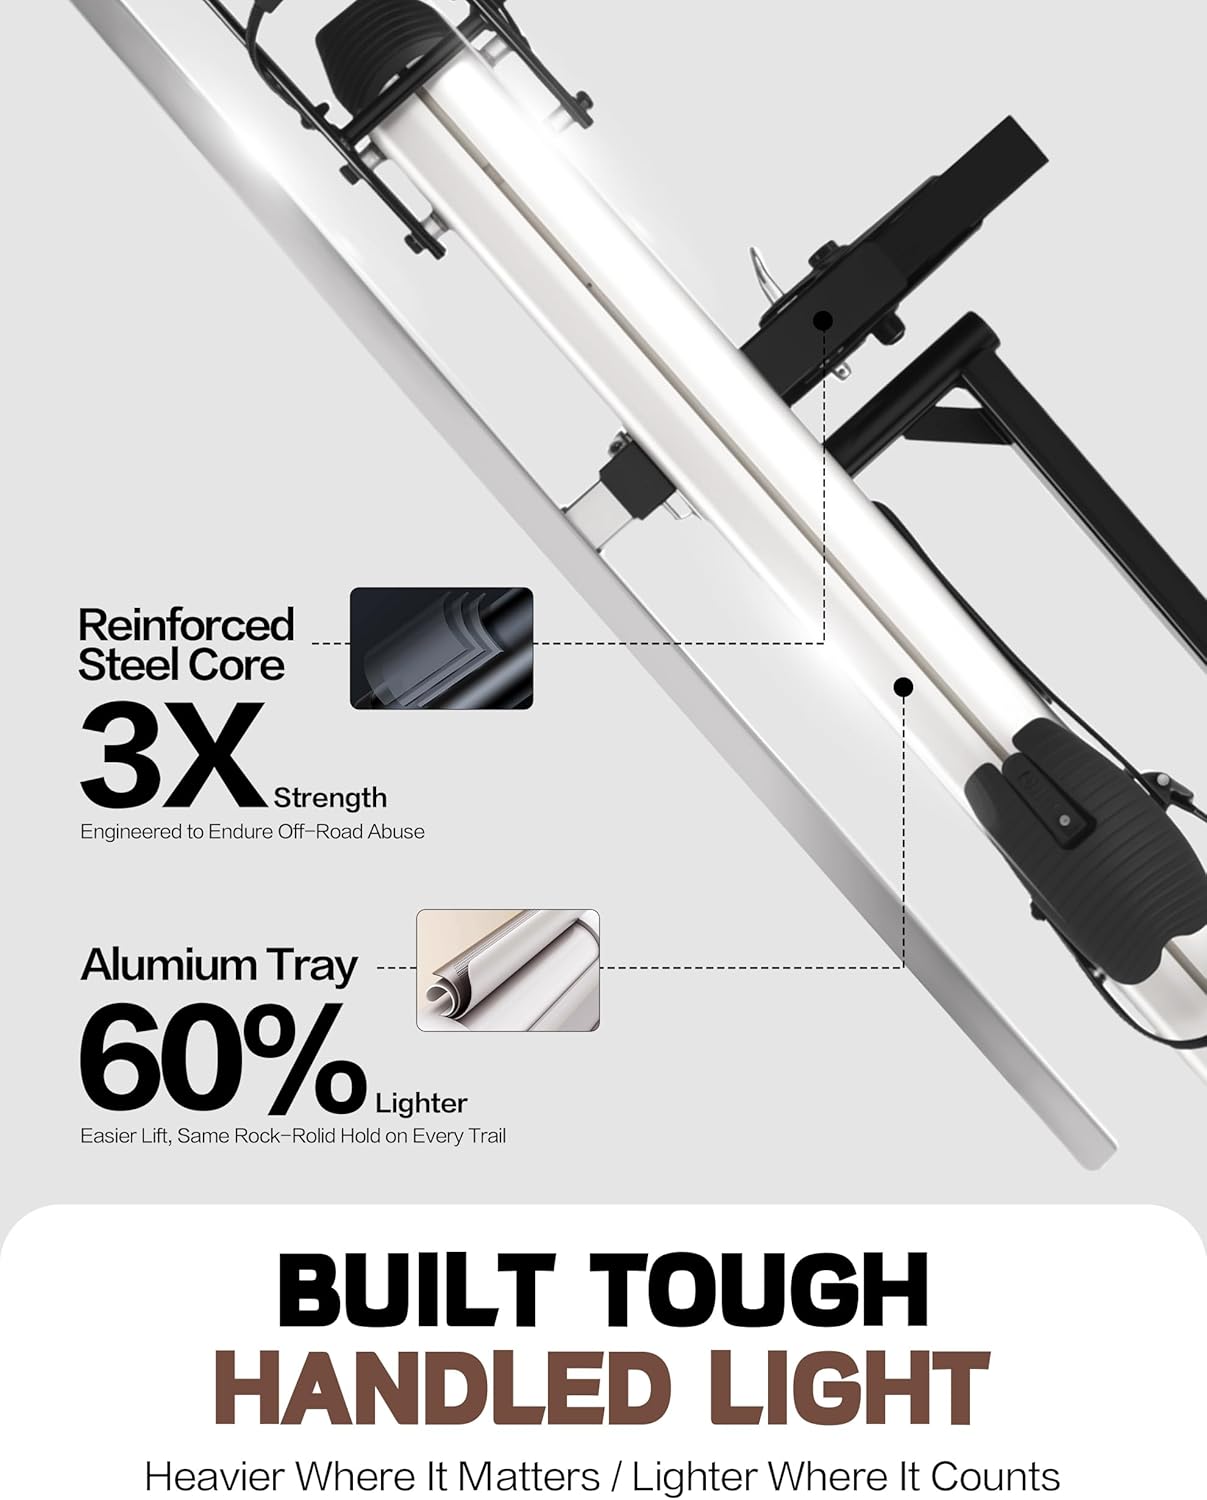
- Materials: Reinforced Steel Core, Aluminum Tray
- Maximum Wheelbase: 50 inches
- Tire Compatibility: Fits road, mountain, and fat tires up to 5 inches wide
- RV Approved: Yes

9. Warranty and Support
Young Electric products are manufactured to high-quality standards. For warranty information, technical support, or to inquire about replacement parts, please contact Young Electric customer service through the retailer where the product was purchased or visit the official Young Electric website. Please have your product model number and purchase date available when contacting support.