1. Introduction
Welcome to the Fanvace HiFi MP3 Player user manual. This guide provides essential information for setting up, operating, and maintaining your new audio device. Please read this manual thoroughly to ensure proper use and to maximize your listening experience.
1.1 Package Contents
- 1 x Fanvace HiFi MP3 Player
- 1 x USB-C Cable
- 1 x Audio Cable
- 1 x 64GB Micro SD Card
- 1 x Leather Case
- 1 x User Manual

The Fanvace HiFi MP3 Player, showcasing its compact design with a touch screen on the front and the rear panel with regulatory markings.
2. Safety Information
To ensure safe and reliable operation, please observe the following safety guidelines:
- Do not expose the device to extreme temperatures, direct sunlight, or high humidity.
- Avoid dropping or subjecting the device to strong impacts.
- Do not disassemble, repair, or modify the device yourself. Contact authorized service personnel for assistance.
- Keep the device away from water and other liquids.
- Use only the provided or certified compatible charging cables and adapters.
- Prolonged listening at high volume levels may cause hearing damage.
3. Product Overview
3.1 Device Layout and Controls
Familiarize yourself with the physical components and controls of your MP3 player.

An illustration of the Fanvace HiFi MP3 Player highlighting its core features: DSD decoding, DAC ES9018K2M chip, Bluetooth 5.3, 50 hours music play, multiple music formats, line & audio output, equalizer, and 2.8-inch TFT screen.
- Volume Knob: Rotate to adjust playback volume.
- Power Button: Press and hold to power on/off. Short press to turn screen on/off.
- Navigation Buttons: For track control (play/pause, next/previous).
- 2.8-inch HD Touch Screen: Primary interface for navigation and control.
- 3.5mm Headphone Jack: For wired headphone connection.
- Line Out Port: For connecting to external amplifiers or audio systems.
- USB-C Port: For charging and data transfer.
- Micro SD Card Slot: For expandable storage.

A close-up view of the Fanvace MP3 Player's audio output ports, including the 3.5mm headphone jack and line-out, with examples of connected devices like headphones, speakers, and car audio systems.
4. Setup
4.1 Charging the Device
Before first use, fully charge the MP3 player.
- Connect the provided USB-C cable to the player's USB-C port.
- Connect the other end of the USB-C cable to a USB power adapter (not included) or a computer's USB port.
- The charging indicator will illuminate. A full charge typically takes 3-4 hours.

The Fanvace MP3 Player displayed with information about its 2000mAh rechargeable battery, indicating 3-4 hours for full charge, 50 hours playback with headphones, and 60 hours with Bluetooth.
4.2 Inserting a Micro SD Card
The player comes with a 64GB Micro SD card. You can expand storage up to 256GB.
- Locate the Micro SD card slot on the side of the player.
- Insert the Micro SD card with the gold contacts facing down until it clicks into place.
- To remove, gently push the card in until it springs out.

The Fanvace MP3 Player shown with a Micro SD card being inserted, illustrating its expandable storage capacity up to 256GB.
4.3 Transferring Music Files
Connect the player to your computer to transfer audio files.
- Connect the MP3 player to your computer using the USB-C cable.
- The player will appear as a removable disk drive on your computer.
- Drag and drop your desired audio files into the player's internal storage or the Micro SD card.
- Safely eject the device from your computer before disconnecting the cable.

The Fanvace MP3 Player connected to a laptop using a USB-C cable, demonstrating the method for efficient music file transfer.
5. Operating Instructions
5.1 Power On/Off
- To Power On: Press and hold the Power button until the screen illuminates.
- To Power Off: Press and hold the Power button, then confirm 'Power Off' on the screen.
- Screen On/Off: Short press the Power button to turn the screen on or off without powering down the device.
5.2 Navigating the Interface
The player features a 2.8-inch HD touch screen for intuitive navigation.
- Touch Screen: Tap icons to select, swipe to scroll through lists or menus.
- Physical Buttons: Use the navigation buttons for quick control during playback.
5.3 Music Playback
- From the main menu, select 'Music' or 'Files' to browse your audio library.
- Tap on a song or album to begin playback.
- Use the on-screen controls or physical buttons for Play/Pause, Next Track, Previous Track.
- Adjust the volume using the rotary volume knob.
5.4 Bluetooth Pairing
Connect your player to Bluetooth headphones or speakers.
- Ensure your Bluetooth headphones/speaker are in pairing mode.
- On the MP3 player, go to 'Settings' > 'Bluetooth'.
- Turn Bluetooth 'On' and scan for available devices.
- Select your device from the list to pair. Once paired, the player will connect automatically in the future.
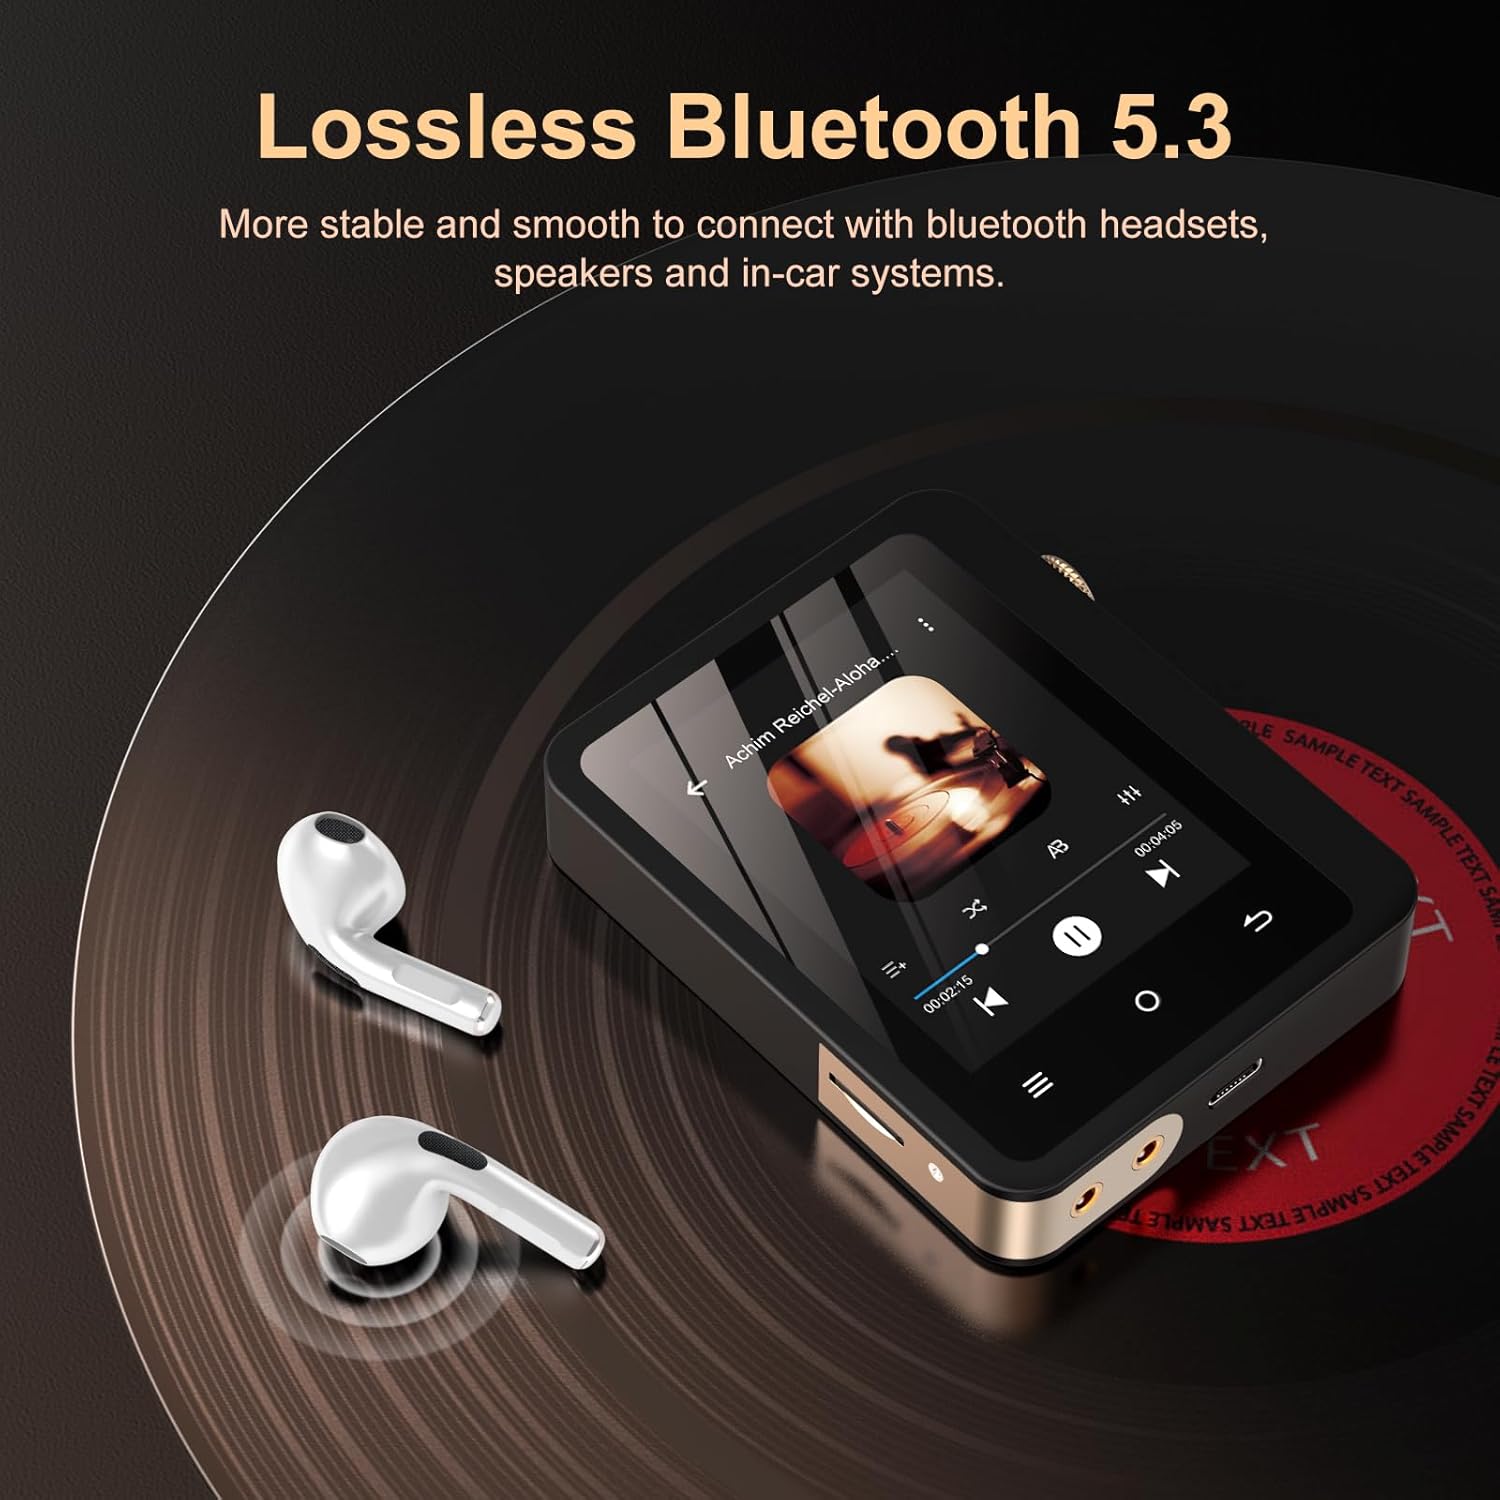
The Fanvace MP3 Player demonstrating its Bluetooth 5.3 connectivity, shown next to a pair of wireless earbuds on a vinyl record surface.
Note: The player functions as a Bluetooth transmitter only, not a receiver.
5.5 Audio Output Modes
- Headphone Output: Connect wired headphones to the 3.5mm jack for direct listening.
- Line Out: Use the dedicated line-out port with the provided audio cable to connect to external amplifiers, home audio systems, or car audio systems for enhanced sound.
6. Maintenance
6.1 Cleaning
- Wipe the device with a soft, dry, lint-free cloth.
- Do not use abrasive cleaners, alcohol, or chemical solvents.
6.2 Storage
- Store the player in a cool, dry place away from direct sunlight.
- If storing for an extended period, charge the battery to approximately 50% to prolong its lifespan.
7. Troubleshooting
If you encounter issues with your Fanvace MP3 Player, refer to the table below for common problems and solutions.
| Problem | Solution |
|---|---|
| Device does not power on. | Ensure the battery is charged. Connect to a power source and try again. |
| No sound during playback. | Check volume level. Ensure headphones/speakers are properly connected or Bluetooth is paired. Verify audio file format compatibility. |
| Cannot transfer files to the device. | Ensure the USB-C cable is securely connected. Try a different USB port or cable. Ensure the device is recognized by the computer. |
| Bluetooth connection issues. | Ensure the player and the Bluetooth device are in pairing mode and within range. Disconnect and re-pair the devices. |
| Screen is unresponsive. | Restart the device by holding the power button. If unresponsive, allow the battery to drain completely and then recharge. |
8. Specifications
Key technical details of the Fanvace HiFi MP3 Player.

An internal view highlighting the ES9018K2M DAC chip, emphasizing the player's high-fidelity audio capabilities with specifications like DSD 256 decoding, PCM 24bit/192kHz, SNR 127dB/kHz, and low THD+N.
| Feature | Detail |
|---|---|
| Model Number | F10 |
| Dimensions | 6.22 x 3.35 x 1.14 inches |
| Item Weight | 10.5 ounces |
| Battery | 2000mAh Rechargeable (1 x 9V battery included) |
| Memory Storage Capacity | 64 GB (expandable up to 256 GB via Micro SD) |
| Screen Size | 2.8 Inches |
| Connectivity Technology | Aux, Bluetooth 5.3 |
| Special Features | Equalizer, Hi-Res Audio, Touch Screen, DSD Decoding |
| Supported Audio Formats | MP1/2/3, AAC, FLAC, APE, WAV, PCM, WMA, OGG, ALAC, MS-ADPCM, AIFF, IMA, DSF, DFF, DSD256 |
| DAC Chip | ES9018K2M |
| SNR | 127dB/kHz |
| THD+N | <0.001% |
9. Warranty and Support
9.1 Warranty Information
Your Fanvace HiFi MP3 Player is covered by a standard manufacturer's warranty. Please refer to the warranty card included in your package for specific terms and conditions. Keep your proof of purchase for warranty claims.
9.2 Customer Support
If you have any questions, require technical assistance, or experience issues not covered in this manual, please contact Fanvace customer support. Contact details can typically be found on the product packaging or the official Fanvace website.


