1. Introduction
Thank you for choosing the WISHBETY 4K Night Vision Binoculars, Model Ja-50. This device is engineered to provide clear observation capabilities in various lighting conditions, from low light to complete darkness. It is ideal for outdoor activities such as wildlife observation, hunting, and security monitoring. This manual provides essential information for the proper setup, operation, and maintenance of your night vision binoculars.
What's in the Box:
- 1x WISHBETY 4K Night Vision Binoculars (Model Ja-50)
- 1x USB Charging Cable
- 1x Carrying Case
- 1x User Manual
- 1x 32GB TF Card (Built-in)
- 1x Neck Strap
- 1x Cleaning Cloth
2. Safety Information
- Do not expose the device to direct sunlight for extended periods, as this may damage internal components.
- Avoid pointing the infrared illuminator directly at eyes.
- Keep the device away from extreme temperatures, humidity, and dust.
- Use only the specified charging cable and power adapter to prevent damage.
- Do not attempt to disassemble or repair the device yourself. Contact customer support for assistance.
- Ensure the TF card is inserted correctly to avoid data loss or device malfunction.
3. Product Overview
The WISHBETY Ja-50 Night Vision Binoculars feature a robust design with intuitive controls for ease of use in the field. Key components include the objective lens, infrared illuminator, eyepiece, 3.5-inch HD display, and control buttons.

Figure 3.1: Top-down view of the WISHBETY Ja-50 Night Vision Binoculars, highlighting the control panel and integrated display.

Figure 3.2: Front view of the binoculars, illustrating the objective lens, infrared illuminator, and the focus adjustment wheel.
4. Setup
4.1 Charging the Battery
The device is powered by a built-in 4000mAh rechargeable lithium battery.
- Connect the provided USB charging cable to the device's charging port.
- Connect the other end of the USB cable to a compatible USB power adapter (not included) or a computer's USB port.
- The charging indicator light will illuminate during charging and turn off when fully charged. A full charge typically takes a few hours.
4.2 TF Card Installation
A 32GB TF card is pre-installed for storing photos and videos. If you need to replace or re-insert the card:
- Locate the TF card slot, usually covered by a rubber flap.
- Gently push the TF card into the slot until it clicks into place. Ensure the correct orientation.
- To remove, push the card again until it springs out slightly, then pull it out.
4.3 Attaching the Neck Strap
Attach the included neck strap to the designated strap loops on the binoculars for secure and convenient carrying.
5. Operating Instructions
5.1 Powering On/Off
- To power on: Press and hold the Power/OK button until the screen illuminates.
- To power off: Press and hold the Power/OK button again until the screen turns off.
5.2 Adjusting Focus
For a clear image, adjust the focus according to your distance from the target.
- Look through the eyepiece at your target.
- Rotate the focusing gear (located on the front of the device, between the lenses) clockwise or counter-clockwise until the image on the screen is sharp.
Figure 5.1: Adjusting the focus wheel for optimal image clarity.
5.3 Using Night Vision (IR Adjustment)
The device features a 9-level adjustable infrared (IR) illuminator (850 nm) for enhanced visibility in low light or complete darkness.
- In low-light conditions, press the IR+ button to activate the infrared illuminator.
- Continue pressing IR+ to increase the IR intensity (levels 1-9).
- Press the IR- button to decrease the IR intensity.
- Adjust the IR level to achieve the best visibility without overexposure.
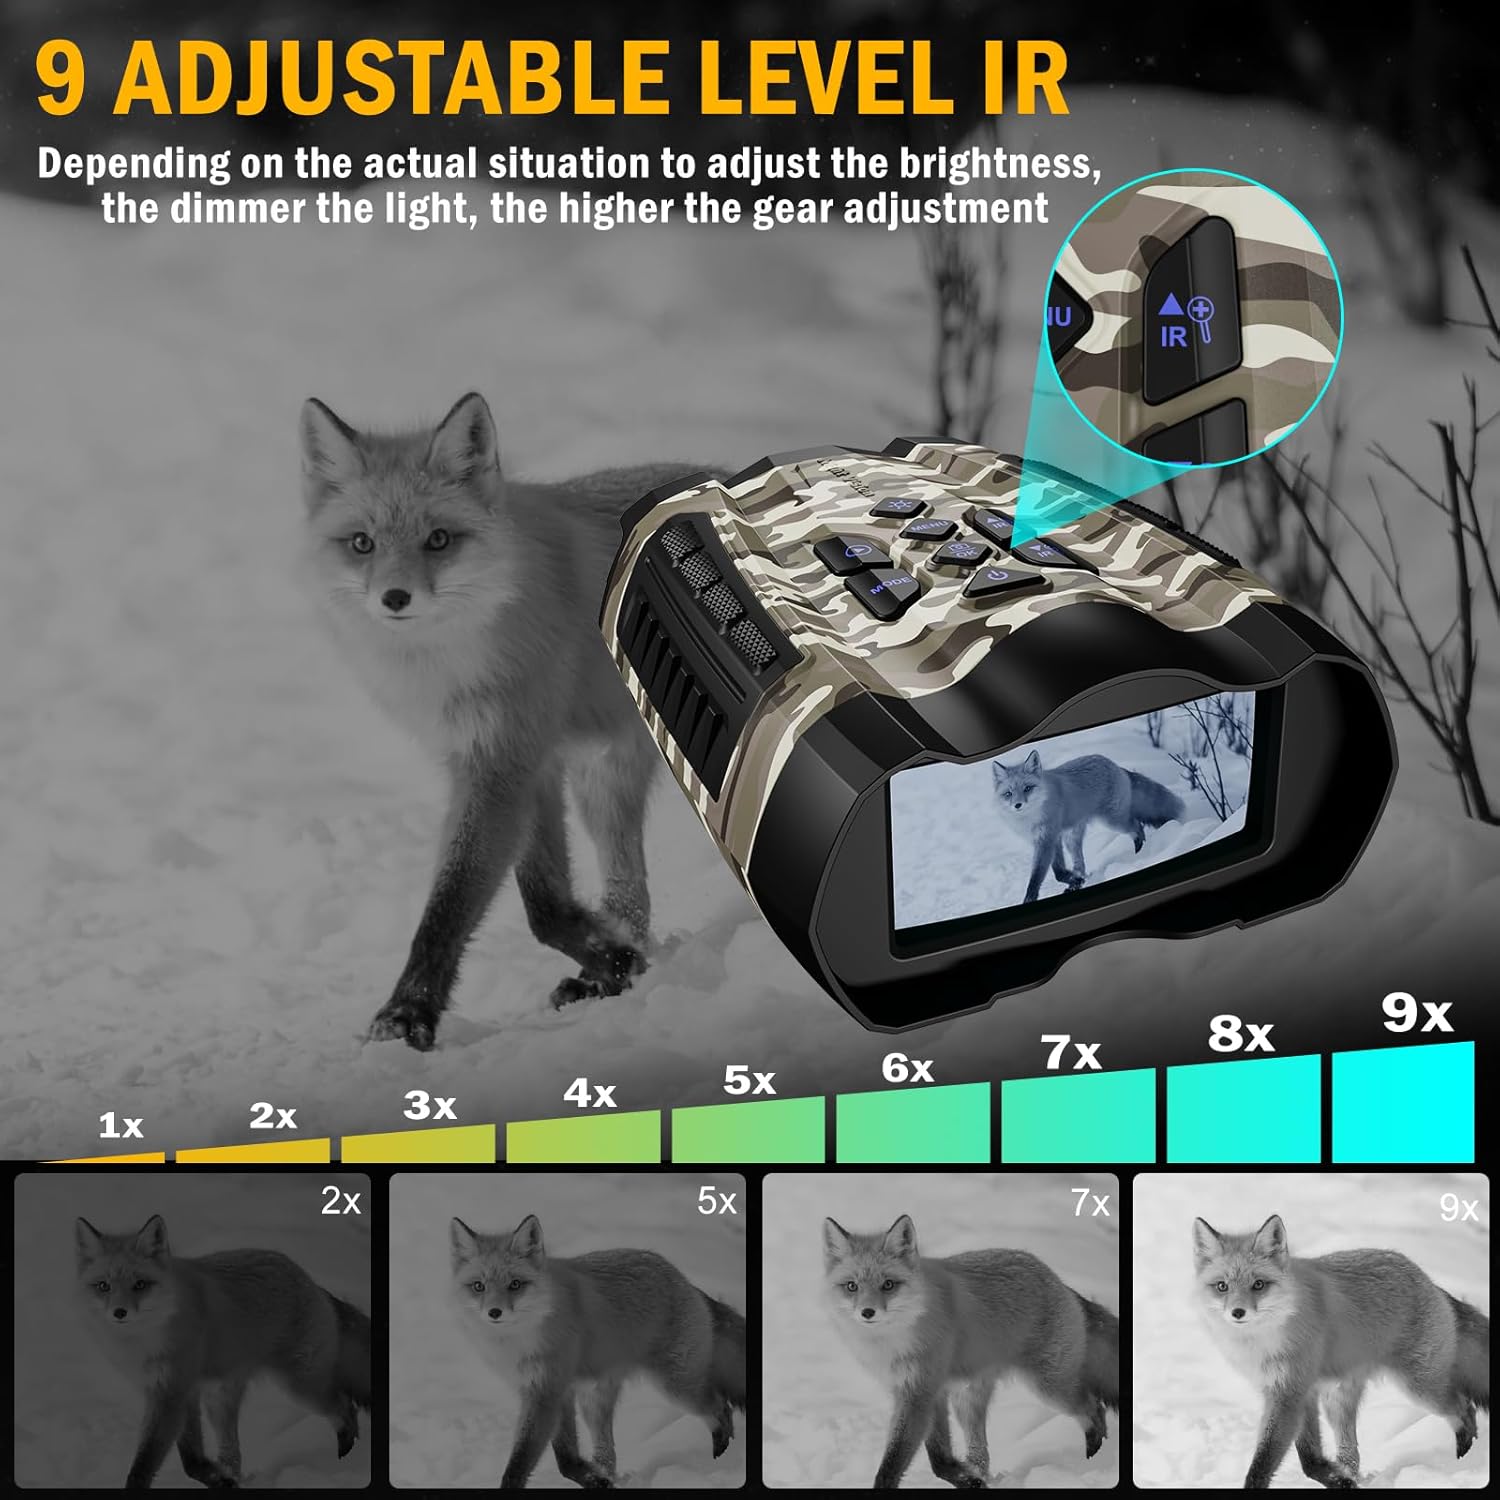
Figure 5.2: Visual representation of the 9-level infrared adjustment, showing how image clarity improves with higher IR settings in darkness.
5.4 Digital Zoom
The binoculars offer up to 10X digital zoom to observe distant objects.
- To zoom in: Press the Zoom In button (often combined with IR+).
- To zoom out: Press the Zoom Out button (often combined with IR-).
- Note that digital zoom may reduce image quality at higher magnifications.

Figure 5.3: The 10x digital zoom feature, showing how to magnify distant subjects.
5.5 Photo and Video Recording
Capture high-resolution photos (up to 36MP) and 4K UHD videos.
- Switching Modes: Press the MODE button to cycle between Photo, Video, and Playback modes.
- Taking Photos: In Photo mode, press the Shutter button (often labeled with a camera icon) to capture an image.
- Recording Videos: In Video mode, press the Record button (often labeled with a video camera icon) to start recording. Press again to stop.

Figure 5.4: Day and night observation capabilities, demonstrating the device's ability to capture both photos and videos in varying light conditions.
5.6 Playback
Review your captured media directly on the 3.5-inch HD display.
- Switch to Playback mode using the MODE button.
- Use the navigation buttons (Up/Down or Left/Right) to browse through your photos and videos.
- Press the OK button to view a selected item or play a video.
5.7 Connecting to a PC
Transfer your recorded photos and videos to a computer.
- Ensure the binoculars are powered off.
- Connect the binoculars to your PC using the provided USB cable.
- The device should appear as a removable disk on your computer. You can then access and transfer files.
5.8 Menu Navigation
Access settings and advanced features through the menu.
- Press the MENU button to enter the settings menu.
- Use the navigation buttons to scroll through menu options.
- Press OK to select an option or confirm a setting.
- Press MENU again to exit the menu.
6. Maintenance
6.1 Cleaning
- Use the provided cleaning cloth to gently wipe the lenses and screen.
- For stubborn dirt, use a lens cleaning solution specifically designed for optical surfaces.
- Wipe the body of the device with a soft, dry cloth. Avoid abrasive materials or harsh chemicals.
6.2 Storage
- Store the binoculars in the provided carrying case when not in use to protect them from dust and impact.
- Store in a cool, dry place, away from direct sunlight and high humidity.
6.3 Battery Care
- Charge the battery regularly, even if the device is not used frequently, to maintain battery health.
- Avoid fully discharging the battery repeatedly.
7. Troubleshooting
| Problem | Possible Cause | Solution |
|---|---|---|
| Device does not power on. | Low battery; device malfunction. | Charge the battery fully. If issue persists, contact support. |
| Image is blurry. | Improper focus; dirty lens. | Adjust the focusing gear. Clean the objective lens. |
| Poor night vision performance. | IR illuminator off or too low; environmental factors. | Increase IR intensity. Ensure no obstructions. |
| Cannot record photos/videos. | TF card full or not inserted correctly; incorrect mode. | Check TF card status and free space. Ensure correct mode is selected. |
| Device freezes or is unresponsive. | Software glitch. | Press and hold the Power button to force a restart. |
8. Specifications
| Feature | Detail |
|---|---|
| Display | 3.5 Inch HD IPS Screen |
| Video Resolution | 4K Max (Adjustable) |
| Photo Resolution | 36MP (Adjustable) |
| Storage | 32GB TF Card (Built-in) |
| Infrared Levels | 9 levels of infrared adjustment (850 nm) |
| Night Vision Range | 300M Max |
| Digital Zoom | 10X |
| Battery Type | Rechargeable lithium battery (4000mAh) |
| Battery Life | 3-12 hours continuous use (depending on mode) |
| Weight | 634 ± 30g (approximately 1 pound) |
| Product Dimensions | 22.2 x 17.6 x 8.3 cm (approximately 6.72 x 5.55 x 3 inches) |
| Material | Durable ABS plastic |
| Operating Temperature | -20°C to 60°C |
9. Warranty and Support
WISHBETY products are designed for reliability and performance. For warranty information, technical support, or any questions regarding your Ja-50 Night Vision Binoculars, please refer to the contact information provided on the product packaging or visit the official WISHBETY website. Please retain your proof of purchase for warranty claims.