Gevanti SA8
Gevanti Home Weather Station SA8 Instruction Manual
Model: SA8
Introduction
This manual provides comprehensive instructions for the setup, operation, and maintenance of your Gevanti Home Weather Station Model SA8. Please read this manual thoroughly before using the device to ensure proper function and longevity. This model operates wirelessly but does not include WiFi connectivity.

Image: The Gevanti Home Weather Station display unit and the multi-sensor outdoor unit.
Package Contents
Verify that all components are present in your package:
- 1x Display Console
- 1x Integrated Outdoor Transmitter (Multi-sensor unit)
- 1x Foot Mounting (with pole insert)
- 1x Mounting Bracket Back Plate (pole mount)
- 1x Mounting Pole
- 2x Pole mounting nuts (M3) / bolts (D3)
- 4x Pole mounting nuts (M5) / bolts (D5)
- 4x Tapping screws
- 1x Instruction Manual
- 1x Power Adapter

Image: Visual representation of the package contents and key dimensions of the display console and outdoor sensor.
Setup and Installation
1. Battery Installation
The weather station requires batteries for both the display console and the outdoor transmitter.
- Display Console: Insert 3x AA batteries (not included) into the battery compartment. Alternatively, power the console using the provided AC adapter.
- Outdoor Transmitter: Insert 3x AAA batteries (not included) into the battery compartment of the outdoor sensor. Ensure the battery cover is securely fastened to protect against moisture.
Note: Batteries are not included and must be purchased separately.
2. Outdoor Sensor Mounting
The outdoor sensor can be mounted in various ways to ensure accurate readings. Choose a location that is open, free from obstructions, and allows for good air circulation. Ensure the rain gauge is level and the wind vane can rotate freely.
- Mount on Top: Attach the sensor directly to a flat surface using the foot mounting.
- Mount on Pole (Top): Secure the sensor to the top of a pole using the foot mounting and pole insert.
- Mount on Side: Attach the sensor to a vertical surface using the mounting bracket.
- Mount on Pole (Side): Secure the sensor to the side of a pole using the mounting bracket.

Image: Diagram illustrating four different ways to mount the outdoor sensor: on top of a surface, on top of a pole, on the side of a surface, and on the side of a pole.

Image: Detailed view of the outdoor sensor components, including the LED, RESET button, battery door, and thermo-hygrometer sensor, along with various mounting options.
3. Initial Synchronization
After installing batteries in both units, place the outdoor sensor within range of the display console. The console will automatically search for and connect to the outdoor sensor. This process may take a few minutes. Once connected, outdoor temperature, humidity, wind, and rain data will appear on the display.
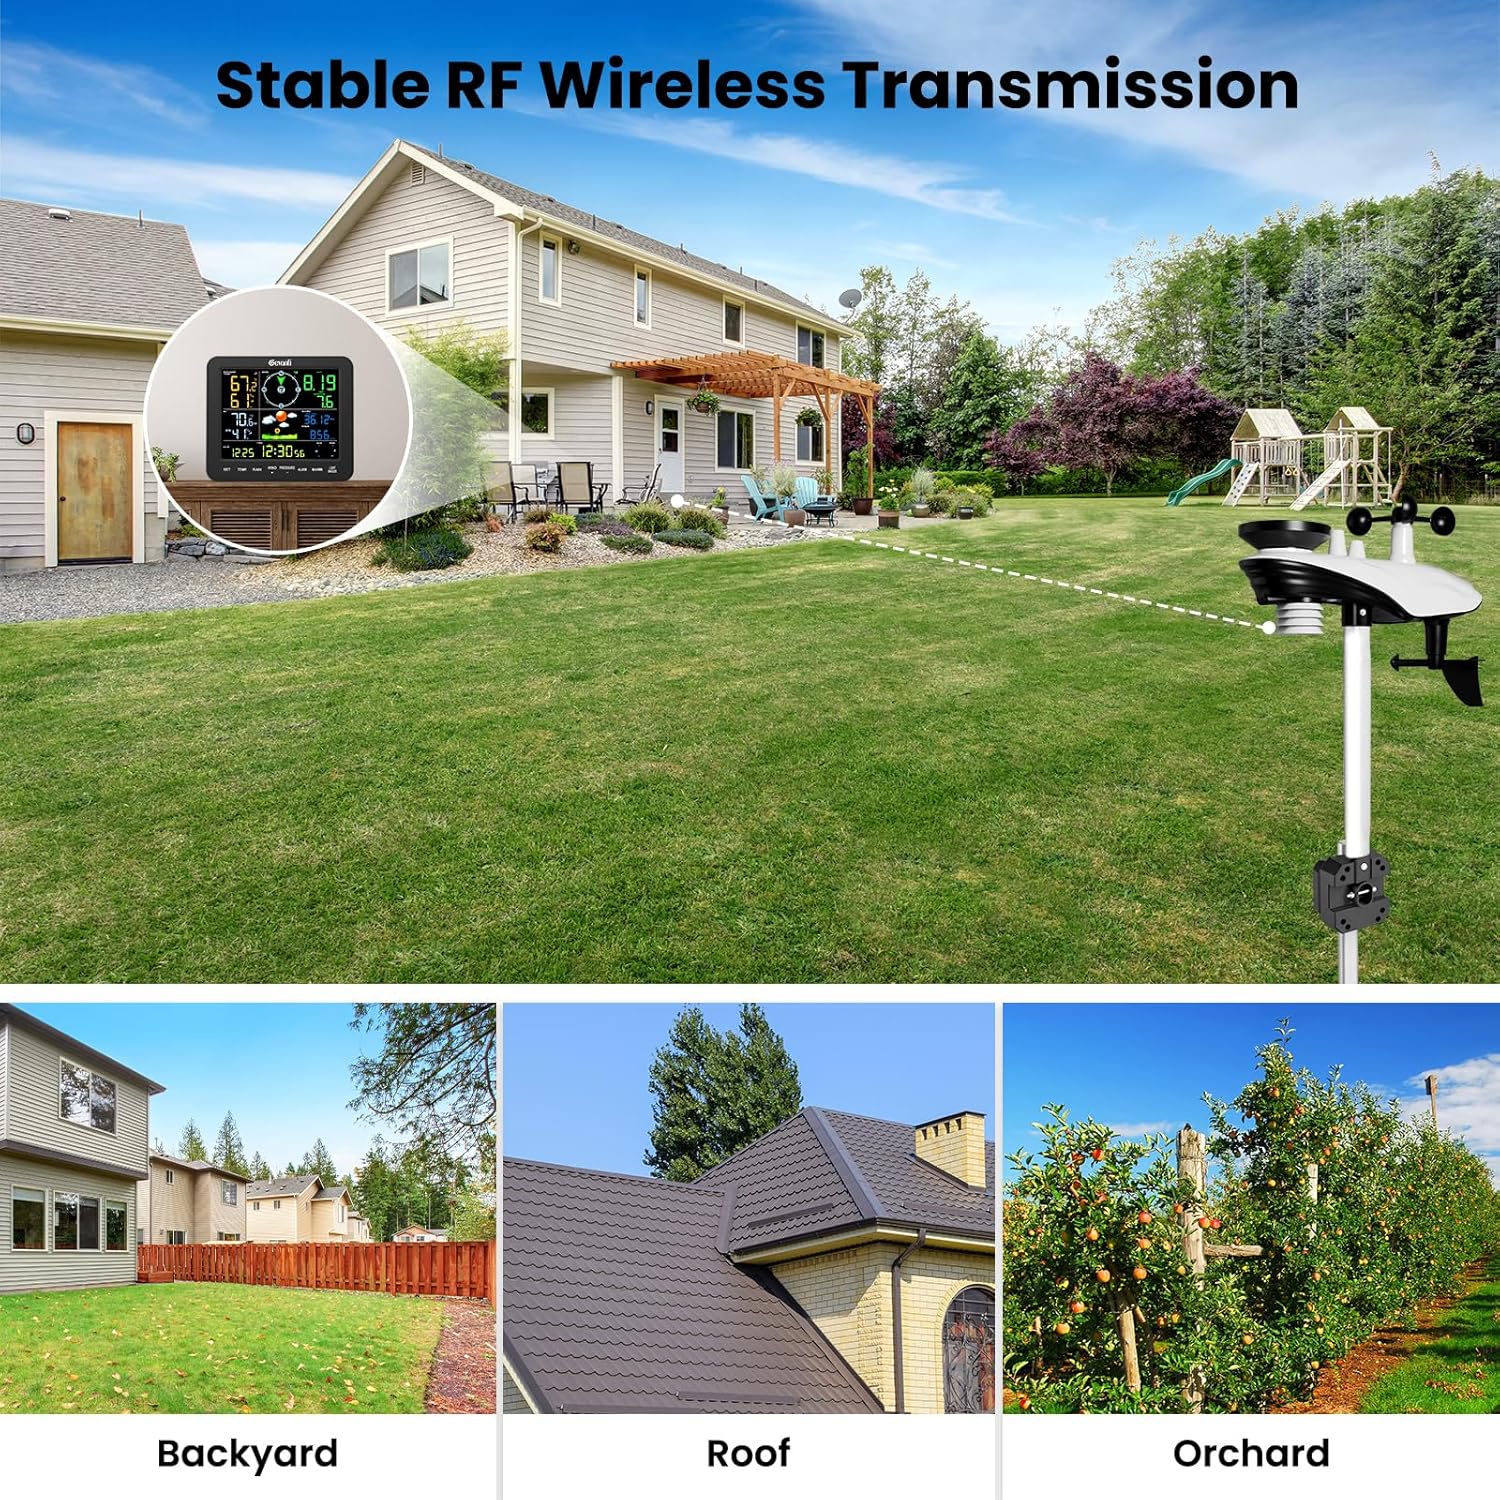
Image: Illustration of the wireless transmission capability of the Gevanti weather station, showing connectivity across various outdoor environments like backyards, roofs, and orchards.
Operating Instructions
Display Console Overview
The 7.5-inch high-contrast color screen provides a clear overview of all weather data. The display features XXL bold fonts for enhanced readability.

Image: The display console showing various weather parameters including outdoor temperature/humidity, indoor temperature/humidity, wind direction, wind gust, average wind speed, barometric pressure, weather icon, rainfall, moon phase, date, time, and week/second.

Image: A detailed view of the display console highlighting the various data points and control buttons (SET, TEMP, RAIN, WIND/+, PRESSURE/-, ALARM, MAX/MIN, LIGHT/SNOOZE).
Button Functions
- SET: Enters setup mode for time, date, and other settings.
- TEMP: Toggles between temperature units (°C/°F) or displays temperature history.
- RAIN: Displays rainfall data (hourly, daily, weekly, monthly, cumulative).
- WIND / +: Displays wind speed data or increases values during setup.
- PRESSURE / -: Displays barometric pressure or decreases values during setup.
- ALARM: Sets or activates/deactivates alarms.
- MAX/MIN: Displays maximum and minimum recorded values.
- LIGHT/SNOOZE: Adjusts backlight brightness (3-stage manual adjustment) or activates snooze for alarms.
Rainfall Monitoring
The integrated rain gauge provides precise rainfall measurements. The system records hourly, daily, weekly, monthly, and cumulative rainfall data.

Image: Close-up of the rain gauge with accuracy specifications: ±1mm for rainfall under 15mm, and ±7% for 15-9999mm range.

Image: Display showing total rainfall and a bar chart illustrating rainfall data over hours, days, 7-days, months, and years, along with accuracy details.
Customizable Weather Alerts
Set high and low alerts for various weather parameters such as temperature, humidity, and wind speed. When a set threshold is reached, the display console will provide an alert.
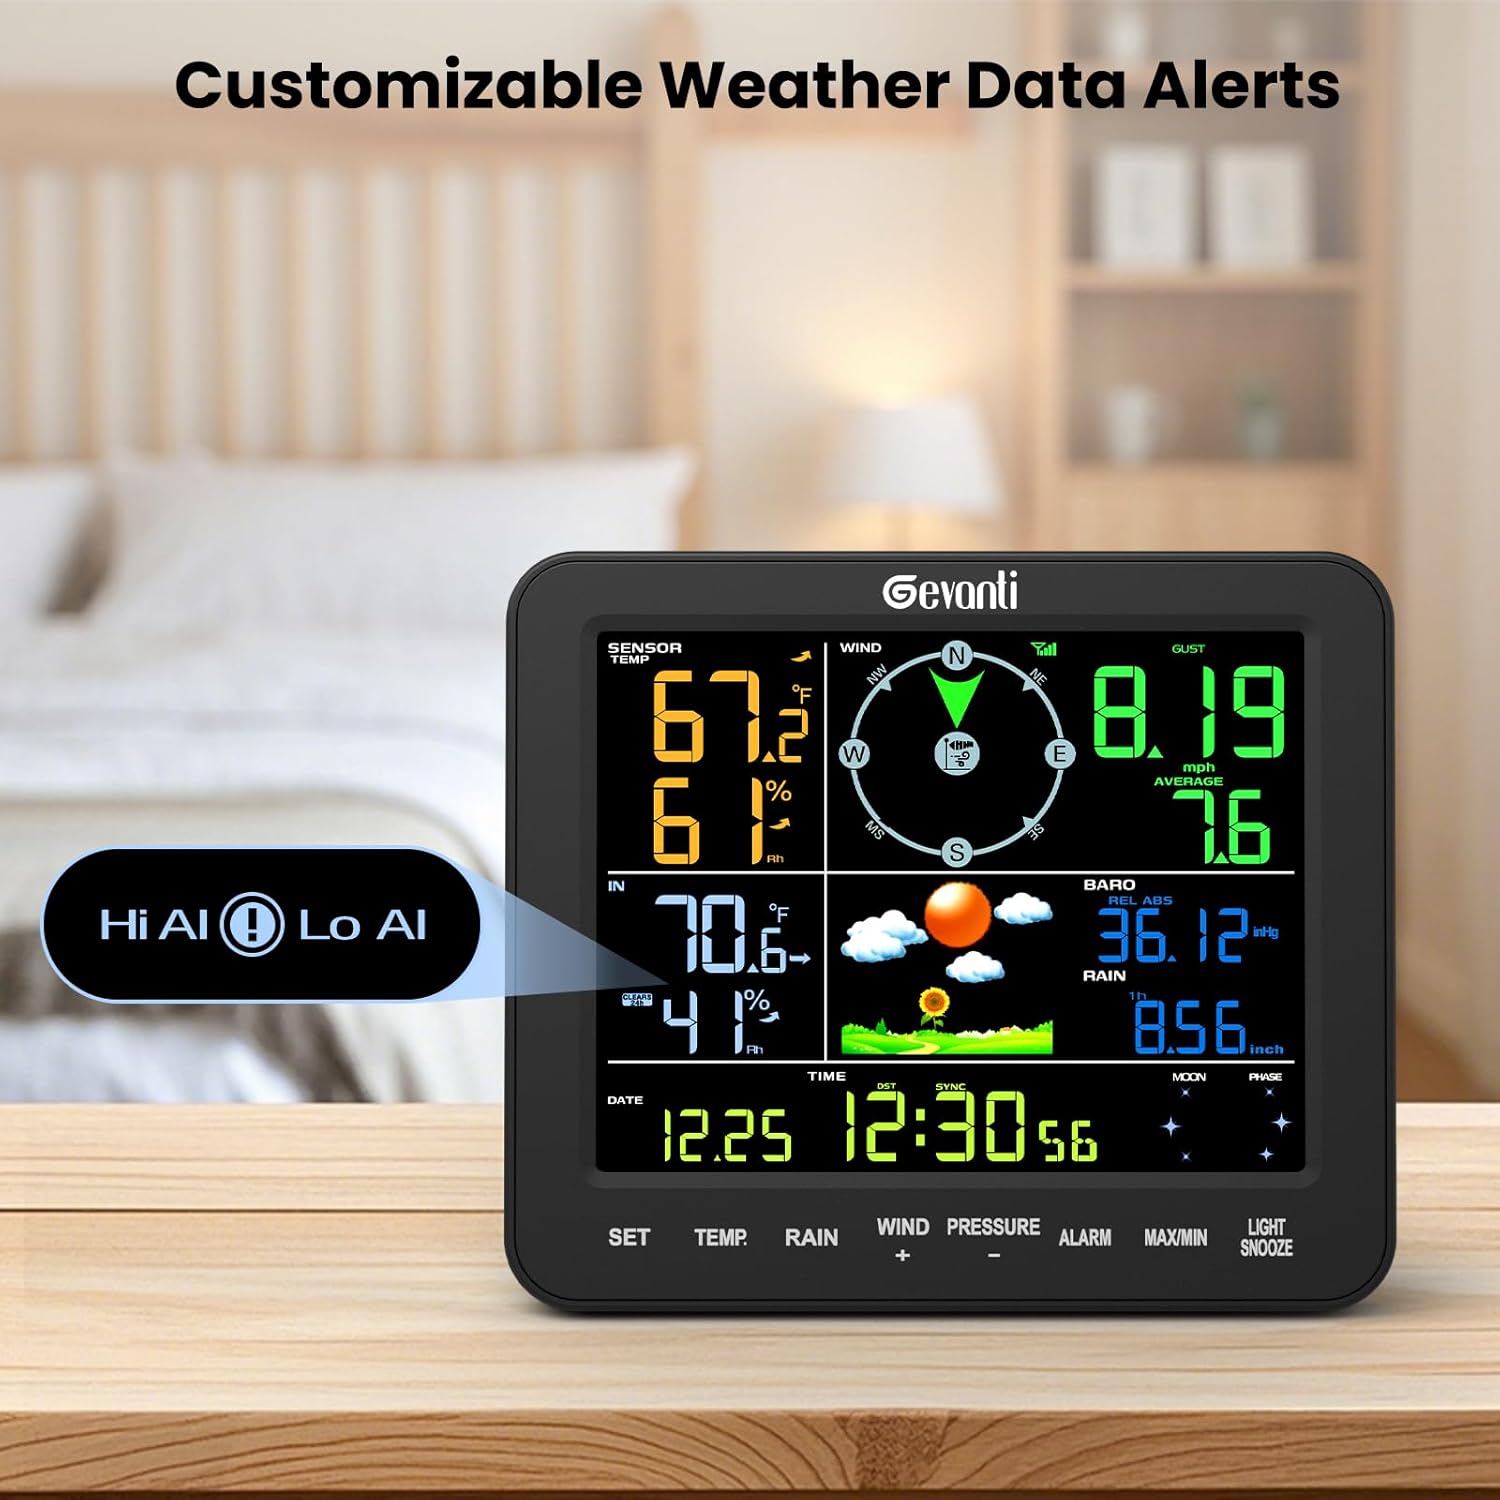
Image: The display console showing "Hi Al" and "Lo Al" indicators, signifying high and low alert settings for weather data.
Maintenance
- Cleaning: Periodically clean the outdoor sensor, especially the rain gauge funnel and wind cups, to prevent debris buildup that could affect accuracy. Use a soft, damp cloth. Do not use abrasive cleaners.
- Battery Replacement: Replace batteries in both the display console and outdoor sensor when the low battery indicator appears on the display. Ensure proper polarity.
- Sensor Placement: Regularly check the outdoor sensor's mounting to ensure it remains secure and free from new obstructions.
Troubleshooting
| Problem | Possible Cause | Solution |
|---|---|---|
| No outdoor data displayed. |
|
|
| Inaccurate temperature/humidity readings. |
|
|
| Rainfall data is incorrect or not registering. |
|
|
| Wind speed/direction is inaccurate. |
|
|
Specifications
| Feature | Detail |
|---|---|
| Model Number | SA8 |
| Product Dimensions | 1 x 6.7 x 5.2 inches (Display Console) |
| Item Weight | 5.7 pounds |
| Manufacturer | Gevanti |
| Display Console Power | 3x AA batteries (not included) or AC Adapter (Input: 100-240V AC, 50/60Hz, 0.4A; Output: 5.0V DC, 1000mA, 5W) |
| Outdoor Sensor Power | 3x AAA batteries (not included) |
| Indoor Temperature Range | 0°C to 60°C (32°F to 140°F) |
| Outdoor Temperature Range | -40°C to 60°C (-40°F to 140°F) |
| Humidity Range | 10% to 99% RH |
| Barometric Pressure Range | 300-1100 hPa |
| Rainfall Accuracy | ±1mm (under 15mm), ±7% (15-9999mm) |
| Main Material | ABS |
| UPC | 768556638572 |
Warranty and Support
Gevanti is committed to providing quality products and customer satisfaction. For any questions, technical assistance, or warranty claims, please contact our support team through the following channels:
- Phone Support: U.S. local phone support available Monday through Friday, 10:00 AM to 6:00 PM (Eastern Time).
- Email Support: Expect a reply within 24 hours on weekdays and within 48 hours on weekends.
- Official Website: Visit the Gevanti official website for additional guides and support resources.
Please have your model number (SA8) and purchase information ready when contacting support.