YATINEY DN12UDBB-CJ06BB
YATINEY 47.2" Computer Desk with Charging Station and LED Lights and Vinyl Record Holder
Model: DN12UDBB-CJ06BB
Introduction
This manual provides detailed instructions for the assembly, operation, and maintenance of your YATINEY 47.2" Computer Desk with Charging Station, LED Lights, and Vinyl Record Holder. Please read this manual thoroughly before assembly and use to ensure proper function and safety.
Safety Information
- Ensure all parts are present before beginning assembly.
- Do not overtighten screws during assembly to avoid damaging components.
- Keep children and pets away from the assembly area.
- Place the desk on a flat, stable surface.
- Do not exceed the weight capacity of the desk.
- Unplug the charging station and LED lights before cleaning or moving the desk.
Package Contents
Verify that all components listed below are included in your package. If any parts are missing or damaged, please contact customer support.
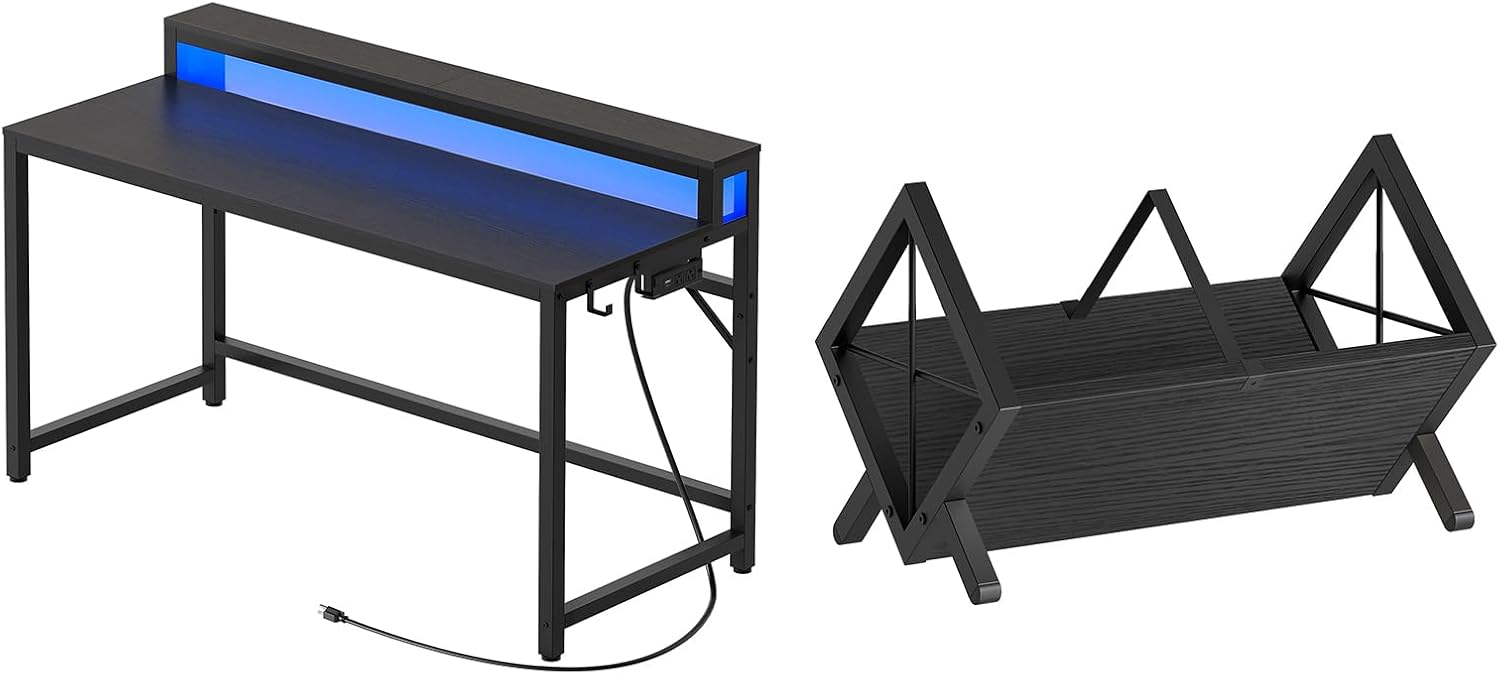
Image: Main components of the YATINEY Computer Desk and the separate Vinyl Record Holder.
- Desk Frame Components (Legs, Crossbars)
- Desk Top Panels (Main desk surface, Monitor stand)
- Charging Station Unit
- LED Light Strip
- Vinyl Record Holder Components
- Hardware Pack (Screws, Allen wrench, etc.)
- Side Hooks (4 units)
- Remote Control for LED Lights
Setup and Assembly
Follow these steps carefully for proper assembly of your computer desk and vinyl record holder.
Desk Assembly
- Step 1: Assemble the Desk Frame. Attach the desk legs to the crossbars using the provided screws. Ensure all connections are secure but do not fully tighten yet.
- Step 2: Attach the Main Desk Surface. Carefully place the main desk panel onto the assembled frame and secure it with screws.
- Step 3: Install the Monitor Stand. Position the monitor stand on the main desk surface and secure it. This stand also houses the LED light strip and charging station.
- Step 4: Install Charging Station and LED Lights. Insert the charging station unit into its designated slot on the monitor stand. Affix the LED light strip along the underside of the monitor stand. Connect the power cables.
- Step 5: Attach Side Hooks. Secure the four side hooks to the designated points on the desk frame.
- Step 6: Final Tightening. Once all components are in place, carefully tighten all screws.

Image: The computer desk fully assembled, showing the monitor stand and integrated LED lighting.
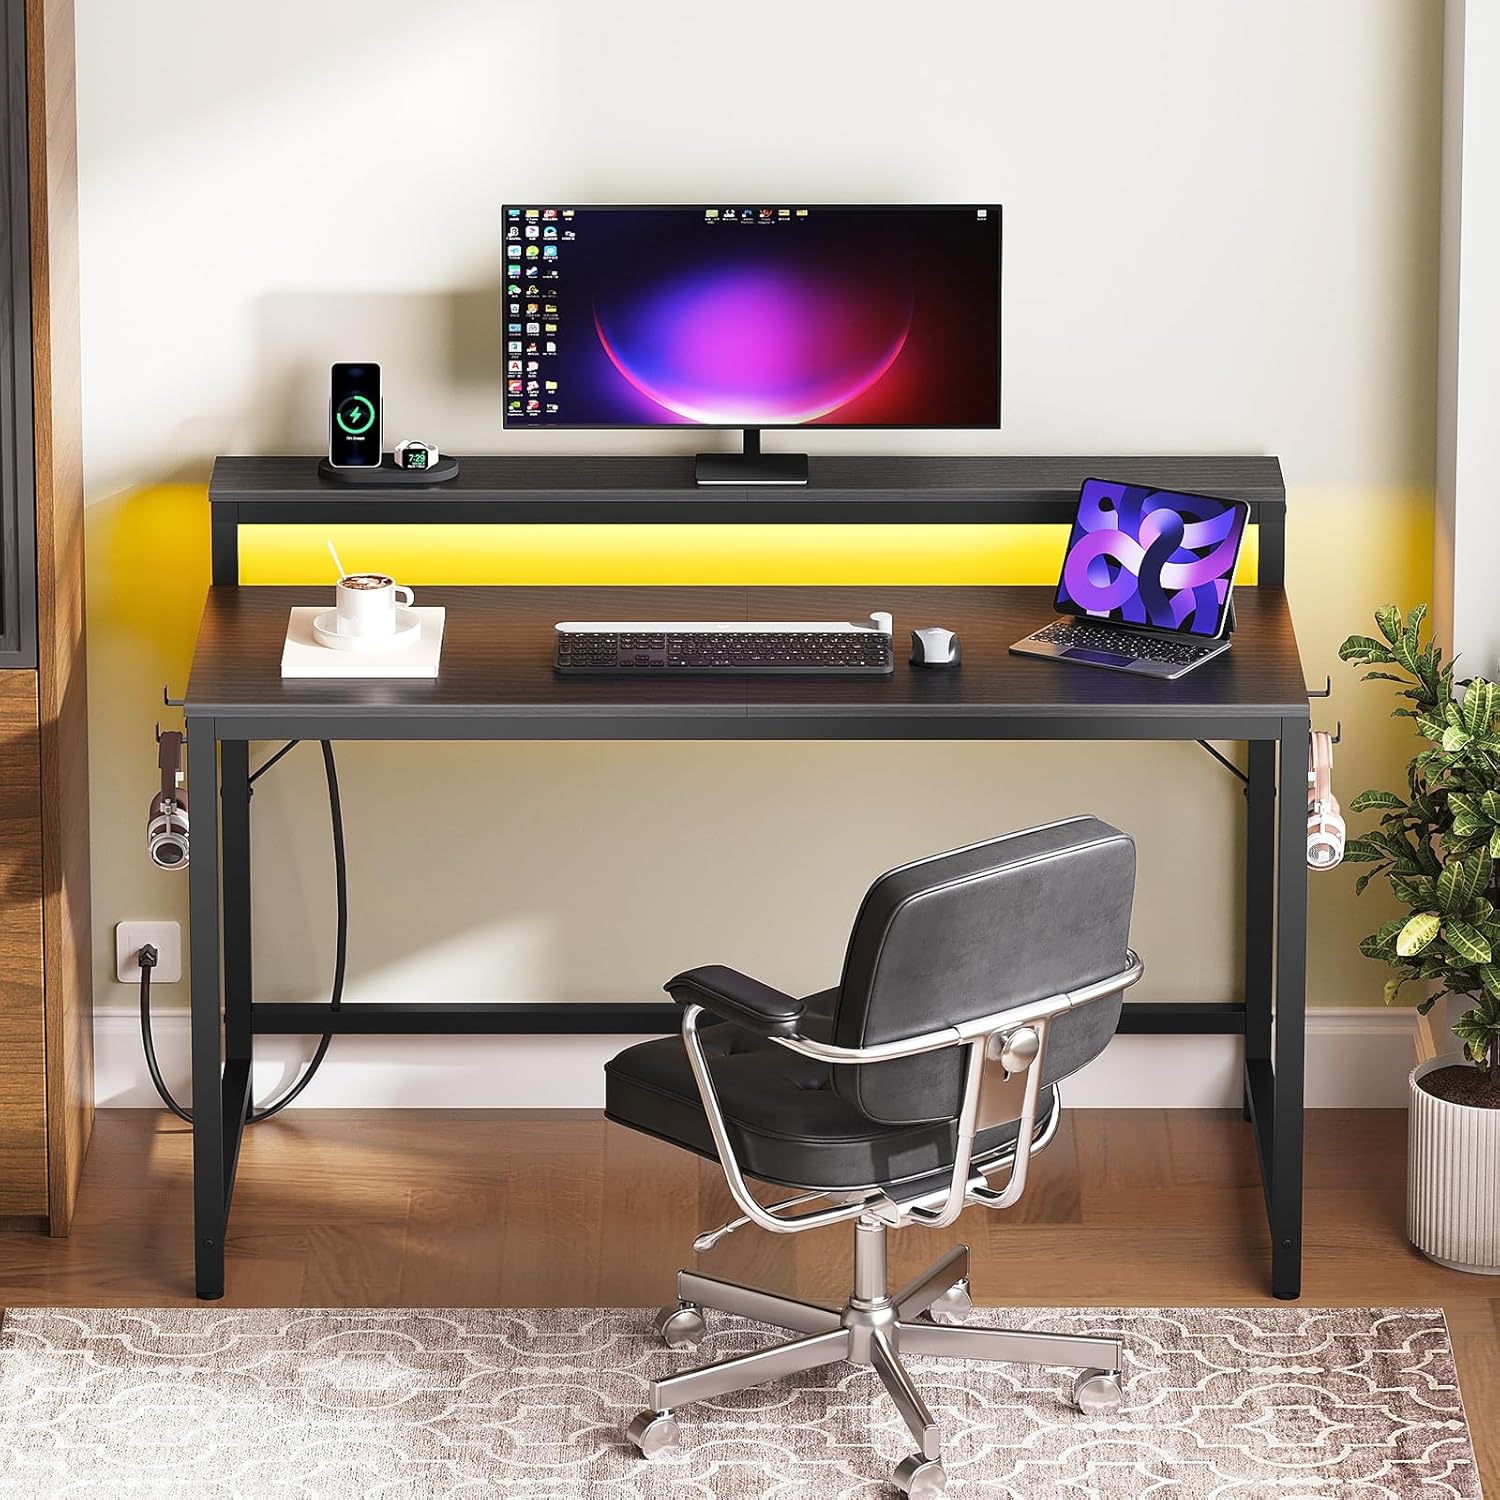
Image: Close-up of the desk showing the integrated charging station with outlets and USB ports, and the side hooks for accessories.
Vinyl Record Holder Assembly
- Step 1: Connect Side Panels. Attach the two triangular side panels to the central base panel using the provided hardware.
- Step 2: Secure Support Bars. Install the support bars between the side panels to ensure stability.
- Step 3: Final Tightening. Ensure all screws are securely tightened.

Image: The vinyl record holder in its unassembled state, showing the individual components.

Image: The vinyl record holder fully assembled, ready for use.
Operating Instructions
Charging Station
The integrated charging station provides convenient power access for your devices.
- AC Outlets: Plug in standard electronic devices.
- USB-A Port: Connect USB-compatible devices for charging.
- USB-C Port: Connect USB-C compatible devices for charging.
- Ensure the desk's main power cord is plugged into a wall outlet for the charging station to function.
Image: Close-up view of the charging station, highlighting the available power outlets and USB ports.
LED Lights
The LED light strip offers customizable lighting options to enhance your workspace.
- Power On/Off: Use the remote control or the integrated button on the desk to turn the lights on or off.
- Color Selection: The remote control allows you to choose from various static colors.
- Mode Adjustment: Select different lighting modes, such as flashing, fading, or pulsing.
- Brightness Control: Adjust the intensity of the LED lights using the remote.
- Bluetooth Connection: For advanced control, connect the LED lights to your smartphone via Bluetooth. Download the recommended app (refer to packaging or product details for app name) to access additional features, including music synchronization.

Image: The computer desk with its LED lights illuminated in a vibrant color, demonstrating the lighting feature.

Image: Diagram illustrating the remote control for the LED lights and the Bluetooth connection process for smartphone control.
Vinyl Record Holder
The vinyl record holder is designed to store and display your LP records.
- Place records vertically within the holder.
- Ensure records are evenly distributed to maintain balance.
- The holder can accommodate approximately 80-100 LP records.

Image: The vinyl record holder shown in use, filled with a collection of LP records.
Maintenance
- Cleaning: Wipe the desk surfaces with a soft, damp cloth. Avoid harsh chemicals or abrasive cleaners.
- Dusting: Regularly dust the LED light strip and charging station to prevent accumulation.
- Hardware Check: Periodically check all screws and connections to ensure they remain tight. Retighten if necessary.
- Cable Management: Organize power cords and device cables to prevent tangles and damage.
Troubleshooting
LED Lights Not Working
- Check Power Connection: Ensure the desk's main power cord is securely plugged into a functional wall outlet.
- Check LED Strip Connection: Verify that the LED light strip is properly connected to its power source on the desk.
- Remote Control Battery: If using the remote, check if its battery needs replacement.
- Bluetooth Connection: If controlling via app, ensure Bluetooth is enabled on your device and the lights are paired correctly.
Charging Station Not Providing Power
- Verify Main Power: Confirm the desk's main power cord is plugged in and the wall outlet is active.
- Check Device Cables: Ensure your device's charging cable is fully inserted into the charging station port and the device.
- Test Different Ports/Devices: Try a different port or a different device to isolate the issue.
Desk Wobbles After Assembly
- Tighten All Screws: Go back and ensure all assembly screws are fully tightened.
- Level Surface: Confirm the desk is placed on a flat and even floor.
Specifications
| Model Number | DN12UDBB-CJ06BB |
| Brand | YATINEY |
| Desk Dimensions | 47.2 inches (Length) x [Width] x [Height] |
| Material | Engineered Wood, Metal |
| Charging Station | 2 AC Outlets, 1 USB-A Port, 1 USB-C Port |
| LED Lights | RGB, Bluetooth Control, Remote Control, Music Sync Function |
| Vinyl Record Holder Capacity | 80-100 LP Records |
Warranty and Support
For warranty information or technical support, please refer to the product packaging or contact YATINEY customer service directly. Contact details can typically be found on the manufacturer's website or through your purchase platform.
YATINEY Customer Service: Visit the YATINEY Store on Amazon
Ask a question about this manual
Ask about setup, troubleshooting, compatibility, parts, safety, or missing instructions. Manuals+ will review the question and use this page’s manual context to help answer it.