1. Introduction
This manual provides detailed instructions for the setup, operation, maintenance, and troubleshooting of your LANTOOCAM Solar Trail Camera P903W. Please read this manual thoroughly before using the camera to ensure optimal performance and longevity.
2. Product Overview
2.1 Key Features
- Ultra-Long Runtime: Equipped with a 5200mAh rechargeable battery and a top-mounted solar panel for extended operation. Supports 8 AA batteries (not included) for additional power backup, allowing for up to 30 days of cloudy weather operation.
- High-Resolution Imaging: Captures 60MP still photos and 5K UHD videos with audio, providing clear and detailed wildlife footage.
- IP66 Weatherproof: Designed to operate in extreme conditions from -10°C to 45°C (14°F to 113°F), making it suitable for various outdoor environments including rain, snow, and heat.
- Advanced Night Vision: Features 940nm invisible IR LEDs with a 120° wide-angle lens and a 65ft (20m) detection range for clear nighttime footage without disturbing wildlife.
- WiFi Connectivity & App Control: Allows for quick setup and remote access to photos, videos, and settings via a dedicated mobile application.
2.2 What's in the Box
- LANTOOCAM 5K Solar Trail Camera (1)
- 64 GB SD Card (1)
- Mounting Belt (1)
- Stand Mount & Support (1)
- User Manual (1)
- Screw Accessories (1)
- USB Type C Cable (1)
- Power Cable (1)
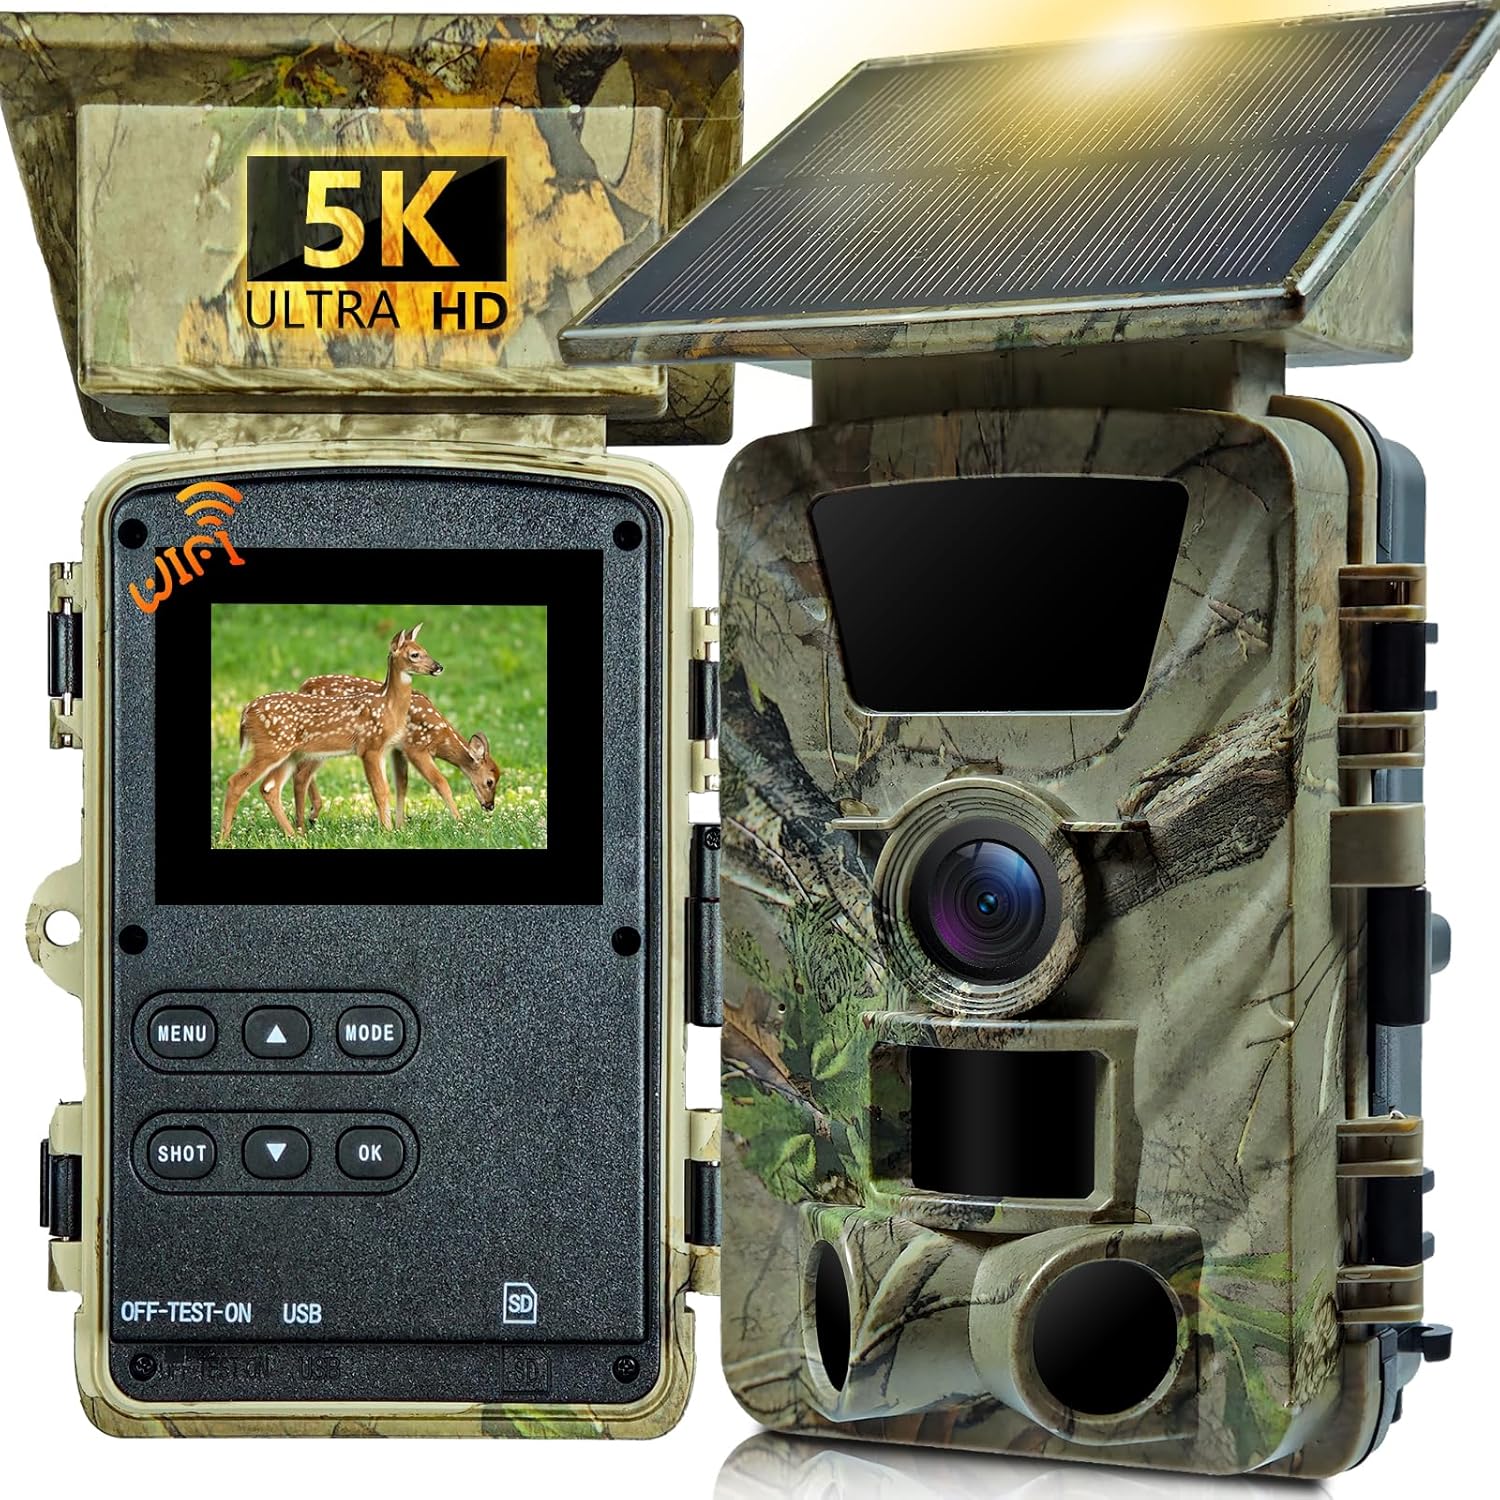
Figure 1: LANTOOCAM Solar Trail Camera P903W.

Figure 2: Included components in the product package.
3. Setup
3.1 Initial Setup
- Insert Batteries: The camera is equipped with a 5200mAh rechargeable battery. For extended standby time, it is recommended to install 8 AA 1.5V alkaline batteries (not included) into the battery compartment.
- Insert SD Card: Insert the included 64GB microSD card into the designated slot. For first-time use, format the SD card via the camera's menu settings.
- Power On: Move the slider from "OFF" to "TEST" to access the camera's menu and settings.
- Format SD Card: In the "TEST" mode, navigate to the menu, find "Memory Card Format," and select "Yes" to format the card.
- Set Date and Time: Adjust the date and time settings in the menu for accurate timestamping of recordings.
- Remove Protective Film: Ensure all protective films are removed from the lens and screen to avoid affecting image quality.
3.2 Mounting the Camera
The camera can be mounted using the provided mounting belt or the stand mount. Choose a location that receives adequate sunlight for the solar panel and provides a clear view of the desired monitoring area.
- Using the Mounting Belt: Thread the mounting belt through the slots on the back of the camera. Wrap the belt around a tree or post and secure it tightly.
- Using the Stand Mount: Attach the stand mount to the bottom of the camera. Secure the stand mount to a flat surface or stake it into the ground using the provided screw accessories. Adjust the camera angle as needed.

Figure 3: Dual power options: solar panel and 8xAA battery compatibility.
Video 1: Demonstration of unboxing and initial setup of the LANTOOCAM Solar Trail Camera, including battery and SD card installation.
4. Operating Instructions
4.1 Basic Operation
After initial setup, you can configure the camera's operating modes and settings:
- Mode Selection: In "TEST" mode, press the "MODE" button to switch between Photo, Video, or Photo+Video modes.
- Resolution Settings: Access the menu to adjust photo resolution (up to 60MP) and video resolution (up to 5K).
- PIR Sensitivity: Configure the Passive Infrared (PIR) sensor sensitivity (Low, Medium, High) based on the desired detection range and environment.
- Fill Light Distance: Adjust the night vision fill light distance (Near, Middle, Far) for optimal nighttime recording.
- Motion Detection: Set the detection interval and enable/disable motion detection.
- Activate Recording: Once settings are configured, move the slider from "TEST" to "ON." The screen will close after 5 seconds, and the camera will begin recording based on your settings.
Video 2: Detailed overview of the LANTOOCAM Solar Trail Camera's features and menu navigation.
4.2 App Control (TrailCam Go)
The LANTOOCAM Solar Trail Camera can be controlled and monitored via the "TrailCam Go" mobile application.
- Download App: Scan the QR code in the user manual or search for "TrailCam Go" in your device's app store (available for Android and iOS).
- Connect to Camera: Enable Bluetooth and Wi-Fi on your smartphone. Open the app and follow the prompts to connect to the camera's Wi-Fi hotspot (model PR903W).
- Live View & Settings: Once connected, you can view live footage, check battery status, temperature, and adjust camera settings remotely.
- Gallery & Download: Access the camera's gallery to view recorded photos and videos. You can download selected media directly to your smartphone.

Figure 4: Smart sharing and instant WiFi connectivity via the mobile app.

Figure 5: Visual guide for connecting the camera to the mobile application.
4.3 Night Vision
The camera's 940nm invisible IR LEDs provide clear black-and-white footage in total darkness, with a detection range of up to 65 feet (20 meters). This ensures discreet monitoring of wildlife without visible light emission.

Figure 6: Super Night Vision capabilities with invisible IR LEDs.
5. Maintenance
- Cleaning: Regularly clean the camera lens and solar panel with a soft, dry cloth to ensure optimal performance. Avoid abrasive materials or harsh chemicals.
- Battery Check: Monitor the battery level via the app or camera screen. Replace AA batteries as needed and ensure the internal rechargeable battery is charging via the solar panel or power cable.
- SD Card Management: Periodically review and delete old footage from the SD card to prevent it from becoming full. Format the SD card every few months to maintain performance.
- Firmware Updates: Check the manufacturer's website or app for any available firmware updates to ensure your camera has the latest features and bug fixes.
6. Troubleshooting
- Camera Not Turning On: Check if the internal battery is charged and if AA batteries are correctly installed. Ensure the power slider is in the "ON" or "TEST" position.
- Poor Image/Video Quality: Clean the camera lens. Ensure the protective film has been removed. Check resolution settings in the menu.
- Motion Detection Issues: Adjust PIR sensitivity. Ensure the camera is positioned correctly to avoid false triggers from swaying branches or direct sunlight.
- Wi-Fi Connection Problems: Ensure your smartphone's Wi-Fi and Bluetooth are enabled. Make sure the camera is within range of your phone's Wi-Fi hotspot. If issues persist, try restarting both the camera and your phone.
- SD Card Errors: Reformat the SD card via the camera menu. If the error persists, try a different compatible SD card.
7. Specifications
| Feature | Specification |
|---|---|
| Model Name | P903W |
| Video Capture Resolution | 5K |
| Effective Still Resolution | 60 MP |
| Power Source | Solar Powered (5200mAh internal battery) & 8xAA Batteries (not included) |
| Connectivity Technology | Wi-Fi, Wireless |
| International Protection Rating | IP66 (Waterproof) |
| Night Vision Range | 20 Meters (65 feet) |
| Viewing Angle | 120 Degrees |
| Flash Memory Installed Size | 64 GB (included) |
| Flash Memory Supported Size Maximum | 256 GB |
| Operating Temperature | -10°C to 45°C (14°F to 113°F) |
| Material | Acrylonitrile Butadiene Styrene (ABS) |
| Item Weight | 1.34 pounds |
8. Warranty and Support
For warranty information and technical support, please refer to the contact details provided in your product packaging or visit the official LANTOOCAM website. Keep your purchase receipt for warranty claims.