Introduction
This manual provides instructions for the setup, operation, and maintenance of your Growell 17 Pods Hydroponics Growing System Kit and the accompanying 240 Pcs Hydroponic Pods. Please read these instructions carefully before use to ensure optimal performance and longevity of your product.
The Growell Hydroponics Growing System is designed for indoor plant cultivation, allowing you to grow a variety of plants without soil. The included hydroponic pods are compatible with most hydroponic systems and are crafted from high-quality peat for effective seed germination and root development.

Image: The Growell 17 Pods Hydroponics Growing System, showcasing its capacity to grow multiple types of plants simultaneously.
Package Contents
Verify that all items are present in your package:
- Growell 17 Pods Hydroponics Growing System
- 120 x Pre-dried Growing Sponges
- 120 x Pod Labels
- Power Adapter
- User Manual (this document)

Image: A visual representation of the included 120 grow sponges and 120 pod labels, essential components for starting your hydroponic garden.
Setup Instructions
Follow these steps to set up your Growell Hydroponics Growing System and prepare your seeds for growth:
- Prepare the Sponges: Soak the pre-dried growing sponges in water for approximately 5 minutes until they are fully expanded. The sponges will increase in size from 0.78 inches to 0.9 inches in diameter and from 1.97 inches to 2.58 inches in height after soaking.
- Insert Seeds: Carefully place your desired seeds into the small hole located at the top of each soaked sponge.
- Place in System: Insert the seeded sponge into a suitable long round basket, then place the basket into the designated openings of the hydroponic system. Ensure the basket is securely seated.
- Apply Labels: Affix the provided pod labels onto the baskets. These labels help block excess light from reaching the water reservoir, preventing algae growth, and can be used to identify your plants.
- Fill Water Reservoir: Fill the system's water reservoir with clean water up to the 'Max' indicator line.
- Add Nutrients: Add appropriate hydroponic plant nutrients to the water according to the nutrient manufacturer's instructions.
- Connect Power: Plug the power adapter into the system and then into a standard electrical outlet.
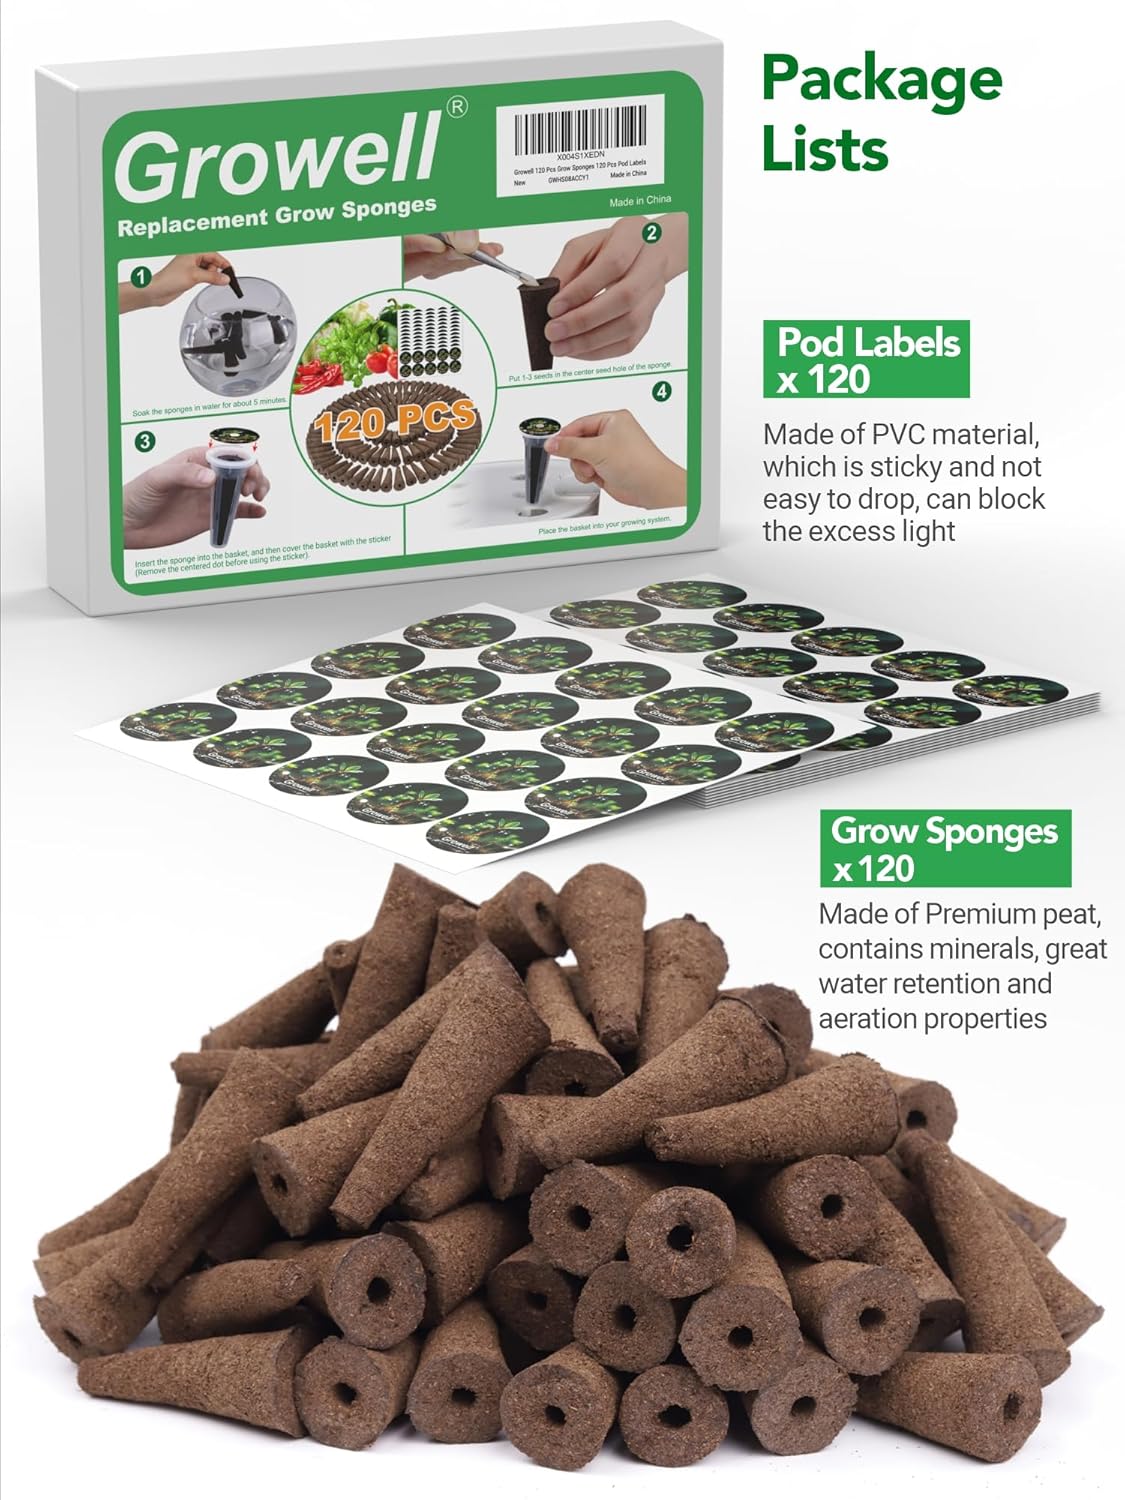
Image: Step-by-step guide on preparing and placing the grow sponges and seeds into the hydroponic system.
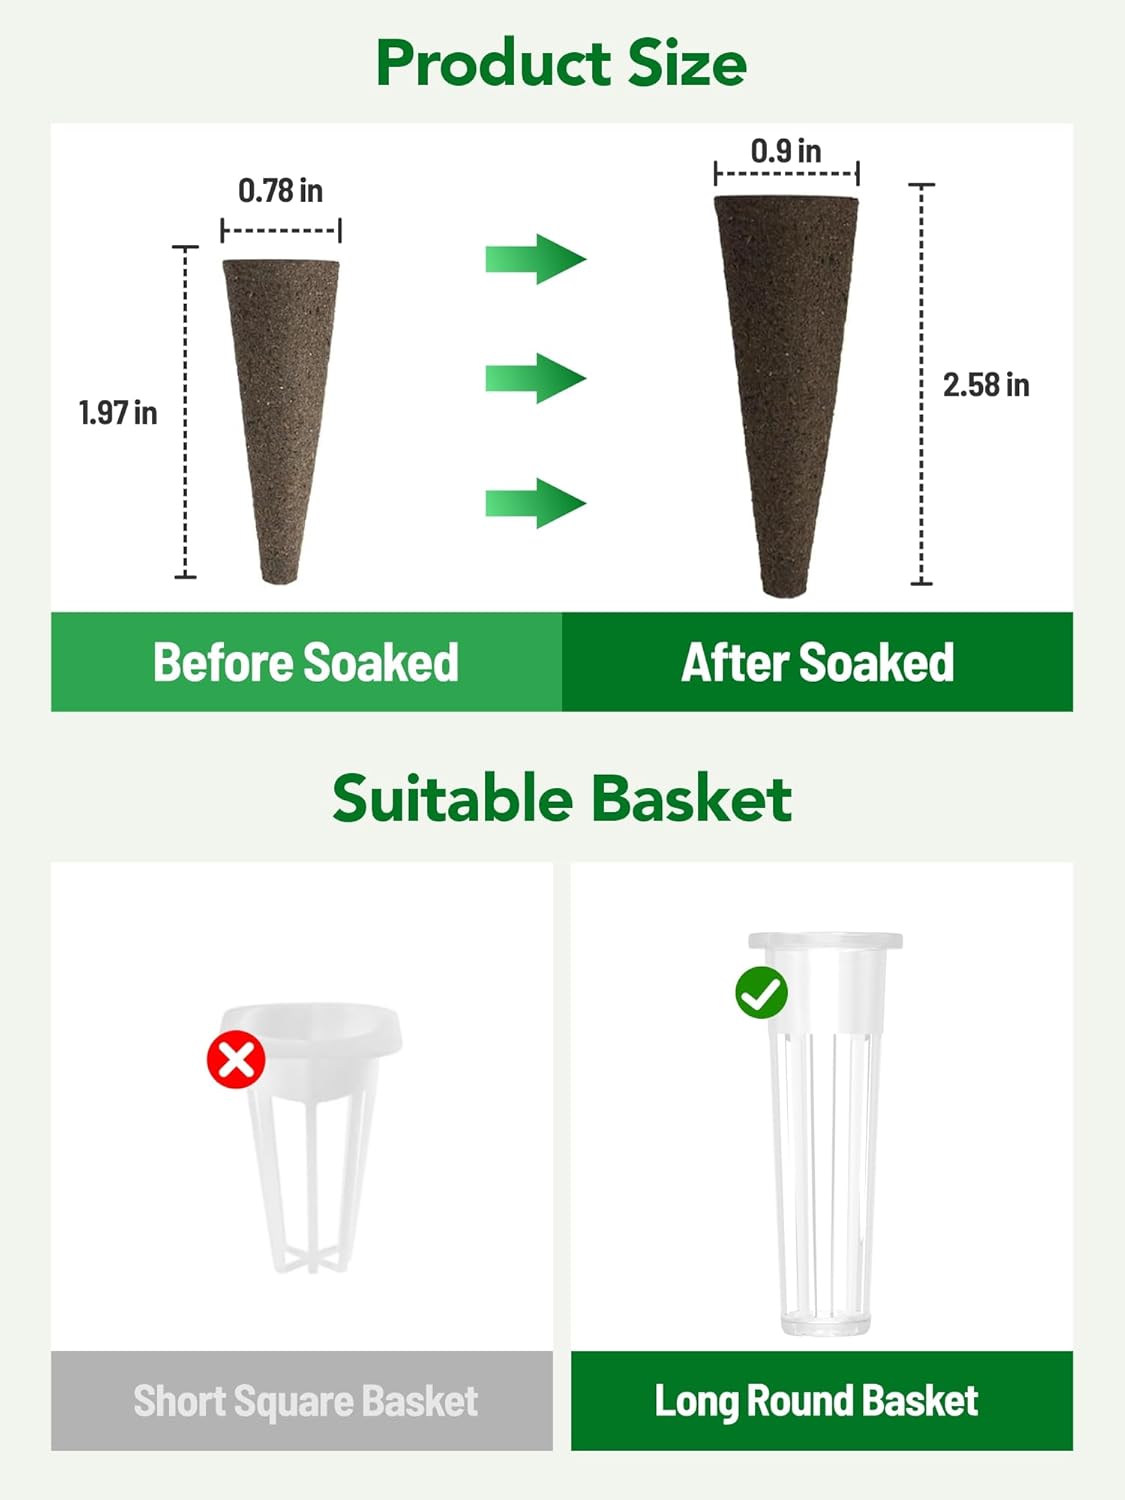
Image: Visual comparison of grow sponge dimensions before and after soaking, along with an illustration of the correct long round basket type for use.
Operating Instructions
Once the system is set up, you can begin operating it to cultivate your plants:
- Power On: Press the power button on the control panel to turn on the system.
- Light Settings: The system features an integrated LED grow light. Refer to the control panel for options to adjust light cycles (e.g., 16 hours on/8 hours off) or light spectrums (e.g., for germination, vegetative growth, or flowering).
- Water Level Monitoring: Regularly check the water level in the reservoir. Refill with water and nutrients as needed, ensuring the level remains between the 'Min' and 'Max' indicators.
- Pump Operation: The water pump circulates water and nutrients to the plant roots. Ensure it is operating correctly. Some systems have automatic pump cycles.
- Plant Growth: Observe your plants for signs of growth. As plants mature, they may require pruning or support.
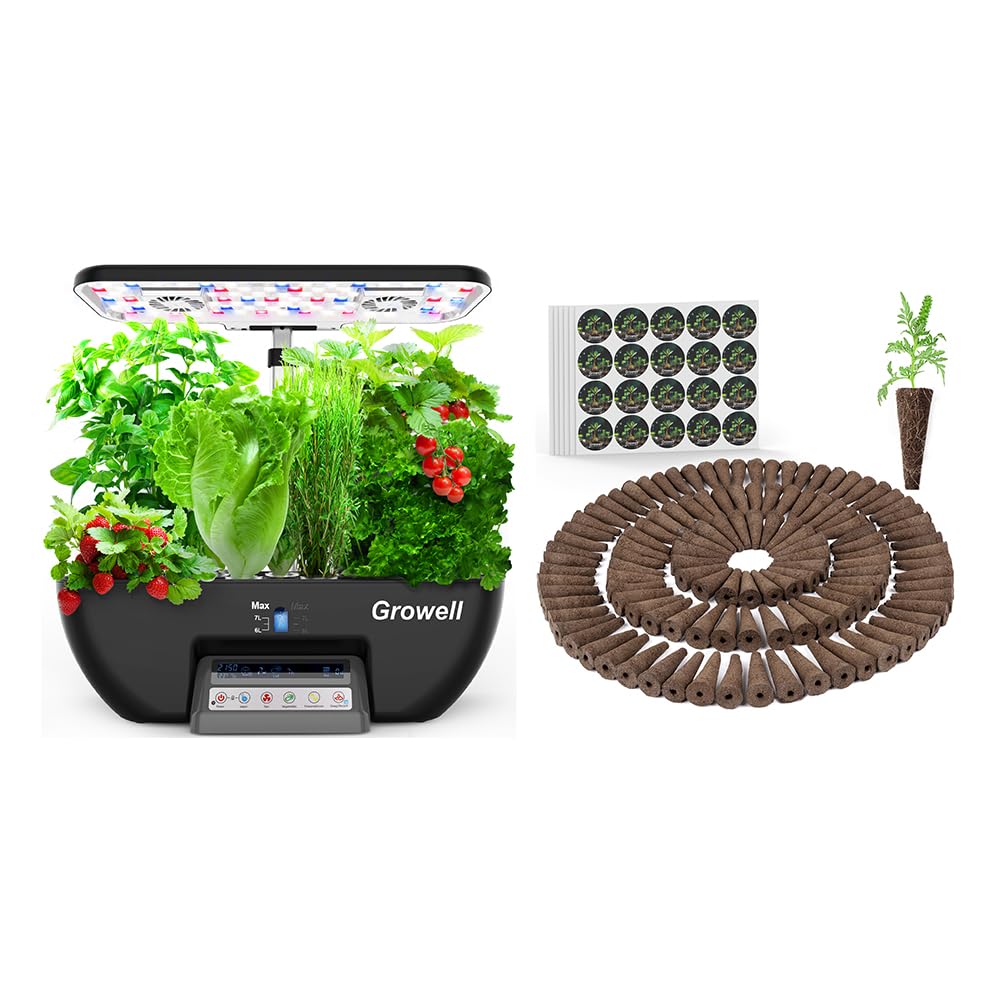
Image: The main Growell hydroponics system unit, highlighting the control panel for managing light and fan functions, and the water level indicators.
Maintenance
Proper maintenance ensures the health of your plants and the longevity of your system:
- Water Changes: It is recommended to perform a full water change every 2-4 weeks. Drain the old water, clean the reservoir, and refill with fresh water and nutrients.
- System Cleaning: Periodically clean the entire system, including the reservoir, pump, and grow deck, to prevent algae buildup and maintain hygiene. Use a mild, non-toxic cleaning solution.
- Sponge Storage: Store any unused replacement growing sponges in a dry place to maintain their quality and prevent degradation.
- Pump Maintenance: Check the water pump regularly for any blockages or debris. Clean the pump impeller if necessary to ensure proper water circulation.

Image: Healthy seedlings thriving in grow sponges, demonstrating the positive outcome of consistent maintenance and optimal growing conditions.
Troubleshooting
If you encounter issues with your hydroponics system, consider the following common solutions:
- Poor Germination: Ensure seeds are fresh and viable. Check that sponges are adequately moist and placed correctly. Verify light cycle settings are appropriate for germination.
- Plant Wilting/Stunted Growth: Check water level and nutrient concentration. Ensure the pump is circulating water effectively. Verify light intensity and duration are suitable for the plant type.
- Algae Growth: Algae often indicates too much light reaching the water or excessive nutrients. Ensure pod labels are covering openings, and consider reducing light duration if not impacting plant growth. Perform a thorough system cleaning.
- Pump Not Working: Check power connection. Inspect the pump for any blockages or debris. Clean the impeller if necessary.
Specifications
| Feature | Detail |
|---|---|
| Product Type | Hydroponic Growing System Kit |
| Model Name | 17 Pods Hydroponics Growing System Kit |
| Grow Sponge Material | High-quality Peat |
| Grow Sponge Size (Before Soaking) | 0.78 inches (diameter) x 1.97 inches (height) |
| Grow Sponge Size (After Soaking) | 0.9 inches (diameter) x 2.58 inches (height) |
| Compatibility | Compatible with most hydroponics growing systems (e.g., AeroGarden, Growell, Ahopegarden) |
| Included Pods | 120 Pcs Pre-dried Growing Sponges |
| Included Labels | 120 Pcs Pod Labels (PVC material) |

Image: Illustration of the hydroponic system's compatibility with various popular brands, highlighting its versatile design.
Warranty and Support
Information regarding product warranty and customer support was not available in the provided product data. Please refer to the product packaging or the manufacturer's official website for details on warranty coverage and how to contact customer support for assistance.