1. Introduction
Thank you for choosing the Instant-Pot RIO Gourmet 6QT Multi-Cooker. This versatile appliance is designed to simplify your cooking process, offering multiple functions including pressure cooking, slow cooking, sautéing, and yogurt making. This manual provides essential information for safe and efficient operation, maintenance, and troubleshooting to help you get the most out of your multi-cooker.
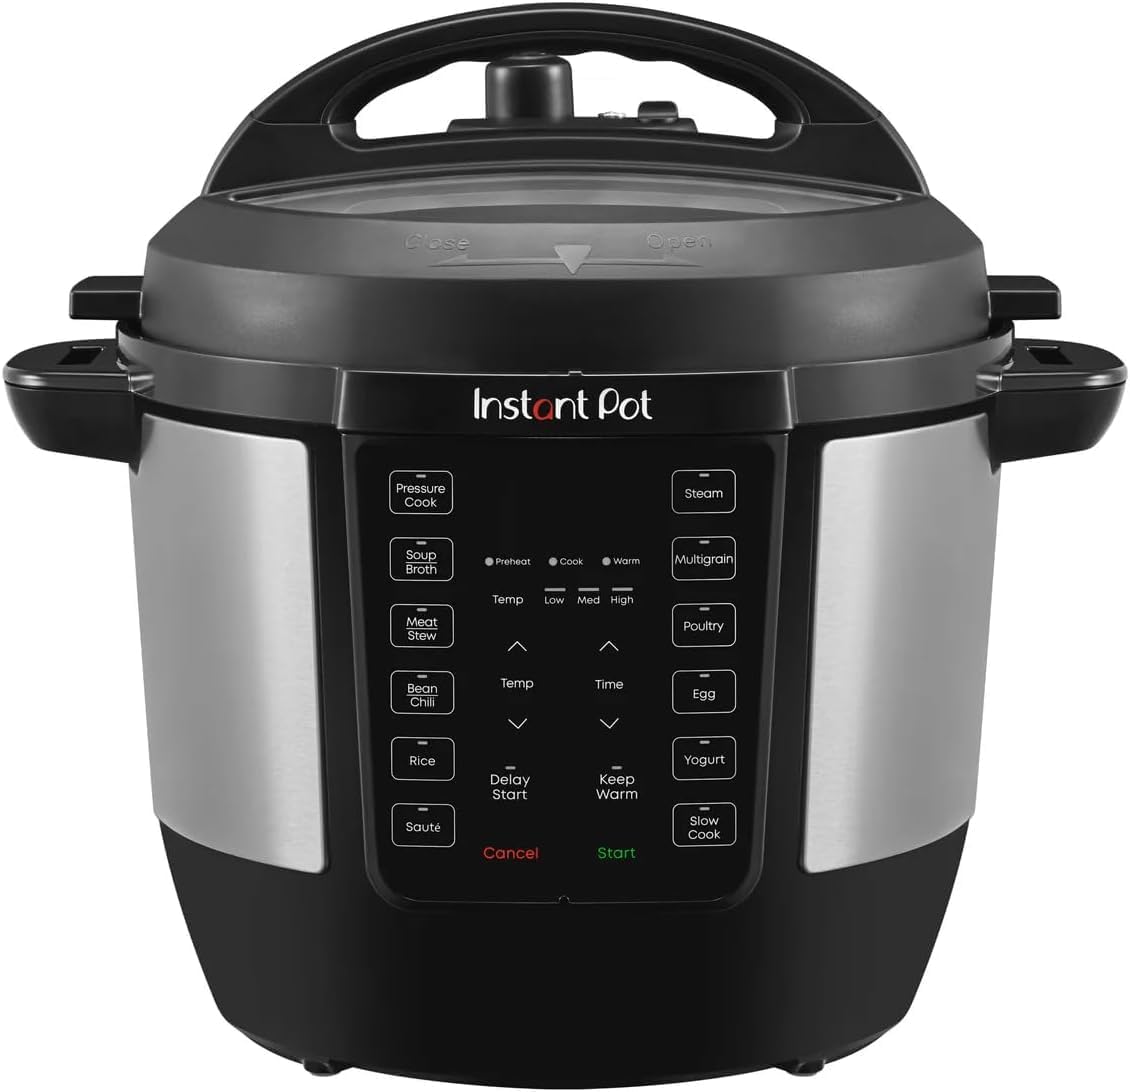
Image 1.1: Front view of the Instant-Pot RIO Gourmet 6QT Multi-Cooker, showcasing its sleek design and control panel.
2. Important Safeguards
When using electrical appliances, basic safety precautions should always be followed. Read all instructions carefully before operating the Instant-Pot RIO Multi-Cooker. This appliance incorporates over 10 proven safety features, including Overheat Protection and an Easy Seal Safety Lid Lock, designed to ensure safe operation. Always ensure the lid is properly sealed and the steam release valve is correctly positioned before cooking under pressure.
- Do not touch hot surfaces. Use handles or knobs.
- To protect against electrical shock, do not immerse cord, plugs, or the appliance in water or other liquid.
- Close supervision is necessary when any appliance is used by or near children.
- Unplug from outlet when not in use and before cleaning. Allow to cool before putting on or taking off parts.
- Do not operate any appliance with a damaged cord or plug, or after the appliance malfunctions or has been damaged in any manner.
3. Product Components
Familiarize yourself with the various parts of your Instant-Pot RIO Multi-Cooker:
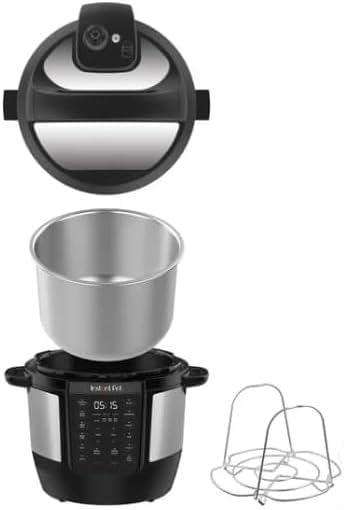
Image 3.1: Exploded view of the Instant-Pot RIO, showing the lid, stainless steel inner pot, main cooker base, and a steaming rack.
- Main Cooker Base: Houses the heating element and control panel.
- Inner Pot: 6-quart capacity, made of durable stainless steel.
- Lid: Features the steam release valve and sealing ring.
- Sealing Ring: Essential for pressure cooking, located inside the lid.
- Steam Release Valve: Controls pressure release.
- Condensation Collector: Catches condensation during cooking.
4. Setup
4.1 Unpacking
Carefully remove all components from the packaging. Retain packaging materials for future storage or transport if needed. Remove any promotional stickers or labels from the appliance.
4.2 Initial Cleaning
Before first use, wash the inner pot, lid, and sealing ring with warm, soapy water. Rinse thoroughly and dry all parts. Wipe the exterior of the cooker base with a damp cloth. Ensure all parts are completely dry before assembly.
4.3 Placement
Place the multi-cooker on a stable, level surface away from heat sources and flammable materials. Ensure there is adequate space around the appliance for ventilation, especially above the steam release valve. Do not place on a stovetop.

Image 4.1: The Instant-Pot RIO positioned on a kitchen countertop, demonstrating appropriate placement with surrounding space.
5. Operating Instructions
5.1 Control Panel Overview
The Instant-Pot RIO features a user-friendly control panel with one-touch smart programs and manual settings.

Image 5.1: Detailed view of the Instant-Pot RIO control panel, highlighting program buttons like Pressure Cook, Sauté, Rice, and Yogurt, along with temperature and time adjustments.
- Smart Programs: Buttons for Pressure Cook, Slow Cook, Meat/Stew, Poultry, Beans/Chili, Rice, Multigrain, Soup/Broth, Steam, Sauté, Yogurt, Cake, and Keep Warm.
- Temp/Time Buttons: Use the arrow buttons to adjust cooking temperature and time.
- Delay Start: Allows you to program cooking to begin at a later time.
- Cancel/Start: To stop a program or begin cooking.
5.2 General Operation Steps
- Place the inner pot into the cooker base.
- Add ingredients to the inner pot.
- Secure the lid: Align the arrow on the lid with the arrow on the cooker base, then rotate clockwise until it locks into place.
- Ensure the steam release valve is set to the correct position for your chosen cooking method (e.g., Sealing for pressure cooking).
- Plug in the multi-cooker.
- Select a Smart Program or adjust time/temperature manually.
- Press 'Start' to begin cooking.
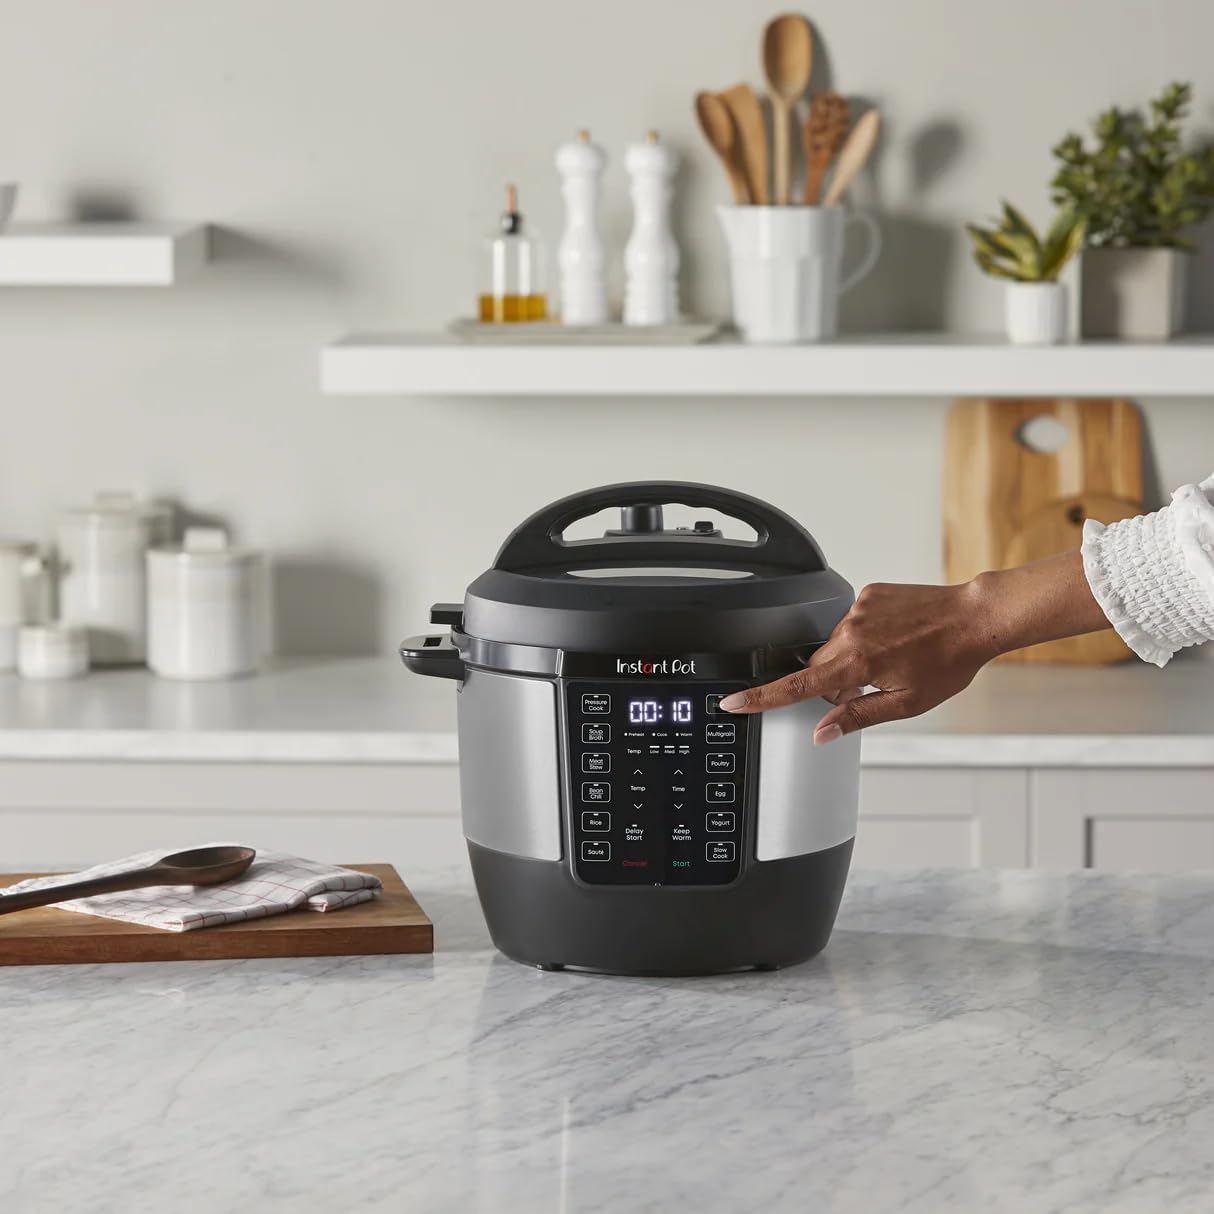
Image 5.2: A user interacting with the control panel, demonstrating the ease of selecting cooking functions.
5.3 Specific Cooking Functions
- Pressure Cooking: After selecting a pressure cook program, ensure the steam release valve is in the 'Sealing' position. The cooker will preheat, then pressurize, and the cooking cycle will begin. Once complete, use the Quick Easy-Release switch to safely release steam.
- Sauté: Select the 'Sauté' program. The inner pot will heat up, allowing you to brown ingredients before pressure cooking or to reduce sauces.
- Slow Cook: Select the 'Slow Cook' program. Adjust temperature (Low, Med, High) and time as needed. Ensure the steam release valve is in the 'Venting' position.
- Yogurt: Follow specific recipes for yogurt making. This program maintains the precise temperature required for fermentation.
- Keep Warm: This function automatically activates after most cooking programs to keep food warm until serving. It can also be selected manually.
- Delay Start: Use this feature to set a delayed start time for your cooking program, allowing you to prepare meals in advance.
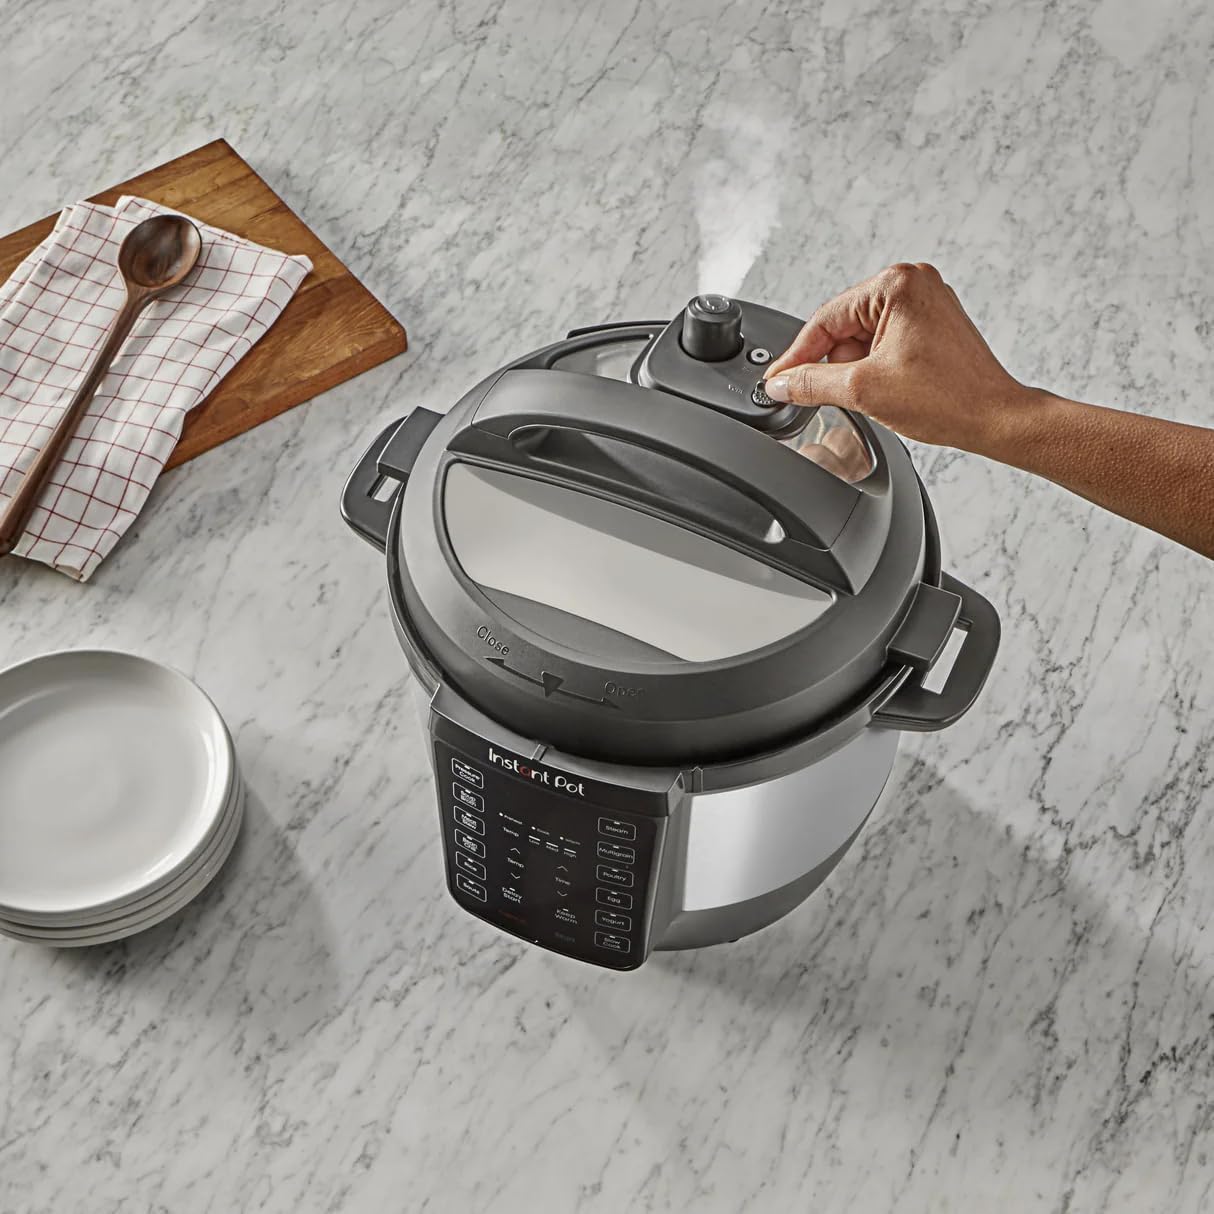
Image 5.3: A user operating the Easy-Release switch on the lid, illustrating the steam release process after pressure cooking.

Image 5.4: Ingredients being sautéed directly in the stainless steel inner pot of the Instant-Pot RIO.
6. Maintenance and Cleaning
Regular cleaning ensures the longevity and optimal performance of your Instant-Pot RIO Multi-Cooker.
- Inner Pot: The stainless steel inner pot is dishwasher safe. For hand washing, use warm, soapy water and a non-abrasive sponge.
- Lid: Remove the sealing ring and steam release valve for thorough cleaning. Wash the lid, sealing ring, and valve with warm, soapy water. Ensure the sealing ring is properly reinstalled before next use.
- Cooker Base: Wipe the exterior of the cooker base with a damp cloth. Never immerse the cooker base in water or any other liquid.
- Condensation Collector: Empty and clean the condensation collector after each use.
- Storage: Ensure all parts are clean and dry before storing. Store the multi-cooker in a dry place.
7. Troubleshooting
If you encounter issues with your Instant-Pot RIO, refer to the following common problems and solutions:
| Problem | Possible Cause | Solution |
|---|---|---|
| Cooker not pressurizing | Lid not sealed, steam release valve open, insufficient liquid | Ensure lid is locked and steam release valve is set to 'Sealing'. Add minimum required liquid. Check sealing ring for proper placement. |
| Food not cooking properly | Incorrect program/time, insufficient liquid, power interruption | Verify program settings and cooking time. Ensure adequate liquid. Check power connection. |
| Error code on display | Specific internal issue | Refer to the Instant-Pot website or contact customer support for specific error code meanings and solutions. |
| Steam leaking from lid | Sealing ring dirty/damaged, lid not properly closed | Clean or replace sealing ring. Ensure lid is correctly aligned and locked. |
If troubleshooting steps do not resolve the issue, please contact customer support.
8. Specifications
| Feature | Detail |
|---|---|
| Brand | Generic |
| Model Number | 112221301 |
| Capacity | 6 Quarts |
| Material | Stainless steel |
| Color | Black/Stainless Steel |
| Product Dimensions | 12.13"D x 13.82"W x 12.6"H |
| Special Features | Pressure Cooking, Slow Cooking, Sautéing, Yogurt Making, Keep Warm, Delay Start, Energy Efficient |
| Wattage | 1000 watts |
| Item Weight | 16.43 Pounds |
| Control Method | Touch |
| Operation Mode | Electric |
| Dishwasher Safe Parts | Inner Pot, Sealing Ring, Steam Release Valve |
| Voltage | 120 Volts |
9. Warranty and Support
This product comes with a standard manufacturer's warranty. Please refer to the warranty card included in your product packaging for specific terms and conditions. For technical support, service, or warranty claims, please contact the manufacturer's customer service department.
Customer Support: For assistance, please visit the manufacturer's website or refer to the contact information provided in your product documentation.