1. Introduction
Thank you for choosing the Generic Commercial Electric Bread Slicer. This manual provides essential information for the safe and efficient operation, maintenance, and troubleshooting of your new bread slicer. Please read this manual thoroughly before initial use and retain it for future reference.
This machine is designed for commercial use in bakeries, restaurants, and other food service establishments to efficiently slice various types of bread, toast, and similar products.
2. Safety Instructions
- Electrical Safety: Ensure the power supply matches the machine's voltage (220V/50Hz or 110V/60Hz). Always plug the machine into a grounded outlet. Do not operate with wet hands or in wet environments. Disconnect power before cleaning or maintenance.
- Blade Safety: The blades are extremely sharp. Exercise extreme caution when handling or cleaning. Never attempt to touch the blades while the machine is operating or connected to power. Keep hands and loose clothing away from moving parts.
- Proper Usage: Only use the machine for its intended purpose of slicing bread and similar food items. Do not attempt to slice frozen products or items containing hard inclusions.
- Supervision: Do not leave the machine unattended during operation. Keep children and unauthorized personnel away from the machine.
- Maintenance: Regularly inspect the power cord for damage. If any part is damaged, discontinue use and contact support for repair.
3. Product Overview
Key Features:
- Efficient Slicing: Equipped with a 370W motor, capable of cutting up to 31 slices simultaneously with a flat cutting surface.
- Durable Construction: Made from 304 stainless steel for corrosion resistance, wear resistance, and easy cleaning.
- Adjustable Width: Inlet and outlet width can be adjusted from a minimum of 13cm (5 inches) to a maximum of 38cm (15 inches).
- Consistent Thickness: This model provides a 45mm slice thickness. Other available thicknesses include 10mm, 12mm, 15mm, 20mm, 24mm, 30mm, and 36mm.
- Versatile Application: Suitable for slicing bread, toast, steamed bread, ham, and other similar food products.
Components:

Figure 1: Overall view of the Commercial Electric Bread Slicer with dimensions: 56cm/22inch width, 68cm/26.7inch depth, 66cm/26inch height. This image shows the main body, feed tray, and discharge area.

Figure 2: Close-up of the power switch located on the side of the bread slicer, clearly marked 'ON' and 'OFF'.
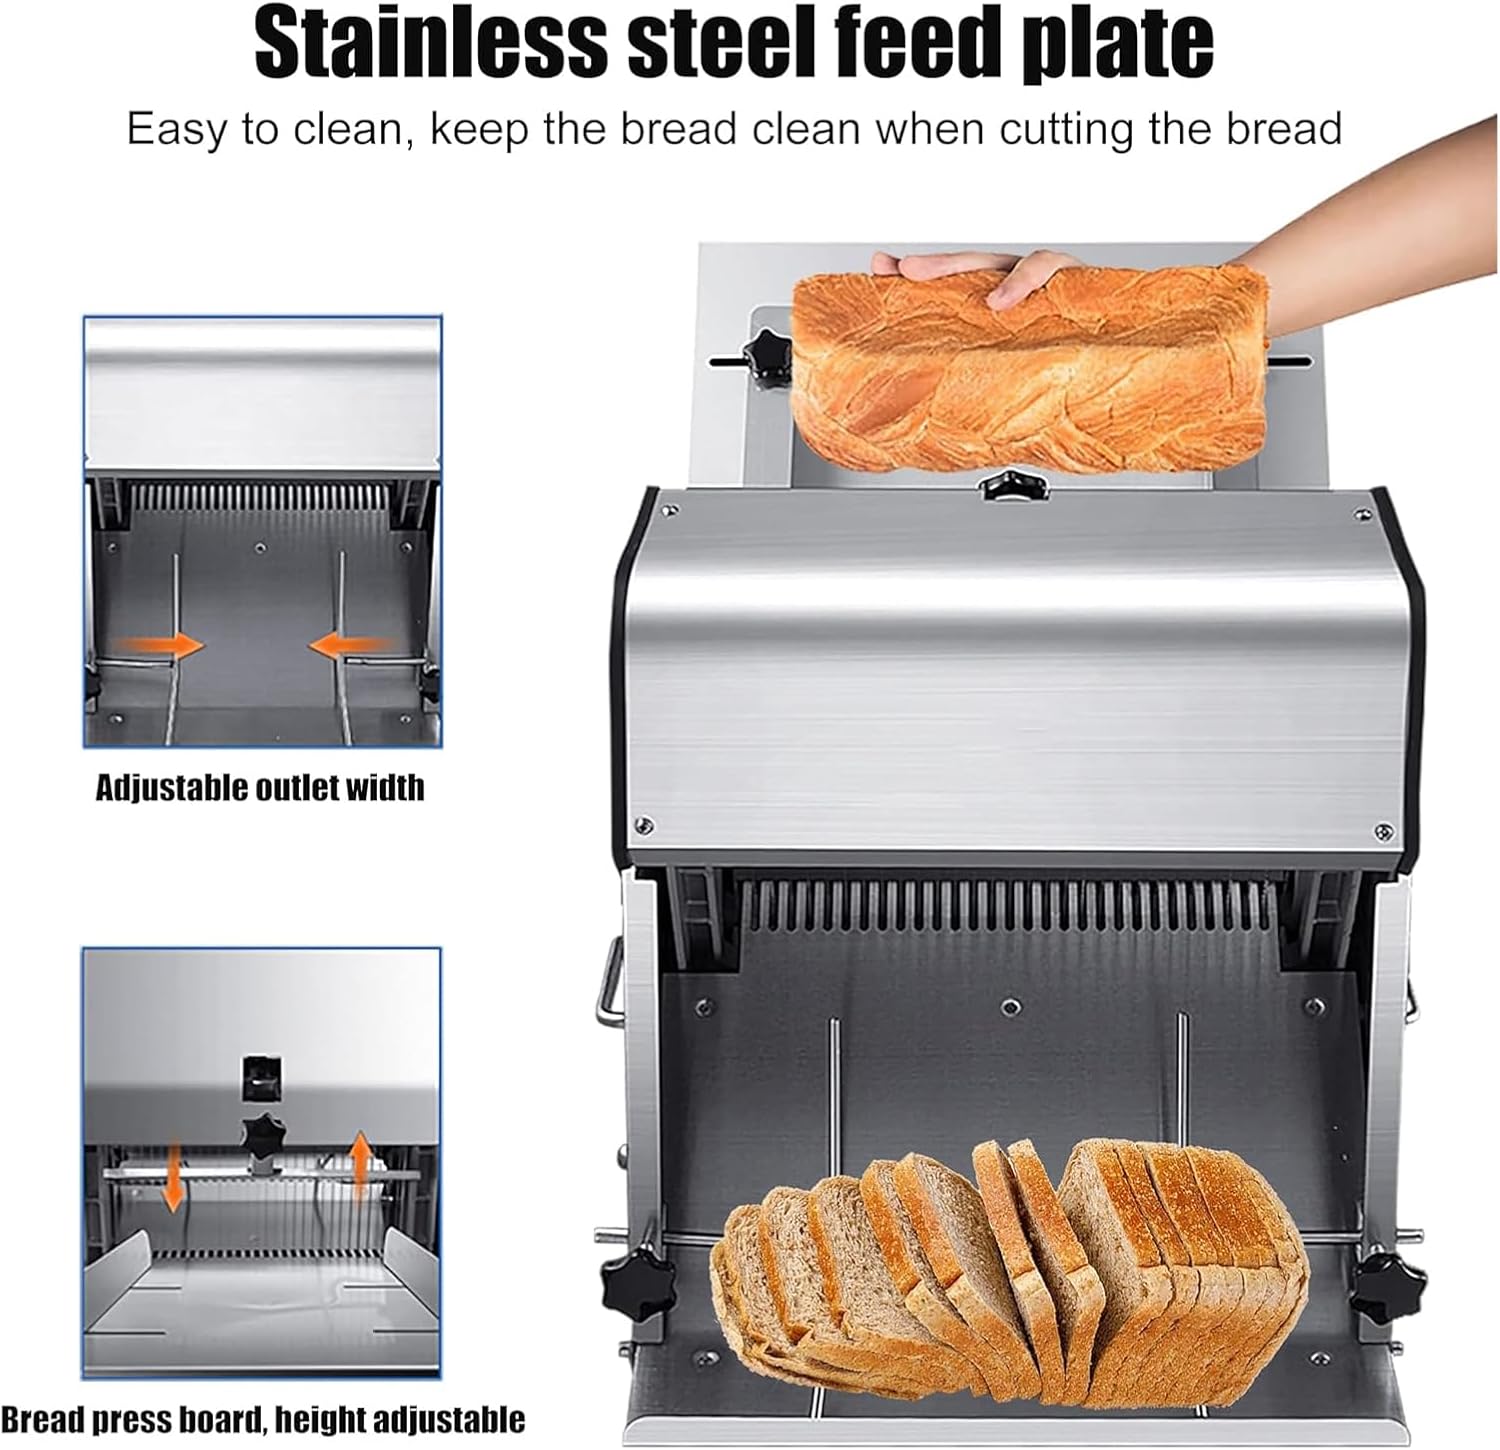
Figure 3: Illustration of the stainless steel feed plate, adjustable outlet width mechanism, and the height-adjustable bread press board. This shows how bread is guided through the slicer.

Figure 4: Detailed view of the 301 stainless steel blades, which are responsible for precise and clean cuts.
4. Specifications
| Feature | Specification |
|---|---|
| Model | 45mm (Slice Thickness) |
| Material | 304 Stainless Steel |
| Voltage | 220V/50Hz; 110V/60Hz |
| Power | 370W |
| Maximum Slices at One Time | 31 slices |
| Maximum Machine Width Adjustment | 38cm / 15 inches |
| Minimum Machine Width Adjustment | 13cm / 5 inches |
| Approximate Net Weight | 48 KG |
| Approximate Gross Weight | 50 KG |
| Dimensions (Packing) | 59cm x 69cm x 68cm |
5. Setup
- Unpacking: Carefully remove the bread slicer from its packaging. Inspect for any shipping damage. Retain packaging materials for future transport if needed.
- Placement: Place the machine on a stable, level, and sturdy surface capable of supporting its weight. Ensure there is adequate space around the machine for ventilation and safe operation.
- Power Connection: Verify that the local power supply matches the voltage and frequency requirements of the machine (220V/50Hz or 110V/60Hz). Plug the power cord into a grounded electrical outlet.
- Initial Cleaning: Before first use, wipe down all food-contact surfaces with a damp cloth and mild, food-safe detergent. Rinse thoroughly and dry completely.
6. Operating Instructions
- Prepare the Bread: Ensure the bread is fully cooled before slicing. Warm bread can compress and tear during slicing.
- Adjust Inlet/Outlet Width: The machine features adjustable inlet and outlet widths. Use the adjustment knobs (refer to Figure 3 and Figure 5) to set the width appropriate for your bread loaf. The maximum width is 38cm (15 inches) and the minimum is 13cm (5 inches).

Figure 5: Demonstration of the adjustable width feature, showing both maximum and minimum settings.
- Power On: Locate the power switch (refer to Figure 2) and switch it to the 'ON' position. The blades will begin to move.
- Load Bread: Carefully place the bread loaf onto the stainless steel feed plate, guiding it towards the blades. Ensure your hands are clear of the blades.
- Slicing Process: The machine will automatically pull the bread through the blades, producing uniform slices. Collect the sliced bread from the discharge area.
- Power Off: Once all bread is sliced, switch the power button to the 'OFF' position. Wait for all moving parts to come to a complete stop before proceeding.
7. Maintenance and Cleaning
Regular cleaning and maintenance are crucial for the longevity and hygienic operation of your bread slicer.
- Disconnect Power: ALWAYS unplug the machine from the power outlet before cleaning or performing any maintenance.
- Remove Crumb Tray: Empty and clean the crumb tray regularly to prevent accumulation.
- Clean Surfaces: Wipe down all exterior and interior surfaces with a damp cloth and a mild, food-safe detergent. Avoid using abrasive cleaners or scouring pads that could scratch the stainless steel.
- Blade Cleaning: Use extreme caution when cleaning around the blades. A brush designed for kitchen equipment can help remove crumbs and debris. Do not use bare hands.
- Drying: Ensure all parts are thoroughly dried before reassembling or operating the machine.
- Inspection: Periodically check the blades for any signs of damage or dullness. Damaged blades should be replaced by a qualified technician.
8. Troubleshooting
| Problem | Possible Cause | Solution |
|---|---|---|
| Machine does not turn on | No power supply; Power switch off; Faulty power cord/outlet | Check power connection; Ensure switch is ON; Test outlet with another device; Contact support if cord is damaged. |
| Bread is torn or unevenly sliced | Bread is too warm/soft; Blades are dull; Incorrect width adjustment | Allow bread to cool completely; Inspect blades for sharpness (contact support for replacement); Adjust inlet/outlet width correctly. |
| Machine makes unusual noise | Foreign object; Loose component; Motor issue | Immediately power off and unplug. Inspect for obstructions. If noise persists, contact support. |
| Bread jams in the machine | Bread too large for opening; Crumb buildup; Blades obstructed | Power off and unplug. Carefully remove jammed bread. Clean crumb tray and blades. Adjust width for loaf size. |
If you encounter problems not listed here or if the suggested solutions do not resolve the issue, please contact customer support.
9. Support
For any questions, technical assistance, or service needs regarding your Generic Commercial Electric Bread Slicer, please contact your supplier or the manufacturer. Always provide your product model number (45mm) and ASIN (B0FVFDGB2H) when seeking support to ensure efficient service.


