Introduction
Thank you for choosing the Generic Automatic Sprinkler Controller. This device is designed to simplify your watering tasks, ensuring your garden, lawn, or plants receive optimal hydration. Featuring an intuitive LCD display, flexible operating modes, and rain sensing technology, this controller offers efficient and convenient irrigation management.
Safety Information
- Ensure the controller is installed securely to prevent accidental detachment.
- Do not submerge the device in water. It is designed to be weather-resistant, not submersible.
- Use only AAA batteries. Do not mix old and new batteries or different battery types.
- Keep out of reach of children.
- Disconnect from the water source during freezing temperatures to prevent damage.
Package Contents
Verify that all components are present:
- 1x Automatic Sprinkler Controller
- 1x User Manual (this document)
- (Batteries not included - requires 2x AAA batteries)
Product Overview
The sprinkler controller features a clear LCD display and five control buttons for easy programming. It includes a built-in water filter/strainer to prevent debris buildup.

Image: Front view of the Automatic Sprinkler Controller, highlighting the LCD screen and the five control buttons below it. The device is black with a brass-colored connector at the top.

Image: A detailed view of the controller's LCD display, showing current time (13:00), start time (06:02), and end time (06:08) settings. Various icons for mode, frequency, and battery level are visible.
Setup
1. Battery Installation
- Locate the battery compartment on the back of the controller.
- Open the compartment cover.
- Insert 2 new AAA batteries, ensuring correct polarity (+/-).
- Close the battery compartment cover securely.
2. Hose Connection
- Attach the top connector of the sprinkler controller to your outdoor faucet. Hand-tighten only.
- Connect your garden hose or drip irrigation system to the bottom outlet of the controller. Hand-tighten only.
- Ensure all connections are secure to prevent leaks.

Image: The automatic sprinkler controller connected to a standard outdoor faucet at the top and a garden hose at the bottom, demonstrating proper installation.

Image: The sprinkler controller shown installed on a silver faucet, with a green background suggesting a garden or lawn setting.
Operating Instructions
1. LCD Display Interface
The 2.1-inch LCD display shows current time, watering schedule, battery status, and other settings. Icons indicate the active mode and functions.
2. Button Functions
- Left Button (Water Drop Icon): Manual watering / Rain Delay activation.
- Middle Left Button (Gear Icon): Settings / Program adjustment.
- Middle Right Button (M/Clock Icon): Mode selection (Manual/Automatic) / Time setting.
- Right Plus Button (+): Increase value / Navigate forward.
- Right Minus Button (-): Decrease value / Navigate backward.
3. Setting Current Time
- Press the M/Clock button until the time display flashes.
- Use the + and - buttons to adjust the hour.
- Press M/Clock again to move to minutes, then adjust with + and -.
- Press M/Clock to confirm and exit time setting.
4. Programming Automatic Watering Schedule
This controller allows customization of start time, watering duration, and frequency.
- Press the Gear button to enter programming mode. The display will show options for Start Time, Duration, and Frequency.
- Use + and - to adjust the flashing value (e.g., hour for Start Time).
- Press the Gear button to move to the next setting (e.g., minutes for Start Time, then Duration, then Frequency).
- Start Time: Set the desired time for watering to begin.
- Duration: Set how long the watering cycle will last (e.g., minutes).
- Frequency: Set how often watering occurs (e.g., every X hours or days).
- Once all settings are adjusted, press the Gear button repeatedly until the display returns to the main screen, saving your program.
5. Manual Watering Mode
To initiate watering outside of the programmed schedule:
- Press the Water Drop button.
- Use + and - to set the desired manual watering duration.
- Press the Water Drop button again to start manual watering. The display will show a countdown.
- To stop manual watering prematurely, press the Water Drop button again.
6. Rain Delay Function
The rain delay function temporarily pauses your watering schedule to conserve water during rainy periods.
- While on the main screen, press and hold the Water Drop button for a few seconds.
- The display will show options for rain delay duration (e.g., 24h, 48h, 72h).
- Use + and - to select the desired delay period.
- Press the Water Drop button to confirm. The schedule will resume automatically after the delay.
- To cancel rain delay, press and hold the Water Drop button again until the delay icon disappears.
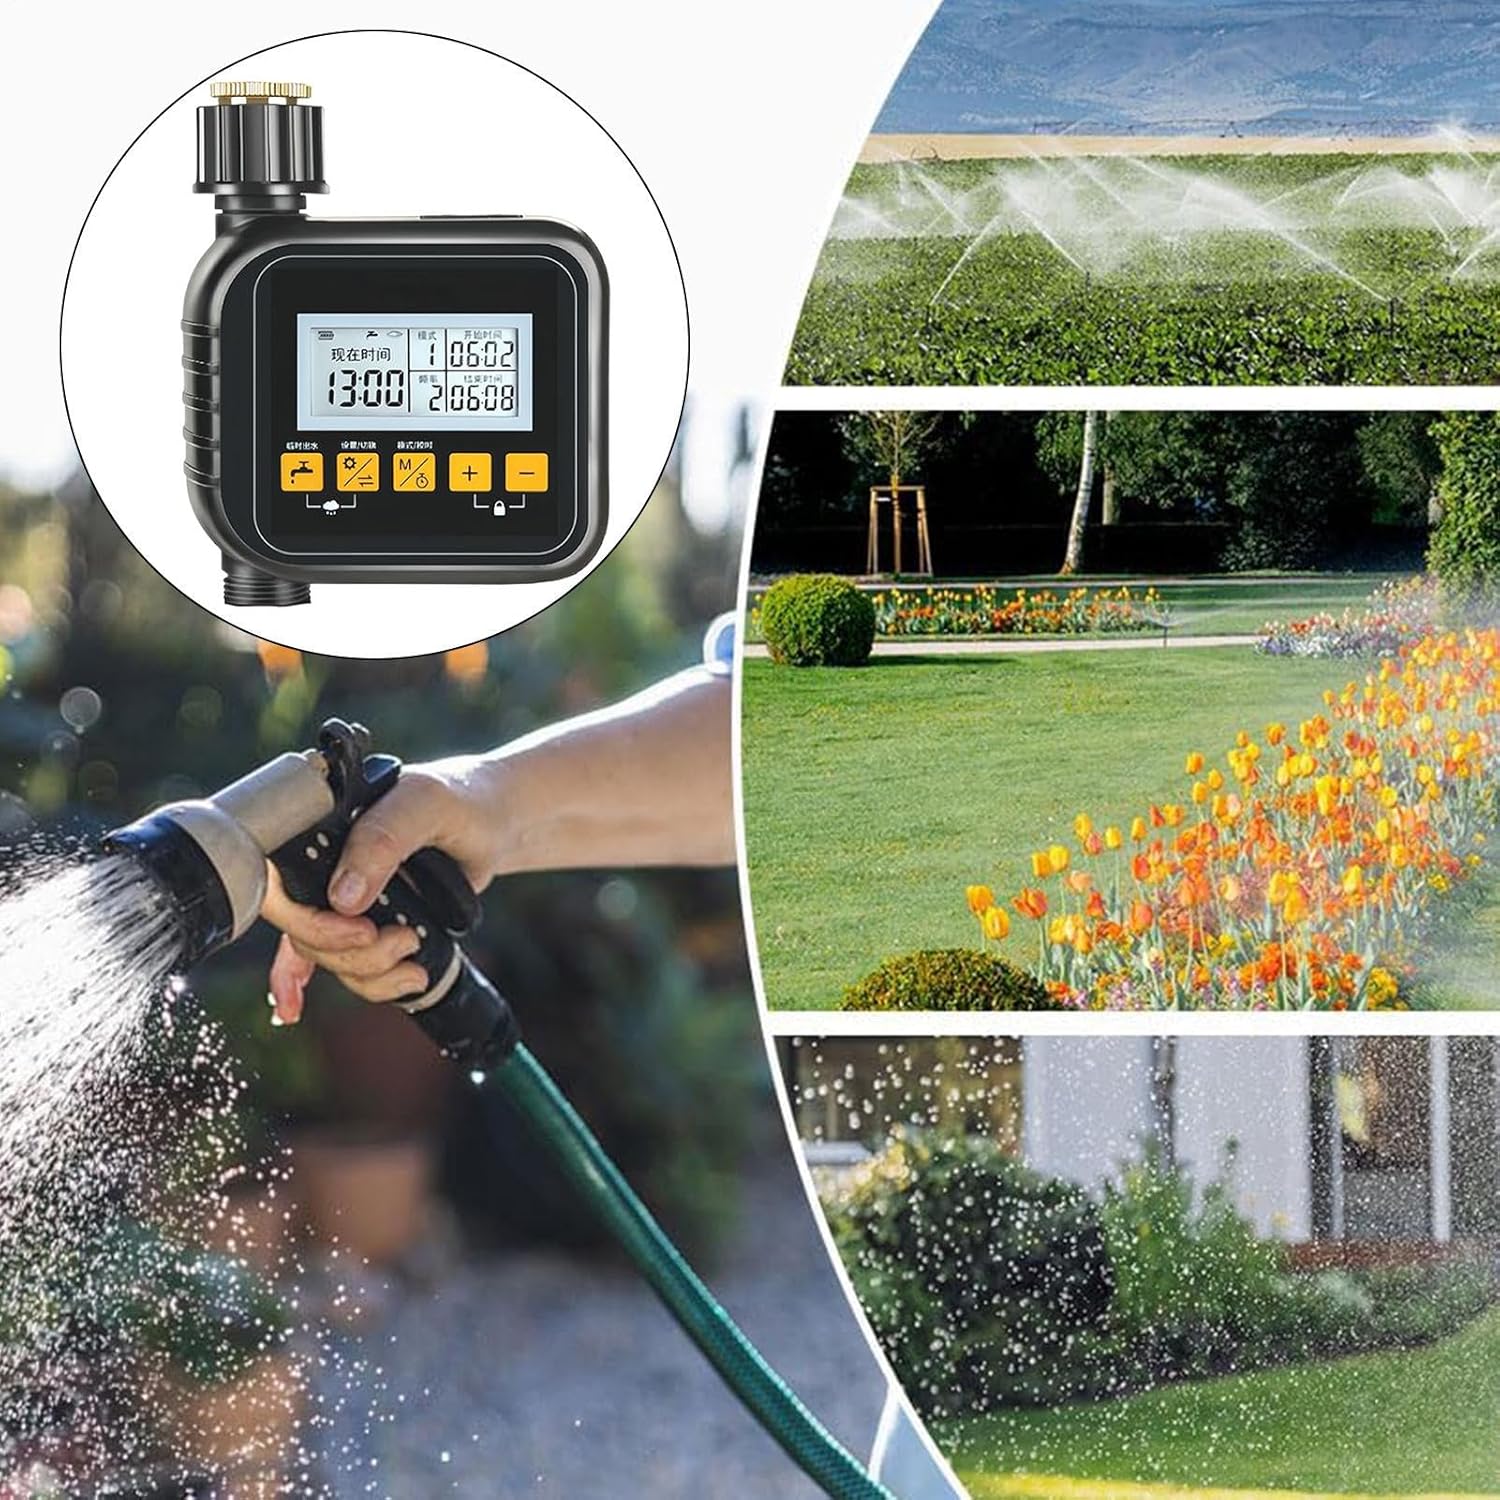
Image: A collage showing the sprinkler controller in the foreground, with background images depicting different watering methods like overhead sprinklers, garden beds being watered, and a person using a hose nozzle, illustrating its versatile application.
Maintenance
- Cleaning: Periodically wipe the controller with a damp cloth. Do not use abrasive cleaners.
- Filter Maintenance: The built-in water filter/strainer should be checked and cleaned regularly to prevent debris buildup and ensure proper water flow. Unscrew the inlet connection, remove the filter, rinse it under running water, and reinsert.
- Battery Replacement: Replace batteries when the low battery indicator appears on the LCD. Remove old batteries promptly to prevent leakage.
- Winter Storage: Before the first frost, disconnect the controller from the faucet and hose. Remove batteries and store the unit indoors in a dry, frost-free location.
Troubleshooting
| Problem | Possible Cause | Solution |
|---|---|---|
| Controller does not turn on. | Dead or incorrectly installed batteries. | Replace batteries with new AAA batteries, ensuring correct polarity. |
| Water does not flow. | Faucet is off; filter is clogged; low battery; incorrect programming. | Ensure faucet is fully open. Clean the water filter. Replace batteries. Check programming for start times and duration. |
| Leaks from connections. | Loose connections; worn washer. | Tighten connections by hand. Check and replace rubber washers if damaged. |
| Watering schedule not activating. | Incorrect time setting; program not saved; rain delay active. | Verify current time and programmed schedule. Ensure program is saved. Check if rain delay is active and cancel if necessary. |
Specifications
- Model: SQ7S7FA9SDPOAO6C
- Product Material: ABS + Copper
- Product Dimensions: Approximately 15cm x 12cm x 6cm (5.91 x 4.72 x 2.36 inches)
- Item Weight: Approximately 350g (13.6 ounces)
- Display: 2.1-inch LCD
- Power Source: 2x AAA batteries (not included)
- Operating Modes: Manual, Automatic, Rain Delay

Image: A diagram illustrating the physical dimensions of the sprinkler controller: 15cm (5.90 inches) in height, 12cm (4.72 inches) in width, and 6cm (2.36 inches) in depth.
Warranty and Support
This product is manufactured by Generic. For specific warranty information or technical support, please refer to the retailer's return policy or contact the seller directly through your purchase platform. Keep your purchase receipt for warranty claims.