
1. Introduction
This manual provides detailed instructions for the setup, operation, and maintenance of your XZXCVN 3-Channel Audio Mixer. Designed for versatility, this compact mixing console is suitable for home studio recording, live broadcasting, DJ setups, and various audio mixing applications. Please read this manual thoroughly before using the device to ensure proper functionality and to maximize your audio experience.

Image 1.1: XZXCVN 3-Channel Audio Mixer. This image displays the overall layout of the mixer, including input/output ports and control knobs.
2. Product Features
- 3-Channel Input: Supports microphones, guitars, and headsets via XLR, 6.35mm, and 3.5mm connectors.
- 48V Phantom Power: Provides power for condenser microphones on Channel 1.
- Versatile Connectivity: Features XLR to USB compatibility, ideal for streaming, digital audio production, and gaming.
- Independent Volume Controls: Each channel has its own volume control for precise mixing.
- Built-in Digital Effects: Includes Delay and Repeat functions for enhanced audio.
- Flexible Power Options: Powered via USB DC 5V Type-C interface, compatible with computers, mobile power supplies, and adapters.
- High-Fidelity Chips: Equipped for noise reduction and stable performance.
- Compact and Portable: Designed for easy transport and setup in various environments.
3. Package Contents
Please check the package for the following items:
- 1 x XZXCVN 3-Channel Audio Mixing Console
- 1 x USB Power Cord (Type-C)
If any items are missing or damaged, please contact your retailer.
4. Product Overview and Controls
Familiarize yourself with the various inputs, outputs, and controls of the mixer as illustrated below.

Image 4.1: Mixer Control Panel Layout. This diagram highlights and labels each knob, button, and port on the mixer for easy identification.
4.1 Input Section
- CH1 (MIC/LINE) Input: Mono input socket for microphones (XLR) or line-level instruments (6.35mm).
- PC/BT Input: Input for audio from a computer via USB Type-C or Bluetooth.
- AUX IN: 3.5mm stereo input for external audio devices.
4.2 Output Section
- MAIN OUT (LEFT/RIGHT): RCA outputs for connecting to main speakers or amplifiers.
- REC OUT (LEFT/RIGHT): RCA outputs for recording the mixed audio.
- PHONES: 3.5mm stereo output for headphones.
- AUX OUT: Additional 3.5mm stereo output.
- TO PHONE: Output for connecting to a smartphone for live streaming or recording.
4.3 Controls
- GAIN Knob (+60dB): Adjusts the input sensitivity for Channel 1.
- HIGH Knob (+15): Adjusts the high-frequency equalization for Channel 1.
- LOW Knob (+15): Adjusts the low-frequency equalization for Channel 1.
- PHANTOM Power Switch: Activates +48V phantom power for condenser microphones on Channel 1.
- LOOPBACK Switch: Enables or disables the loopback function for PC/BT input.
- DELAY Knob: Adjusts the intensity of the delay effect.
- REPEAT Knob: Adjusts the repetition frequency of the delay effect.
- Channel Volume Knobs (CH1, CH2/3, PC/BT, MAIN, HEAD PHONE): Independently control the output volume for each channel and the main mix/headphones.
- BT Switch: Activates Bluetooth pairing mode.
- Power Supply Display Lamp (POWER): Indicates power status.
- CLIP Indicator: Lights up when the input signal is too high, indicating potential distortion.
- SIG Indicator: Lights up when an input signal is detected.
5. Setup Guide
5.1 Power Connection
- Connect the provided USB Type-C power cord to the DC 5V IN port on the mixer.
- Connect the other end of the USB cable to a compatible power source, such as a computer USB port, a mobile power bank, or a USB power adapter (5V DC).
- The POWER indicator light will illuminate, indicating the mixer is receiving power.

Image 5.1: Power Connection. This image demonstrates how to connect the mixer to a power source using the USB Type-C cable.
5.2 Connecting Audio Sources
- Microphones/Instruments (CH1): Connect an XLR microphone or a 6.35mm instrument cable to the CH1 MIC/LINE input. If using a condenser microphone, ensure the PHANTOM power switch is engaged.
- PC/Bluetooth:
- USB Connection: Connect the mixer to your computer using a USB Type-C data cable. The computer should recognize the mixer as an audio device.
- Bluetooth Connection: Press the BT switch. The Bluetooth indicator will flash. On your device (smartphone, tablet), search for the mixer's Bluetooth name (e.g., "XZXCVN Mixer") and pair.
- External Audio Devices (AUX IN): Connect devices like MP3 players or smartphones using a 3.5mm stereo cable to the AUX IN port.
5.3 Connecting Output Devices
- Main Speakers/Amplifier (MAIN OUT): Connect RCA cables from the MAIN OUT (LEFT/RIGHT) ports to your main sound system.
- Headphones (PHONES): Plug your headphones into the 3.5mm PHONES jack.
- Recording Device (REC OUT): Connect RCA cables from the REC OUT (LEFT/RIGHT) ports to your recording interface or device.
- Smartphone (TO PHONE): Use a suitable cable to connect the TO PHONE output to your smartphone's audio input for live streaming or mobile recording.
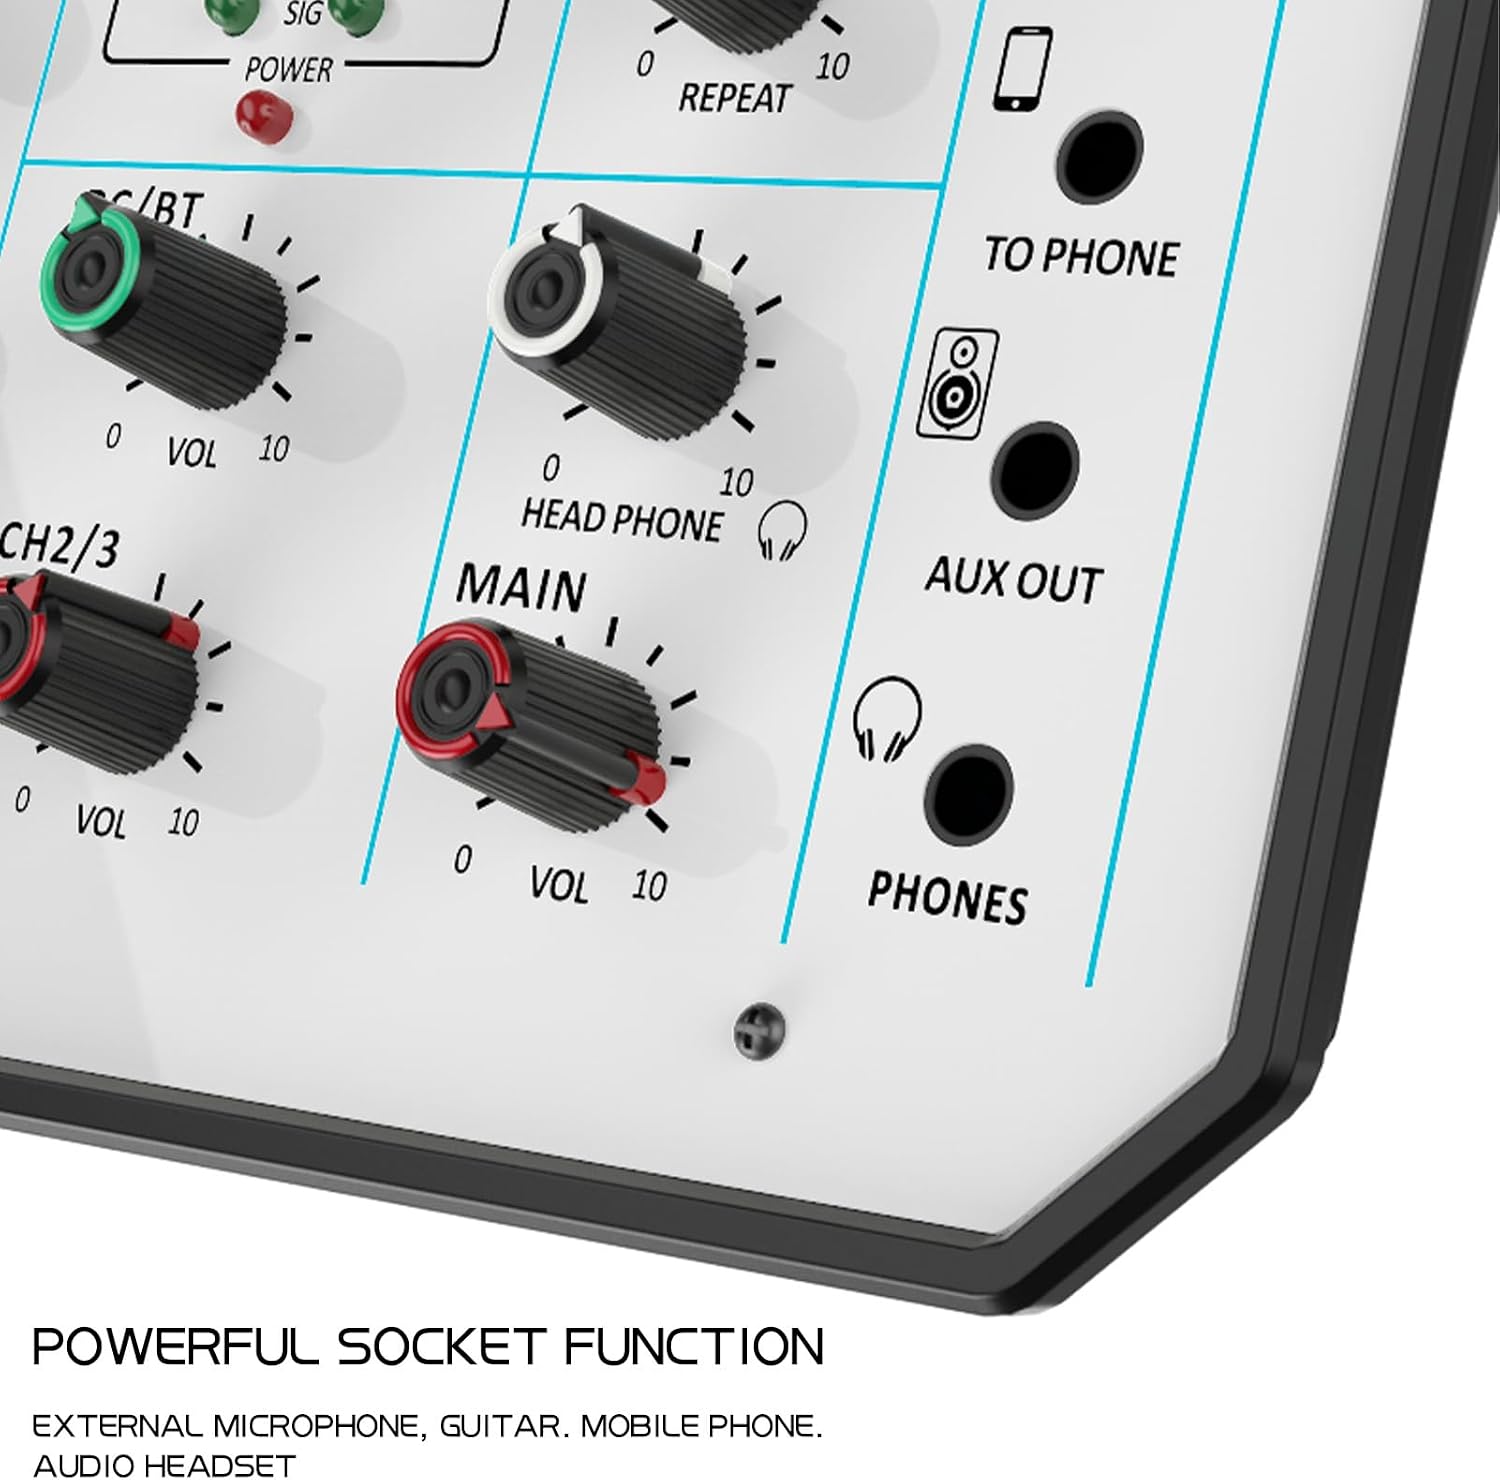
Image 5.2: Powerful Socket Function. This image provides a detailed view of the mixer's input and output jacks, illustrating its versatile connectivity options.
6. Operating Instructions
6.1 Basic Mixing
- Power On: Ensure the mixer is powered on as described in Section 5.1.
- Set Initial Levels: Turn all channel volume knobs (CH1, CH2/3, PC/BT) and the MAIN volume knob to their minimum positions (0).
- Adjust Input Gain (CH1): For microphones or instruments connected to CH1, slowly increase the GAIN knob until the SIG indicator lights up consistently, but the CLIP indicator only flashes occasionally during the loudest peaks. If CLIP stays lit, reduce the GAIN.
- Adjust Equalization (CH1): Use the HIGH and LOW knobs to fine-tune the tone of the CH1 input. Turn clockwise to boost frequencies, counter-clockwise to cut.
- Set Channel Volumes: Gradually increase the volume knob for each active input channel (CH1, CH2/3, PC/BT) to achieve a balanced mix.
- Adjust Main Output: Slowly increase the MAIN volume knob to control the overall output level to your speakers or recording device.
- Monitor with Headphones: Adjust the HEAD PHONE volume knob to set your desired monitoring level.
6.2 Using Phantom Power
If you are using a condenser microphone with the CH1 input, you will need to activate phantom power:
- Connect your condenser microphone to the XLR input of CH1.
- Ensure the CH1 volume is at minimum.
- Press the PHANTOM power switch. The +48V indicator will light up.
- You can now proceed with adjusting the GAIN and volume for CH1.
Caution: Do not activate phantom power when using dynamic microphones or instruments that do not require it, as this could potentially damage some equipment.
6.3 Applying Digital Effects (Delay/Repeat)
The mixer includes built-in digital effects for enhancing your audio:
- Turn the DELAY knob clockwise to increase the intensity of the delay effect.
- Adjust the REPEAT knob to control how many times the delayed sound repeats.
6.4 Using Loopback Function
The LOOPBACK function, typically used with the PC/BT input, allows you to route the mixer's output back into the computer's input. This is useful for live streaming or recording where you want to capture both your microphone and computer audio simultaneously.
- Ensure the mixer is connected to your computer via USB.
- Press the LOOPBACK switch to activate the function.
- Configure your computer's audio settings or streaming software to use the mixer as both input and output, if desired.
7. Specifications
| Feature | Specification |
|---|---|
| Channels | 3 |
| Phantom Power | +48V |
| Power Supply | USB DC 5V Type-C |
| Product Size (L x W x H) | 16.5 x 21 x 6.5 cm (6.5 x 8.3 x 2.6 inches) |
| Product Weight | 578 g (20.4 oz / 1.27 lbs) |
| Connectivity Technology | USB Type-C, Bluetooth, XLR, 6.35mm, 3.5mm, RCA |
| Item Model Number | XZXCVN0fgao498uq |