1. Product Overview
The HAUSPROFI 12V/24V 20A Intelligent Battery Charger is designed for efficient and safe charging and maintenance of various battery types. It features adjustable current, a repair mode for deeply discharged batteries, and intelligent thermal compensation.

Image 1: HAUSPROFI 12V/24V 20A Intelligent Battery Charger.
2. Key Features
- Adjustable Current (1A-20A): Allows precise current selection for various battery sizes and charging needs, from gentle maintenance to rapid charging.
- Universal Compatibility: Automatically detects 12V and 24V systems. Supports Lead-Acid (AGM, GEL, EFB) and Lithium LiFePO4 batteries with capacities from 2Ah to 300Ah.
- 9-Step Pulse Repair Function: Designed to desulfate and restore deeply discharged batteries, capable of reactivating batteries with residual voltage as low as 0.3V.
- Smart Thermal Compensation: An integrated sensor adjusts charging voltage based on ambient temperature (-15°C to 45°C) to prevent overcharging or undercharging.
- Memory Function: Retains the last charging setting after a power interruption.
- Clear LCD Display: Shows real-time voltage, current, and charge status for easy monitoring.
- Certified Safety: Features 8 intelligent protection mechanisms, including reverse polarity, short-circuit, and overheating protection, housed in a flame-retardant ABS casing.
- Extended Cables: Combined cable length of 200cm + 90cm for convenient access to batteries.
3. Setup and Connection
Before connecting the charger, ensure your vehicle is turned off and the ignition is in the OFF position. Always wear appropriate safety gear, including eye protection and gloves.
- Unpack the Charger: Carefully remove the charger and its accessories from the packaging. Inspect for any damage.
- Access Cables: Open the storage compartment on the charger to access the battery clamps and power cable.
- Connect to Battery:
- Connect the RED (+) clamp to the positive terminal of the battery.
- Connect the BLACK (-) clamp to the negative terminal of the battery.
Ensure a secure connection to prevent sparks.
- Plug into Power: Plug the charger's power cable into a standard electrical outlet (100-240V AC).

Image 2: Package contents and dimensions. Note the battery clamps and power cable.

Image 3: The charger connected to a battery, illustrating the 9-step charging process.
4. Operating Instructions
Once connected, the charger will automatically detect the battery voltage (12V or 24V) and display the current status on the LCD screen.
4.1. Automatic Charging
The charger will automatically begin the optimal charging process based on the detected battery type and condition. The 9-step charging process ensures efficient and safe charging.
4.2. Manual Current Adjustment
To manually adjust the charging current (from 1A to 20A), press the 'SETUP' button repeatedly until the desired amperage is displayed. This allows for tailored charging based on battery size and desired charging speed.

Image 4: The large LCD screen displays various information including voltage, current, temperature, and charge status.
4.3. Repair Mode
For deeply discharged or sulfated batteries, select the 'REPAIR' mode. This mode uses a 9-step pulse repair process to attempt to restore battery capacity. Monitor the battery during this process.
4.4. Thermal Compensation
The charger automatically adjusts its output based on ambient temperature. In cold conditions (below 10°C), it enters 'Winter Mode' to prevent undercharging. In hot conditions (above 28°C), it enters 'Summer Mode' to prevent overcharging.
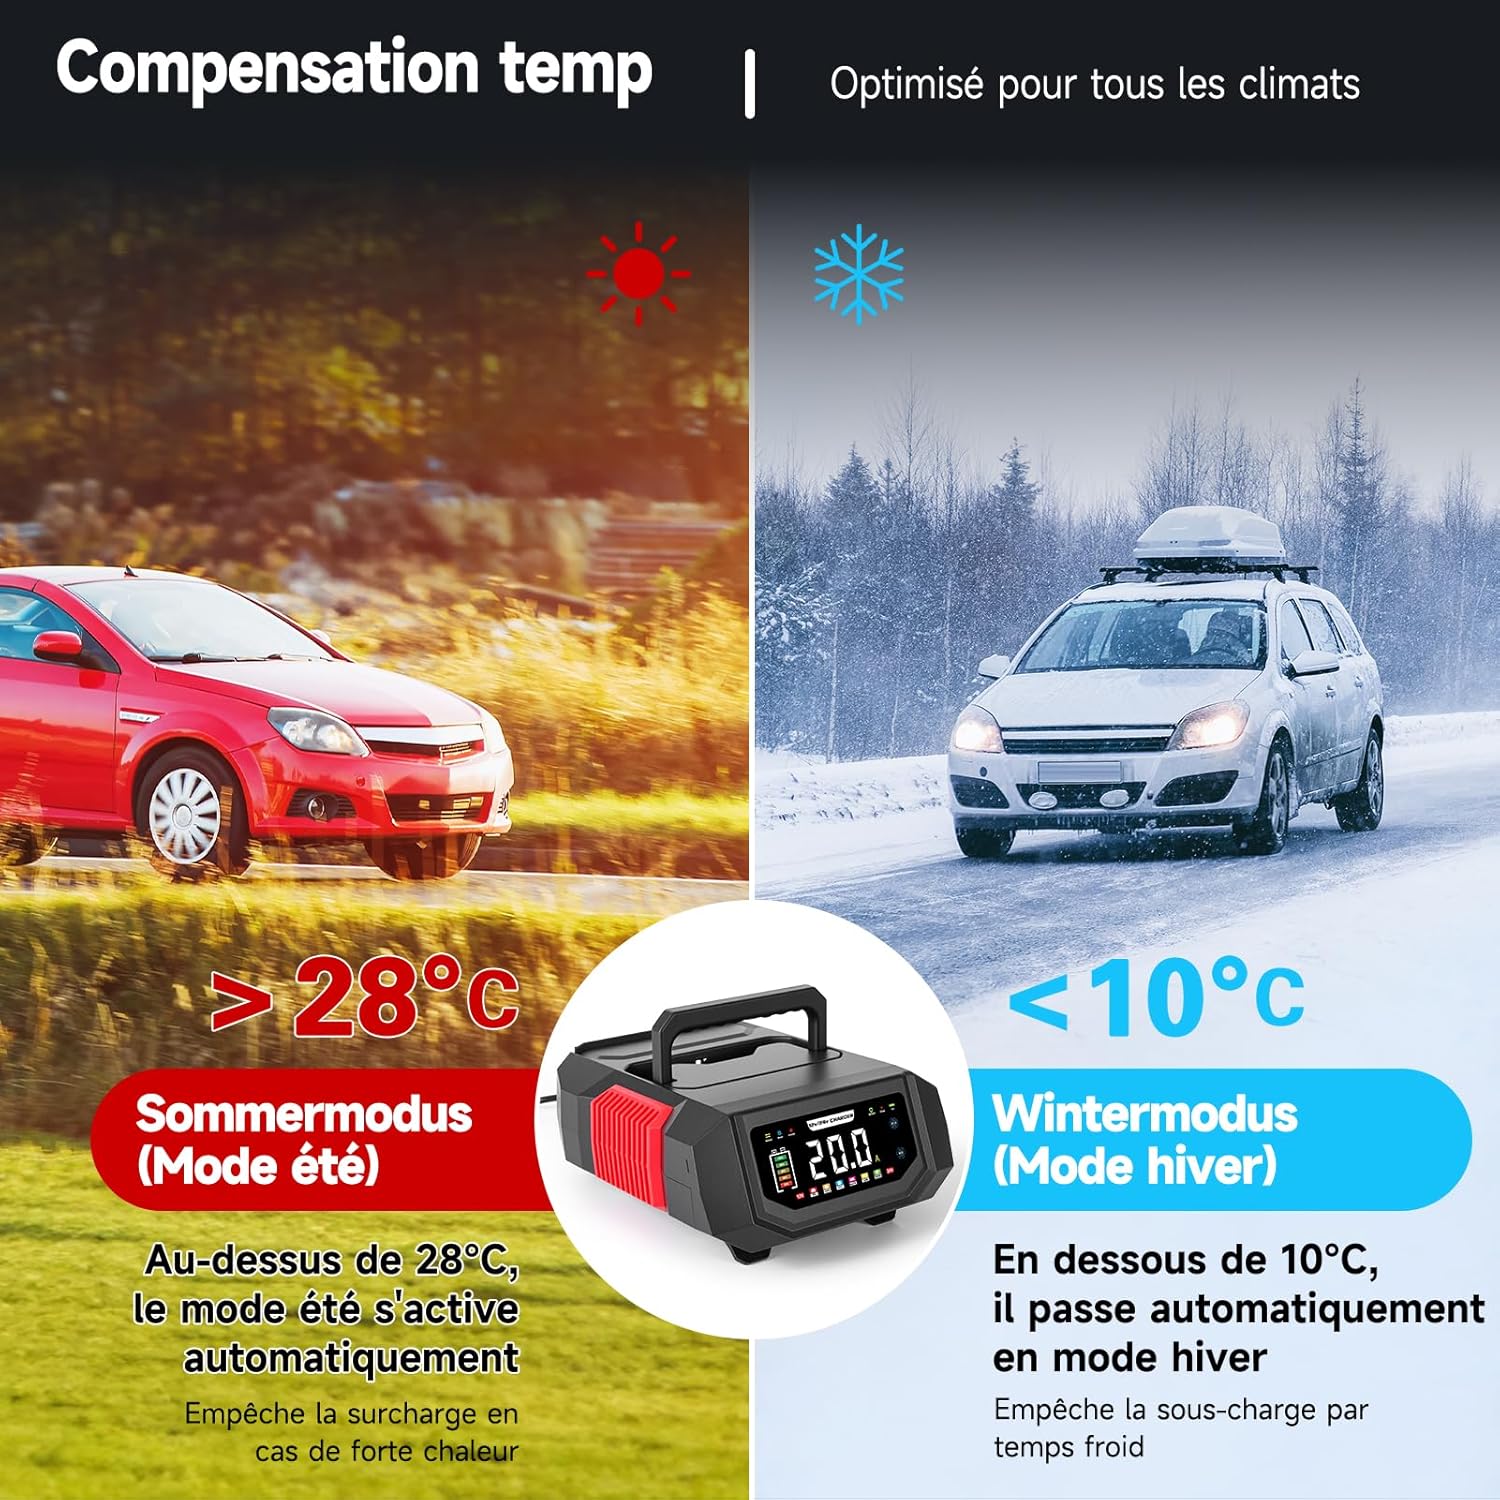
Image 5: Visual representation of the charger's automatic temperature compensation for different climates.
4.5. Disconnecting the Charger
Once charging is complete, or if you need to disconnect:
- Unplug the charger from the electrical outlet.
- Remove the BLACK (-) clamp from the negative battery terminal.
- Remove the RED (+) clamp from the positive battery terminal.
5. Safety and Maintenance
The HAUSPROFI charger incorporates multiple safety features to protect both the device and your battery.
5.1. Integrated Protections
- Reverse Polarity Protection
- Short-Circuit Protection
- Overheating Protection
- Overcurrent Protection
- Overvoltage Protection
- Flame-Retardant Casing
- Cooling System

Image 6: Overview of the 8 intelligent protection mechanisms.
5.2. General Maintenance
- Keep the charger clean and dry. Avoid exposure to moisture or extreme temperatures.
- Store the cables neatly in the integrated compartment when not in use.
- Do not attempt to open or repair the charger yourself. Refer to qualified personnel for service.
- Ensure good ventilation around the charger during operation.
6. Troubleshooting
If you encounter issues with your HAUSPROFI battery charger, refer to the following common troubleshooting steps:
- Charger Not Turning On:
- Check if the power cable is securely plugged into both the charger and the electrical outlet.
- Verify that the electrical outlet is functional.
- No Charging Indication:
- Ensure the battery clamps are correctly connected to the positive (+) and negative (-) terminals.
- Check if the battery voltage is extremely low (below 0.3V), which might prevent detection. Try the repair mode if applicable.
- Error Message on Display:
- Refer to the specific error code displayed on the LCD screen. Common errors include reverse polarity (E-01), short circuit (E-02), or overheating (E-03). Disconnect and re-evaluate the connection or environment.
- Slow Charging:
- Ensure the selected charging current is appropriate for your battery size. Adjust to a higher amperage if needed (within safe limits for your battery).
- Check the battery's health; older or damaged batteries may charge slower or not hold a charge effectively.
If the issue persists after following these steps, please contact HAUSPROFI customer support for further assistance.
7. Specifications
| Feature | Specification |
|---|---|
| Brand | HAUSPROFI |
| Color | Black |
| Product Dimensions (D x W x H) | 21.5 cm x 8 cm x 18.5 cm |
| Output Voltage | 12 Volts (DC) |
| Input Voltage | 24 Volts |
| Current Rating / Amperage | 20 A |
| Connector Type | Battery terminals |
| Compliance | CE |
| Manufacturer | HAUSPROFI |
8. Warranty and Support
HAUSPROFI products are designed for reliability and performance. For warranty information, please refer to the documentation included with your purchase or visit the official HAUSPROFI website.
For technical support, troubleshooting assistance, or to inquire about replacement parts, please contact HAUSPROFI customer service. Contact details can typically be found on the product packaging or the brand's official website.


