1. Introduction
The XURUYI X2 Ultra Retro Game Stick 4K is a plug-and-play video gaming console designed for high-definition entertainment. It comes pre-loaded with a vast library of classic games and supports multiple emulators, offering a nostalgic gaming experience on modern displays. This manual provides essential information for setting up, operating, and maintaining your device.

Image 1.1: Overview of the XURUYI X2 Ultra Retro Game Stick 4K and its components, including the game stick, wireless controllers, and cables.
2. Package Contents
Please verify that all items listed below are included in your package:
- Game Console (Game Stick) x1
- HDMI Cord x1
- USB Charging Cable x1
- Wireless Gamepad x2
- Instruction Manual x1
- TF Card (pre-installed in game stick) x1
- USB Receiver x1
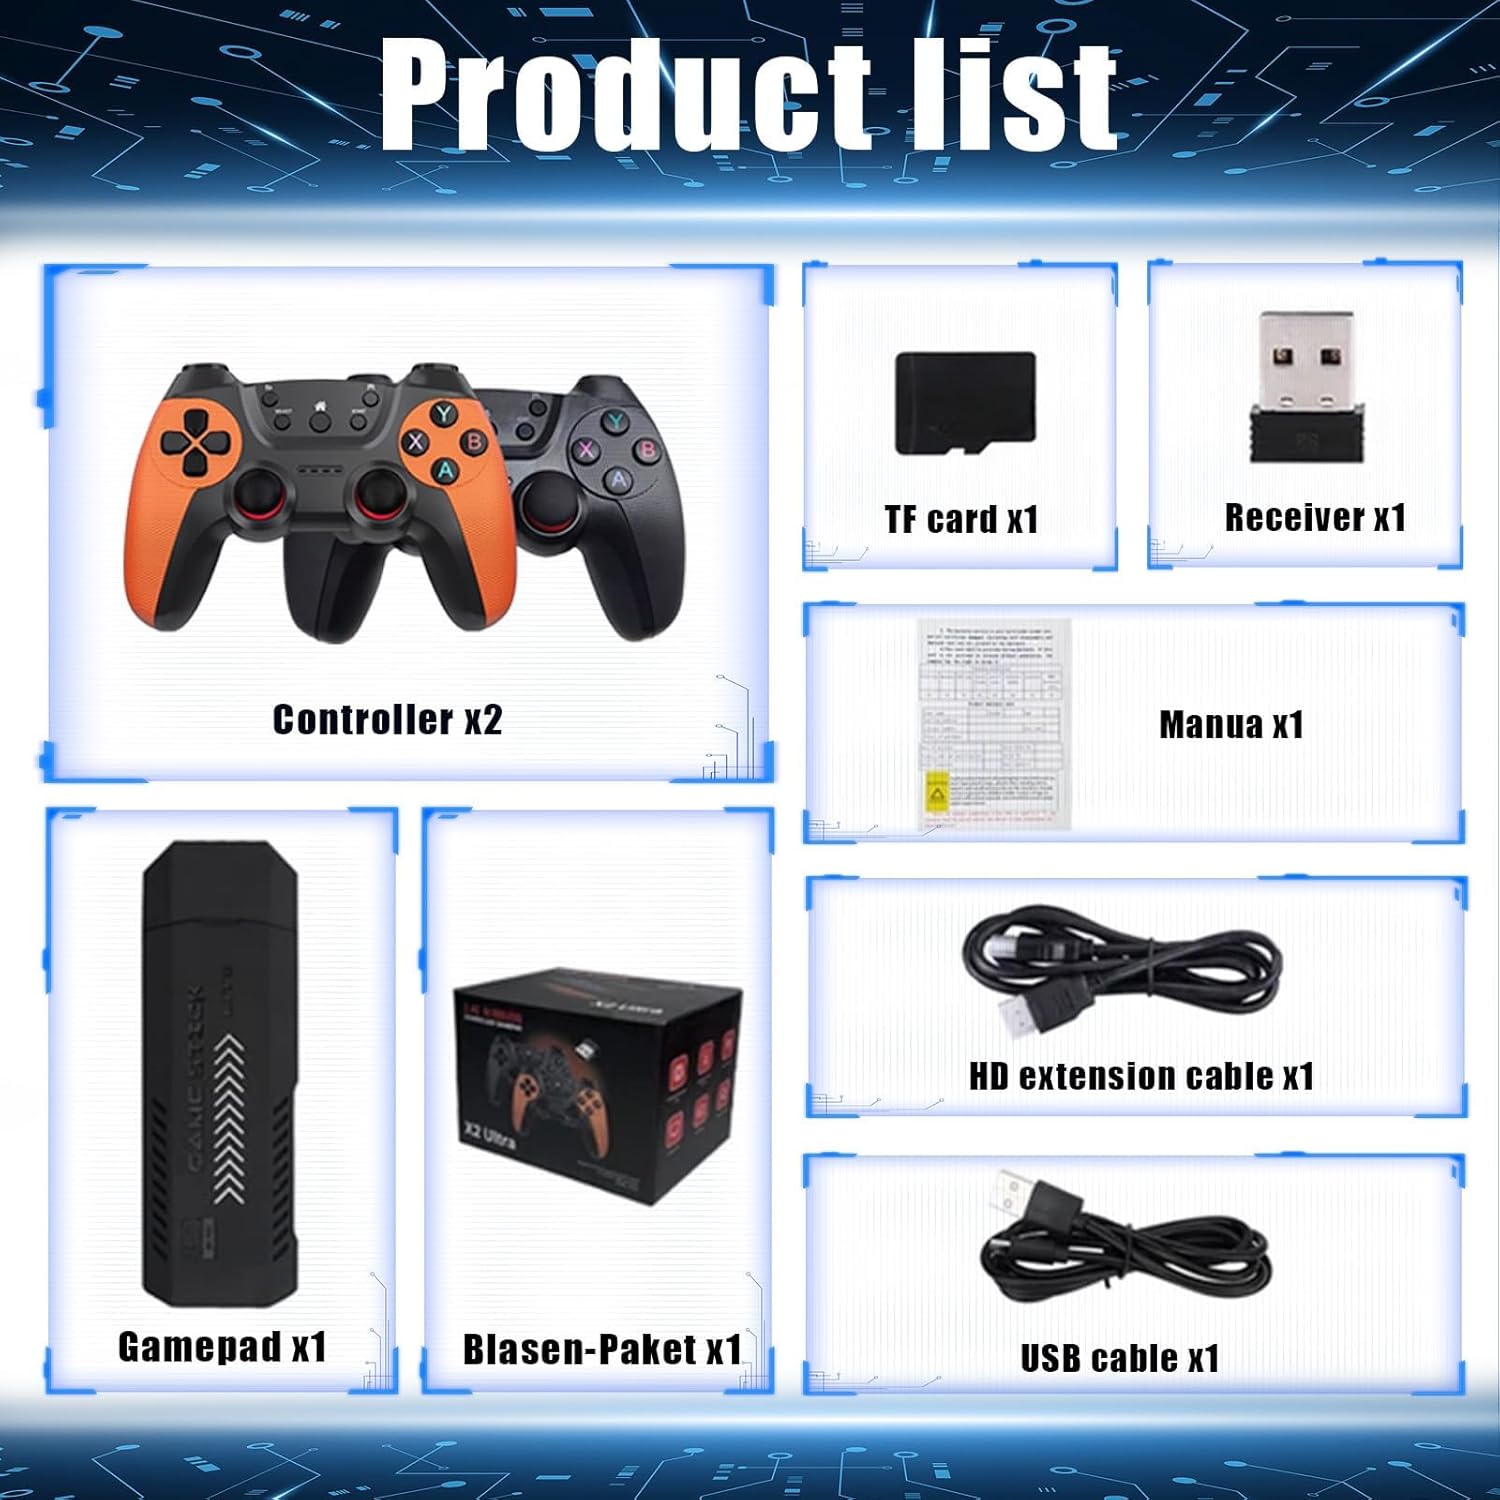
Image 2.1: Visual representation of the complete package contents, including the game stick, two controllers, cables, and TF card.
3. Setup Instructions
Follow these steps to set up your XURUYI X2 Ultra Retro Game Stick 4K:
- Insert TF Card: Ensure the TF card is securely inserted into the TF card slot on the game stick. (Refer to Image 3.1, Step 1)
- Connect to Display: Plug the game stick directly into an available HDMI port on your television, monitor, or projector. If needed, use the provided HDMI extension cable. (Refer to Image 3.1, Step 4)
- Connect Power: Connect the USB charging cable to the game stick's power input port and then to a USB power source (e.g., TV USB port, USB wall adapter). (Refer to Image 3.1, Step 3 & 5)
- Insert USB Receiver: Plug the 2.4G wireless USB receiver into the USB port on the game stick. This enables wireless communication with the controllers. (Refer to Image 3.1, Step 2)
- Prepare Controllers: Open the battery compartment on the back of each wireless gamepad and insert 2 AAA batteries (not included). Ensure correct polarity. Close the compartment. (Refer to Image 3.1, Step 6)
- Power On: Turn on your display device and select the correct HDMI input source. The game stick should power on automatically once connected to power.

Image 3.1: Detailed visual instructions for connecting the TF card, USB receiver, power, HDMI, and preparing the controllers.
The X2 Ultra Game Stick supports various display platforms, including projectors, home TV devices, and other HDMI-compatible screens.

Image 3.2: Illustration of the game stick's compatibility with projectors, televisions, and other display types.
4. Operating Instructions
Once the game stick is set up and powered on, the main menu will appear on your screen.
- Navigation: Use the directional pad (D-pad) on your wireless controller to navigate through the game menus and selections.
- Select Game: Press the 'A' button (or equivalent action button) to select a game or menu option.
- Return: Press the 'B' button (or equivalent back button) to go back to the previous menu.
- Start Game: Once a game is selected, follow the on-screen prompts to start playing.
- Exiting Games: To exit a game and return to the main menu, typically press the 'SELECT' and 'START' buttons simultaneously. Refer to the on-screen instructions within the game or emulator for specific exit commands.
- Saving Progress: Many emulators support in-game saving or 'save states'. Consult the emulator's specific instructions for saving and loading game progress.
The wireless controllers provide a responsive and untethered gaming experience.

Image 4.1: The X2 Ultra Game Stick and its wireless controllers, highlighting the TF card and internal chips.
5. Maintenance
To ensure the longevity and optimal performance of your XURUYI X2 Ultra Retro Game Stick 4K, follow these maintenance guidelines:
- Cleaning: Use a soft, dry cloth to clean the game stick and controllers. Avoid using liquid cleaners or abrasive materials.
- Storage: Store the device in a cool, dry place away from direct sunlight, extreme temperatures, and humidity.
- Handling: Handle the game stick and controllers with care. Avoid dropping them or subjecting them to strong impacts.
- Power Off: When not in use for extended periods, disconnect the power cable from the game stick.
- Battery Replacement: Replace controller batteries when performance degrades. Remove batteries if the controllers will not be used for a long time to prevent leakage.
6. Troubleshooting
If you encounter issues with your XURUYI X2 Ultra Retro Game Stick 4K, refer to the following common problems and solutions:
| Problem | Possible Cause | Solution |
|---|---|---|
| No display on TV/monitor | Incorrect HDMI input selected; Loose HDMI connection; No power to game stick. | Ensure TV is on correct HDMI input. Check HDMI cable connection. Verify power cable is securely connected and power source is active. |
| Controllers not responding | Low or dead batteries; USB receiver not connected; Controllers not paired. | Replace controller batteries. Ensure USB receiver is firmly plugged into the game stick. Some controllers may require a pairing sequence (refer to controller manual if provided). |
| Games not loading or freezing | Corrupted game file; TF card issue; System overload. | Restart the game stick. Ensure the TF card is properly inserted. Avoid running too many background processes if applicable. |
| Poor game performance (lag) | System resources strained; Game compatibility. | Ensure the game stick has adequate ventilation. Some demanding games may experience minor performance variations. |
7. Specifications
Detailed technical specifications for the XURUYI X2 Ultra Retro Game Stick 4K:
- System: Emuelec 4.3
- CPU: S905X quad-core 1.8GHz high-performance open source chip
- Interface: HDMI Output (1080P, 720P)
- Compatible Emulators: 40+ Emulators
- Game Capacity (256G Version): Built-in 58,000+ Games
- Color: Black
- Connectivity: HDMI, USB (for receiver and power)
- Controllers: 2.4G Wireless Gamepads
- Console Dimensions: Approximately 16.5 x 12.5 x 10.5 cm
- Console Weight: Approximately 400g

Image 7.1: Visual representation of the S905L chip, which powers the X2 Ultra Game Stick for efficient performance.

Image 7.2: Demonstrates the immersive visual experience with 1080p resolution provided by the game stick.
8. Warranty and Support
For warranty information or technical support, please refer to the documentation included with your purchase or contact the seller directly through the platform where the product was acquired. Keep your purchase receipt as proof of purchase.