1. Introduction
The HUAGZIMO Morse Code Decoder Soldering Practice Kit is designed for electronics enthusiasts and students to learn and practice soldering skills while building a functional Morse code decoder. This kit allows users to understand the basic principles of Morse code and apply them to real-world decoding tasks. The finished product features an LCD display for clear feedback and supports various functions for practice and learning.
2. Package Contents
Before beginning assembly, please verify that all components listed below are present in your kit.

Image: Kit Components Overview
- Printed Circuit Board (PCB)
- LCD Display Module (16x2 characters)
- Various Resistors, Capacitors, Diodes
- Integrated Circuits (ICs) and Sockets
- Push Buttons (SW1, SW2, SW3)
- Potentiometer (for LCD brightness)
- Buzzer
- Audio Jacks (Input/Output)
- USB Power Cable
- Acrylic Casing Parts
- Screws and Standoffs
- Morse Code Key (Paddle)
- Detailed Installation Instructions (Paper/Electronic format)
3. Assembly Instructions
This kit requires soldering and assembly. Follow the detailed installation instructions provided with your kit. The PCB is clearly labeled to guide component placement. Ensure all components are correctly oriented before soldering.
3.1. PCB Assembly
Carefully solder all electronic components onto the Printed Circuit Board (PCB) according to the provided schematic and component layout. Pay attention to polarity for diodes, electrolytic capacitors, and integrated circuits.

Image: PCB Component Layout (Top and Bottom)
3.2. LCD Module Installation
Attach the LCD display module to the designated header pins on the PCB. Ensure it is securely connected.
3.3. Casing Assembly
Assemble the acrylic casing around the assembled PCB and LCD module using the provided screws and standoffs. Remove any protective film from the acrylic parts before assembly.

Image: Assembled Morse Code Decoder
4. Operating Instructions
Once assembled, connect the device to a 5V USB power source.
Image: Control Panel Overview
4.1. Connections
- USB Port: Connect to a 5V power supply (e.g., phone charger, computer USB port).
- Key Input: Connect your Morse code key (paddle) here.
- Audio Input (CW_IN): Connect an audio source containing Morse code signals for decoding.
- Audio Output (CW_OUT): Connect headphones or speakers to monitor the audio.
4.2. Controls and Indicators
- LCD Display: Displays decoded characters (up to 16 characters) and settings.
- Adjust LCD Brightness (Potentiometer): Rotate to adjust the display's backlight brightness.
- Power Indicator Light (LED1): Illuminates when the device is powered on.
- Decoding Indicator Light (LED2): Flashes during Morse code decoding.
- SW1 Button:
- Short press: Displays Morse password (received code).
- Long press: Turns off the buzzer sound.
- SW2 Button:
- Short press: Sets decoding parameters (e.g., WPM, sensitivity).
- Long press: Enters decoding rate setting interface.
- SW3 Button:
- Short press: Displays bitrate (characters per minute).
- Long press: Clears characters on the display.
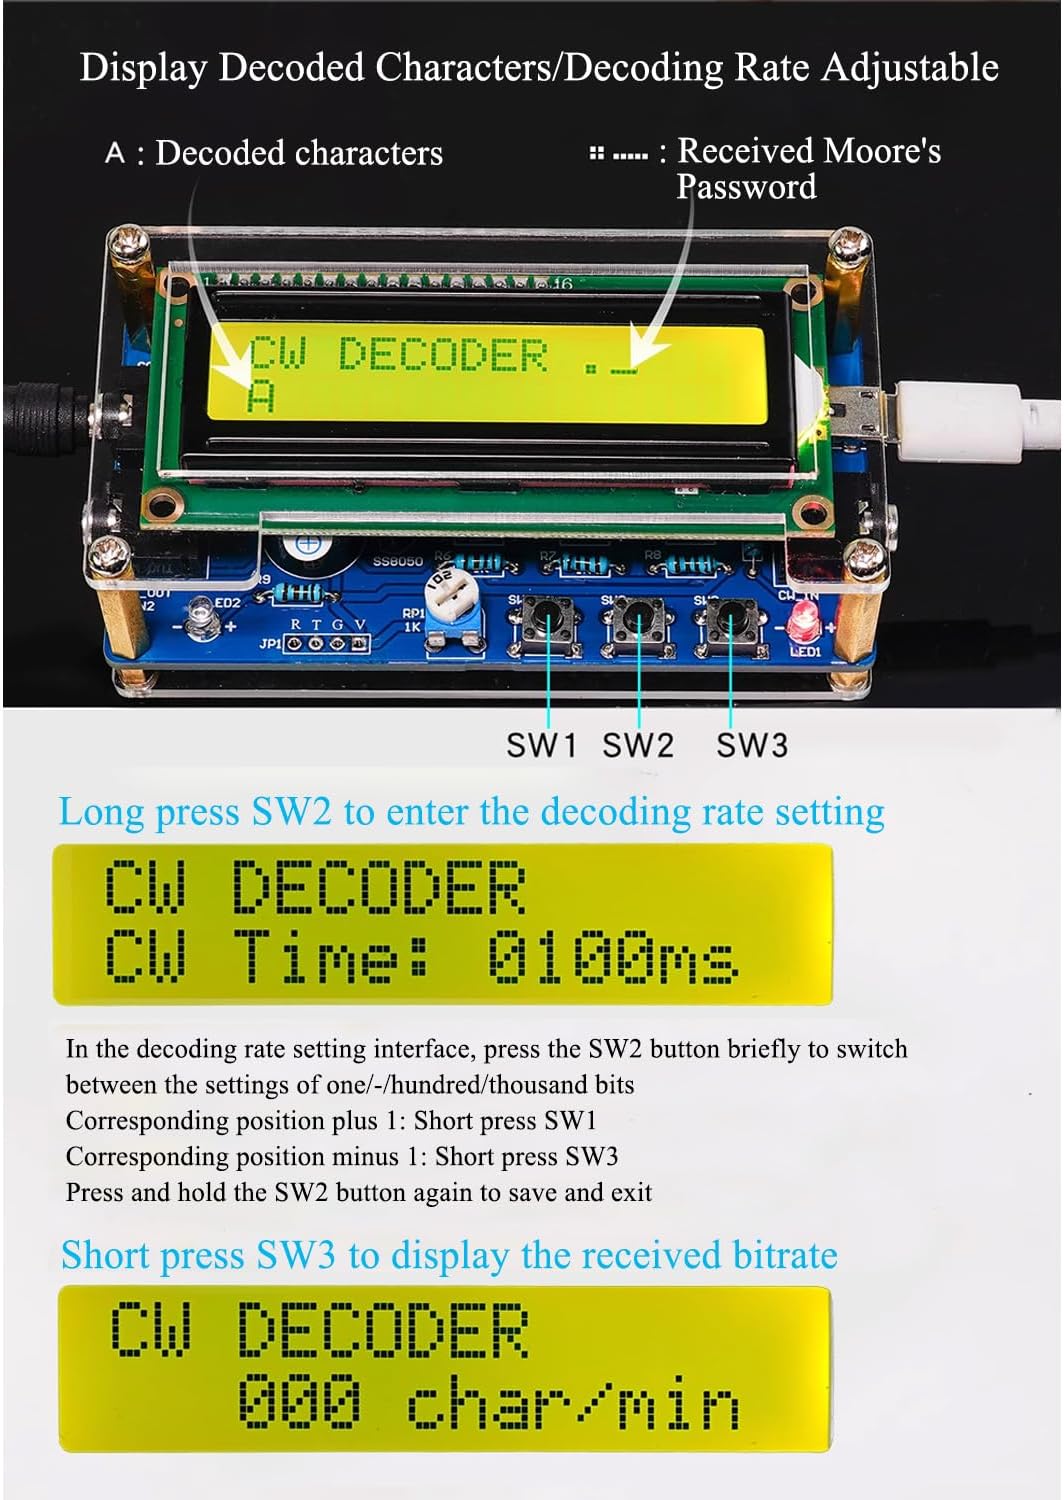
Image: Decoding Rate and Bitrate Display
4.3. Morse Code Key Operation

Image: Morse Code Keypad Usage
- Short press: Generates a dot (.). Default duration is approximately 100ms.
- Long press: Generates a dash (-). Default duration is approximately 300ms.
5. Features
- Morse Code Decoding: Decodes CW Morse code signals from audio input.
- LCD Display: 16-character display shows decoded text and settings.
- Adjustable Brightness: LCD backlight brightness can be adjusted.
- Adjustable Decoding Rate: Allows setting of decoding speed and sensitivity.
- Bitrate Display: Shows characters per minute (WPM).
- Buzzer Feedback: Provides audible feedback for key presses, can be toggled off.
- Practice Tool: Ideal for learning and practicing Morse code and soldering skills.
- Comprehensive Instructions: Detailed guidance for assembly and operation.
6. Specifications
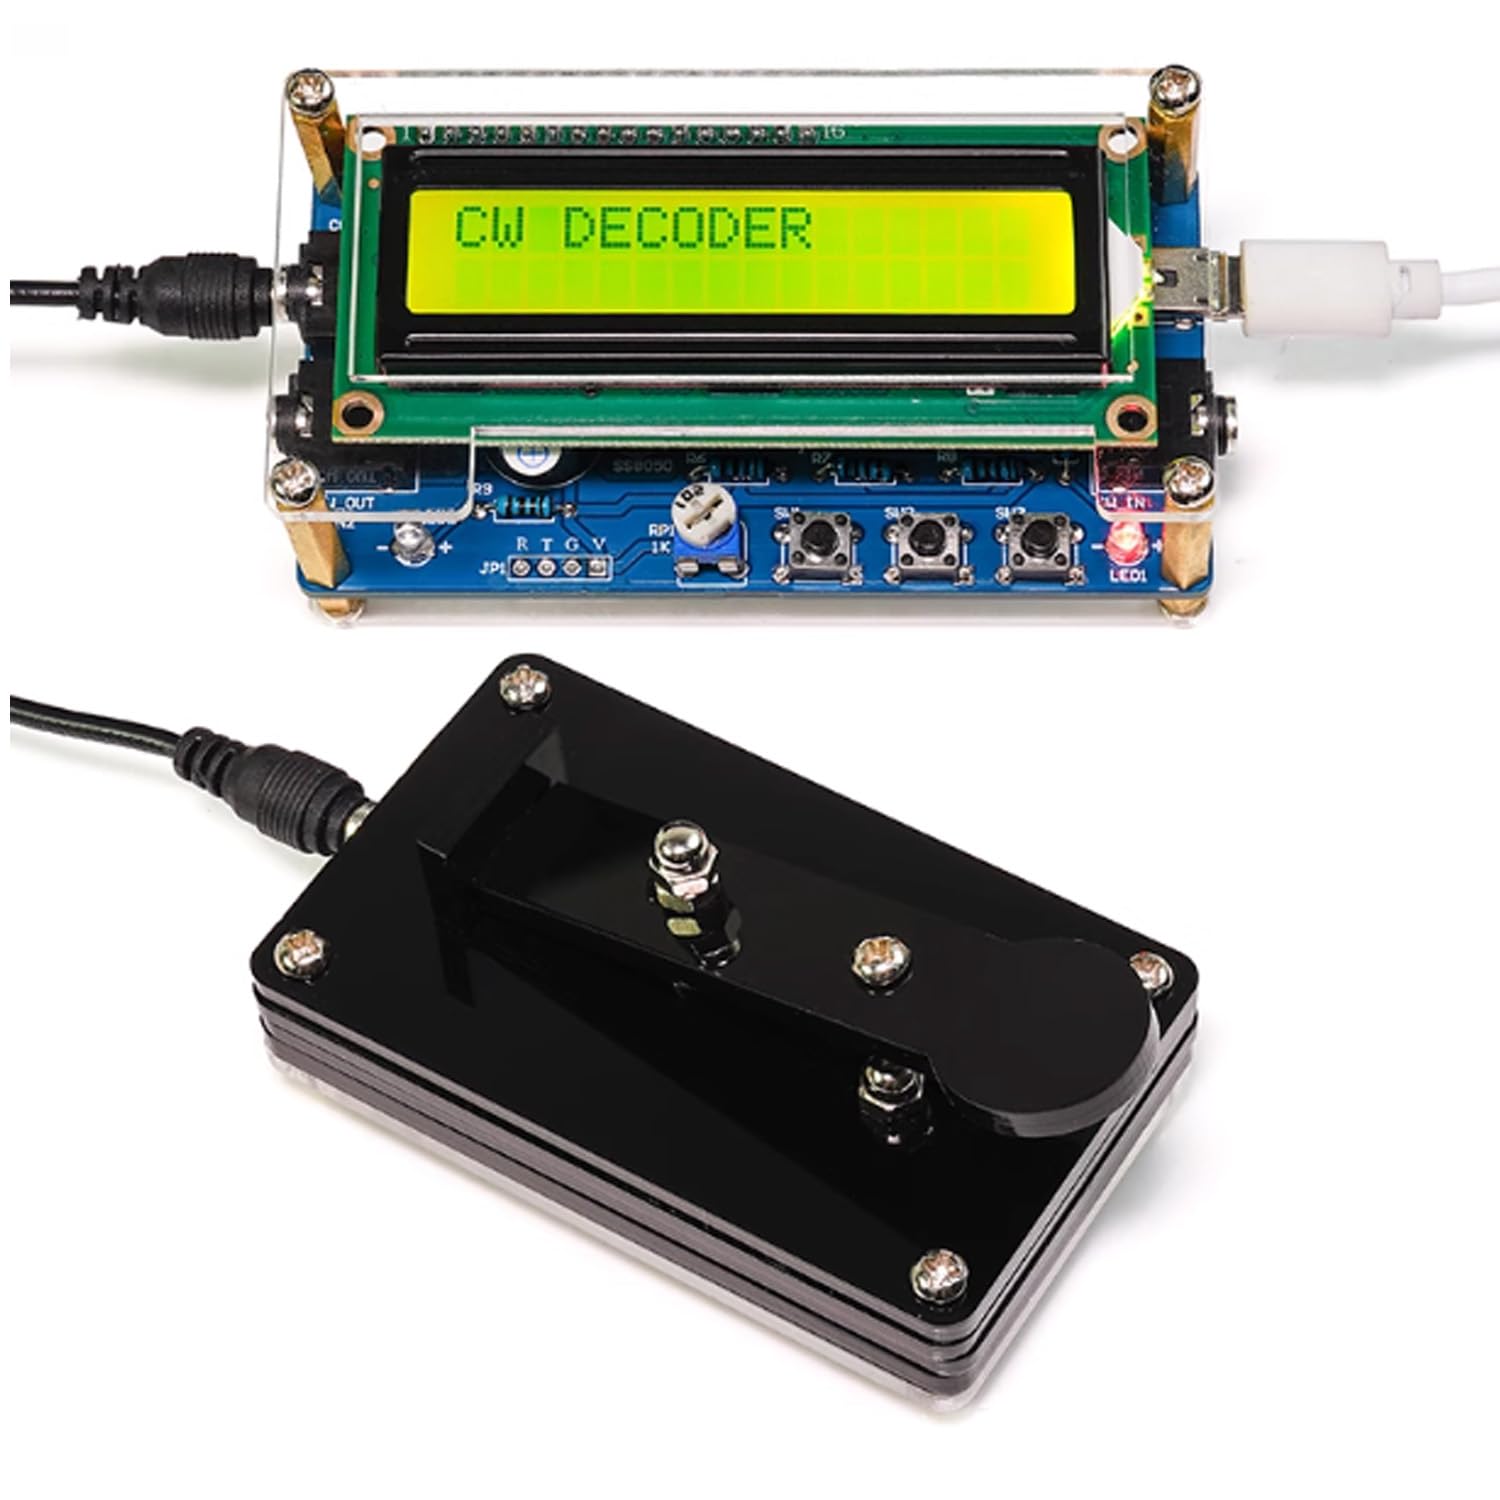
Image: Product Dimensions and Electrical Specifications
| Parameter | Value |
|---|---|
| Product Name | Upgraded CW Morse Code Decoder |
| Brand | HUAGZIMO |
| Model Number | Morse Code Decoder |
| Power Supply | USB power supply |
| Working Voltage | 5V |
| Working Current (without decoding) | 25mA |
| Max Operating Current (with buzzer) | 60mA |
| PCB Size | 91mm x 48mm |
| Assembled Unit Dimensions (approx.) | 96.5mm (L) x 48mm (W) x 33.5mm (H) |
| Morse Key Dimensions (approx.) | 75mm (L) x 45mm (W) x 21mm (H) |
| Display Type | LCD (16x2 characters) |
| Material | Metal, Acrylic |
| Item Weight | 50 Grams |
7. Troubleshooting
- No Power/Display:
- Ensure the USB power cable is securely connected to a 5V power source.
- Check for proper soldering connections, especially for the power input and LCD module.
- Adjust the LCD brightness potentiometer.
- Incorrect Decoding:
- Verify the audio input signal quality. Ensure it is clear and free from excessive noise.
- Adjust the decoding rate settings using SW2 to match the incoming Morse code speed.
- Check all component values and orientations during assembly.
- Buzzer Not Working:
- Ensure the buzzer is correctly soldered and oriented.
- Check if the buzzer has been turned off by a long press of SW1.
- Missing Components:
- Refer to the package contents list. If any components are missing, contact customer support.
8. Warranty and Support
HUAGZIMO is committed to providing excellent after-sale service. If you encounter any issues during assembly or operation, or if any components are missing from your kit, please contact our customer support for assistance or replacements.
Please refer to the contact information provided with your purchase or on the official HUAGZIMO website for support.