1. Introduction
This manual provides detailed instructions for the safe and efficient operation, setup, and maintenance of your LKAHYUIBC PS100E Portable Label Maker. Please read this manual thoroughly before using the device to ensure proper functionality and to prevent damage.
2. Safety Information
- Keep the device away from water and other liquids to prevent electric shock or malfunction.
- Do not expose the device to extreme temperatures or direct sunlight.
- Use only LKAHYUIBC approved power adapters and label tapes.
- Do not attempt to disassemble or repair the device yourself. Contact customer support for assistance.
- Keep out of reach of children.
3. Package Contents
Verify that all items are present in the package:
- LKAHYUIBC PS100E Portable Label Maker
- AC Power Adapter
- Label Tape Cartridge (pre-installed or separate)
- Instruction Manual
Note: The product description mentions "Envelopes" in "whats_in_the_box", which is likely an error. Standard label maker packages typically include the device, power adapter, and a starter label tape.
4. Product Overview
The LKAHYUIBC PS100E is a portable label maker designed for efficient and high-quality label creation. It features automatic cutting, a user-friendly keyboard, and supports various label tape widths.

Figure 4.1: The LKAHYUIBC PS100E Portable Label Maker securely stored in its protective carrying case, with a label tape cartridge visible in the lid's mesh pocket.

Figure 4.2: A detailed view of the PS100E label maker, showcasing its orange and black design, QWERTY keyboard, and LCD display. Key functions like ON/OFF, Print, Format, and various settings are clearly visible.
Key Features:
- Automatic Cutting: Streamlined operation with an integrated auto-cutting mechanism for clean label separation.
- Portable Design: Compact and easy to carry, suitable for various environments including home, office, and industrial sites.
- Versatile Labeling: Supports multiple label tape widths (6mm, 9mm, 12mm) for diverse applications.
- Intuitive Controls: Features a 57-key keyboard and clear display for easy navigation and quick task completion.
- Advanced Printing: Offers 180dpi resolution, 15mm/s print speed, up to 4 lines of print, and support for barcodes and QR codes.

Figure 4.3: An illustration comparing the PS100E's automatic label cutting feature (top, with a checkmark) against manual cutting (bottom, with an 'X'), highlighting the convenience and precision of auto-cutting.
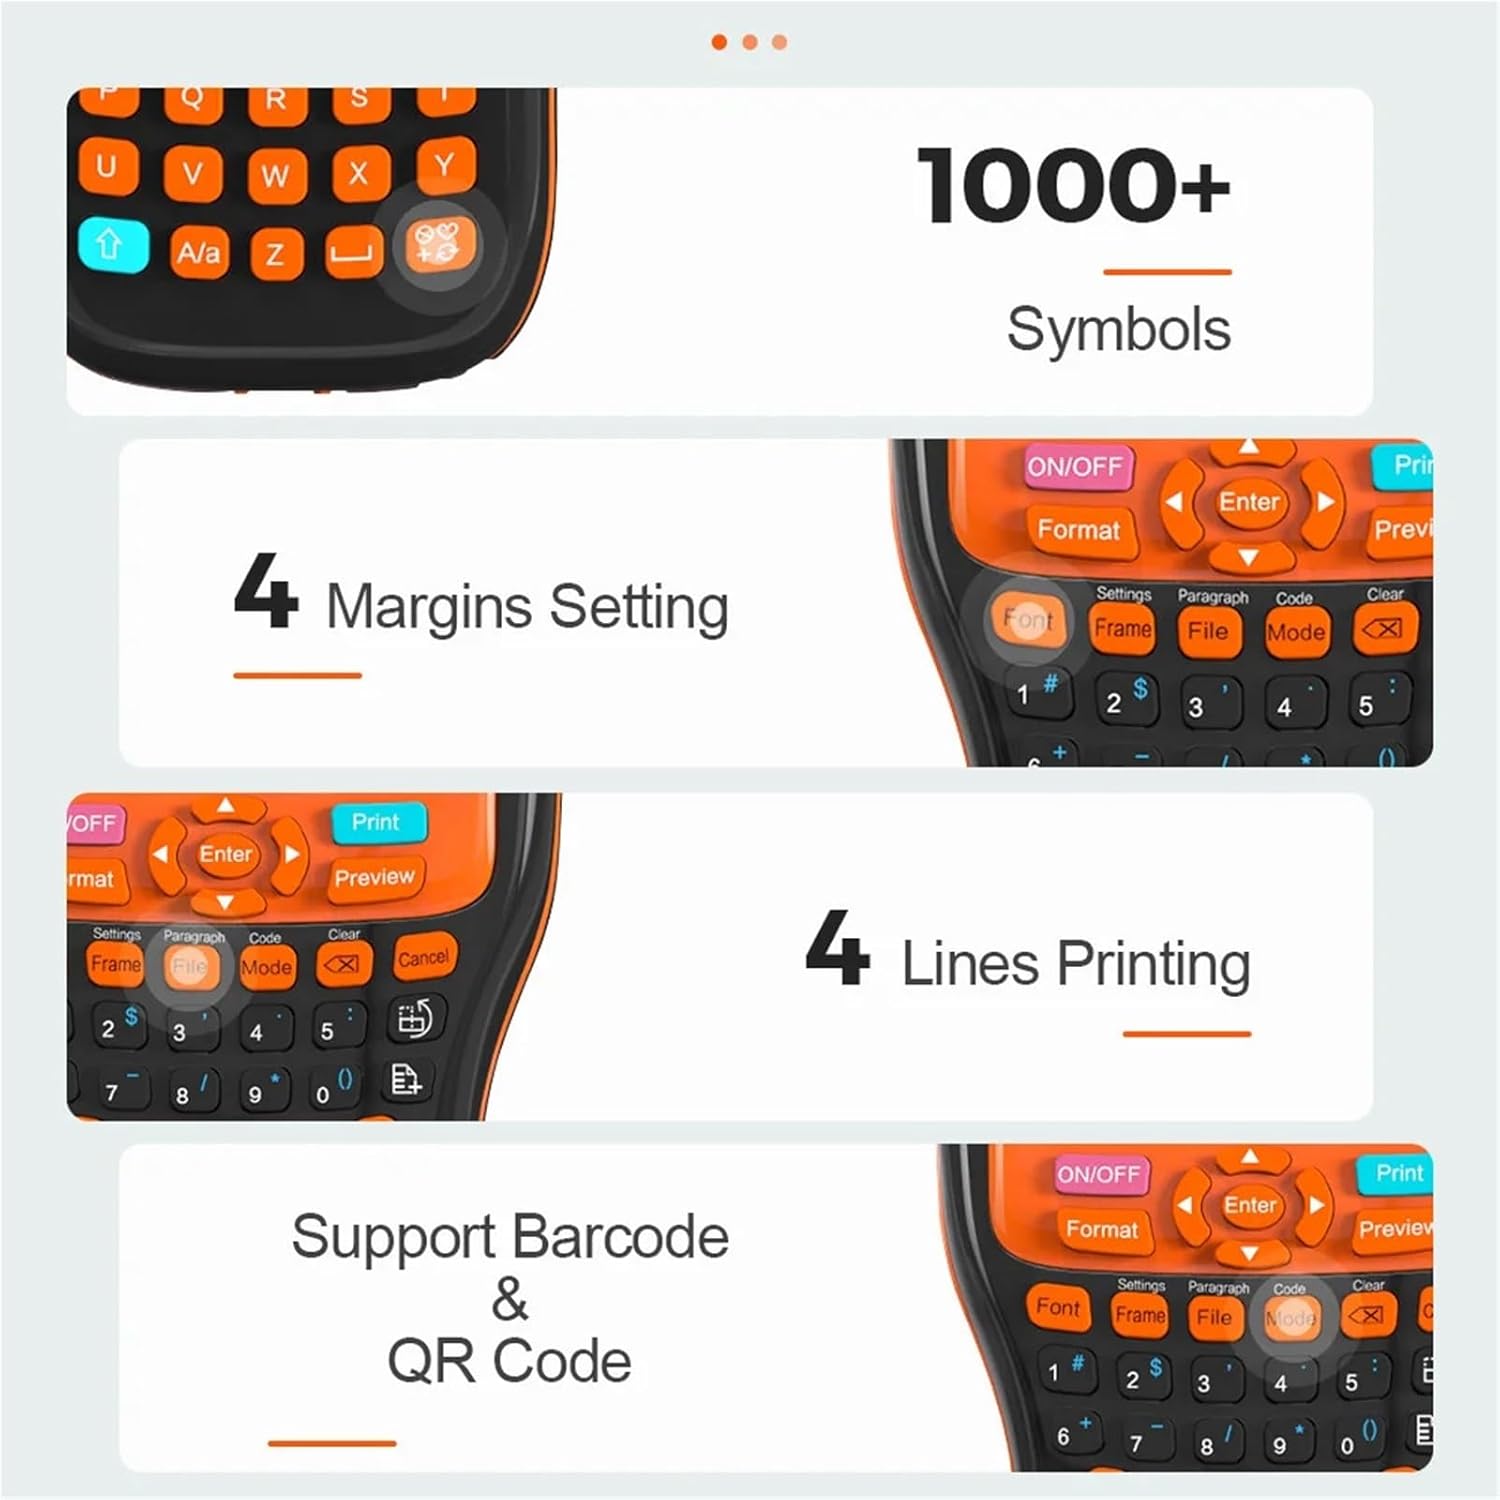
Figure 4.4: A visual breakdown of the PS100E's capabilities, including over 1000 symbols, 4 margin settings, 4 lines of printing, and support for barcode and QR code generation.

Figure 4.5: Examples demonstrating the versatility of the label maker for various uses: organizing cables at work, labeling notebooks for school, and categorizing items in jars at home.
5. Setup
5.1. Powering On the Device
- Connect the AC power adapter to the power port on the label maker.
- Plug the adapter into a standard electrical outlet.
- Press the ON/OFF button to power on the device. The display will illuminate.
5.2. Installing Label Tape
- Ensure the label maker is powered off.
- Open the tape compartment cover, typically located at the back or top of the device.
- Insert the label tape cartridge with the tape facing the print head, ensuring it clicks into place.
- Gently feed a small portion of the tape through the tape exit slot.
- Close the tape compartment cover securely.
6. Operating Instructions
6.1. Basic Label Creation
- Power on the label maker.
- Use the QWERTY keyboard to type your desired text. The text will appear on the LCD display.
- To adjust font settings, press the Font button and use the arrow keys to navigate options (size, style, etc.). Press Enter to confirm.
- To add symbols or special characters, press the relevant symbol key or navigate through the symbol menu.
- Once your label text and formatting are complete, press the Print button.
- The label maker will print and automatically cut the label.
6.2. Advanced Features
- Formatting: Use the Format button to access options for text alignment, margins, and other layout settings.
- Frames: Select the Frame button to add decorative borders around your text.
- Barcode/QR Code: The device supports generating barcodes and QR codes. Refer to the on-screen menu via the Code button for specific input requirements.
- Preview: Press the Preview button to view your label before printing.
- Multiple Lines: The PS100E supports up to 4 lines of text. Use the Enter key to move to the next line.
7. Maintenance
7.1. Cleaning the Print Head
Regular cleaning of the print head ensures optimal print quality.
- Power off the label maker and disconnect the power adapter.
- Open the tape compartment cover.
- Gently wipe the print head with a soft, lint-free cloth dampened with isopropyl alcohol. Do not touch the print head with bare hands.
- Allow the print head to dry completely before closing the cover and powering on the device.
7.2. Replacing Label Tape
When the label tape runs out or you wish to change tape types:
- Power off the label maker.
- Open the tape compartment cover.
- Remove the empty or unwanted tape cartridge.
- Insert a new LKAHYUIBC compatible label tape cartridge, ensuring it is properly seated.
- Close the tape compartment cover.
7.3. Battery Care (if applicable)
If your PS100E model includes a rechargeable battery:
- Charge the device fully before first use.
- Avoid completely draining the battery frequently to prolong its lifespan.
- If storing the device for an extended period, charge it to approximately 50% and store in a cool, dry place.
8. Troubleshooting
| Problem | Possible Cause | Solution |
|---|---|---|
| Device does not power on. | No power, low battery, or faulty adapter. | Ensure power adapter is securely connected and plugged into a working outlet. Charge the device if it has a battery. Try a different outlet. |
| Poor print quality (faded, streaky). | Dirty print head, incorrect tape installation, or low tape. | Clean the print head (see Section 7.1). Reinstall the label tape cartridge. Replace the label tape. |
| Label tape does not feed or jams. | Incorrect tape installation, tape obstruction. | Ensure the tape cartridge is correctly installed. Remove any obstructions from the tape path. |
| Automatic cutting not working. | Obstruction in cutter, cutter blade dull. | Check for any tape scraps or debris obstructing the cutter. If the issue persists, contact customer support. |
| Display is blank or frozen. | Software glitch, low battery. | Try turning the device off and on again. If unresponsive, disconnect power, wait a few seconds, then reconnect and restart. |
9. Specifications
| Feature | Detail |
|---|---|
| Model Name | PS100E Auto-Cut Label Maker Machine |
| Print Method | Heat Transfer Printing |
| Dimensions (W*D*H) | 211*121*55 mm (approx. 8.3 x 4.8 x 2.2 inches) |
| Color | Orange Black |
| Supported Tape Widths | 6mm, 9mm, 12mm |
| Keyboard | 57-key QWERTY Keyboard |
| Print Speed | 15mm/s |
| Resolution | 180dpi |
| Max Print Lines | 4 Lines Max |
| Stand-by Time | 500 Hours |
| Continuous Printing | Up to 99 consecutive prints |
| Power Output | DC 9V/1.5A |
| Connectivity Technology | Bluetooth |
| Item Weight | 1.54 pounds (approx. 0.7 kg) |
10. Warranty Information
For detailed warranty information, please refer to the warranty card included with your product packaging or visit the official LKAHYUIBC website. Keep your purchase receipt as proof of purchase for warranty claims.
11. Customer Support
If you encounter any issues or have questions not covered in this manual, please contact LKAHYUIBC customer support. Refer to your product packaging or the official website for contact details.