1. Introduction
This instruction manual provides detailed guidance for the installation, operation, and maintenance of your Generic PAR-21MAA Wired Controller, designed for compatibility with Mitsubishi Electric central air conditioning systems. Please read this manual thoroughly before using the controller to ensure proper function and longevity of your unit.
2. Product Overview
The PAR-21MAA wired controller offers a convenient interface for managing your air conditioning system. It features a clear display and intuitive buttons for various functions.

Figure 2.1: Front view of the PAR-21MAA Wired Controller with cover open.
Controller Components:
- Display Screen: Shows current temperature, operating mode, fan speed, and status indicators.
- ON/OFF Button: Powers the unit on or off.
- TEMP ▲/▼ Buttons: Adjusts the desired temperature setting.
- MENU Button: Accesses advanced settings and options.
- BACK Button: Returns to the previous menu or screen.
- CLOCK Button: Sets or displays the current time.
- FILTER Button: Indicates filter status and can be used to reset the filter indicator.
- CHECK/TEST Button: Used for system diagnostics and testing.
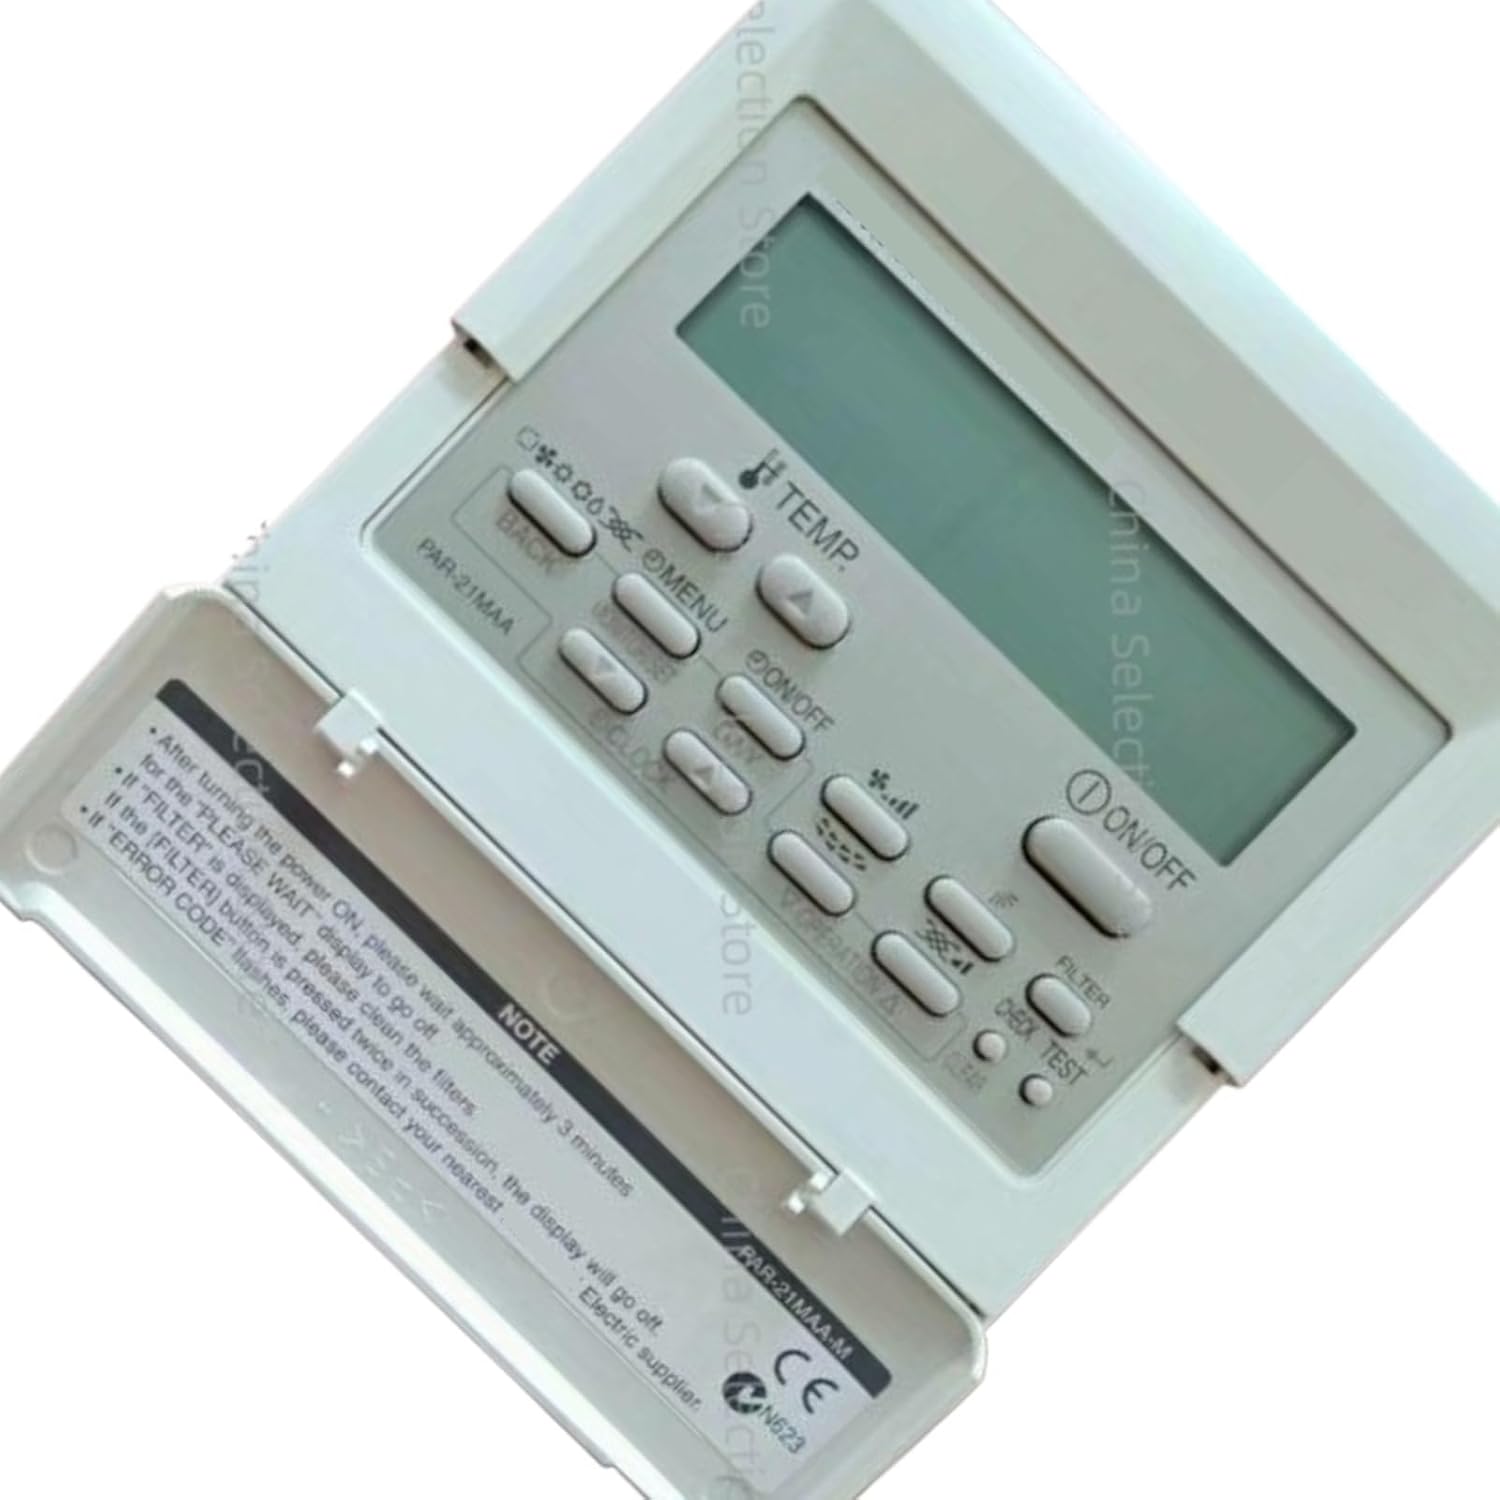
Figure 2.2: Close-up view of the controller's 'NOTE' section.
3. Setup
3.1 Installation
The PAR-21MAA controller is designed for convenient wall-mounted installation. Ensure it is installed in a location that allows for easy access and clear visibility of the display. Refer to your air conditioning system's main installation manual for specific wiring diagrams and connection procedures. Professional installation is recommended.
3.2 Initial Power-On
After the controller is powered on, the system will undergo an initialization sequence. Please wait approximately 3 minutes for the 'PLEASE WAIT' message to disappear from the display before attempting to operate the unit.
4. Operating Instructions
4.1 Basic Operation
- Power ON/OFF: Press the ON/OFF button to turn the air conditioning system on or off.
- Temperature Adjustment: Use the TEMP ▲ (up) and TEMP ▼ (down) buttons to set your desired room temperature.
4.2 Multi-Mode Switching
The controller integrates multiple operating modes to suit various environmental conditions:
- Cooling Mode: For reducing room temperature.
- Heating Mode: For increasing room temperature.
- Air Supply (Fan) Mode: Circulates air without heating or cooling.
- Dehumidification Mode: Reduces humidity levels in the room.
Press the MENU button to navigate through the available modes and select the desired one. Confirm your selection using the appropriate button (refer to on-screen prompts).
4.3 Multi-Speed Adjustment
The fan speed can be adjusted to balance comfort and operating noise. Available settings typically include:
- Automatic: The system automatically adjusts fan speed based on temperature difference.
- High: Maximum airflow for rapid temperature change.
- Medium: Balanced airflow.
- Low: Quiet operation with reduced airflow.
Access fan speed settings via the MENU button and select your preference.
5. Maintenance
5.1 Filter Cleaning
Regular cleaning of your air conditioning system's filters is essential for maintaining efficiency and air quality. If the 'FILTER' indicator is displayed on the controller, it is time to clean the filters.
After cleaning the filters, press the FILTER button twice in quick succession to reset the filter indicator. The 'FILTER' display should then turn off.
6. Troubleshooting
6.1 Error Codes
If an 'ERROR CODE' flashes on the display, it indicates a system malfunction. In such cases, please contact your nearest authorized electric supplier or service technician for assistance. Do not attempt to repair the unit yourself, as this may void your warranty or cause further damage.
6.2 Common Issues
- Controller not responding: Check the power supply to the air conditioning unit. Ensure all connections are secure.
- Incorrect temperature reading: Ensure the controller's sensor is not obstructed or exposed to direct heat sources.
- System not cooling/heating effectively: Check if filters are clean and ensure no obstructions to airflow. Verify the operating mode and temperature settings.
7. Specifications
| Brand | Generic |
| Model Name | A-1 |
| Model Number | A-1 (Mfr Part Number: KM-P3SYme) |
| Compatible Models | Mitsubishi Electric PAR-21MAA, PAR-21MAAC-J-N |
| Manufacturer | GQQBDB |
| ASIN | B0FT39W7J4 |
| Key Features |
|
8. Warranty and Support
For warranty information or technical support, please refer to the documentation provided with your purchase or contact your retailer. Keep your purchase receipt as proof of purchase for any warranty claims.