1. Introduction
This manual provides essential instructions for the safe and efficient operation, installation, and maintenance of your LCRHLCNC HE200-3600 Hybrid Solar Inverter. Please read this manual thoroughly before installation and use to ensure proper functionality and to prevent damage to the unit or injury to personnel. Keep this manual for future reference.
The HE200-3600 is a multifunctional hybrid inverter designed to integrate solar power, utility power, and battery power to provide continuous power supply. It features a pure sine wave output, an integrated MPPT solar charge controller, and WiFi/GPRS monitoring capabilities.
2. Safety Instructions
Important Safety Precautions:
- Read all instructions and cautionary markings on the unit and in this manual before operating.
- Do not disassemble the inverter. Refer servicing to qualified service personnel.
- Ensure all wiring is performed by a qualified electrician.
- Do not install the inverter in direct sunlight, near heat sources, or in environments with high humidity or corrosive substances.
- Ensure proper ventilation around the inverter to prevent overheating.
- Always disconnect all power sources (solar, utility, battery) before performing any maintenance or wiring.
- This inverter is designed for indoor use.
- Use appropriate overcurrent protection for all circuits connected to the inverter.
3. Product Overview
The LCRHLCNC HE200-3600 Hybrid Solar Inverter combines the functions of an inverter, solar charger, and battery charger to offer uninterruptible power support. Its comprehensive LCD display provides user-configurable and easy-accessible button operations such as battery charging current, AC/solar charger priority, and acceptable input voltage based on different applications.
3.1 Key Features
- Pure sine wave output.
- Integrated MPPT solar charge controller.
- Configurable input voltage range for home appliances and personal computers via LCD setting.
- Configurable battery charging current based on applications via LCD setting.
- Configurable AC/Solar Charger priority via LCD setting.
- Compatible with utility mains or generator power.
- Auto restart while AC is recovering.
- Overload/Over temperature/Short circuit protection.
- Smart battery charger design for optimized battery performance.
- Cold start function.
- WiFi/GPRS remote monitoring capability.
- Supports parallel operation up to 9 units.
- Compatible with both lead-acid and lithium batteries.
3.2 Product Components
Familiarize yourself with the various components and connections of the HE200-3600 inverter.

Image 1: Front and Rear Panel Details of the HE200-3600 Inverter. This image illustrates the LED display screen, escape key, page up/down query keys, function settings, OK button, communication indicator lights (AC/INV, BAT, CHG, FAULT), primary and secondary AC outputs, AC input, BMS communication port, photovoltaic input (PV), battery input (BAT+/-), WiFi remote monitoring port, and dry contact ports.

Image 2: Front View of the LCRHLCNC HE200-3600 Hybrid Solar Inverter. This image shows the overall design of the inverter with its display panel and HE200 SERIES branding.
4. Setup and Installation
Proper installation is crucial for the safe and efficient operation of your inverter. It is highly recommended that installation be performed by a qualified professional.
4.1 Unpacking and Inspection
- Carefully unpack the unit and verify that all components are included: Hybrid Inverter, Instruction Manual, and mounting hardware.
- Inspect the unit for any physical damage that may have occurred during transit. If any damage is found, contact your dealer immediately.

Image 3: Included Mounting Hardware. This image displays the screws, wall anchors, and mounting bracket components provided for installation.
4.2 Mounting the Unit
- Choose a suitable mounting location:
- Mount on a solid surface capable of supporting the inverter's weight (17.38 pounds).
- Ensure adequate clearance (at least 20 cm) around the unit for proper heat dissipation.
- Avoid areas with excessive dust, moisture, or flammable materials.
- The ambient temperature should be between 0°C and 55°C.
- Use the provided mounting bracket and hardware to securely attach the inverter to the wall.
4.3 Wiring Connections
WARNING: All wiring must comply with local and national electrical codes. Incorrect wiring can cause severe injury or damage to the inverter.
- Battery Connection: Connect the battery cables to the BAT+ and BAT- terminals. Ensure correct polarity. The inverter is compatible with 24V battery systems (lead-acid or lithium).
- PV Array Connection: Connect the solar panel array to the PV input terminals. Ensure the open-circuit voltage of the solar array does not exceed the maximum PV input voltage (60-450VDC).
- AC Input Connection: Connect the utility grid or generator power to the AC input terminals.
- AC Output Connection: Connect your loads (household appliances, office equipment, industrial equipment) to the AC output terminals.
- Communication Connections: Connect the WiFi module for remote monitoring and BMS communication if applicable.

Image 4: System Diagram for the HE200-3600 Inverter. This diagram illustrates how solar panels, generator, power grid, and batteries connect to the inverter to power various AC loads such as household appliances, office equipment, and industrial equipment.
5. Operating Instructions
5.1 Initial Startup
- After all connections are secure, switch on the battery breaker.
- Switch on the AC input breaker (if connected to utility/generator).
- Switch on the PV array breaker (if solar panels are connected).
- Press and hold the ON/OFF button on the inverter for a few seconds to power it on.
- The LCD display will illuminate, and the inverter will begin its startup sequence.
5.2 LCD Display and Button Functions
The LCD display provides real-time operational status and allows for configuration of various settings. Refer to Image 1 for button identification.
- Escape Key: Exits current menu or setting.
- Page Up/Down Query Keys: Navigates through display screens or adjusts settings.
- Function Settings/OK Button: Enters menu, confirms selection, or saves settings.
- Indicator Lights:
- AC/INV: Indicates AC input or inverter operation.
- BAT: Indicates battery status.
- CHG: Indicates charging status.
- FAULT: Indicates a system fault or error.
5.3 System Settings
Access the settings menu via the Function Settings/OK button to configure parameters such as:
- Output voltage and frequency.
- Battery type and charging parameters.
- AC input voltage range.
- AC/Solar charger priority.
- Load type (e.g., sensitive electronics).
Refer to the detailed settings section in the full manual for specific menu options and parameter adjustments.
5.4 Remote Monitoring (WiFi/GPRS)
The inverter supports remote monitoring via WiFi or GPRS. Install the dedicated mobile application or access the web portal to view real-time data, adjust settings, and receive alerts.
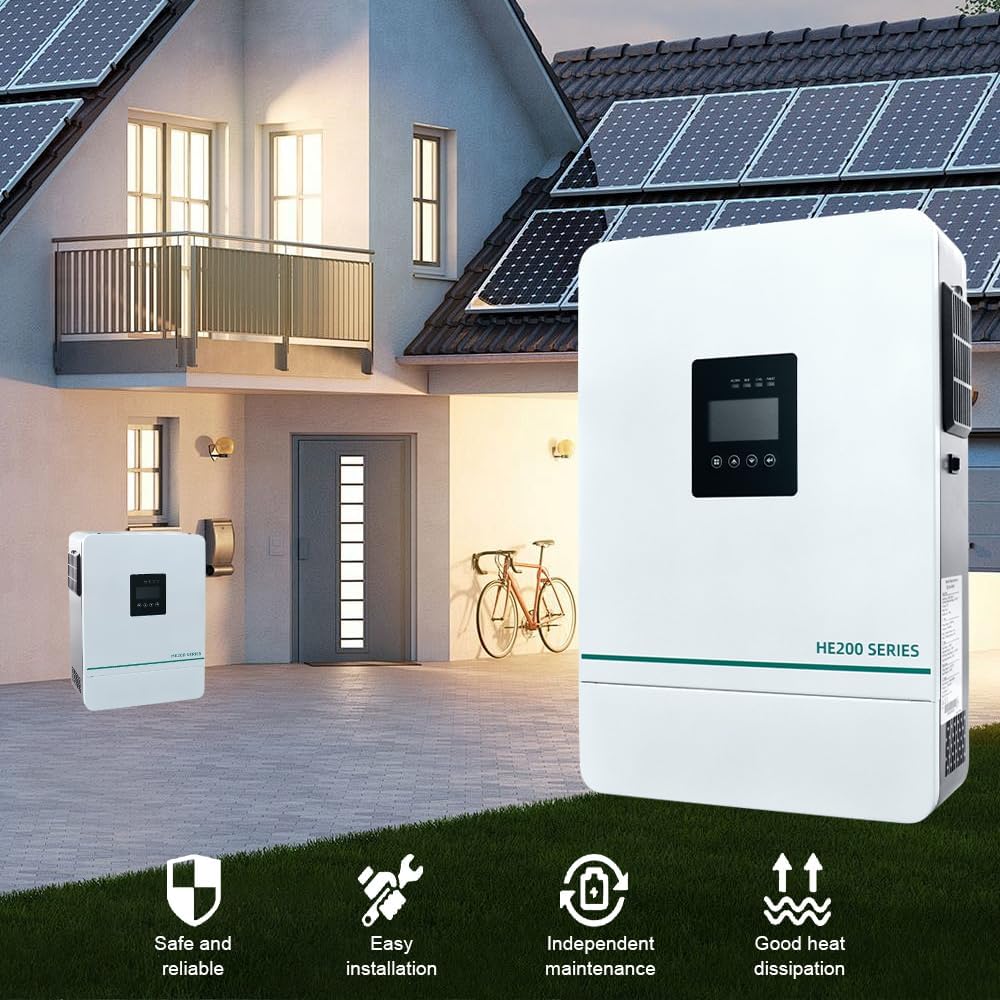
Image 5: WiFi Monitoring Setup for the HE200-3600 Inverter. This image illustrates the concept of remote monitoring via a smartphone app and a WiFi module connected to a computer, showing data analysis, mode adjustment, fault warnings, and remote monitoring capabilities.
6. Maintenance
Regular maintenance ensures the longevity and optimal performance of your HE200-3600 inverter.
- Cleaning: Periodically clean the exterior of the inverter with a dry cloth. Ensure ventilation openings are free from dust and debris.
- Connections: Annually check all electrical connections for tightness and corrosion. Loose connections can lead to overheating and poor performance.
- Battery Inspection: If using lead-acid batteries, check electrolyte levels and terminal condition as per battery manufacturer guidelines.
- Environment: Ensure the installation environment remains within recommended temperature and humidity ranges.
- Firmware Updates: Check the manufacturer's website for any available firmware updates for improved performance or new features.
7. Troubleshooting
This section provides solutions to common issues you might encounter with your inverter. For problems not listed here, contact technical support.
| Problem | Possible Cause | Solution |
|---|---|---|
| Inverter does not turn on. |
|
|
| No AC output. |
|
|
| Battery not charging. |
|
|
8. Specifications
Below are the technical specifications for the LCRHLCNC HE200-3600 Hybrid Solar Inverter.
| Feature | Specification |
|---|---|
| Model | HE200-3600 |
| Rated Power | 3600W |
| Output Waveform | Pure Sine Wave |
| Battery Voltage | 24V |
| MPPT PV Input Voltage Range | 60-450VDC |
| Max. PV Array Power | 5000W |
| Max. Charging Current | 100A (Combined AC and Solar) |
| Communication | WiFi/GPRS |
| Parallel Capability | Up to 9 units |
| Dimensions (Package) | 16.54 x 11.73 x 4.17 inches |
| Item Weight | 17.38 pounds |
| Manufacturer | Lishui Hengli Automation Technology Co., Ltd |
9. Warranty and Support
For warranty information and technical support, please refer to the warranty card included with your product or contact LCRHLCNC customer service. Keep your purchase receipt as proof of purchase for warranty claims.
Manufacturer: Lishui Hengli Automation Technology Co., Ltd
For further assistance, please visit the official LCRHLCNC website or contact your local distributor.