
1. Introduction
This manual provides detailed instructions for the installation, operation, and maintenance of your Sakerplus 360° 4 Channel Car Dash Cam System. Please read this manual thoroughly before using the product to ensure proper functionality and to maximize its benefits. Keep this manual for future reference.
2. Product Overview
2.1 Package Contents
Verify that all items are present in your package:
- Main Dash Cam Unit (with integrated front camera)
- Rear Camera
- Left Side Camera
- Right Side Camera
- Power Cable (Car Charger)
- Mounting Bracket (Windshield Mount)
- 64GB Micro SD Card
- User Manual
2.2 Key Features
- 360° Full Coverage: Records front, rear, left, and right views simultaneously in 1080P resolution.
- Adjustable Side Cameras: Helps eliminate blind spots for comprehensive recording.
- Stable Power Supply: Connects directly to the vehicle's power for continuous operation.
- Loop Recording: Automatically overwrites older files when the SD card is full, ensuring continuous recording.
- Clear Night Vision: Advanced technology for recording in low-light conditions.
- Infrared Cabin Camera: Captures clear interior footage in total darkness.
- G-Sensor Emergency Lock: Automatically locks and protects video footage during collisions.
- 24-Hour Parking Surveillance: Motion detection and emergency lock features for monitoring when parked.
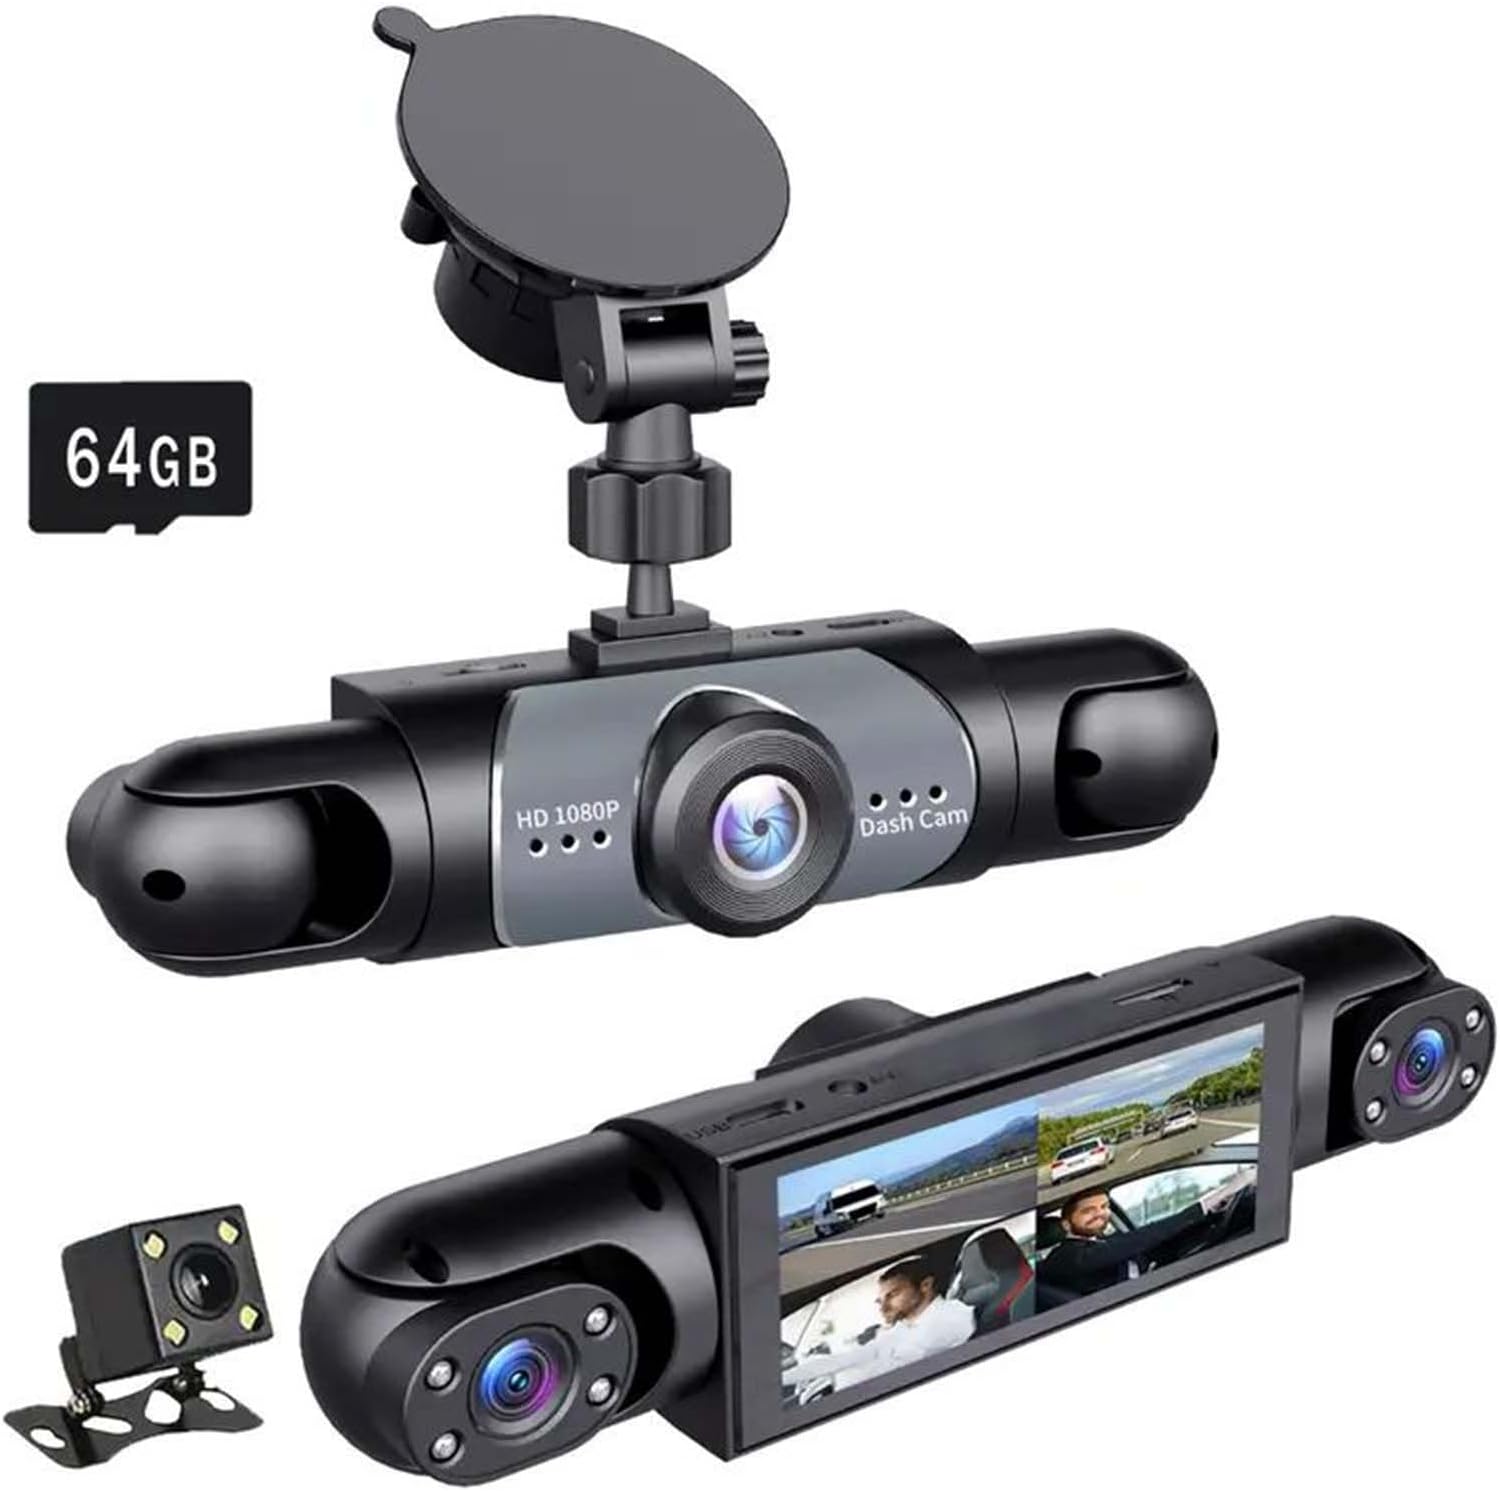
Figure 2.2.1: Sakerplus 360° 4 Channel Dash Cam System components, including the main unit, rear camera, and 64GB SD card.

Figure 2.2.2: Illustration of the 360° total protection provided by the four cameras, showing the field of view for each.
3. Setup
3.1 Inserting the SD Card
- Ensure the dash cam is powered off.
- Locate the SD card slot on the main dash cam unit.
- Insert the provided 64GB Micro SD card into the slot until it clicks into place. Ensure the card is inserted in the correct orientation.
3.2 Mounting the Main Unit
- Clean the chosen area on your windshield thoroughly.
- Attach the mounting bracket to the main dash cam unit.
- Secure the dash cam unit to the windshield using the mounting bracket. Position it to ensure a clear view of the road ahead without obstructing your driving visibility.
3.3 Installing Additional Cameras
- Rear Camera: Mount the rear camera on the rear windshield, typically above the license plate or inside the vehicle, ensuring a clear view of the rear. Route the cable discreetly to the main unit.
- Left and Right Side Cameras: Mount these cameras on the interior of the vehicle, typically near the side windows or on the dashboard, to capture side views. Adjust their angles to cover blind spots. Route cables to the main unit.
3.4 Connecting Power
- Connect the power cable to the main dash cam unit.
- Plug the other end of the power cable into your vehicle's 12V power outlet (cigarette lighter socket).
- Route the power cable along the edges of the windshield and dashboard to keep it tidy and out of the way.

Figure 3.4.1: Example of four simultaneous camera views displayed on the dash cam screen, showing front, rear, left cabin, and right cabin perspectives.
4. Operating Instructions
4.1 Power On/Off
- The dash cam will automatically power on and begin recording when your vehicle's ignition is turned on.
- It will automatically power off when the ignition is turned off.
- To manually power on/off, press and hold the power button on the main unit.
4.2 Loop Recording
The system records video in continuous loops. When the SD card reaches its capacity, the oldest unlocked files are automatically overwritten by new recordings. This ensures that recording never stops due to a full memory card.

Figure 4.2.1: Visual representation of loop recording, showing how the dash cam continuously records and overwrites the oldest files.
4.3 G-Sensor and Emergency Lock
The built-in G-sensor detects sudden impacts or rapid acceleration/deceleration. When triggered, it automatically locks the current video segment, preventing it from being overwritten by loop recording. These protected files are stored in a separate folder on the SD card.
4.4 Night Vision and HDR Function
The dash cam is equipped with advanced night vision technology and infrared lights for the cabin camera, enabling clear recording in low-light conditions and complete darkness. The HDR (High Dynamic Range) function enhances video quality by balancing exposure in varying light environments, ensuring details are captured in both bright and dark areas.

Figure 4.4.1: Demonstration of the dash cam's night vision, illustrating improved image quality in dark conditions.

Figure 4.4.2: Visual comparison of video clarity with the HDR function enabled versus disabled, showing enhanced detail in varied lighting.
4.5 24-Hour Parking Surveillance
When the vehicle is parked and the dash cam is connected to a continuous power source (e.g., hardwired installation, if supported), the parking surveillance feature activates. It uses motion detection and the G-sensor to record events when the vehicle is stationary, providing security monitoring.

Figure 4.5.1: Illustration of the 24-hour parking surveillance feature, highlighting motion detection and emergency lock capabilities.
4.6 Reversing Camera Function
When the vehicle is shifted into reverse gear, the system can automatically switch to a full-screen display of the rear camera view, often with parking guidelines, to assist with safe reversing.

Figure 4.6.1: The dash cam display showing the automatic switch to a full-screen rear view to assist with reversing.
5. Maintenance
5.1 Formatting the SD Card
It is recommended to format the SD card regularly (e.g., once a month) to ensure optimal performance and prevent data corruption. This can typically be done through the dash cam's menu settings. Formatting will erase all data on the card, so back up any important files beforehand.
5.2 Cleaning
Use a soft, dry cloth to clean the dash cam lenses and screen. Avoid using abrasive cleaners or solvents, as they may damage the device. Ensure the cameras are free from dust and smudges for clear recordings.
6. Troubleshooting
- Dash Cam Not Powering On:
- Check if the power cable is securely connected to both the dash cam and the vehicle's 12V outlet.
- Ensure the vehicle's 12V outlet is functioning.
- Try a different power cable or outlet if available.
- Recording Issues (Not Recording/Skipping):
- Ensure the SD card is properly inserted and formatted.
- Format the SD card through the dash cam's settings.
- Replace the SD card if issues persist, as it may be faulty or too slow.
- Poor Video Quality:
- Clean the camera lenses.
- Ensure the protective film has been removed from the lenses.
- Check settings for video resolution and ensure it is set to 1080P.
- G-Sensor Too Sensitive/Not Sensitive Enough:
- Adjust the G-sensor sensitivity setting in the dash cam's menu. Lower sensitivity for fewer false triggers, higher for more detection.
- Mounting Issues (Dash Cam Falling):
- Ensure the windshield surface is clean and dry before mounting.
- Apply firm pressure when attaching the mount.
- In extreme temperatures, adhesive mounts may lose effectiveness. Consider alternative mounting solutions if available.
7. Specifications
| Feature | Specification |
|---|---|
| Brand | SakerPlus |
| Model Name | SakerPlus |
| Product Dimensions | 4.7 x 8 x 7.15 inches |
| Video Capture Resolution | 1080p |
| Field Of View | 170 Degrees |
| Special Feature | 360 Degree Coverage |
| Connectivity Technology | HDMI, Wireless |
| Mounting Type | Windshield Mount |
| Vehicle Service Type | Car |
| Color | Black |
| Included SD Card | 64GB |
8. Warranty and Support
This product comes with a standard manufacturer's warranty. For specific warranty terms and conditions, please refer to the documentation included with your purchase or contact Sakerplus customer support. For technical assistance or further inquiries, please reach out to the manufacturer's support channels.