1. Safety Information
Read all instructions carefully before installation and use. Keep this manual for future reference. Always ensure proper grounding and electrical connections. Professional installation is required for compliance and optimal performance. Wear appropriate safety gear, including a safety belt and helmet, when working at heights.
Important Safety Notes:
- Do not install the unit near heat sources, steam sources, or in areas with smoke or oil.
- Avoid areas with flammable, explosive, or corrosive gases.
- Ensure no obstructions around the inlet and outlet of both indoor and outdoor units.
- The wall for the indoor unit must be hard, flat, and firm to prevent vibration and noise.
2. Product Overview
The GarveeTech 18000 BTU Mini Split Air Conditioner provides efficient year-round climate control for spaces up to 1250 sq. ft. It features advanced inverter technology for energy savings and smart connectivity for convenient operation.
Key Features:
- 4-in-1 Comfort: Offers Cooling, Heating, Dry, and Fan-Only modes.
- Rapid Performance: Achieves 18,000 BTU rapid cooling in 30 seconds and 18,000 BTU turbo-heating in 60 seconds.
- Energy Efficiency: AI-driven vector inverter with 19 SEER2 rating, cutting energy use by over 25% compared to conventional units.
- Smart Control: Built-in Wi-Fi 2.0 for app control (power, modes, schedules) and compatibility with Alexa for voice commands.
- Quiet Operation: Noise levels as low as 28 dB in Sleep mode.
- Space-Saving Design: Outdoor unit is 23% smaller than standard models.
What's in the Box:
- Indoor unit
- Outdoor unit
- Mounting accessories
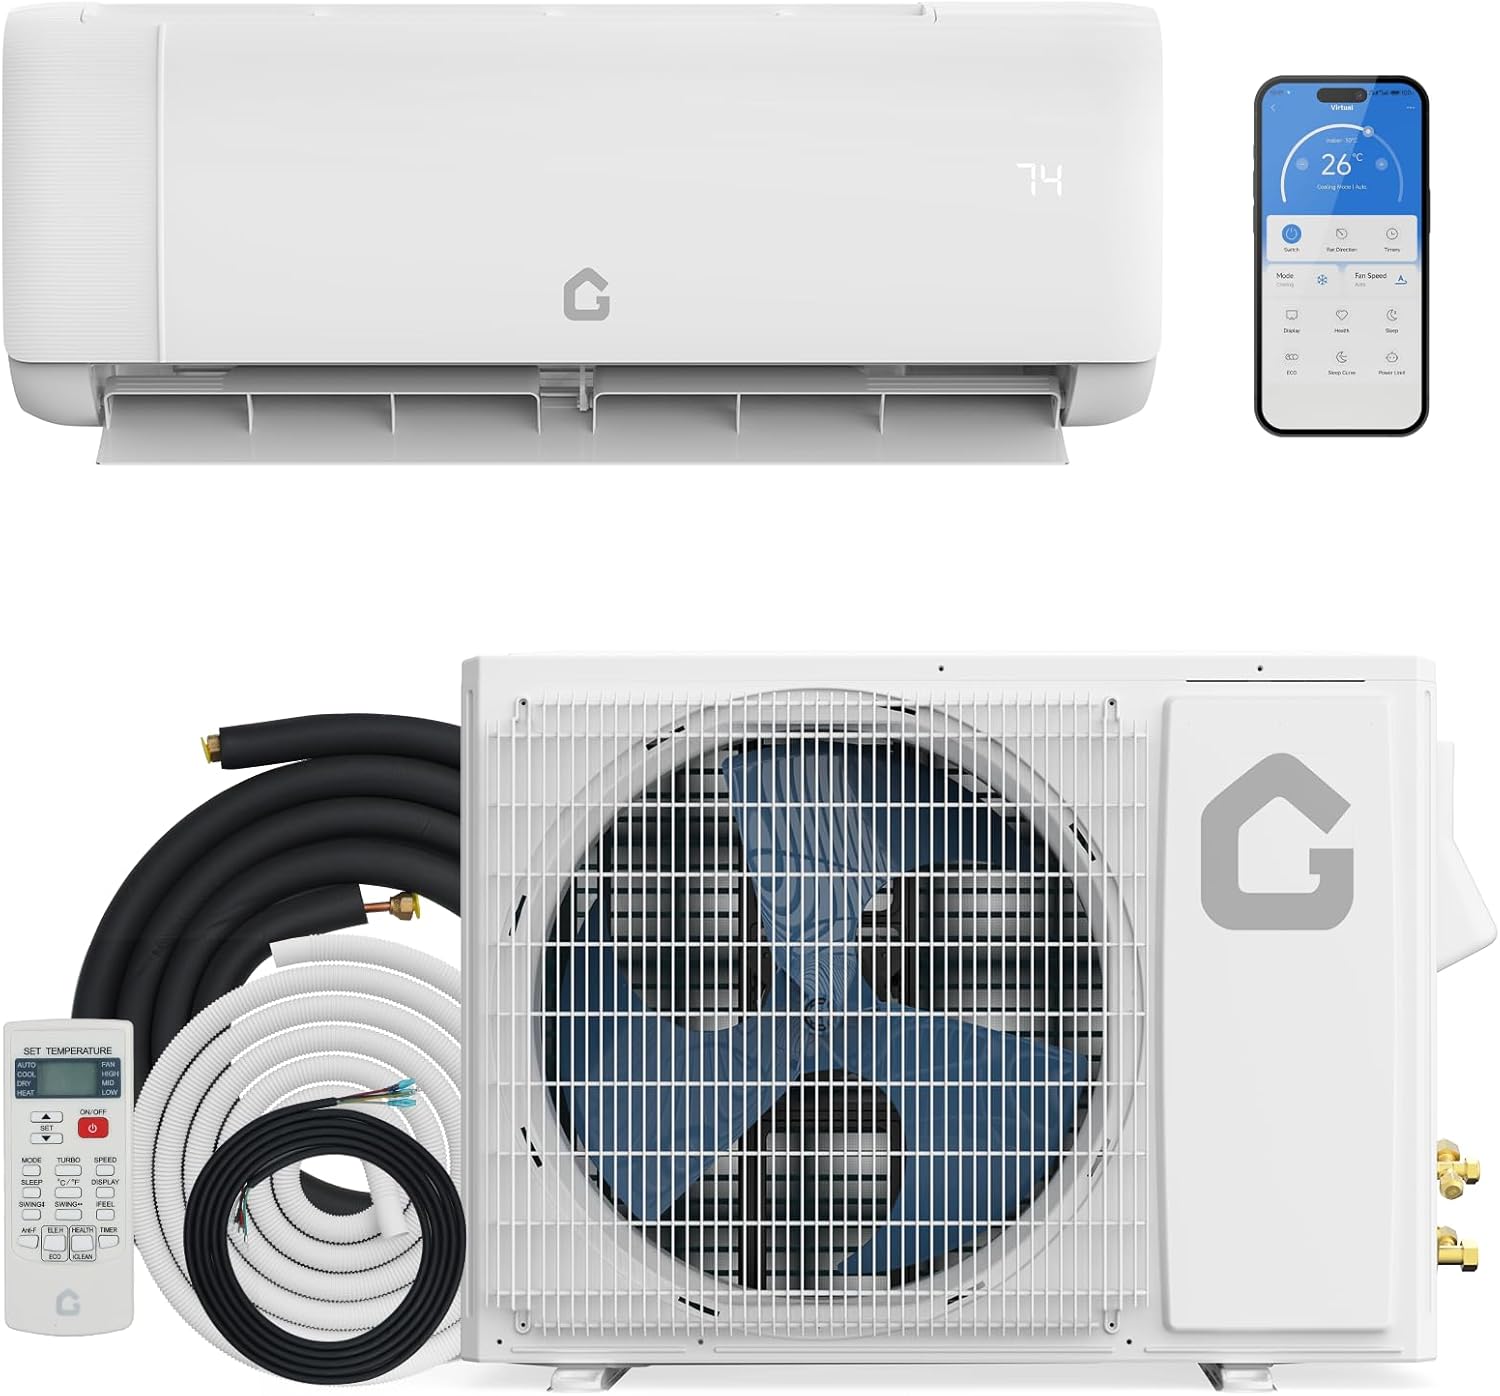
Image: GarveeTech 18000 BTU Mini Split Air Conditioner indoor and outdoor units.
Video: GarveeTech Mini Split System - Comfort without Compromise. This video highlights the key features and benefits of the GarveeTech Mini Split Air Conditioner.
3. Setup and Installation
Proper installation is critical for the performance and longevity of your GarveeTech Mini Split AC. It is recommended that installation be performed by a qualified professional.
Necessary Tools and Materials:
- Hole saw
- Multimeter
- Pipe cutter
- Hex wrenches
- Refrigerant (R32)
- Torque wrench
- Adjustable wrench
- Tape measure
- Pressure gauge
- Safety belt
- Flaring tool
- Bracket
- Level
- Phillips screwdriver
- Electroprobe
- Vacuum pump
- Pliers
- Copper tube
Video: Installation for Split Air Conditioner. This video provides a detailed guide for the installation process.
Installation Steps:
- Check the Installation Environment:
- Ensure no heat source, steam, smoke, oil, flammable, explosive, or corrosive gases are present.
- Maintain clear space around indoor and outdoor unit inlets/outlets.
- Indoor unit wall must be hard, flat, and firm to avoid vibration and noise.
- Indoor unit placement: >15cm to ceiling, >20cm to obstacles (sides), 230-260cm to floor.
- Outdoor unit placement: >20cm to top obstruction, >30cm to side obstructions, >10cm air in side, >200cm air out side.
- Fix Mounting Plate (Indoor Unit):
- Place the plate on the wall and use a level to make it horizontal.
- Select the position for at least 5 screws on the plate.
- Punch holes in the wall and use expansion screw kits to firmly fix the plate. Do not use nails.
- Drill Wall Hole:
- Determine where the pipe will go through the wall.
- Drill holes with a diameter of 60-80mm, inclined outward by 5-10 degrees.
- Use an anti-dust bag to avoid dust. Avoid wires, plumbing, gas, and other sensitive components.
- Install Connection Cable (Indoor Unit):
- Pass the power cable out from the back of the indoor unit and fix it on the terminal board.
- Fix the cable with a clamp.
- According to piping direction, remove the knock-out panel with a knife and remove burrs to prevent drain pipe from being broken.
- Connect Refrigerant Piping (Indoor Unit):
- Use both hands to turn the pipe in the desired direction. Avoid operating with one hand to prevent deformation or rupture.
- Aim at the pipe center, tighten the taper nut with fingers, then tighten with 2 wrenches.
- Refer to the torque table for correct tightening:
The size of pipe (mm) Torque (N.m) φ6/φ 6.35 15-25 φ9/φ 9.52 35-40 φ12/φ 12.7 45-60 φ15.88 73-78 φ19.05 75-80 - Install the Drain Hose:
- Connect the drain hose with the water outlet pipe, and fix it firmly with adhesive tape.
- The length should be more than 5cm to prevent water leakage.
- Wrap the Piping:
- Wrap refrigerant piping, wires, and drain pipe with wrapping tape.
- Mount Indoor Unit:
- Put the refrigerant piping out of the wall hole.
- Put the indoor unit on the mounting plate.
- Push the lower part of the indoor unit until a 'click' sound is heard to make sure the indoor unit is firmly fixed to the wall.
- Pipe Protecting Ring and Putty:
- To protect piping and wires, a pipe protecting ring shall be installed sealed with putty.
- Place the Drain Hose:
- Drain hose should be sloped down.
- Never put the end of the drain hose in the water.
- Install Outdoor Unit:
- Outdoor unit must be installed in a firm and flat place to prevent vibration and noise.
- Use level to ensure bracket horizontal and vertical.
- Use at least 6 expansion bolts to make sure brackets are fixed firmly on the wall.
- Put outdoor unit onto brackets.
- Use 4 screws to fix the feet of the outdoor unit.
- Connect Refrigerant Piping (Outdoor Unit):
- Remove the nut from stop valves.
- Aim at the pipe center of the stop valve, tighten the taper nut with fingers.
- It's better to use a torque wrench to tighten the taper nut. Refer to the torque table above.
- Screw 2 caps.
- Fix Cables (Outdoor Unit):
- Remove electrical box cover.
- Fix cables to terminal board according to wiring diagram on E-parts cover.
- Use clamp to fix cables.
- Put electrical box cover back.
- Vacuumize:
- Before vacuuming, check all the nuts of the indoor and outdoor unit are tightened.
- Connect stop valve, charging hose, manifold valve, vacuum pump as shown in the diagram.
- Turn on handle Lo to vacuumize.
- Vacuumize for 15 minutes at least, make sure the value on the pressure gauge is ≤-0.1MPa.
- Pressure keep for 3-5 minutes after vacuumizing, make sure pressure springback ≤0.05MPa.
- Open 1/4 liquid valve, and remove charging hose.
- Open all the liquid valves and gas valves.
- Screw all the caps and tighten up.
4. Operating Instructions
Your GarveeTech Mini Split AC offers multiple operating modes and smart features for optimal comfort.
Control Methods:
- Remote Control: Use the included full-function remote control (operates up to 26 ft away).
- Mobile App: Download the AC Freedom app (Android 4.1+/iOS 6.0+) to control your unit via built-in Wi-Fi 2.0.
- Voice Control: Compatible with Alexa for hands-free operation.
Operating Modes:
- Cooling Mode: Provides rapid cooling.
- Heating Mode: Offers turbo-heating.
- Dry Mode: Dehumidifies the air.
- Fan-Only Mode: Circulates air without heating or cooling.
- Sleep Mode: Operates at a whisper-quiet 28 dB for undisturbed rest.
- Turbo Mode: Provides maximum cooling or heating power (up to 49 dB).
- 4-Way Swing: Ensures uniform air distribution throughout the room.
Video: GarveeTech Split AC Wi-Fi Connection Guide. This video demonstrates how to connect your AC unit to the mobile app for smart control.
5. Maintenance
Regular maintenance ensures efficient operation and extends the lifespan of your air conditioner.
Filter Cleaning:
The unit features a filter light reminder. Clean the air filters regularly to maintain air quality and system efficiency. Refer to the full manual for detailed filter removal and cleaning instructions.

Image: A technician demonstrating filter cleaning for the indoor unit.
Self-Cleaning Function:
The unit includes a 56°C high-temperature self-cleaning function to ensure fresh and clean air.

Image: Illustration of the air conditioner's self-cleaning function.
6. Troubleshooting
If you encounter issues with your GarveeTech Mini Split AC, refer to the following common problems and solutions. For complex issues, contact customer support.
Common Issues:
- No Wi-Fi Connection: Ensure your mobile device and the AC unit are on the same 2.4GHz Wi-Fi network. Check your router settings to ensure it accepts connections from new devices and that MAC filtering is not enabled. Try resetting the Wi-Fi on the unit (refer to the Wi-Fi connection guide video for specific steps).
- E5 Error (Indoor to Outdoor Unit Communication): This indicates a communication issue between the indoor and outdoor units. Check all wiring connections for tightness and proper installation. If the issue persists, contact customer support.
- Water Leakage: Check that the drain hose is properly installed with a downward slope and securely connected. Ensure the length is sufficient to prevent backflow.
- Unit Not Cooling/Heating Effectively: Verify that the correct mode is selected and the temperature setting is appropriate. Check for any obstructions around the indoor and outdoor units that might impede airflow. Ensure filters are clean.
- Electricity Leakage: If electricity leakage is detected during trial operation, immediately turn off power and conduct further examination by a qualified technician.
7. Specifications
| Feature | Detail |
|---|---|
| Brand | GarveeTech |
| Model Number | SAC18-2-S19-B |
| Cooling Power | 18000 British Thermal Units |
| Capacity | 1.5 Tons |
| Seasonal Energy Efficiency Ratio (SEER) | 19 SEER2 |
| Floor Area Coverage | 1250 Square Feet |
| Voltage | 230 Volts |
| Noise Level (Sleep Mode) | 28 Decibels |
| Control Method | App, Remote, Voice (Alexa) |
| Refrigerant Type | R32 |
| Product Dimensions (Indoor Unit) | 12.2"D x 37.8"W x 8.74"H |
| Item Weight | 87.08 Pounds |
| Installation Type | Split System |
8. Warranty and Support
Your GarveeTech Mini Split Air Conditioner is backed by a 5-year manufacturer’s warranty covering shipping damage, normal-use part failures, and any functional defects. For installation guidance, troubleshooting, or replacement parts, contact our customer service team first to avoid unnecessary third-party fees.
Contact Information: Refer to your product packaging or the official GarveeTech website for the most up-to-date customer service contact details.