1. Introduction
This manual provides comprehensive instructions for the installation, operation, and maintenance of your CO-Z 280W Sliding Gate Opener System. This system is designed for automated control of sliding gates up to 600 kg (1320 lbs) in weight and 12.2 meters (40 feet) in length. Please read this manual thoroughly before installation and operation to ensure safe and efficient use of the product.

Figure 1: Overview of the CO-Z Sliding Gate Opener System main unit, highlighting its 280W power, 600 kg maximum weight capacity, 30m remote control range, and IP44 waterproof rating.
2. Safety Information
Always prioritize safety during installation, operation, and maintenance. Failure to follow these instructions may result in serious injury or property damage.
- Ensure all electrical connections are performed by a qualified electrician and comply with local regulations.
- Keep children and pets away from the gate area during operation.
- Do not attempt to repair the unit yourself. Contact qualified service personnel.
- Regularly inspect the gate and opener for signs of wear, damage, or misalignment.
- Use the manual release keys only in emergencies or during power outages.
- The infrared sensors are crucial for obstacle detection; ensure they are installed correctly and kept clear.
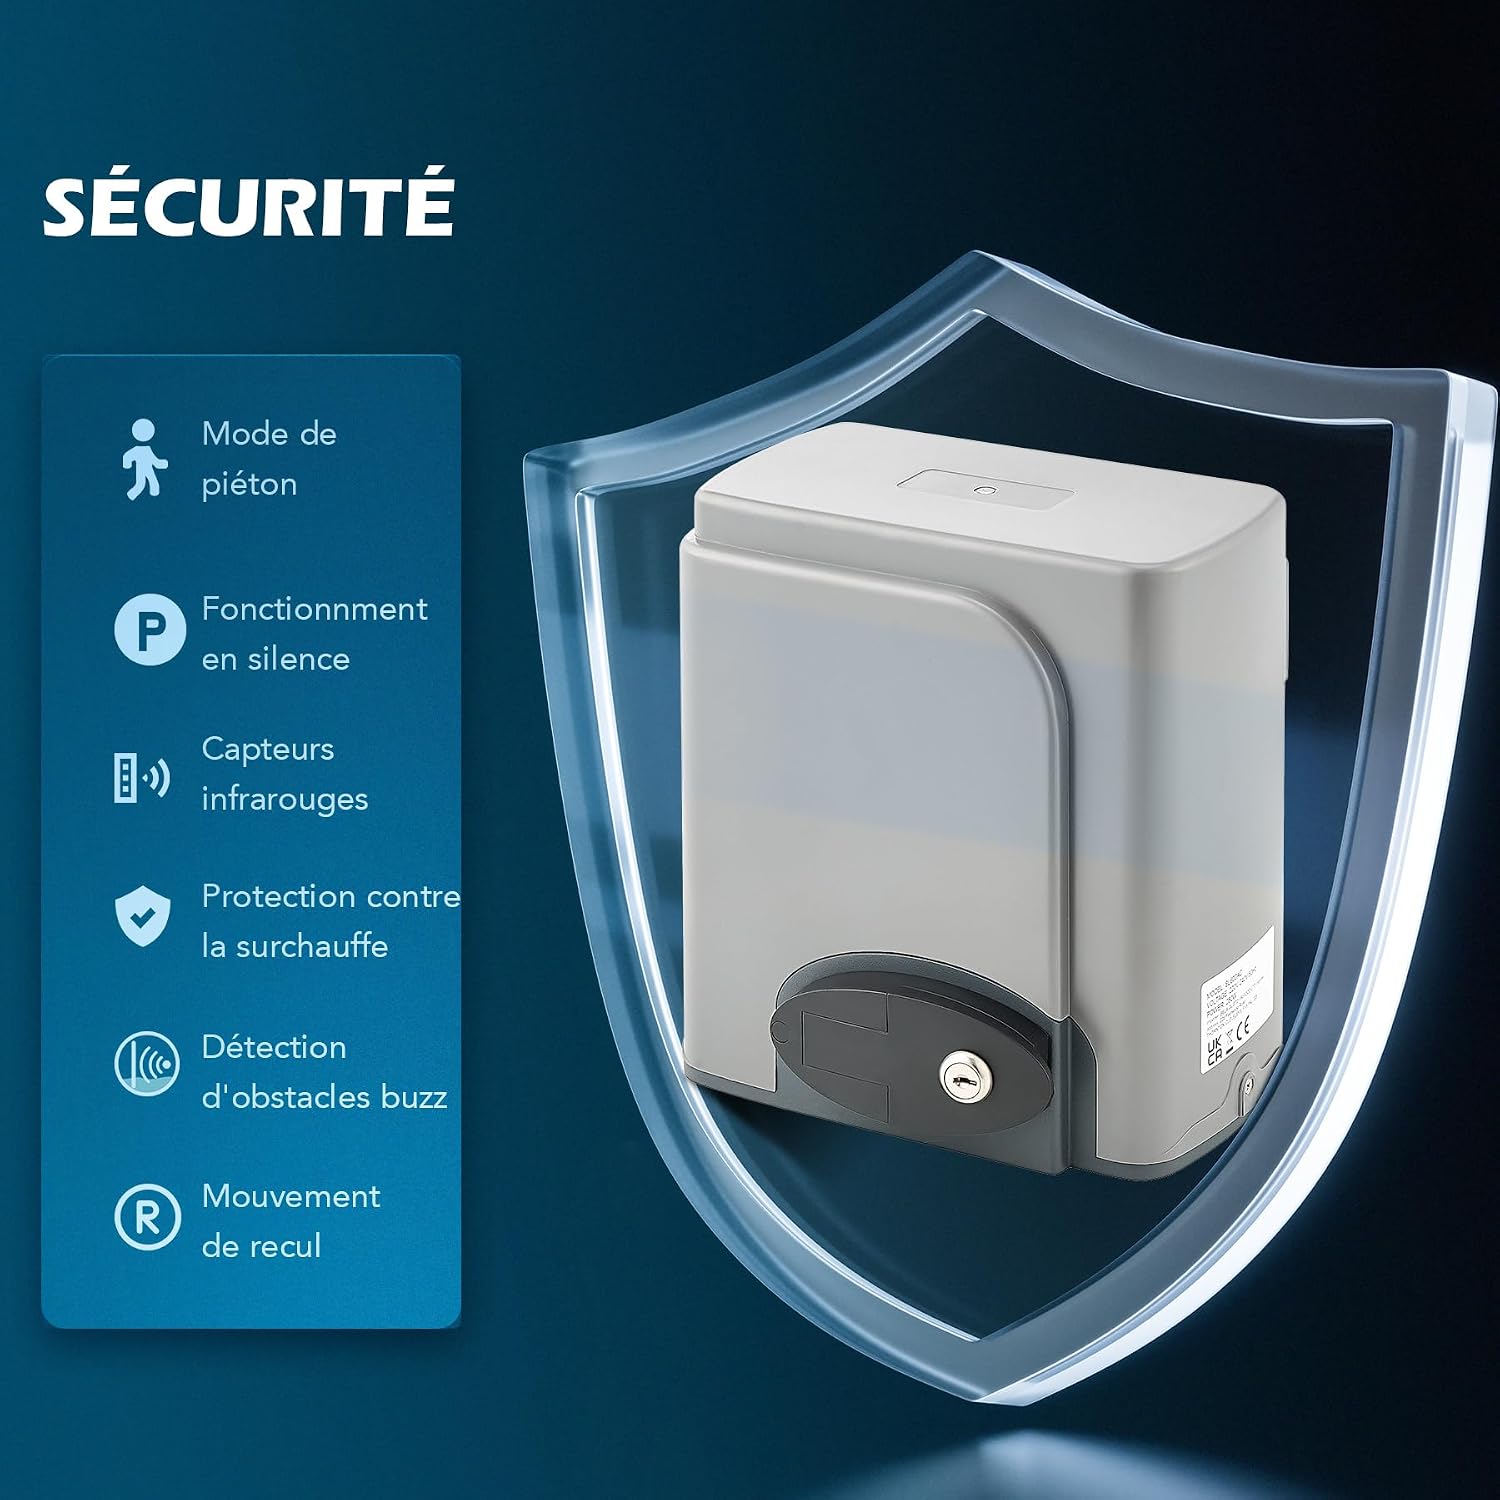
Figure 2: Diagram illustrating the safety features of the gate opener, including pedestrian mode, silent operation, infrared sensors, overheat protection, obstacle detection with reverse movement, and manual release.
3. Package Contents
Verify that all items listed below are present and undamaged before beginning installation. If any parts are missing or damaged, contact customer support.

Figure 3: Visual representation of all components included in the CO-Z Sliding Gate Opener package.
| Item | Quantity |
|---|---|
| Motor and Control Board | 1 |
| Manual Release Keys | 2 |
| Remote Controls | 2 |
| Mounting Plate | 1 |
| Gear Rack Modules (4m total) | 12 |
| Limit Switches with Accessories | 2 |
| M8 Foundation Bolts | 4 |
| M6×18 Mounting Bolts | 4 |
| M8×40 Hex Bolts | 4 |
| Self-tapping Screws | 24 |
| Mounting Lugs | 24 |
| M8 Flat Washers | 8 |
| M8 Spring Washers | 8 |
| M8 Nuts | 8 |
| Infrared Sensors | 2 |
| User Manual | 1 |
4. Specifications
Technical specifications for the CO-Z Sliding Gate Opener System.

Figure 4: Detailed technical specifications including power, torque, gate dimensions, and environmental ratings.
| Specification | Value |
|---|---|
| Manufacturer | CO-Z |
| Model Number | SGO-RA11-E0-FYXAMZFR2-1 |
| Product Dimensions (L x W x H) | 25.1 x 22.7 x 26 cm (9.9 x 8.9 x 10.2 inches) |
| Product Weight | 14.5 kg (32 lbs) |
| Input Power | 220-240V 50Hz |
| Motor Power | 280 Watts |
| Max. Gate Weight Capacity | 600 kg (1320 lbs) |
| Max. Gate Length | 12.2 m (40 feet) |
| Torque | 16 Nm |
| Gate Speed Range | 11-13 m/min |
| Remote Control Range | 30 m (100 feet) |
| Max. Remote Controls Supported | 40 |
| Waterproof Rating | IP44 |
| Max. Noise Level | ≤56 dB |
| Operating Temperature Range | -20°C to 70°C (-4°F to 158°F) |
| Gear Rack Material | Nylon |
| Batteries Required | No |

Figure 5: Dimensional drawing of the gate opener unit and a single gear rack module, showing key measurements in centimeters.
5. Setup and Installation
Proper installation is critical for the safe and reliable operation of your gate opener. This section provides a general overview; refer to the included detailed user manual (PDF) for step-by-step instructions and diagrams.
- Site Preparation: Ensure the gate moves freely and is properly aligned. Clear any obstacles from the gate's path.
- Mounting the Opener: Securely attach the motor unit to a stable concrete base using the provided foundation bolts and mounting plate. Ensure the unit is level and correctly positioned relative to the gate.
- Installing Gear Racks: Attach the gear rack modules along the bottom edge of the gate, ensuring proper engagement with the motor's drive gear. Maintain a small gap (approx. 1-2mm) between the gear and the rack to allow for smooth operation.
- Electrical Connections: Connect the power supply and control wiring according to the wiring diagram in the full manual. This step should be performed by a qualified electrician.
- Installing Limit Switches: Position and secure the limit switches at the desired open and closed positions of the gate to define its travel limits.
- Installing Infrared Sensors: Mount the infrared sensors on opposite sides of the gate opening, ensuring they are aligned and unobstructed. These sensors provide crucial safety by detecting obstacles.

Figure 6: Technical diagram illustrating the installation process of the gate opener motor, including measurements and mechanical specifications.
6. Operating Instructions
The CO-Z Sliding Gate Opener offers various operating modes and features for convenient and secure gate control.
6.1 Remote Control Operation
Your system includes two remote controls. Up to 40 remote controls can be programmed. Refer to the full manual for programming instructions.
- Press the designated button on the remote control to open or close the gate.
- Pressing the button again during operation will stop the gate. A third press will reverse its direction.

Figure 7: The two remote controls included with the system, used for wireless gate operation.
6.2 Key Features
- Adjustable Speed: Customize the gate's opening and closing speed.
- Automatic Close Timer: Set the gate to automatically close after 12, 24, or 36 seconds.
- Pedestrian Mode: Allows the gate to open partially for pedestrian access.
- Obstacle Detection: Infrared sensors detect obstructions and reverse the gate's movement to prevent damage or injury.
- Manual Release: In case of power failure, use the provided keys to manually unlock and operate the gate.

Figure 8: Illustration of customizable features such as adjustable speed, automatic closing timer, and left/right direction settings.

Figure 9: Close-up of the manual release keys, essential for operating the gate during power outages.
7. Maintenance
Regular maintenance ensures the longevity and optimal performance of your gate opener system.
- Cleanliness: Keep the motor unit, gear racks, and infrared sensors free from dirt, debris, and ice.
- Lubrication: Periodically lubricate the gear racks and any moving parts of the gate with appropriate grease.
- Inspection: Regularly check all bolts, screws, and connections for tightness. Inspect the gate for smooth movement and ensure there are no obstructions in its path.
- Sensor Check: Test the infrared sensors regularly to ensure they are functioning correctly and detecting obstacles.
- Power Disconnection: Always disconnect power to the unit before performing any maintenance or inspection.
8. Troubleshooting
This section addresses common issues you might encounter. For more complex problems, consult the full user manual or contact customer support.
| Problem | Possible Cause | Solution |
|---|---|---|
| Gate does not respond to remote control. | Dead remote battery, remote out of range, remote not programmed, power outage. | Replace remote battery, move closer to the gate, reprogram remote, check power supply. |
| Gate stops or reverses unexpectedly. | Obstruction detected by infrared sensors, gate mechanism jammed, limit switch issue. | Clear path, check gate for obstructions, inspect sensors for alignment/cleanliness, check limit switch settings. |
| Motor runs but gate does not move. | Manual release engaged, gear rack not properly engaged with motor gear, damaged gear. | Disengage manual release, check gear rack alignment, inspect gear for damage. |
| Gate operates slowly or with difficulty. | Lack of lubrication, excessive friction, gate weight exceeds capacity, low voltage. | Lubricate moving parts, check gate for friction, ensure gate weight is within limits, verify power supply. |
9. Warranty and Support
For warranty information, technical support, or to purchase replacement parts, please refer to the contact details provided in your original purchase documentation or visit the official CO-Z website. Keep your purchase receipt as proof of purchase for warranty claims.