Introduction
Thank you for choosing the Tressify Body Camera 2K WiFi L9. This device is designed for reliable video recording in various environments, including outdoor activities and law enforcement applications. It features 2K Ultra HD resolution, a 150° wide-angle lens, WiFi connectivity, night vision, and an IP65 waterproof rating. Please read this manual thoroughly to ensure proper operation and maintenance of your body camera.
Product Overview
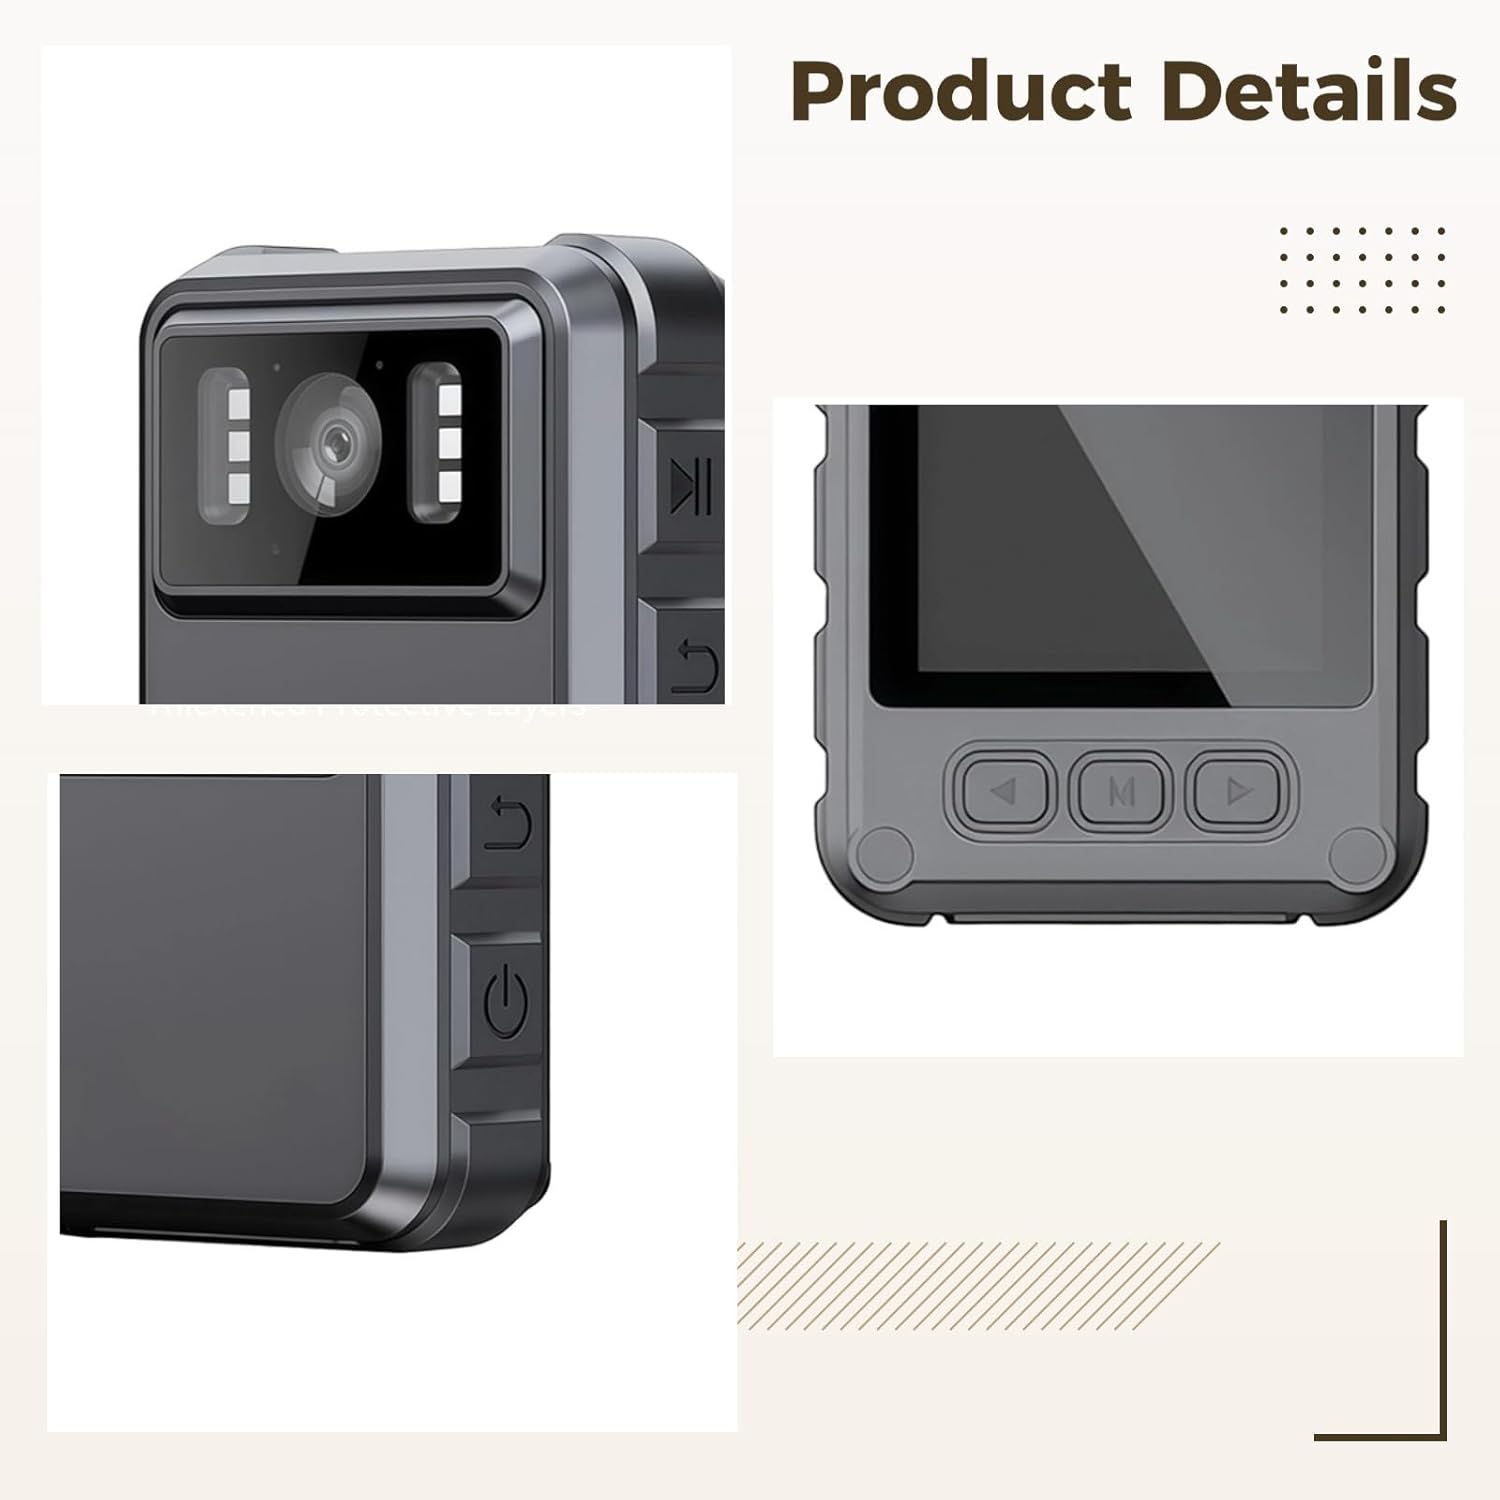
Image: Detailed views of the Tressify Body Camera, highlighting the front lens, infrared lights, and various control buttons on the side and front panel.
The Tressify L9 Body Camera is a compact and robust recording device. It features a front-facing camera lens with integrated infrared lights for night vision, a display screen, and intuitive control buttons for power, recording, mode selection, and WiFi activation. The device is encased in a durable, waterproof housing.
What's in the Box
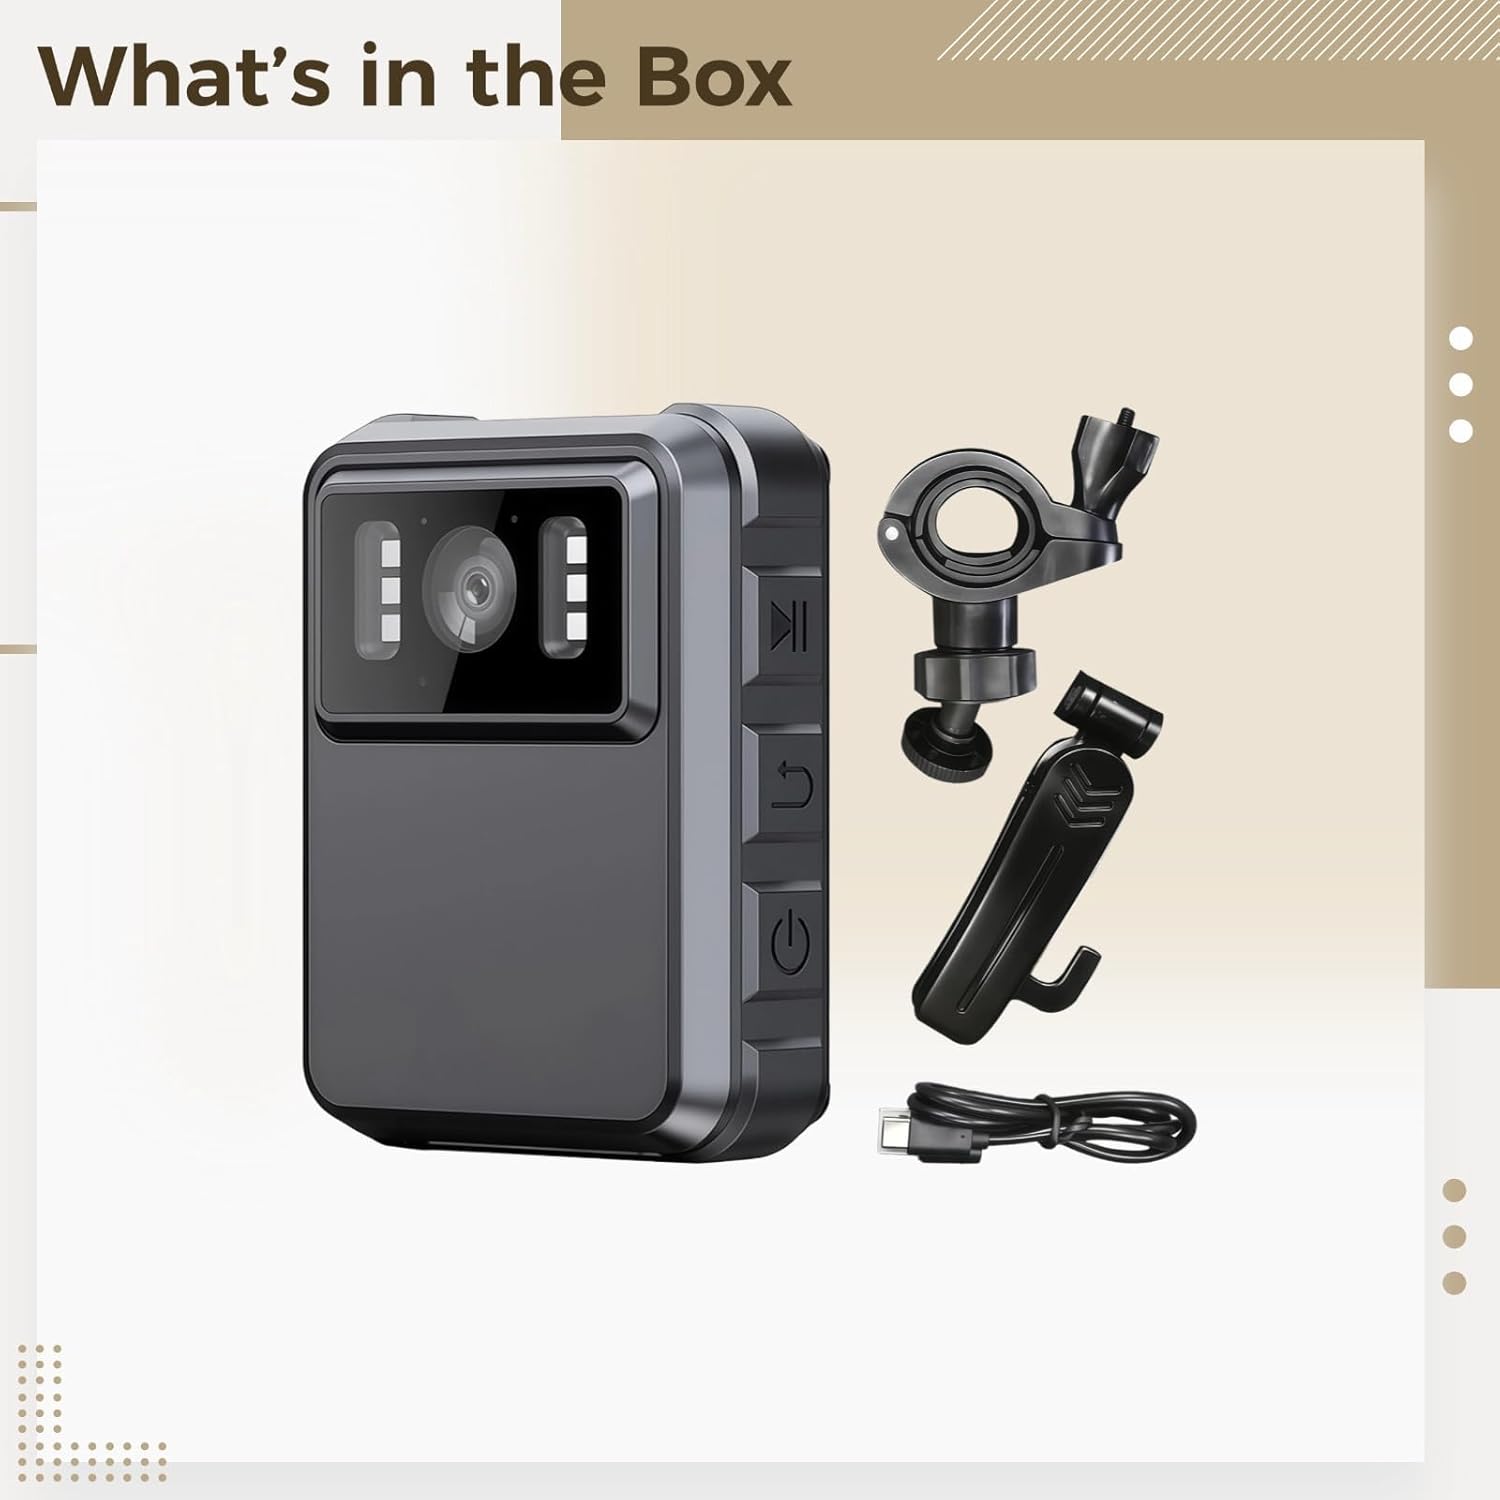
Image: The Tressify Body Camera and its accessories, including two types of mounting brackets, a USB charging cable, and an SD card.
- Tressify Body Camera L9 (1 unit)
- Mounting Brackets (2 types)
- USB Charging Cable (1 unit)
- SD Card (32GB, 1 unit)
- Instruction Manual (this document)
Specifications

Image: The Tressify Body Camera with its key dimensions labeled: 3.15 inches (height), 2.36 inches (width), and 1.18 inches (depth).
| Feature | Detail |
|---|---|
| Model | L9 |
| Video Resolution | 2K Ultra HD (3840 x 2160) |
| Lens Angle | 150° Wide Angle |
| Memory | 32GB (SD Card included) |
| Battery Capacity | 1800mAh |
| Night Vision | Enhanced Infrared (6 IR lights) |
| Connectivity | Built-in WiFi |
| Waterproof Rating | IP65 |
| Material | ABS |
| Dimensions | 3.15 in x 2.36 in x 1.18 in (8 cm x 6 cm x 3 cm) |
Setup
1. Charging the Battery
Before first use, fully charge the body camera. Connect the provided USB charging cable to the camera's charging port and to a standard USB power adapter (not included) or a computer USB port. The charging indicator light will show the charging status and turn off or change color when fully charged.
2. Inserting the SD Card
Locate the SD card slot on the camera. Gently insert the included 32GB SD card with the gold contacts facing the correct direction (refer to the diagram on the camera or in the quick start guide). Push until it clicks into place. To remove, push the card in again until it springs out.
3. Mounting the Camera

Image: The Tressify Body Camera mounted on a bicycle handlebar, illustrating a common use case for outdoor recording.
The camera comes with two types of adjustable mounting brackets. Choose the appropriate bracket for your intended use (e.g., motorcycle, body attachment). Securely attach the bracket to your desired surface or clothing, then slide the camera onto the bracket until it locks. Ensure the camera is stable and the lens has an unobstructed view.
Operating Instructions
1. Power On/Off
- To Power On: Press and hold the Power button (usually marked with a power symbol) for a few seconds until the screen illuminates.
- To Power Off: Press and hold the Power button again until the device shuts down.
2. Recording Video
- Once powered on, the camera typically defaults to video recording mode.
- Press the Record button (often marked with a red dot or camera icon) to start recording. A recording indicator (e.g., a flashing red light or on-screen icon) will appear.
- Press the Record button again to stop recording. The video file will be saved to the SD card.
3. Night Vision
The camera features enhanced infrared night vision. In low-light conditions, the camera can automatically activate its six infrared lights to capture clear footage. This mode ensures visibility in darkness for night-time monitoring.
4. WiFi and Remote Control
The built-in WiFi allows you to stream video and control the camera remotely using a compatible smartphone application. Refer to the quick start guide for instructions on downloading the app and connecting your device via WiFi. This feature enables monitoring footage from your smart device.
5. Audio Recording
The camera records audio along with video. Ensure the microphone is not obstructed for clear audio capture.
6. Playback
You can review recorded footage directly on the camera's screen using the navigation buttons, or by connecting the camera to a computer via USB, or through the WiFi app.
Maintenance
1. Cleaning
Use a soft, dry cloth to clean the camera body. For the lens, use a specialized lens cleaning cloth and solution to avoid scratches. Do not use harsh chemicals or abrasive materials.
2. Waterproof Care
The camera has an IP65 waterproof rating, meaning it is protected against dust and low-pressure water jets. While it can withstand rain, avoid submerging the camera in water. Ensure all port covers are securely closed before exposing the camera to moisture.
3. Battery Care
To prolong battery life, avoid fully discharging the battery frequently. Store the camera in a cool, dry place when not in use. If storing for extended periods, charge the battery to about 50% capacity.
Troubleshooting
- Camera not turning on: Ensure the battery is charged. Connect to a power source and try again.
- Recording issues: Check if the SD card is properly inserted and has sufficient free space. Format the SD card if necessary (this will erase all data).
- Poor video quality: Ensure the lens is clean and free from smudges. Check recording resolution settings.
- WiFi connection problems: Ensure the camera's WiFi is enabled. Restart both the camera and your smart device. Refer to the app's instructions for connection steps.
- Night vision not working: Ensure the camera is in a sufficiently dark environment for IR lights to activate.
Warranty and Support
For warranty information and technical support, please refer to the documentation included with your purchase or contact Tressify customer service through the retailer where the product was purchased. Keep your proof of purchase for warranty claims.