Introduction
This manual provides detailed instructions for the installation, operation, and maintenance of your Thermalright Royal Pretor 130 CPU Cooler. Designed for optimal heat dissipation, this cooler features 6 heat pipes and dual fans, compatible with various Intel and AMD platforms. Please read this manual thoroughly before installation to ensure proper setup and performance.
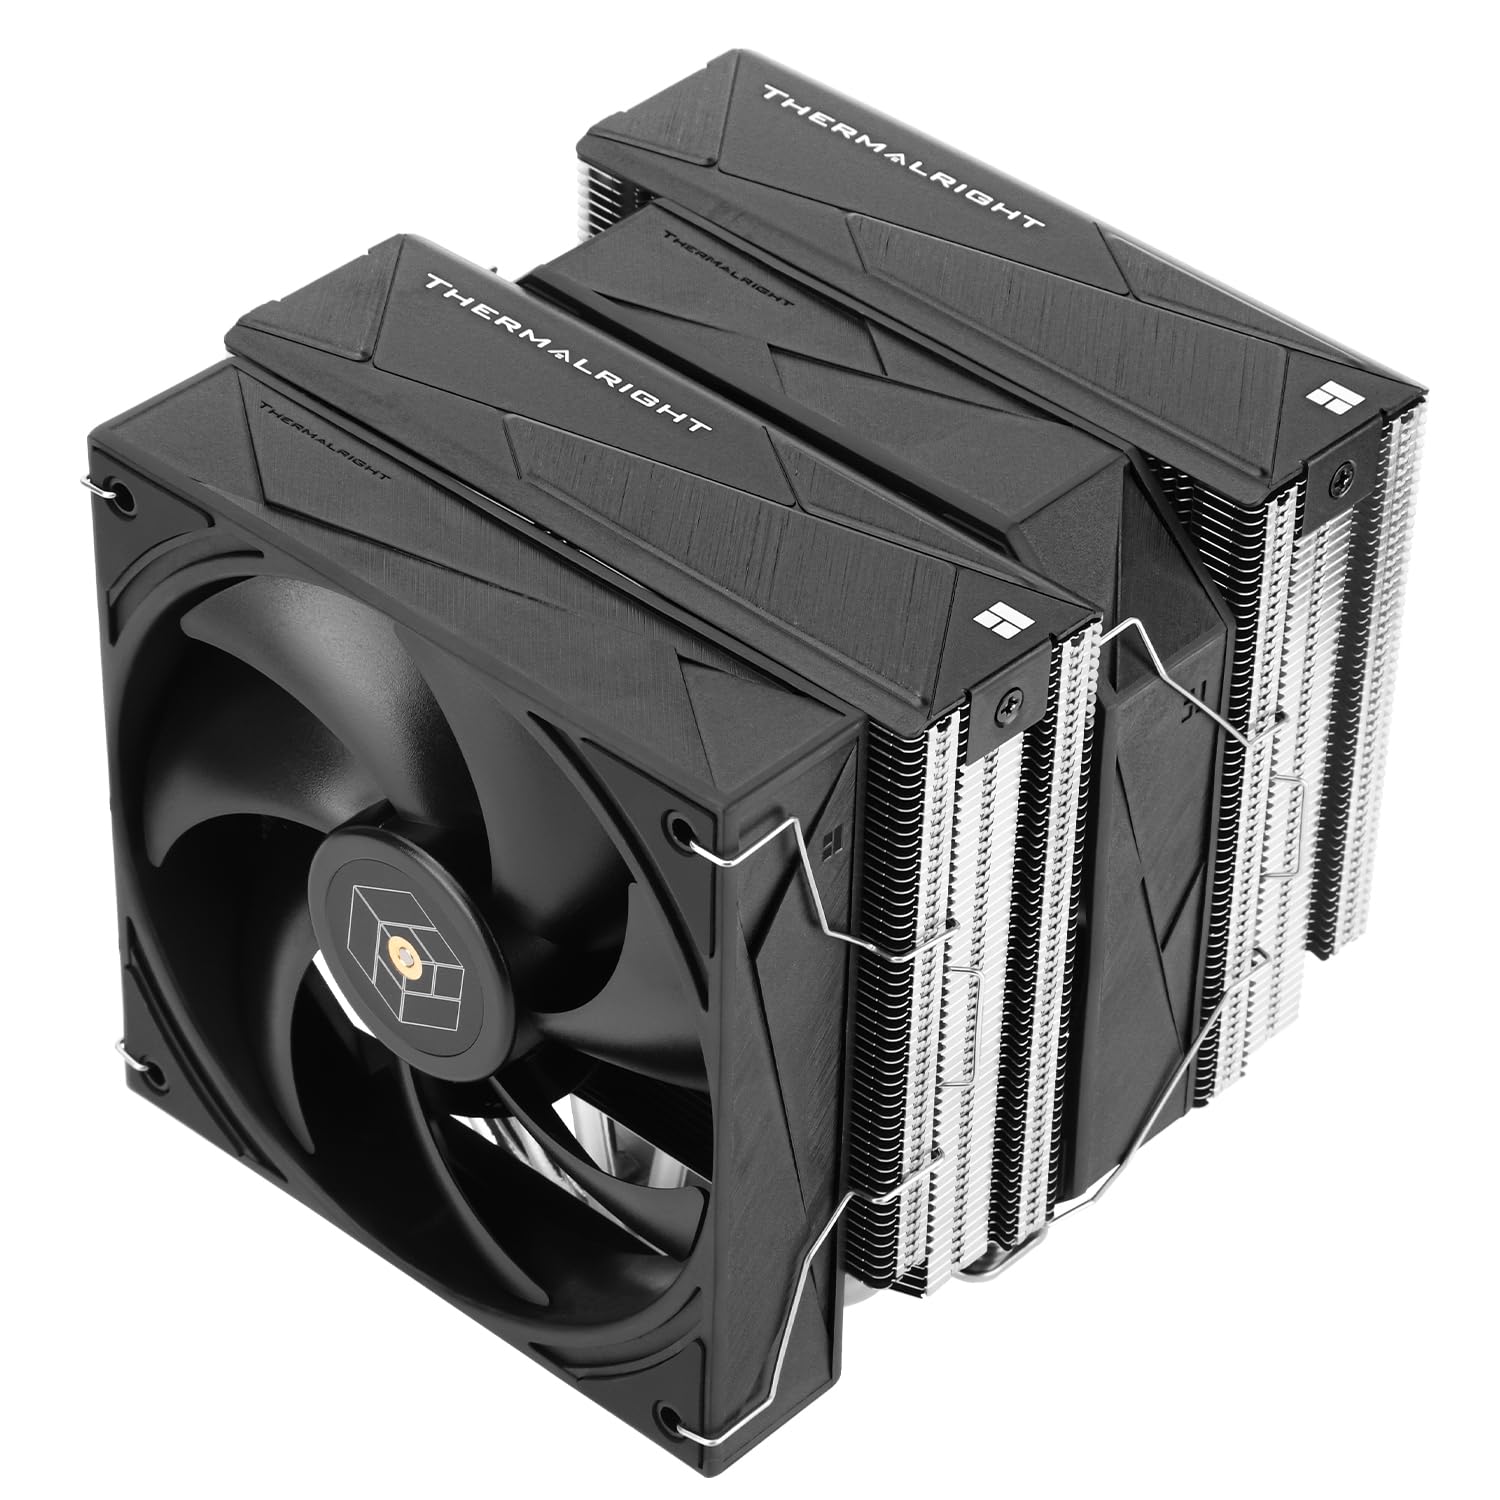
Image: Thermalright Royal Pretor 130 CPU Cooler, showcasing its dual-tower design and fans.
Safety Information
Always observe the following safety precautions:
- Ensure your computer system is powered off and unplugged from the wall outlet before beginning installation.
- Handle all components with care to prevent damage.
- Avoid touching the fan blades while the system is operating.
- Keep small parts away from children.
- If you are unsure about any step, consult a qualified technician.
Package Contents
Verify that all components are present before proceeding with installation:
- Thermalright Royal Pretor 130 Heatsink (with 6 heat pipes)
- TL-H12-X28 Fan (120mm)
- TL-HD13-X28 Fan (130mm)
- Fan Clips (for both fans)
- Thermal Compound
- Intel Mounting Bracket
- AMD Mounting Bracket
- Intel Backplate (LGA115X/1200/1700/1851)
- AMD Spacers (red)
- Intel Metal Standoffs (LGA115X/1200, LGA1700)
- Mounting Screws (for Intel and AMD)
- Fan Y-Cable
Setup and Installation
Follow these steps carefully for proper installation. An installation video is provided below for visual guidance.
Video: Thermalright Royal Pretor 130 Series CPU Cooler Installation Guide.
1. Prepare Motherboard
For AMD AM4/AM5 Platforms:
- Remove the motherboard's original plastic retention brackets around the CPU socket. Keep the original backplate.
- Install the four red spacers onto the motherboard's backplate screws.
- Place the two metal AMD brackets onto the spacers, aligning the screw holes.
- Secure the AMD brackets using the provided AMD screws with a screwdriver.
For Intel LGA1700 Platforms:
- Adjust the Intel backplate mounting hole position to '1700'.
- Install the backplate from the backside of the motherboard, ensuring the screws pass through the mounting holes.
- Install four 1700 metal standoffs onto the backplate screws from the front side of the motherboard. Ensure the insulation side of the standoffs faces the motherboard.
- Install the two Intel brackets onto the metal standoffs.
- Secure the Intel brackets with the provided Intel screws using a screwdriver.
For Intel LGA115X/1200/2011/2066 Platforms:
- For LGA115X/1200, adjust the Intel backplate mounting hole position accordingly. For LGA2011/2066, the motherboard typically has integrated standoffs.
- Install the backplate (if applicable) and the correct metal standoffs (LGA115X/1200 standoffs for those sockets, or use existing LGA2011/2066 standoffs).
- Install the two Intel brackets onto the metal standoffs.
- Secure the Intel brackets with the provided Intel screws using a screwdriver.
2. Apply Thermal Compound
- Clean the surface of your CPU's Integrated Heat Spreader (IHS) with isopropyl alcohol to remove any dust or old thermal paste.
- Apply a small amount of the provided thermal compound to the center of the CPU IHS. A pea-sized dot or a thin line is generally sufficient.
3. Mount Heatsink
- Remove the protective sticker from the heatsink's coldplate.
- Carefully place the heatsink onto the CPU, ensuring the heatsink bracket nuts align with the screws on the installed mounting brackets.
- Using a screwdriver, alternately tighten both nuts on the heatsink bracket to apply even mounting pressure. Tighten until snug, but do not overtighten.
4. Install Fans
- Attach the fan clips to both the 120mm and 130mm fans.
- Mount the fans onto the heatsink using the attached fan clips. Ensure the fans are oriented to pull air through the heatsink fins and exhaust it towards the rear of the case.
- Connect the 4-pin fan connectors from both fans to the provided fan Y-cable.
- Connect the fan Y-cable to your motherboard's CPU_FAN header.
Operating Instructions
Once installed, the Thermalright Royal Pretor 130 CPU Cooler operates automatically, controlled by your motherboard's fan headers via PWM (Pulse Width Modulation). This allows the fan speed to adjust based on CPU temperature, providing efficient cooling when needed and quieter operation during lighter loads.
- Monitoring: Use motherboard monitoring software or BIOS settings to check CPU temperatures and fan speeds.
- Fan Control: Most motherboards allow customization of fan curves in the BIOS/UEFI settings to fine-tune the balance between cooling performance and noise levels.
Maintenance
Regular maintenance helps ensure optimal performance and longevity of your CPU cooler.
- Dust Removal: Periodically (e.g., every 3-6 months), power off and unplug your computer. Use compressed air to gently blow dust out of the heatsink fins and fan blades. Hold the fan blades to prevent them from spinning rapidly during cleaning, which can damage the bearings.
- Thermal Paste: The thermal paste typically lasts for several years. Reapplication is generally only necessary if you remove the heatsink from the CPU.
- Fan Inspection: Check fan cables for secure connections and ensure fan blades are free from obstructions.
Troubleshooting
If you encounter issues with your CPU cooler, consider the following common solutions:
- High CPU Temperatures:
- Ensure the heatsink is securely mounted and making full contact with the CPU.
- Verify that thermal paste was applied correctly and evenly.
- Check fan orientation and ensure they are spinning.
- Clean any dust buildup from the heatsink and fans.
- Ensure adequate airflow within your computer case.
- Fans Not Spinning:
- Check that the fan Y-cable is securely connected to both fans and the motherboard's CPU_FAN header.
- Verify fan settings in your motherboard's BIOS/UEFI.
- Excessive Fan Noise:
- Check for any cables or obstructions hitting the fan blades.
- Clean dust from the fan blades.
- Adjust fan speed curves in BIOS/UEFI to a quieter profile if temperatures allow.
Specifications
| Feature | Specification |
|---|---|
| Model | Royal Pretor 130 |
| Heat Pipe Technology | 6x6mm Pure Copper Heat Pipes (AGHP 4.0) |
| Heat Dissipation Material | Aluminum + Copper |
| Overall Height | 158mm |
| Fans Included | 1x TL-H12-X28 (120mm), 1x TL-HD13-X28 (130mm) |
| Fan Bearing Type | S-FDB V2.0 |
| Maximum Rotational Speed | 2150 RPM |
| Air Flow Capacity | 80.45 Cubic Feet Per Minute (CFM) |
| Noise Level | 29.4 Decibels (dB) |
| Power Connector Type | 4-Pin PWM |
| Compatible Intel Sockets | LGA1851, LGA1700, LGA1150, LGA1151, LGA1155, LGA1156, LGA1200, LGA2011, LGA2066 |
| Compatible AMD Sockets | AM4, AM5 |
| Package Dimensions | 10 x 8.03 x 6.38 inches |
| Weight | 4.3 Pounds |
| UPC | 764035264560 |
Warranty and Support
Thermalright products are manufactured to high-quality standards. For warranty information and technical support, please refer to the official Thermalright website or contact your retailer. Keep your proof of purchase for warranty claims.


