1. Introduction
The THOMSON RT400DABBTBK is a versatile portable radio designed to provide a comprehensive audio experience. It features DAB+ and FM radio reception, Bluetooth connectivity for wireless audio streaming, USB playback for MP3 files, and an AUX-IN port for external devices. Additionally, it includes a dual alarm clock function, making it a practical and convenient device for various settings.
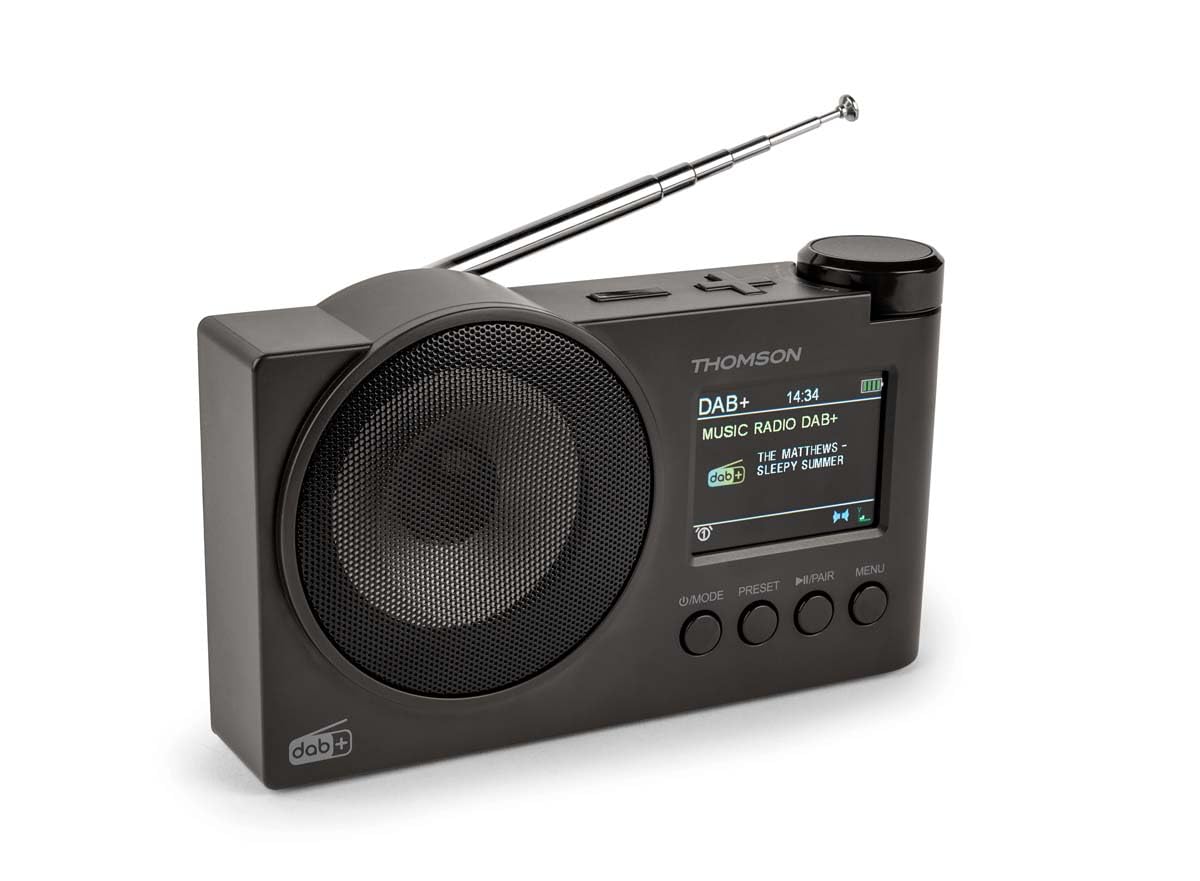
Figure 1.1: THOMSON RT400DABBTBK portable radio. This image shows the front of the radio, featuring the speaker grille on the left and the LED display with control buttons on the right. The display indicates the time, date, and battery level.
2. Important Safety Instructions
- Read all instructions carefully before operating the device.
- Keep this manual for future reference.
- Do not expose the device to rain, moisture, or extreme temperatures.
- Do not disassemble the unit. Refer all servicing to qualified personnel.
- Use only the specified power adapter (DC 5V 2A) and USB-C cable.
- Ensure proper ventilation around the device.
- Avoid placing the device near heat sources or direct sunlight.
3. Package Contents
Please check that all items are present:
- THOMSON RT400DABBTBK Radio
- USB-C Charging Cable
- Owner's Manual (this document)
4. Product Layout and Controls

Figure 4.1: Front Panel Controls and Display. This image provides a detailed view of the radio's front panel, featuring the circular speaker on the left and the rectangular LED display on the right. Below the display are four control buttons: MODE, PRESET, PLAY/PAIR, and MENU. The display shows '12/8/2025 Mardi 16:24' with alarm and stop icons.
4.1. Control Buttons
- POWER / MODE: Press to turn on/off. Press to switch between DAB+, FM, Bluetooth, USB, and AUX-IN modes.
- PRESET: Access and save preset radio stations.
- PLAY / PAIR: In Bluetooth mode, press to play/pause or initiate pairing. In USB mode, play/pause.
- MENU: Access system settings and options for the current mode.
- Rotary Knob (Top Right): Adjust volume, navigate menus, or tune frequencies. Press to confirm selections.
4.2. Display Information
The LED display shows various information depending on the operating mode:
- Current time and date (12/24h format).
- Radio station name, frequency, or DAB+ service information.
- Bluetooth connection status.
- USB track information.
- Battery level indicator.
- Alarm icons (Alarm 1, Alarm 2).
5. Setup
5.1. Powering On
The radio can be powered in two ways:
- AC Power: Connect the supplied USB-C cable to the DC 5V 2A input on the radio and to a suitable USB power adapter (not included).
- Rechargeable Battery: The radio has a built-in 1500mAh Lithium rechargeable battery. Ensure it is fully charged before portable use. The battery charges automatically when connected to AC power.
5.2. Antenna Adjustment
For optimal DAB+ and FM radio reception, fully extend the telescopic antenna. Adjust its position for the best signal quality.
5.3. Initial Settings
Upon first use or after a factory reset, you may need to configure basic settings:
- Language Selection: Use the MENU button to navigate to System Settings, then select 'Language' to choose your preferred language (French, English, German, Italian, Spanish, Portuguese, Dutch).
- Time and Date: The time and date are often automatically updated in DAB+ mode. If not, navigate to System Settings > Time/Date to set manually.
6. Operating the Radio
6.1. DAB+ Radio Mode
- Press the MODE button to select DAB+ mode.
- The radio will automatically perform a scan for available DAB+ stations.
- Use the rotary knob to scroll through the list of found stations. Press the knob to select a station.
- To save a station as a preset, press and hold the PRESET button, select a preset number using the rotary knob, and press the knob to confirm.
6.2. FM Radio Mode
- Press the MODE button to select FM mode.
- To auto-scan for stations, press and hold the rotary knob. The radio will scan and save stations.
- To manually tune, rotate the knob to adjust the frequency.
- To save a station as a preset, press and hold the PRESET button, select a preset number using the rotary knob, and press the knob to confirm.
6.3. Bluetooth Speaker Mode
- Press the MODE button to select Bluetooth mode. The display will show 'Bluetooth Pairing'.
- On your smartphone or tablet, enable Bluetooth and search for 'THOMSON RT400DABBTBK'.
- Select the device to pair. Once connected, the display will show 'Bluetooth Connected'.
- Play audio from your paired device. Use the radio's rotary knob to adjust volume.
6.4. USB Playback
- Insert a USB flash drive containing MP3 files into the USB port.
- Press the MODE button to select USB mode.
- The radio will automatically start playing MP3 files. Use the rotary knob to navigate tracks and the PLAY/PAIR button to play/pause.
6.5. AUX-IN Mode
- Connect an external audio device (e.g., MP3 player) to the AUX-IN 3.5mm port using an audio cable (not included).
- Press the MODE button to select AUX-IN mode.
- Control playback from your external device. Use the radio's rotary knob to adjust volume.
6.6. Headphone Use
Connect headphones (not supplied) to the 3.5mm headphone jack for private listening. The main speaker will be muted automatically.
7. Alarm Clock
The radio features a dual alarm clock.
- Press the MENU button and navigate to 'Alarm Settings'.
- Select 'Alarm 1' or 'Alarm 2' to configure.
- Set Time: Use the rotary knob to set the desired alarm time.
- Alarm Source: Choose your preferred wake-up sound: DAB+, FM, USB, or Bluetooth.
- Alarm Duration: Set the alarm duration (15, 30, 45, 60, or 90 minutes).
- Alarm Frequency: Select how often the alarm should sound: Once, Daily, Weekdays, or Weekends.
- Volume: Adjust the alarm volume.
- Enable/Disable: Turn the alarm ON or OFF.
8. System Settings
Access system settings by pressing the MENU button and navigating to 'System Settings'.
- Display Settings: Adjust backlight duration (10 to 180 seconds) and choose between 12-hour or 24-hour time format.
- Language: Select the display language (French, English, German, Italian, Spanish, Portuguese, Dutch).
- Automatic Station Update: Enable or disable automatic updates for radio stations.
- Factory Reset: Reset all settings to their default values.
9. Maintenance
9.1. Cleaning
Wipe the radio's surface with a soft, dry cloth. Do not use abrasive cleaners, waxes, or solvents, as these may damage the finish.
9.2. Battery Care
To prolong the life of the built-in Lithium battery:
- Avoid fully discharging the battery frequently.
- Charge the battery regularly, even if the radio is not in use for extended periods.
- Store the radio in a cool, dry place when not in use.
10. Troubleshooting
| Problem | Possible Cause | Solution |
|---|---|---|
| No power | Battery discharged or power cable not connected. | Connect the USB-C cable to a power source. Charge the battery. |
| Poor radio reception | Antenna not extended or weak signal area. | Fully extend and adjust the telescopic antenna. Try moving the radio to a different location. |
| Bluetooth not connecting | Radio not in pairing mode or device already paired. | Ensure the radio is in Bluetooth mode and 'Bluetooth Pairing' is displayed. Forget the device on your phone/tablet and try pairing again. |
| USB playback not working | USB drive not formatted correctly or unsupported file type. | Ensure USB drive is formatted to FAT32 and contains MP3 files. Try a different USB drive. |
| Alarm not sounding | Alarm disabled or incorrect settings. | Check alarm settings (time, source, frequency, enable/disable status). |
11. Specifications
| Feature | Specification |
|---|---|
| Brand | THOMSON |
| Model Number | RT400DABBTBK |
| Radio Bands Supported | DAB+, FM |
| Connectivity Technology | Bluetooth |
| Special Feature | Portable |
| Power Source | Battery Powered, Corded Electric (DC 5V 2A via USB-C) |
| Battery | 1500mAh Rechargeable Lithium |
| Display Type | LED |
| Product Dimensions (L x W x H) | 8 x 5 x 15 centimeters |
| Item Weight | 300 Grams |
| Compatible Devices | MP3 Player, Speaker, Headphones, Tablet |
12. Warranty and Support
This THOMSON RT400DABBTBK radio comes with a 1-year manufacturer warranty.
For further support, troubleshooting, or warranty claims, please refer to your point of purchase or visit the official THOMSON brand store: