1. Introduction and Safety Information
Thank you for choosing the Cumbor Extra Wide Baby Gate. This gate is designed to provide a secure barrier for children and pets in various home environments, including doorways, hallways, and stairs. Please read this manual thoroughly before installation and use to ensure proper function and safety.
Important Safety Warnings:
- WARNING: Read all instructions before installation and use. Failure to follow these instructions could result in serious injury or death.
- This safety barrier is for domestic use only.
- This safety barrier is suitable for openings from 36.6 inches to 59 inches.
- Never use without wall cups.
- Never install all extensions on the same side of the gate.
- Always ensure the gate is securely closed and latched before leaving a child or pet unattended.
- Regularly check all parts for wear and tear. Replace damaged parts immediately.
- Do not allow children to climb on or play with the gate.
- This gate is not a substitute for adult supervision.
2. Package Contents
Please verify that all components are present before beginning installation.

Image: Detailed view of all components included in the Cumbor Baby Gate package, labeled A through L, with quantities.
| Item | Description | Quantity |
|---|---|---|
| A | Main Gate | 1 |
| B | Extension | 3 |
| C | Tension Bolt | 4 |
| D | Wall Cup | 4 |
| E | Pedal | 1 |
| F | Position Plate | 1 |
| G | Stair Tension Bolt | 2 |
| H | Up Cup | 2 |
| I | Wall Anchor | 4 |
| J | Screw | 4 |
| K | Sticky Pad | 4 |
| L | Wrench | 1 |
3. Setup and Installation
The Cumbor Baby Gate offers both pressure-mounted and hardware-mounted installation options. Choose the method best suited for your location.
3.1 Measure Your Opening
Before installation, accurately measure the width of your opening at the narrowest point (usually near the floor). This will help determine which extensions are needed.

Image: Visual guide on measuring the opening width and selecting appropriate gate extensions for narrow doorways, stairs, and extra-wide openings, considering both 30.5" and 36" heights.
3.2 Installation Steps (General)
Follow these general steps for installation. Refer to the specific mounting instructions below for details.

Image: Step-by-step visual instructions for installing the baby gate, from measuring the opening to securing the tension bolts and removing the zip ties.
- Measure the Opening Width: Use a tape measure to determine the width of your desired installation area.
- Attach Extensions: Based on your measurement, attach the necessary extensions to the main gate. Ensure they are securely connected.
- Insert Tension Bolts: Insert the four tension bolts into the corners of the gate.
- Position the Gate: Place the gate in the opening. Ensure the bottom bar is flush with the floor or the accessible pedal (if using).
- Rotate and Tighten Tension Bolts: Rotate the tension bolts to extend them until they make contact with the wall or door frame. Gradually tighten all four bolts evenly until the gate is secure and the gap in the latch mechanism is approximately 1/16 inch. Do not overtighten initially.
- Cut Off Zip Ties: Once the gate is securely installed and the latch mechanism functions correctly, cut and remove the zip ties holding the gate frame together.
3.3 Mounting Options
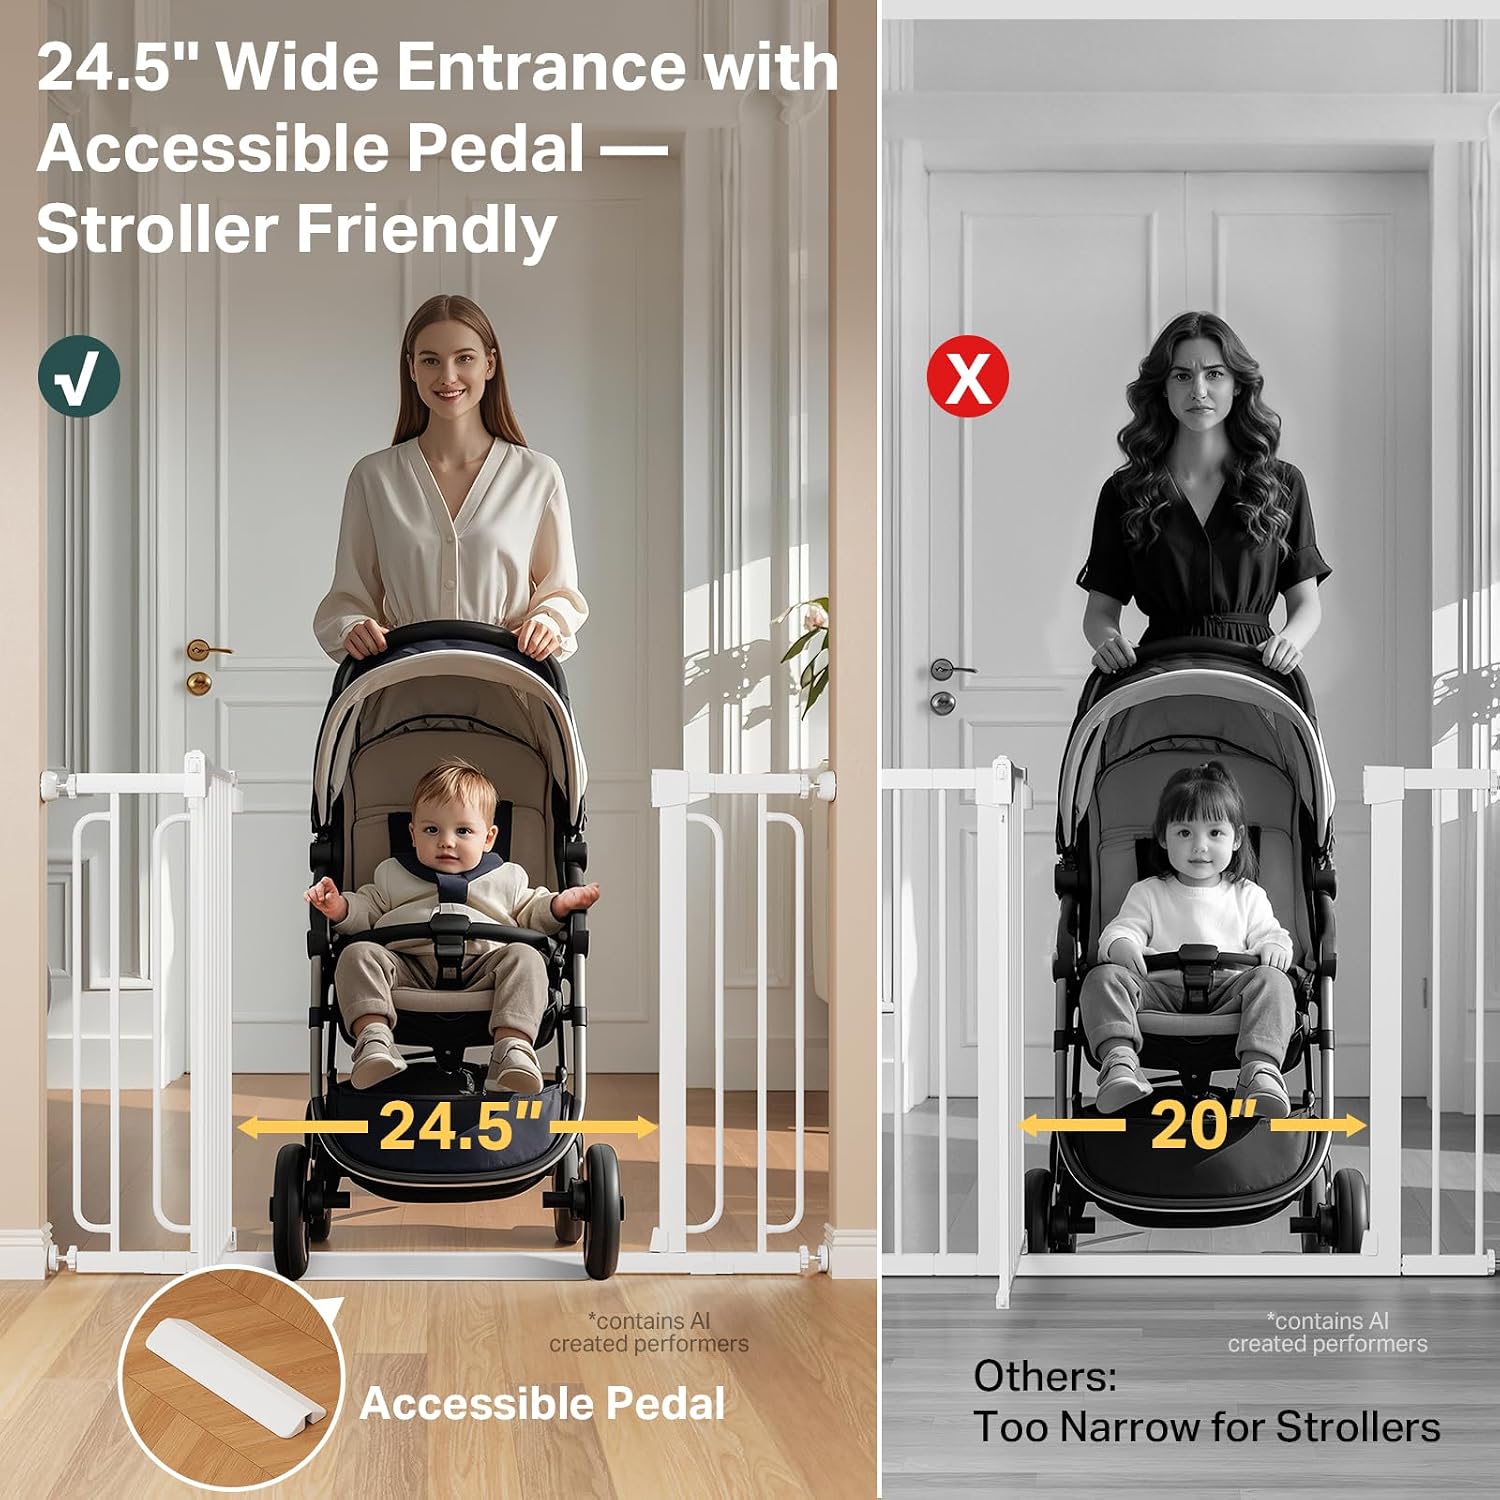
Image: Illustrates the two mounting options: Hardware Mounted (more stable, for stairs) and Pressure Mounted (wall damage-free, for doorways). Shows a drill for hardware mounting and a hand tightening a pressure bolt for pressure mounting.
Pressure Mounted Installation (for Doorways/Hallways)
This method uses tension to hold the gate in place and is ideal for areas where drilling is not desired. It is suitable for most standard doorways and hallways.
- Place the wall cups (D) against the wall where the tension bolts will press. For added stability, you can use the sticky pads (K) on the back of the wall cups.
- Follow steps 1-6 from the general installation guide. Ensure the gate is firmly secured and does not move when pushed.
Hardware Mounted Installation (for Stairs)
For maximum security, especially at the top of stairs, hardware mounting is recommended. This involves drilling into the wall or banister.
- Mark the desired locations for the wall cups (D) on your wall or banister.
- For drywall, use the wall anchors (I) before screwing in the wall cups (J). For wood studs or banisters, drill pilot holes and then screw in the wall cups directly.
- If installing on a round banister, use the provided Y-bolts (G) and Up Cups (H) instead of standard tension bolts and wall cups.
- Follow steps 1-6 from the general installation guide, ensuring the tension bolts align with the installed wall cups.

Image: Demonstrates the baseboard-friendly design that keeps top and bottom widths aligned, and the use of Y-bolts for secure installation on round stair banisters.
4. Operating Instructions
4.1 Opening the Gate
The Cumbor Baby Gate features a dual-lock handle for enhanced safety, requiring a two-step process to open.

Image: Illustrates the gate's auto-close function when released and its ability to swing 180 degrees. It also shows that the gate stays open when positioned at a 90-degree angle.
- Push the Button: Locate the button on the upper lock of the gate handle and push it.
- Lift the Gate: While holding the button, gently lift the gate handle.
- Swing Open: Swing the gate open in either direction. The gate will stay open if pushed to a 90-degree angle. If opened less than 90 degrees, it will auto-close.
4.2 Closing the Gate
The gate features an auto-close mechanism for convenience and safety.
- If the gate is opened less than 90 degrees, simply release it, and it will automatically swing shut and latch.
- If the gate is held open at 90 degrees, gently push it towards the closed position, and it will auto-close and latch.
4.3 Accessible Pedal
The gate includes a low-profile accessible pedal, making it easier to pass through with strollers, laundry baskets, or other items, reducing the risk of tripping.

Image: Highlights the 24.5" wide entrance and accessible pedal of the Cumbor gate, demonstrating its stroller-friendly design compared to a narrower alternative.
5. Maintenance
To ensure the longevity and proper function of your Cumbor Baby Gate, follow these maintenance guidelines:
- Cleaning: Wipe the gate regularly with a damp cloth and mild soap. Avoid abrasive cleaners or harsh chemicals, as they may damage the finish.
- Inspection: Periodically check all connections, bolts, and the latch mechanism to ensure they are secure and functioning correctly.
- Lubrication: If the gate hinges become stiff, apply a small amount of silicone-based lubricant to the hinge points.
- Storage: If storing the gate, disassemble it carefully and keep all parts in a dry, safe place.
6. Troubleshooting
If you encounter issues with your Cumbor Baby Gate, refer to the following common solutions or contact customer support.
6.1 Gate Not Latching or Too Loose
If the gate does not latch properly or feels loose, the tension bolts may not be tightened sufficiently. The gap in the latch mechanism should be approximately 1/16 inch when properly installed.
Video: Demonstrates how to fix a Cumbor Baby Gate when the tension bolts are too loose, ensuring proper installation and security.
- Gradually tighten all four tension bolts evenly.
- Check the gap at the latch. It should be small enough for the latch to engage securely.
- Ensure the gate frame is vertical and not leaning.
6.2 Gate Difficult to Open or Too Tight
If the gate is difficult to open or the latch feels too tight, the tension bolts may be overtightened.
Video: Provides instructions on how to adjust a Cumbor Baby Gate when the tension bolts are too tight, making it easier to open and close.
- Slightly loosen all four tension bolts evenly.
- Test the latch mechanism. It should open smoothly with the dual-lock action.
- Adjust until the gate opens and closes easily while remaining secure.
7. Specifications
| Feature | Detail |
|---|---|
| Brand | Cumbor |
| Model Number | S7V2 |
| Color | White |
| Mounting Type | Pressure Mount, Hardware Mount |
| Adjustable Width | 36.6 - 59 inches (with extensions) |
| Height | 30.5 inches |
| Closure Type | Automatic Closing |
| Target Species | Dog, Kids |
| GTIN | 850055912663 |
8. Warranty and Support
Cumbor products are manufactured with quality and durability in mind. For specific warranty information or if you require further assistance, please refer to the product packaging or contact Cumbor customer support directly through their official channels.
For common questions and support, you may also visit the Cumbor Store on Amazon.