1. Important Safety Instructions
Read all safety warnings, instructions, illustrations, and specifications provided with this power tool. Failure to follow all instructions listed below may result in electric shock, fire, and/or serious injury.
General Safety
- Work Area Safety: Keep the work area clean and well-lit. Cluttered or dark areas invite accidents. Do not operate power tools in explosive atmospheres, such as in the presence of flammable liquids, gases, or dust.
- Electrical Safety: Avoid body contact with earthed or grounded surfaces such as pipes, radiators, ranges, and refrigerators. There is an increased risk of electric shock if your body is earthed or grounded.
- Personal Safety: Always wear appropriate personal protective equipment, including safety glasses, gloves, and respiratory protection if necessary. Stay alert, watch what you are doing, and use common sense when operating a power tool.
Heat Gun Specific Safety
- High Temperature Hazard: The heat gun produces very high temperatures. Do not touch the nozzle or heated surfaces during or immediately after use. Allow the tool to cool completely before storing.
- Fire Hazard: Do not use the heat gun near flammable materials, liquids, or gases. Ensure adequate ventilation to prevent the buildup of fumes.
- Ventilation: Ensure the air intake and exhaust vents are clear and unobstructed during operation to prevent overheating of the tool. The body features multiple heat dissipation holes for efficient cooling.
- Safety Lock: The cordless heat gun is equipped with a safety lock to prevent accidental start-up. Always engage the safety lock when the tool is not in use or when changing accessories.
- Battery Safety: Use only the specified charger and batteries for this tool. Do not expose batteries to water or extreme temperatures. Do not short-circuit battery terminals.
2. Product Overview
The JEXUGK CHG-G1 Cordless Heat Gun is designed for various applications requiring concentrated heat. Its portable design and battery power offer flexibility for use in diverse environments.
Components Included
- Cordless Heat Gun Unit
- Rechargeable 4.0Ah Batteries (x2)
- Battery Charger
- Assorted Nozzles (5 types)
Key Features
- Cordless Design: Offers portability and freedom from power outlets.
- Fast Heating: Equipped with a powerful motor for rapid temperature achievement.
- Dual Temperature Settings:
- Low (L): Approximately 300℃ (572℉)
- High (H): Approximately 550℃ (1022℉)
- LCD Display: Provides precise temperature control and airflow settings.
- Interchangeable Nozzles: Five different nozzles for various applications.
- Battery System: Two 4.0Ah rechargeable batteries for extended operation.
- Safety Lock: Prevents unintentional activation.
- Ergonomic Handle: Designed for comfortable use.
- Efficient Heat Dissipation: Multiple vents and honeycomb air outlet for tool longevity.

Figure 2.1: JEXUGK CHG-G1 Cordless Heat Gun with battery attached.

Figure 2.2: Internal view and temperature range of the heat gun.
3. Setup
3.1 Charging the Batteries
Before first use, fully charge both 4.0Ah batteries. Use only the charger provided by JEXUGK.
- Connect the charger to a standard power outlet.
- Slide the battery onto the charger until it clicks into place.
- The charger indicator light will show the charging status (refer to charger manual for specific light patterns).
- Once fully charged, remove the battery from the charger.

Figure 3.1: JEXUGK 4.0Ah Li-ion Batteries.
3.2 Attaching and Detaching Batteries
- To Attach: Align the battery with the base of the heat gun handle and slide it in until it clicks securely into place.
- To Detach: Press the battery release button (usually located on the battery itself) and slide the battery out.
3.3 Attaching Nozzles
The heat gun comes with five different nozzles for various applications. Ensure the heat gun is cool and powered off before changing nozzles.
- Select the appropriate nozzle for your task.
- Slide the nozzle onto the metal outlet of the heat gun until it fits snugly.
- Ensure the nozzle is securely attached before operating the tool.
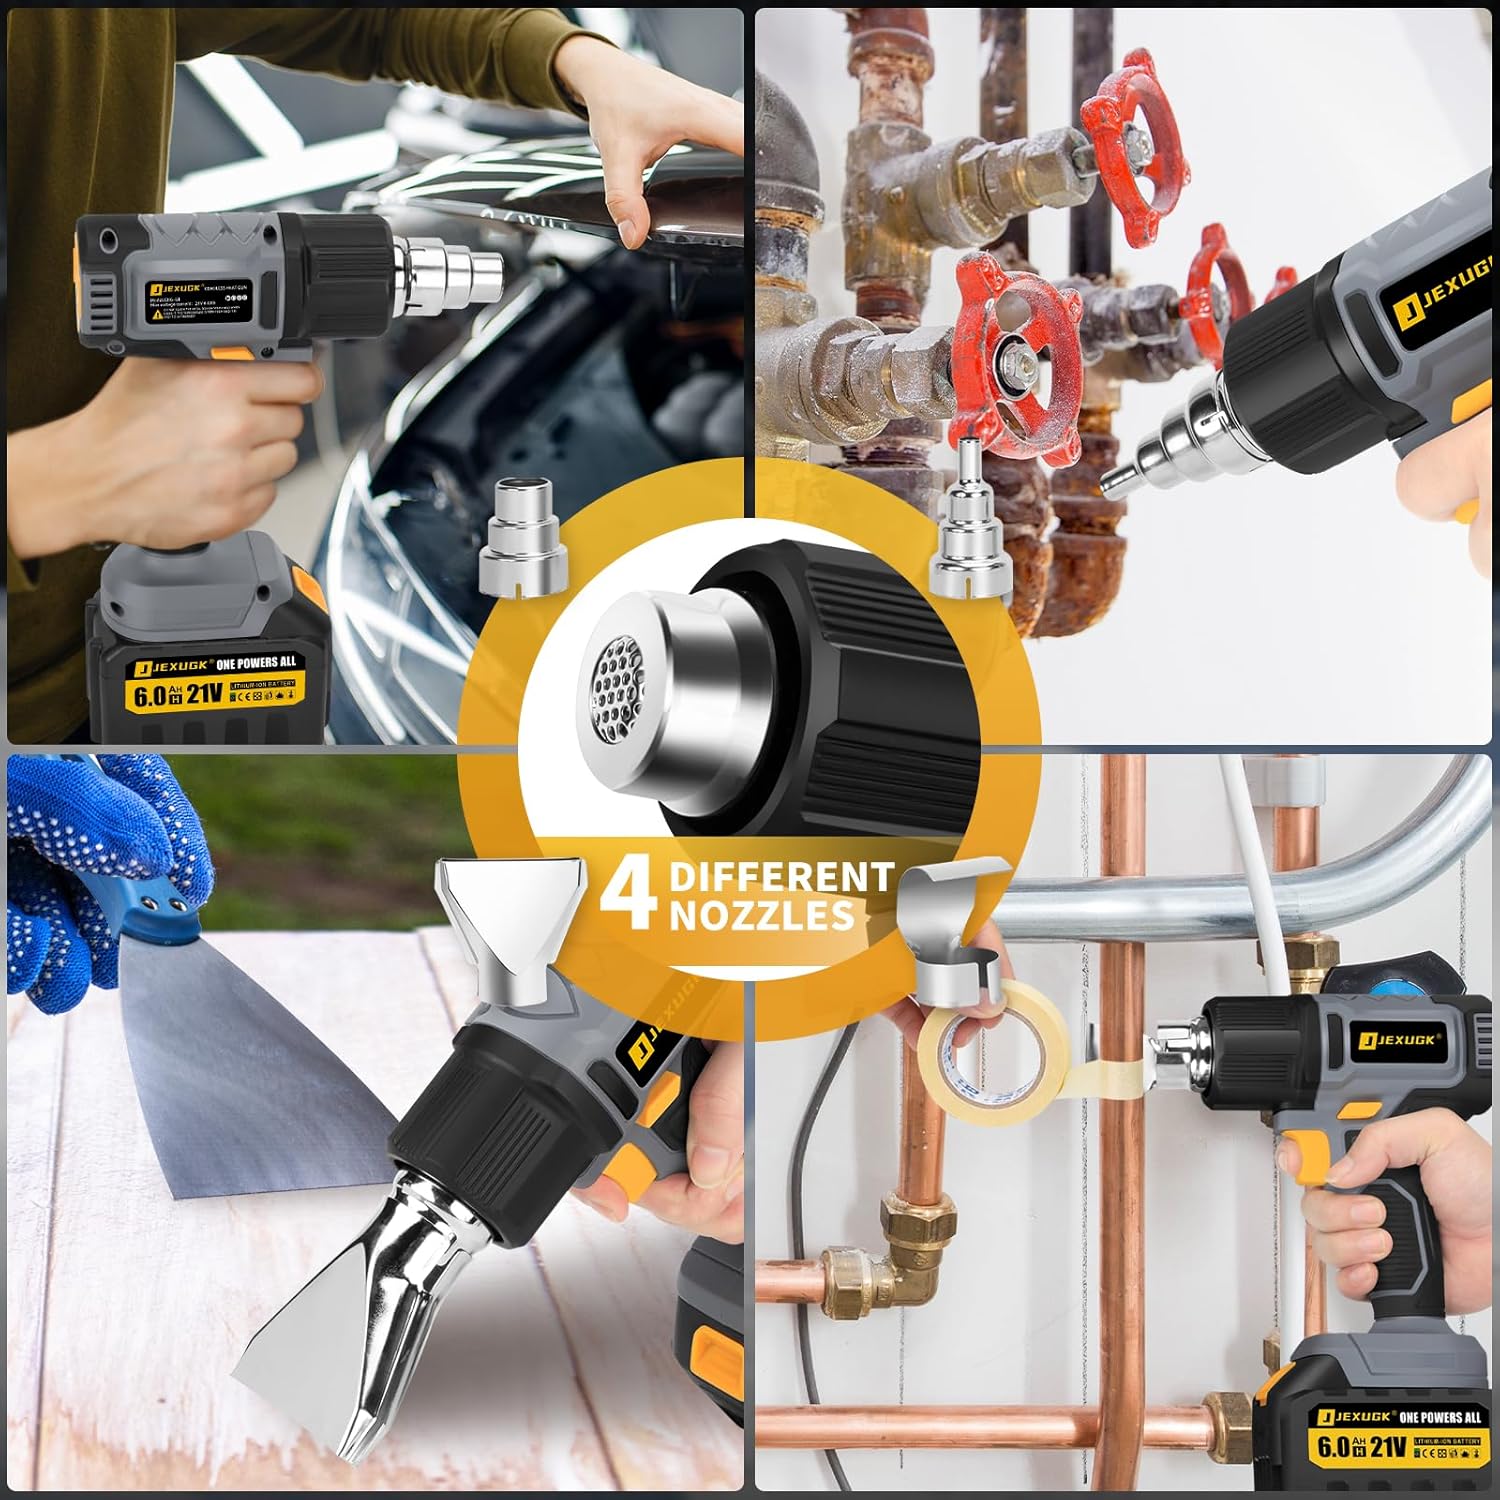
Figure 3.2: Various nozzles and their application.
4. Operating Instructions
4.1 Powering On/Off
- To Power On: Ensure a charged battery is attached. Disengage the safety lock (if engaged). Press and hold the power trigger.
- To Power Off: Release the power trigger. Engage the safety lock for storage or when not in immediate use.

Figure 4.1: Safety lock and quick heat dissipation features.
4.2 Temperature and Airflow Adjustment
The heat gun features an LCD display for precise control.
- Temperature Settings: Use the temperature adjustment buttons (+/-) to cycle between the Low (L) and High (H) settings, or to fine-tune the temperature within these ranges if supported by the model. The LCD will display the current temperature.
- Airflow Settings: Use the airflow adjustment button (P) to select one of the four available airflow speeds (50-200 L/min). The LCD will indicate the selected airflow level.

Figure 4.2: LCD display and control panel for temperature and airflow.
4.3 Hands-Free Operation (Lock-On Button)
For extended tasks, the heat gun can be set to operate continuously.
- To activate continuous operation, press the lock-on button while the trigger is engaged.
- To deactivate, press the trigger again.
- The heat gun can stand upright on its base for hands-free use.

Figure 4.3: Heat gun in stand-up position for hands-free tasks.
4.4 Common Applications
- Shrink Tubing: Use a concentrator nozzle and low to medium heat setting. Apply heat evenly around the tubing until it shrinks tightly.
- Vinyl Packaging/Wrap: Use a wide nozzle and low heat. Work slowly and evenly to avoid overheating the material.
- Paint Removal: Use a scraper nozzle and high heat. Apply heat to a small area until the paint softens, then scrape it off.
- Thawing Frozen Pipes: Use a concentrator nozzle and low heat. Keep the heat gun moving to prevent localized overheating and pipe damage.
- DIY Crafts: Adjust temperature and nozzle based on the material and desired effect.
Figure 4.4: Examples of heat gun applications with different nozzles.
5. Maintenance
Regular maintenance ensures the longevity and safe operation of your heat gun.
- Cleaning: After each use, ensure the tool is cool. Wipe the exterior with a soft, damp cloth. Do not use harsh chemicals or abrasive cleaners.
- Air Vents: Keep the air intake and exhaust vents clear of dust and debris. Use compressed air to clear blockages if necessary.
- Nozzles: Clean nozzles after use, especially if material has adhered to them. Ensure they are free of blockages.
- Battery Care: Store batteries in a cool, dry place away from direct sunlight and extreme temperatures. Do not store fully discharged batteries for extended periods.
- Inspection: Periodically inspect the tool and batteries for any signs of damage, such as cracks, frayed wires, or loose connections. Do not use damaged equipment.
6. Troubleshooting
If you encounter issues with your JEXUGK CHG-G1 Cordless Heat Gun, refer to the following common problems and solutions:
| Problem | Possible Cause | Solution |
|---|---|---|
| Heat gun does not turn on. | Battery not charged or improperly inserted. Safety lock engaged. | Ensure battery is fully charged and securely attached. Disengage the safety lock. |
| Heat gun produces insufficient heat. | Low battery charge. Incorrect temperature setting. Air vents blocked. | Charge the battery. Adjust to a higher temperature setting. Clear any obstructions from air vents. |
| Battery drains quickly. | Operating in High (H) temperature mode. Battery nearing end of life. | High temperature mode consumes more power; consider using Low (L) mode for longer tasks. Ensure batteries are fully charged before use. Consider replacing old batteries. |
| Tool overheats and shuts off. | Air vents blocked. Continuous heavy use. Overload protection activated. | Clear air vents. Allow the tool to cool down. Reduce continuous heavy use. |
7. Specifications
| Feature | Detail |
|---|---|
| Model Number | CHG-G1 |
| Brand | JEXUGK |
| Power Source | 21V DC (Battery Powered) |
| Voltage | 21 Volts |
| Low Temperature Setting | 300℃ (572℉) |
| High Temperature Setting | 550℃ (1022℉) |
| Airflow Settings | 4 levels (50-200 L/min) |
| Battery Capacity | 2 x 4.0Ah Li-ion |
| Approximate Run Time (per battery) | 40 minutes (Low mode), 20 minutes (High mode) |
| Item Weight (with battery) | 2.86 kg (6.3 lbs) |
| Product Dimensions (L x W x H) | 26.01 x 8 x 16.99 cm (10.24 x 3.15 x 6.69 inches) |
| Included Components | Heat Gun, 2x 4.0Ah Batteries, Charger, 5x Nozzles |
8. Warranty and Support
For warranty information, technical support, or service inquiries, please contact JEXUGK customer service through your original point of purchase or the official JEXUGK website. Please have your model number (CHG-G1) and purchase date available when contacting support.