Introduction
Thank you for choosing the Canoly C03 Cold Press Juicer. This manual provides essential information for the safe and efficient operation, maintenance, and care of your new juicer. Please read all instructions carefully before first use and keep this manual for future reference.
The Canoly C03 is designed for extracting juice from a variety of fruits and vegetables, and can also be used to make nut milk. Its slow cold press technology helps preserve nutrients and minimize oxidation, delivering fresh and flavorful results.
Product Components
Your Canoly C03 Cold Press Juicer comes with several key components designed for easy assembly and efficient juicing. Please ensure all parts are present before assembly.

Figure 1: Exploded View of Canoly C03 Juicer Components
This diagram illustrates all the parts included with your juicer: (1) Hopper, (2) Bowl Cover, (3) Filter, (4) Squeezing Screw, (5) Bowl, (6) Base, (7) Strainer, (8) Pulp Container, (9) Juice Cup, (10) Cleaning Brush, (11) Pusher.
Setup and Assembly
Assembling your Canoly C03 Juicer is a straightforward process. Follow these steps to prepare your juicer for use.
- Place the Juicing Bowl: Position the juicing bowl onto the motor base, ensuring it is securely seated. Align the handle with the unlock symbol on the base.
- Insert the Strainer: Place the strainer into the juicing bowl.
- Insert the Auger: Carefully insert the squeezing screw (auger) into the center of the strainer.
- Install the Hopper: Place the hopper assembly onto the juicing bowl. Turn the hopper clockwise until the lock symbol aligns with the triangle on the base, indicating it is securely locked.
- Close the Hopper Lid: Ensure the hopper lid is securely closed before operation.
- Position Containers: Place the pulp container and juice cup under their respective outlets.

Figure 2: Step-by-Step Assembly Guide
This image visually demonstrates the assembly process: 1. Insert the auger. 2. Insert the filter screen. 3. Install the juicing system. 4. Rotate to install the feeding chute. Ensure the top lid and pulp chute cover are closed after setup.
Video 1: TUUMIIST Slow Juicer Quick Installation Details
This video provides a quick visual guide on how to install the components of a slow juicer, including placing the juicing bowl, strainer, auger, and locking the hopper. Note: The video shows a similar model, but the assembly steps are generally applicable.
Operating Instructions
The Canoly C03 Juicer is designed for ease of use, allowing you to extract fresh juice and make nut milk efficiently.
1. Preparing Ingredients
- Wash all fruits and vegetables thoroughly.
- The 4.5-inch wide feed chute with auto-rotating cutting allows for whole fruits and vegetables like apples and oranges to be inserted directly, reducing pre-cutting time.
- For harder ingredients or very fibrous items, it is recommended to cut them into smaller pieces to ensure smooth operation and maximize juice yield.

Figure 3: Wide Feed Chute for Whole Ingredients
The juicer's wide feed chute accommodates large pieces of produce, minimizing the need for pre-cutting.
2. Juicing Process
- Ensure the juicer is properly assembled and the juice cup and pulp container are in place.
- Turn the control knob to the "ON" position to start the motor.
- Slowly feed the prepared fruits and vegetables into the wide feed chute. The auto-rotating cutting mechanism will process them.
- The upgraded multi-layer grinding auger will extract juice, which will flow into the juice cup, while the pulp will be expelled into the pulp container.
- For non-clogging operation, the juicer operates at 60 Hz, reducing blockages and sediment.
- If the juicer becomes clogged, turn the knob to "REV" (reverse) for a few seconds to clear the blockage, then return to "ON".
- Once juicing is complete, turn the control knob to "OFF".

Figure 4: Juicing in Progress
The juicer efficiently separates fresh juice from pulp, maximizing yield.

Figure 5: High Juice Yield
The dry pulp indicates efficient juice extraction, ensuring minimal waste.
3. Making Nut Milk
The 2-in-1 strainer allows for the creation of nut milk. Soak nuts (e.g., almonds, cashews) overnight, then rinse. Feed them into the juicer with water for fresh nut milk.

Figure 6: Nut Milk Production
The juicer is versatile enough to produce fresh, homemade nut milk.
Cleaning and Maintenance
Regular cleaning ensures the longevity and hygienic operation of your Canoly C03 Juicer. The design prioritizes easy cleanup.
1. Disassembly for Cleaning
- Turn the juicer off and unplug it from the power outlet.
- Unlock the hopper by turning it counter-clockwise and lift it off.
- Remove the squeezing screw (auger), strainer, and juicing bowl from the base.
- The innovative quick-release latch makes cleaning the pulp outlet easy; simply unlock and rinse.
2. Washing Components
- Rinse all detachable parts under running water. The self-cleaning mesh filter removes most residue.
- Use the included cleaning brush to remove any stubborn pulp or residue from the strainer and other parts.
- All detachable parts are dishwasher safe for added convenience.
- Wipe the motor base with a damp cloth. Never immerse the motor base in water.
- Ensure all parts are completely dry before reassembling or storing the juicer.

Figure 7: Easy to Clean Design
The juicer's components are designed for quick rinsing under running water.
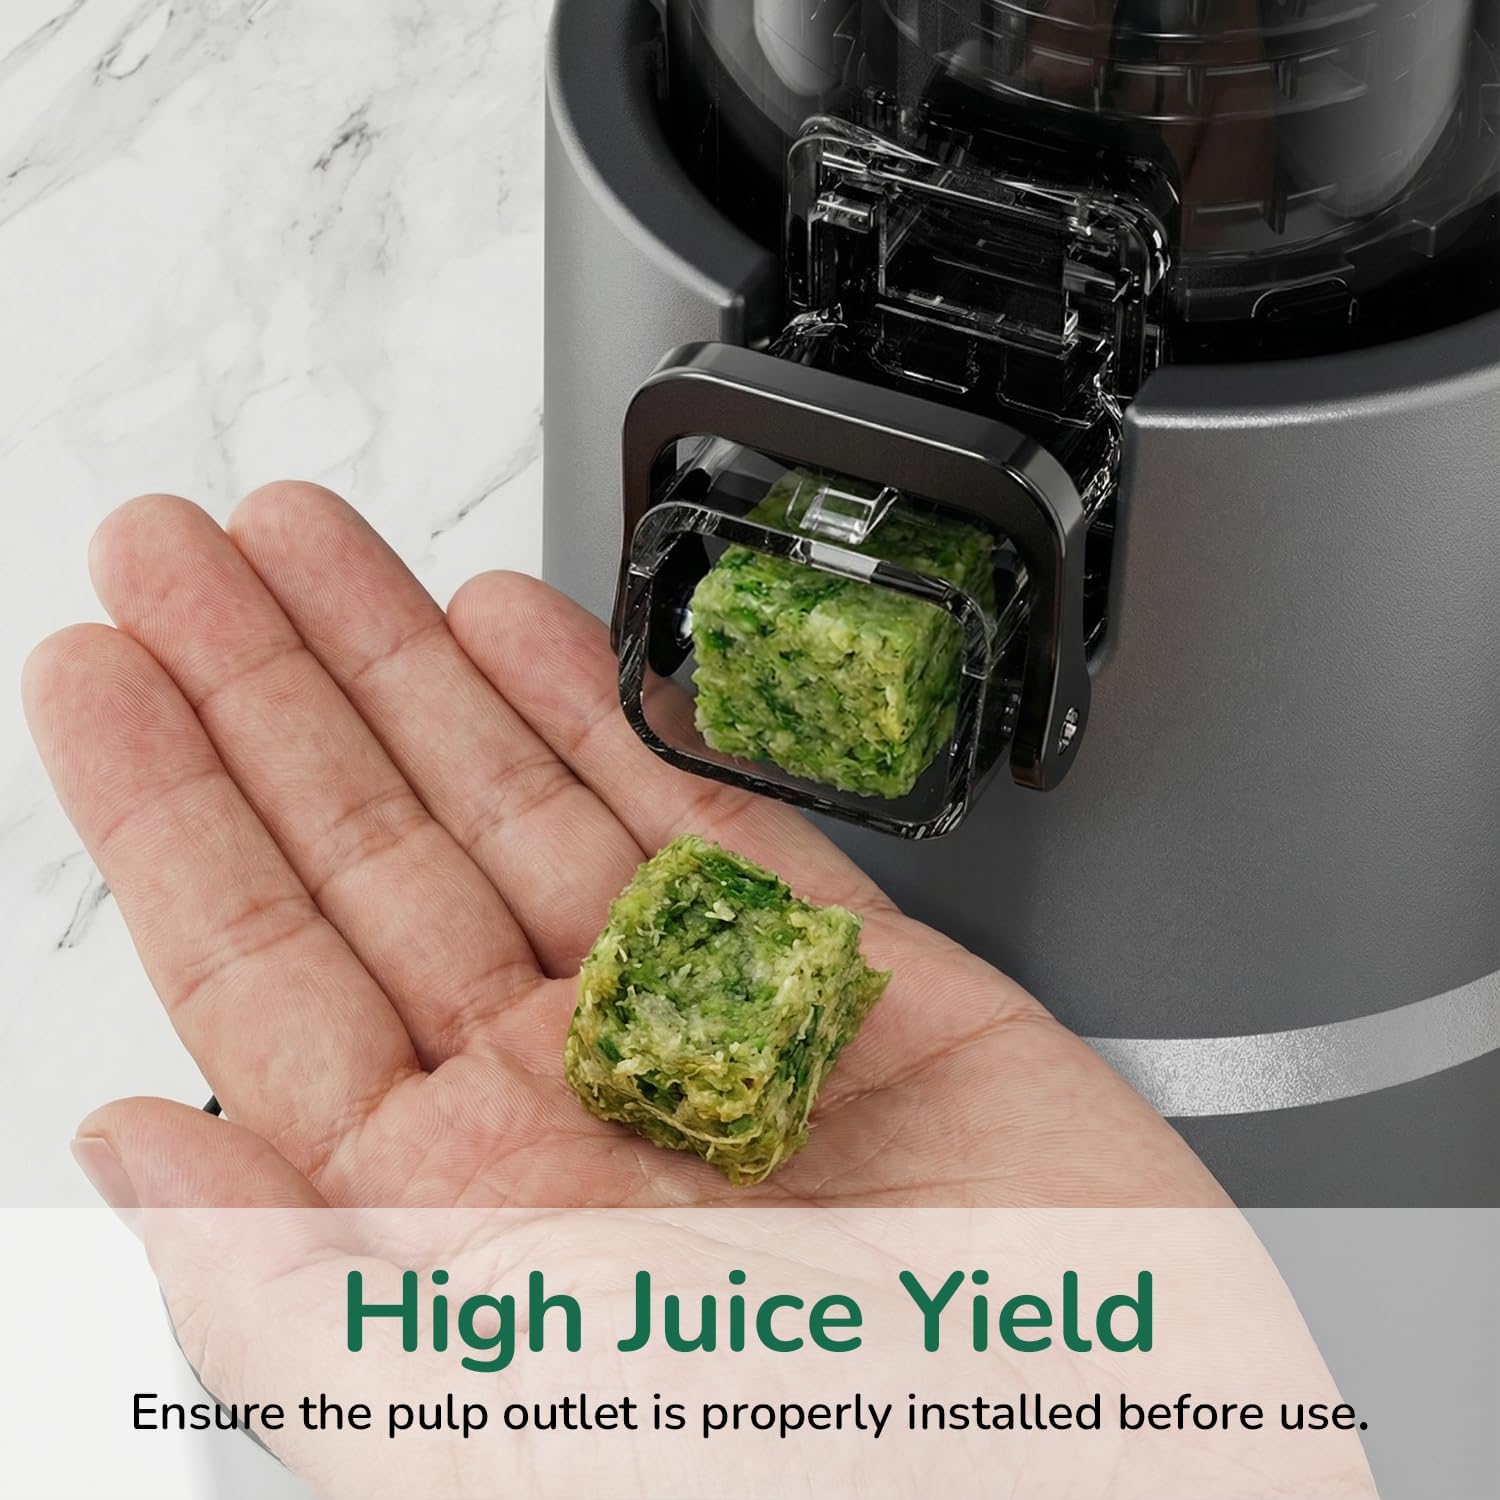
Figure 8: Dishwasher Safe Components
For ultimate convenience, most parts of the juicer can be safely cleaned in a dishwasher.
Safety Information
To ensure safe operation and prevent injury or damage, please observe the following safety precautions:
- Always ensure the juicer is properly assembled and locked before turning it on. The safety lock design prevents operation if parts are not correctly aligned.
- Do not put fingers or other objects into the feed chute while the juicer is operating. Use the pusher provided to guide ingredients.
- The juicer features overheat protection. If the motor overheats, it will automatically shut off. Allow it to cool down before resuming operation.
- Unplug the juicer from the power outlet before cleaning, disassembling, or when not in use.
- Keep the appliance out of reach of children.
- Do not operate the juicer with a damaged cord or plug. Contact customer support for assistance.
Troubleshooting
If you encounter any issues with your Canoly C03 Juicer, refer to the following common troubleshooting tips:
| Problem | Possible Cause | Solution |
|---|---|---|
| Juicer does not turn on. | Not properly assembled or plugged in. | Ensure all parts are correctly assembled and locked. Check if the power cord is securely plugged into a working outlet. |
| Motor stops during operation. | Overheat protection activated or blockage. | Turn off and unplug. If overheated, allow to cool for 30 minutes. If clogged, use the "REV" function to clear. |
| Low juice yield or wet pulp. | Ingredients fed too quickly or improper preparation. | Feed ingredients slowly. For fibrous items, cut into smaller pieces. Ensure the pulp outlet is clear. |
| Excessive vibration or noise. | Improper assembly or hard ingredients. | Check assembly of all parts. Ensure ingredients are suitable for juicing. |
Specifications
Detailed technical specifications for the Canoly C03 Cold Press Juicer:
- Model Name: C03
- Brand: Canoly
- Colour: Matte Grey
- Product Dimensions: 20.5D x 18W x 39H Centimetres (8.1 x 7.1 x 15.4 inches)
- Item Weight: 3.2 Kilograms (7.05 lbs)
- Maximum Power: 200 Watts
- Special Features: Easy to Clean, Overheat Protection, Quiet Motor, Safety Lock, Whole Fruit Processing
- Product Care Instructions: Dishwasher Safe (detachable parts)
- ASIN: B0FSCKNFJ5
Warranty and Support
Canoly is committed to providing high-quality kitchen appliances and customer satisfaction. While specific warranty details are not provided in this manual, please retain your proof of purchase for any warranty claims.
For technical support, troubleshooting assistance, or to inquire about replacement parts, please contact Canoly customer service through the retailer where you purchased the product or visit the official Canoly website for contact information.
We value your health and aim to provide reliable products that enhance your healthy lifestyle.